Bubbly Clouds: Difference between revisions
m (→Kirby Super Star (Ultra): any need to downscale that?) |
Luigifan18 (talk | contribs) m (→Synopsis: Grammar check) |
||
| (73 intermediate revisions by 18 users not shown) | |||
| Line 1: | Line 1: | ||
{{Infobox-KDLWorld | {{Infobox-KDLWorld | ||
|image=[[File:Bubbly Clouds | |image=[[File:KDL Bubbly Clouds.png]] | ||
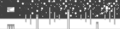
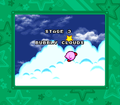
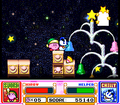
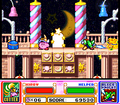
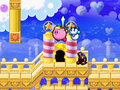
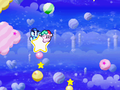
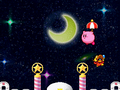
|caption=A portion of the intro | |caption=A portion of the intro cutscene for '''Bubbly Clouds''' in ''[[Kirby's Dream Land]]''. | ||
|level=4 | |level=4 | ||
|boss=[[Kracko]] | |boss=[[Kracko]] | ||
| Line 8: | Line 7: | ||
|previousworld=[[Float Islands]] | |previousworld=[[Float Islands]] | ||
|nextworld=[[Mt. Dedede]] | |nextworld=[[Mt. Dedede]] | ||
|theme music=[[File:Bubbly Clouds | |theme music=[[File:KDL Bubbly Clouds.oga]] | ||
|theme title=[[Bubbly Clouds (theme)|Bubbly Clouds | |theme title="[[Bubbly Clouds (theme)|Bubbly Clouds]]" | ||
|game=Kirby's Dream Land | |||
|levelname=Stage 4: Bubbly Clouds | |||
}} | }} | ||
'''Bubbly Clouds''' is the fourth stage of ''[[Kirby's Dream Land]]'', and the third stage in | {{about|the stage in [[Kirby's Dream Land]] and [[Spring Breeze]] in [[Kirby Super Star]] and [[Kirby Super Star Ultra]]|the [[Battle Stage]] in the [[Kirby Fighters (series)|''Kirby Fighters'' games]]|[[Bubbly Clouds (Battle Stage)]]}} | ||
'''Bubbly Clouds''' is the fourth stage of ''[[Kirby's Dream Land]]'', and the third stage in [[Spring Breeze]], in ''[[Kirby Super Star]]'' and ''[[Kirby Super Star Ultra]]''. The area is dominated by cloud-top landscapes, dotted with pillars, towers, and other structures. Due to its lofty locale, there are many [[bottomless pit]]s to reckon with. Later parts of the stage transition to a celestial backdrop, and near the end, a recurring secret involving entering the [[moon]] to reach a secret area with a long fall was introduced. This stage features [[Kracko Jr.]] as its [[Mid-Boss]] and [[Kracko]] proper as the boss. | |||
==''Kirby's Dream Land'' | ==Game appearances== | ||
===''Kirby's Dream Land''=== | |||
Kirby | Bubbly Clouds serves as the fourth stage of ''Kirby's Dream Land'', and here is where the platforming starts to become very tricky, since [[bottomless pit]]s can be found everywhere and lots of flying enemies pollute the skies. This stage features several large spaces, some of which involve winding paths and others being quite vertical. It transitions from a daytime cloudscape into a floating palace set against a starry night sky, with the main dividing line being the fight against [[Kracko Jr.]] — [[Kracko]] proper is faced at the very end. | ||
=== | ====Cutscene==== | ||
Kirby falls into a cloud and disappears from view. Shortly after, the cloud starts churning, then starts raining numerous different copies of Kirby, along with some large stars. | |||
====Room breakdown==== | |||
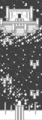
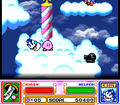
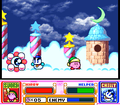
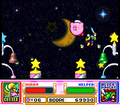
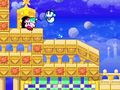
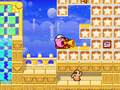
[[File:KDL Bubbly Clouds screenshot.png|thumb|Kirby floats on by the clouds.]] | |||
Bubbly Clouds consists of ten distinct rooms, with two of them being optional side areas and two more being areas where Kirby fights the mid-boss and boss. Each room can be summarized as follows: | |||
[[ | The first room is a long lateral path made of isolated cloud platforms and littered with various enemies, including [[Shotzo]]s, [[Scarfy|Scarfies]], and [[Parasol Waddle Dee]]s. Kirby will have to travel to the right by jumping over gaps and dealing with any enemies that get in his way in order to reach the door at the end of a long stone walkway. | ||
The second room is an interior castle hall leading off to the right, guarded by boomerang-wielding foes and lined with [[spike]]s in places. From there, it leads outside to a walkway patrolled by different foes. The door can be found nestled in a cloud after the walkway ends. | |||
The third room is a long cloud tunnel which loops on itself from left to right while generally leading upward. Kirby will have to deel with [[Kookler]]s as he travels upward, and passes by a small pool of water before leading up to a door flanked by two pillars. By the water pool is a hidden door that leads to a big dark side area featuring a [[Mint Leaf]] and several other items on pillars to collect from enemies on patrol. | |||
The fourth room is a small area where [[Kracko Jr.]] must be fought. Defeating him yields a [[Warp Star]] which takes Kirby for a ride into the stars above. | |||
The | The fifth room begins with Kirby emerging from a waterfall hole, and falling into a pool. To the left is a [[Mint Leaf]], and to the right, the path continues along a wide hall which leads to a large [[Star Block]] barricade patrolled by [[Gordo]]s and holding some snacks. From there, the path narrows into a winding hall, part of which is lined with spikes. A [[Scarfy]] guards the door. | ||
The | The sixth room is a small courthouse overlooking a starry vista. Up ahead is a bowl of [[Superspicy Curry|Spicy Food]], which Kirby can use to clear a long hall of Star Blocks to reach the door. | ||
The seventh room begins on a small platform hanging over a [[bottomless pit]]. The path continues upward into the night sky, past hanging platforms with enemies on them. The door can be found at the top, just under a crescent moon. Entering this moon leads to a secret area where Kirby can fall a great distance and collect items along the way. | |||
The last room is where Kirby battles the boss [[Kracko]]. Once hit six times, Kracko explodes, leaving the fourth [[Sparkling Star]] for Kirby to collect and finish the stage. | |||
====Enemies, Mid-Boss, and Boss==== | |||
===Enemies, Mid-Boss, and Boss=== | |||
{| width=50% | {| width=50% | ||
|<tabs> | |<tabs> | ||
| Line 53: | Line 54: | ||
!Extra Enemy | !Extra Enemy | ||
|- | |- | ||
|align=center|[[File: | |align=center|[[File:KDL Bronto Burt sprite.png]] [[File:KDL Koozer sprite.png]] | ||
|[[Bronto Burt|Bront Burt]] | |[[Bronto Burt|Bront Burt]] | ||
|style="border-style: solid; border-width: 1px 3px 1px 1px"|[[Koozer]] | |style="border-style: solid; border-width: 1px 3px 1px 1px"|[[Koozer]] | ||
|align=center|[[File: | |align=center|[[File:KDL Scarfy sprite.png]] | ||
|[[Scarfy]] | |[[Scarfy]] | ||
|{{N}} | |{{N}} | ||
|- | |- | ||
|align=center|[[File: | |align=center|[[File:KDL Dizzy sprite.png]] [[File:KDL Benny sprite.png]] | ||
|[[Dizzy]] | |[[Dizzy]] | ||
|style="border-style: solid; border-width: 1px 3px 1px 1px"|[[Benny]] | |style="border-style: solid; border-width: 1px 3px 1px 1px"|[[Benny]] | ||
|align=center|[[File: | |align=center|[[File:KDL Shotzo sprite.png]] [[File:KDL Blatzy sprite.png]] | ||
|[[Shotzo]] | |[[Shotzo]] | ||
|[[Blatzy]] | |[[Blatzy]] | ||
|- | |- | ||
|align=center|[[File: | |align=center|[[File:KDL Gordo sprite.png]] | ||
|[[Gordo]] | |[[Gordo]] | ||
|style="border-style: solid; border-width: 1px 3px 1px 1px"|{{N}} | |style="border-style: solid; border-width: 1px 3px 1px 1px"|{{N}} | ||
|align=center|[[File: | |align=center|[[File:KDL Sir Kibble sprite.png]] [[File:KDL Boomer sprite.png]] | ||
|[[Sir Kibble]] | |[[Sir Kibble]] | ||
|[[Boomer]] | |[[Boomer]] | ||
|- | |- | ||
|align=center|[[File: | |align=center|[[File:KDL Kookler sprite.png]] [[File:KDL Whiskers sprite.png]] | ||
|[[Kookler]] | |[[Kookler]] | ||
|style="border-style: solid; border-width: 1px 3px 1px 1px"|[[Whiskers]] | |style="border-style: solid; border-width: 1px 3px 1px 1px"|[[Whiskers]] | ||
|align=center|[[File: | |align=center|[[File:KDL Waddle Dee sprite.png]] | ||
|[[Waddle Dee]] | |[[Waddle Dee]] | ||
|{{N}} | |{{N}} | ||
|- | |- | ||
|align=center|[[File: | |align=center|[[File:KDL Parasol sprite.png]] | ||
|[[Parasol (enemy)|Parasol]] | |[[Parasol (enemy)|Parasol]] | ||
|style="border-style: solid; border-width: 1px 3px 1px 1px"|{{N}} | |style="border-style: solid; border-width: 1px 3px 1px 1px"|{{N}} | ||
|align=center|[[File: | |align=center|[[File:KDL Waddle Doo sprite.png]] | ||
|[[Waddle Doo]] | |[[Waddle Doo]] | ||
|{{N}} | |{{N}} | ||
|- | |- | ||
|align=center|[[File: | |align=center|[[File:KDL Puffy sprite.png]] [[File:KDL Cawcun sprite.png]] | ||
|[[Puffy]] | |[[Puffy]] | ||
|style="border-style: solid; border-width: 1px 3px 1px 1px"|[[Cawcun]] | |style="border-style: solid; border-width: 1px 3px 1px 1px"|[[Cawcun]] | ||
| Line 100: | Line 101: | ||
!Name | !Name | ||
|- | |- | ||
|align=center|[[File: | |align=center|[[File:KDL Kracko Jr sprite.png]] | ||
|[[Kracko Jr.]] | |[[Kracko Jr.]] | ||
|} | |} | ||
| Line 109: | Line 110: | ||
!Name | !Name | ||
|- | |- | ||
|align=center|[[File: | |align=center|[[File:KDL Kracko sprite.png]] | ||
|[[Kracko]] | |[[Kracko]] | ||
|} | |} | ||
| Line 116: | Line 117: | ||
|} | |} | ||
===Map | ====Map gallery==== | ||
<gallery> | <gallery> | ||
KDL Bubbly Clouds Section 1 Map.png|Map of Room 1 | |||
KDL Bubbly Clouds Section 2 Map.png|Map of Room 2 | |||
KDL Bubbly Clouds Section 3 Map.png|Map of Room 3 (loops on itself) | |||
KDL Bubbly Clouds Moon Area Map.png|Secret room from Room 3 | |||
KDL Bubbly Clouds Section 4 Map.png|Map of Room 4, where [[Kracko Jr.]] is fought | |||
KDL Bubbly Clouds Section 5 Map.png|Map of Room 5 | |||
KDL Bubbly Clouds Section 6 Map.png|Map of Room 6 | |||
KDL Bubbly Clouds Section 7 Map.png|Map of Room 7 | |||
</gallery> | </gallery> | ||
==''Kirby Super Star'' | ===''Kirby Super Star'' / ''Kirby Super Star Ultra''=== | ||
{{Infobox-Super Star Stage | {{Infobox-Super Star Stage | ||
|image=[[File: | |image=[[File:KSSU Bubbly Clouds intro.png]] | ||
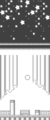
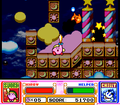
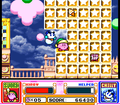
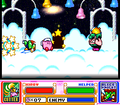
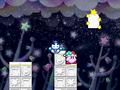
|caption=Intro | |caption=Intro cutscene from ''Kirby Super Star Ultra''. | ||
|main_game=[[Spring Breeze]] | |main_game=[[Spring Breeze]] | ||
|boss=[[Kracko]] | |boss=[[Kracko]] | ||
|midboss=[[Bonkers]], [[Kracko Jr.]] | |midboss=[[Bonkers]], [[Kracko Jr.]] | ||
|previous=[[Float Islands#In Kirby Super Star (Ultra)|Float Islands]] | |previous=[[Float Islands#In Kirby Super Star (Ultra)|Float Islands]] | ||
|next=[[Mt. Dedede#Kirby Super Star (Ultra)|Mt. Dedede]] | |next=[[Mt. Dedede#Kirby Super Star (Ultra)|Mt. Dedede]] | ||
| Line 142: | Line 142: | ||
|description=Clips of the Bubbly Clouds theme from ''Kirby Super Star'' (above) and ''Kirby Super Star Ultra'' (below). | |description=Clips of the Bubbly Clouds theme from ''Kirby Super Star'' (above) and ''Kirby Super Star Ultra'' (below). | ||
}} | }} | ||
Bubbly Clouds is the third stage of [[Spring Breeze]] in ''[[Kirby Super Star]]'' and | Bubbly Clouds is the third stage of [[Spring Breeze]] in ''[[Kirby Super Star]]'' and ''[[Kirby Super Star Ultra]]''. It is a largely truncated version of the same level from ''Kirby's Dream Land'' and features different enemies and Copy Abilities, though it still preserves a certain lunar secret near the end. | ||
=== | ====Cutscene==== | ||
The intro | The intro cutscene is slightly different between these games and ''Kirby's Dream Land''. In this version, Kirby starts sneezing while standing atop the clouds, causing stars to fall each time. On the second sneeze, one bops him on the head, causing him to tumble into the cloud. This cutscene plays out similarly to the intro cutscene for [[Castle Lololo]], which was cut from [[Spring Breeze]]. | ||
===Enemies, Mid-Bosses, and Boss=== | ====Synopsis==== | ||
The Spring Breeze version of Bubbly Clouds consists of eight rooms and has the same basic structure as the ''Kirby's Dream Land'' version, but the rooms themselves are for the most part shorter or otherwise changed. The main differences are as follows: | |||
*The first room is much shorter and contains fewer enemies, with a few [[Blade Knight]]s patrolling the area and some food to find past the door. | |||
*The second room features the same palace-style as the equivalent room in ''Kirby's Dream Land'', but is combined with the upward structure of the cloud tunnels in ''Kirby's Dream Land'' and made much simpler. | |||
*The third room features the same pillar style as the first hidden side area in ''Kirby's Dream Land'', but is much smaller. This leads to the fight with Kracko Jr. | |||
*The fifth room, after Kracko Jr., is similar to its equivalent in ''Kirby's Dream Land'', but is smaller and removes the tight passages between the Star Block wall and the door. | |||
*The sixth room from ''Kirby's Dream Land'' is completely absent from this version. Instead, Kirby is taken directly to the equivalent of the seventh room in ''Kirby's Dream Land''. Naturally, this room is not as tall and features different enemies. | |||
*At the bottom of the secret room through the moon, Kirby fights the Mid-Boss [[Bonkers]]. | |||
====Enemies, Mid-Bosses, and Boss==== | |||
{| width=50% | {| width=50% | ||
|<tabs> | |<tabs> | ||
<tab name="Enemies"> | <tab name="Enemies"> | ||
{| class="wikitable" | {| class="wikitable" | ||
!Sprite (''KSS''/'' | !Sprite (''KSS''/''KSSU'') | ||
!Name | !Name | ||
!style="border-style: solid; border-width: 1px 3px 1px 1px"|Copy Ability | !style="border-style: solid; border-width: 1px 3px 1px 1px"|Copy Ability | ||
!Sprite (''KSS''/'' | !Sprite (''KSS''/''KSSU'') | ||
!Name | !Name | ||
!Copy Ability | !Copy Ability | ||
|- | |- | ||
|align=center|[[File: | |align=center|[[File:KSS Blade Knight.png]] [[File:KSSU Blade Knight Sprite.png]] | ||
|[[Blade Knight]] | |[[Blade Knight]] | ||
|style="border-style: solid; border-width: 1px 3px 1px 1px"|[[Sword]] | |style="border-style: solid; border-width: 1px 3px 1px 1px"|[[Sword]] | ||
|align=center|[[File: | |align=center|[[File:KSS Scarfy sprite.png]] [[File:KSSU Scarfy Sprite.png]] | ||
|[[Scarfy]] | |||
|[[Crash]] (if [[Copy|scanned]]) | |||
|- | |||
|align=center|[[File:KSS Bronto Burt.png]] [[File:KSSU Bronto Burt Sprite.png]] | |||
|[[Bronto Burt]] | |||
|style="border-style: solid; border-width: 1px 3px 1px 1px"|None | |||
|align=center|[[File:KSS Shotzo.png]] [[File:KSSU Shotzo Sprite.png]] | |||
|[[Shotzo]] | |[[Shotzo]] | ||
|N/A | |N/A | ||
|- | |- | ||
|align=center|[[File: | |align=center|[[File:KSS Cappy Cover.png]] [[File:KSSU Cappy Sprite.png]] | ||
|[[ | |[[Cappy]] | ||
|style="border-style: solid; border-width: 1px 3px 1px 1px"|None | |style="border-style: solid; border-width: 1px 3px 1px 1px"|None | ||
|align=center|[[File: | |align=center|[[File:KSS Simirror.png]] [[File:KSSU Simirror Sprite.png]] | ||
|[[Simirror]] | |[[Simirror]] | ||
|[[Mirror]] | |[[Mirror]] | ||
|- | |- | ||
|align=center|[[File: | |align=center|[[File:KSS Grizzo.png]] [[File:KSSU Grizzo Sprite.png]] | ||
|[[ | |[[Grizzo]] | ||
|style="border-style: solid; border-width: 1px 3px 1px 1px"|None | |style="border-style: solid; border-width: 1px 3px 1px 1px"|None | ||
|align=center|[[File: | |align=center|[[File:KSS Sir Kibble.png]] [[File:KSSU Sir Kibble Sprite.png]] | ||
|[[Sir Kibble]] | |[[Sir Kibble]] | ||
|[[Cutter]] | |[[Cutter]] | ||
|- | |- | ||
|align=center|[[File: | |align=center|[[File:KSS Lovely.png]] [[File:KSSU Lovely Sprite.png]] | ||
|[[Lovely]] | |[[Lovely]] | ||
|style="border-style: solid; border-width: 1px 3px 1px 1px"|N/A | |style="border-style: solid; border-width: 1px 3px 1px 1px"|N/A | ||
|align=center|[[File: | |align=center|[[File:KSS Tookey.png]] [[File:KSSU Tookey Sprite.png]] | ||
|[[Tookey]] | |[[Tookey]] | ||
|None | |None | ||
|- | |- | ||
|align=center|[[File: | |align=center|[[File:KSS Noddy.png]] [[File:KSSU Noddy Sprite.png]] | ||
|[[ | |[[Noddy]] | ||
|style="border-style: solid; border-width: 1px 3px 1px 1px"|[[ | |style="border-style: solid; border-width: 1px 3px 1px 1px"|[[Sleep]] | ||
|align=center|[[File: | |align=center|[[File:KSS Waddle Dee.png]] [[File:KSSU Waddle Dee Sprite.png]] | ||
|[[Waddle Dee]] | |[[Waddle Dee]] | ||
|None | |None | ||
|- | |- | ||
|align=center|[[File: | |align=center|[[File:KSS Parasol.png]] | ||
|[[ | |[[Parasol (enemy)|Parasol]] | ||
|style="border-style: solid; border-width: 1px 3px 1px 1px"| | |style="border-style: solid; border-width: 1px 3px 1px 1px"|[[Parasol]] | ||
|align=center|[[File: | |align=center|[[File:KSS Waddle Doo.png]] [[File:KSSU Waddle Doo Sprite.png]] | ||
|[[Waddle Doo]] | |[[Waddle Doo]] | ||
|[[Beam]] | |[[Beam]] | ||
|- | |- | ||
|align=center|[[File: | |align=center|[[File:KSS Poppy Bros Jr Sprite.png]] [[File:KSSU Poppy Bros Jr Sprite.png]] | ||
|[[ | |[[Poppy Bros. Jr.]] | ||
|style="border-style: solid; border-width: 1px 3px 1px 1px"|[[ | |style="border-style: solid; border-width: 1px 3px 1px 1px"|None or [[Bomb]] | ||
|align=center|[[File: | |align=center|[[File:KSS Walky.png]] [[File:KSSU Walky Sprite.png]] | ||
|[[Walky]] | |[[Walky]] | ||
|[[Mike]] | |[[Mike]] | ||
|- | |- | ||
|align=center|[[File: | |align=center|[[File:KSS Rocky.png]] [[File:KSSU Rocky Sprite.png]] | ||
|[[ | |[[Rocky]] | ||
|style="border-style: solid; border-width: 1px 3px 1px 1px"|[[ | |style="border-style: solid; border-width: 1px 3px 1px 1px"|[[Stone]] | ||
!colspan=3| | !colspan=3| | ||
| Line 217: | Line 233: | ||
<tab name="Mid-Bosses"> | <tab name="Mid-Bosses"> | ||
{| class="wikitable" width=25% | {| class="wikitable" width=25% | ||
!Sprite (''KSS''/'' | !Sprite (''KSS''/''KSSU'') | ||
!Name | !Name | ||
!Copy Ability | !Copy Ability | ||
|- | |- | ||
|align=center|[[File: | |align=center|[[File:KSS Bonkers.png]] [[File:KSSU Bonkers Sprite.png]] | ||
|[[Bonkers]] | |[[Bonkers]] | ||
|[[Hammer]] | |[[Hammer]] | ||
|- | |- | ||
|align=center|[[File: | |align=center|[[File:KSS Kracko Jr.png]] [[File:KSSU Kracko Jr Sprite.png]] | ||
|[[Kracko Jr.]] | |[[Kracko Jr.]] | ||
|None | |None | ||
| Line 232: | Line 248: | ||
<tab name="Boss"> | <tab name="Boss"> | ||
{| class="wikitable" width=25% | {| class="wikitable" width=25% | ||
!Sprite (''KSS'') | !Sprite (''KSS''/''KSSU'') | ||
!Name | !Name | ||
!Copy Ability | !Copy Ability | ||
|- | |- | ||
|align=center|[[File: | |align=center|[[File:KSS Kracko Sprite.png]][[File:KSSU Kracko Sprite.png]] | ||
|[[Kracko]] | |[[Kracko]] | ||
|[[Beam]] (via Waddle Doos) | |[[Beam]] (via Waddle Doos) | ||
| Line 243: | Line 259: | ||
</tabs> | </tabs> | ||
|} | |} | ||
====''Kirby Super Star'' gallery==== | |||
<gallery> | |||
KSS Bubbly Clouds intro.png|Intro cutscene, in ''Kirby Super Star'' | |||
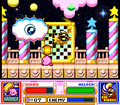
KSS Bubbly Clouds screenshot 01.png|Spotting the Shotzo at the start | |||
KSS Bubbly Clouds screenshot 02.png|Obtaining the Sword Ability | |||
KSS Bubbly Clouds screenshot 03.png|Passing by some bells on the way to the door | |||
KSS Bubbly Clouds screenshot 04.png|Passing through a starry area | |||
KSS Bubbly Clouds screenshot 05.png|Battle with Kracko Jr. | |||
KSS Bubbly Clouds screenshot 06.png|Riding a Warp Star through the clouds | |||
KSS Bubbly Clouds screenshot 07.png|Breaking through a thick Star Block formation | |||
KSS Bubbly Clouds screenshot 08.png|Grabbing a Maxim Tomato above a chasm | |||
KSS Bubbly Clouds screenshot 09.png|Heading through the doorway tucked in the tight passage | |||
KSS Bubbly Clouds screenshot 10.png|Kirby will need to head up from here. | |||
KSS Bubbly Clouds screenshot 11.png|Jumping through floating stone structures | |||
KSS Bubbly Clouds screenshot 12.png|Reaching the door to the boss encounter... | |||
KSS Bubbly Clouds screenshot 13.png|...or Kirby can enter the moon | |||
KSS Bubbly Clouds screenshot 14.png|Optional battle with Bonkers | |||
KSS Bubbly Clouds screenshot 15.png|Contending with the cycloptic stormcloud himself in the cloud palace | |||
</gallery> | |||
====''Kirby Super Star Ultra'' gallery==== | |||
<gallery> | |||
KSSU Bubbly Clouds screenshot 1.png|Kirby and Chilly about to enter a door | |||
KSSU Bubbly Clouds screenshot 2.png|Kirby and Chilly about to enter a door, again | |||
KSSU Bubbly Clouds screenshot 3.png|Kirby and Chilly in a starry room | |||
KSSU Bubbly Clouds screenshot 4.png|The battle with Kracko Jr. | |||
KSSU Bubbly Clouds screenshot 5.png|Kirby and Chilly on a Warp Star, progressing to the next area | |||
KSSU Bubbly Clouds screenshot 6.png|Mike Kirby screams through his megaphone | |||
KSSU Bubbly Clouds screenshot 7.png|Mike Kirby sings in midair | |||
KSSU Bubbly Clouds screenshot 8.png|Mike Kirby shouts "Chesto!" in the cloudy, starry sky | |||
KSSU Bubbly Clouds screenshot 9.png|Kirby and Simirror find a secret moon door | |||
KSSU Bubbly Clouds screenshot 10.png|Kirby and Simirror fall in a starry sky | |||
KSSU Bubbly Clouds screenshot 11.png|The optional battle with Bonkers | |||
KSSU Bubbly Clouds screenshot 12.png|The battle with Kracko | |||
KSSU-map-1-3.png|Stage map | |||
</gallery> | |||
== References in later games == | |||
The following are direct references to Bubbly Clouds in later ''Kirby'' games: | |||
===''Kirby's Adventure'' / ''Kirby: Nightmare in Dream Land''=== | |||
[[File:KA Rainbow Resort Stage 6 screenshot 09.png|thumb|200px|Screenshot from Stage 6 of Rainbow Resort in ''Kirby's Adventure'', featuring an area reminiscent of Bubbly Clouds.]] | |||
[[Rainbow Resort - Stage 6|Stage 6]] of [[Rainbow Resort]] is a truncated homage to ''Kirby's Dream Land'', with its last set of rooms being based on Bubbly Clouds in particular. | |||
===''Kirby Super Star Ultra''=== | |||
In addition to the stage itself being in Spring Breeze, the third stage of [[Revenge of the King]] - [[Crash Clouds]] - is based on Bubbly Clouds. | |||
===''Kirby: Triple Deluxe''=== | |||
In the very last stage of ''[[Kirby: Triple Deluxe]]'' - [[Royal Road - Stage 8 EX]] - a tapestry can be unfurled which depicts Kirby and King Dedede battling in Bubbly Clouds in the classic 8-bit monochrome style. | |||
===''Kirby Fighters'' series=== | |||
{{main|Bubbly Clouds (Battle Stage)}} | |||
In all three iterations of [[Kirby Fighters (series)|''Kirby Fighters'']], one of its [[Battle Stage]]s is based on the battle with Kracko used in the [[Spring Breeze]] version of Bubbly Clouds. | |||
===''Kirby: Planet Robobot''=== | |||
In the very last stage of ''[[Kirby: Planet Robobot]]'' - [[Access Ark - Stage 8 EX]] - a screen can be activated which depicts Kirby and [[Meta Knight]] battling in Bubbly Clouds in the classic 8-bit monochrome style. It should be noted that this scene is based on the equivalent area of [[Rainbow Resort - Stage 6]] from ''Kirby's Adventure''. | |||
===''Kirby's Blowout Blast''=== | |||
[[Kirby's Blowout Blast - Level 4|Level 4]] of ''[[Kirby's Blowout Blast]]'' is inspired by Bubbly Clouds, and uses the same stage music and boss. | |||
==Profiles== | |||
===''Kirby's Dream Land'' Instruction Booklet (NA Print)=== | |||
'''''The Kingdom of Clouds''''' | |||
<br>''You won't find a clear path through these soft billowy clouds. By hiding in the clouds, King Dedede's bullies will find a way to surprise you when you least expect it. The boss Kracko is lightning fast. You'll have to keep moving and keep a clear head in order to beat him!'' | |||
==Trivia== | ==Trivia== | ||
*This was the first level to have a secret doorway hidden in a crescent moon in the background, starting a trope that would recur in many subsequent ''Kirby'' games. | *This was the first level to have a secret doorway hidden in a crescent moon in the background, starting a trope that would recur in many subsequent ''Kirby'' games. | ||
* | *In ''Kirby's Dream Land'', there is a notable [[Glitches in Kirby's Dream Land|glitch]] present in this stage. In the room where Kirby emerges from a waterfall, if he swallows the Mint Leaf and moves in just the right way, he will actually be placed in the background and be able to fly behind background elements. | ||
== Gallery == | |||
<gallery> | |||
Bubbly Clowds - Twinkle Popopo.jpg|Concept art of Bubbly Clouds (misspelled as "Bubbly Clowds") from ''Twinkle Popopo'', the prototype for ''Kirby's Dream Land''. Note the unhappy whale-airship machines, which might have been inspiration for Kaboola | |||
A Day in Bubbly Clouds art.jpg|"A day in Bubbly Clouds" art | |||
</gallery> | |||
== Names in other languages == | |||
{{Names | |||
|ja=バブリークラウズ | |||
|jaR=Baburī Kurauzu | |||
|jaM=Bubbly Clouds | |||
|fr=Nuages Mousseux | |||
|frM=Foamy Clouds | |||
|it=Soffici nuvole | |||
|itM=Fluffy clouds | |||
|ko=버블리 클라우드 | |||
|koR=Beobeulli Keullaudeu | |||
|koM=Bubbly Cloud | |||
|de=Kugelwolken | |||
|deM=Sphere Clouds | |||
|es=Nubes Pastel | |||
|esM=Pastel Clouds | |||
|nl=Bubbelwolken | |||
|nlM=Bubble clouds | |||
|zhTrad=泡泡雲層 | |||
|zhTradR=pào pào yún céng | |||
|zhSimp=泡泡云层 | |||
|zhSimpR=pào pào yún céng | |||
|zhM=Bubble Clouds | |||
}} | |||
{{clear}} | |||
{{Navbox- | {{Navbox-KDL}} | ||
{{Navbox-KSS/KSSU}} | {{Navbox-KSS/KSSU}} | ||
[[Category:Stages in Spring Breeze]] | [[Category:Stages in Spring Breeze]] | ||
Latest revision as of 23:58, 26 April 2024
| ||||||||||
| ||||||||||
| ||||||||||
| ||||||||||
|
| ||||||||||

- This article is about the stage in Kirby's Dream Land and Spring Breeze in Kirby Super Star and Kirby Super Star Ultra. For the Battle Stage in the Kirby Fighters games, see Bubbly Clouds (Battle Stage).
Bubbly Clouds is the fourth stage of Kirby's Dream Land, and the third stage in Spring Breeze, in Kirby Super Star and Kirby Super Star Ultra. The area is dominated by cloud-top landscapes, dotted with pillars, towers, and other structures. Due to its lofty locale, there are many bottomless pits to reckon with. Later parts of the stage transition to a celestial backdrop, and near the end, a recurring secret involving entering the moon to reach a secret area with a long fall was introduced. This stage features Kracko Jr. as its Mid-Boss and Kracko proper as the boss.
Game appearances[edit]
Kirby's Dream Land[edit]
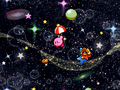
Bubbly Clouds serves as the fourth stage of Kirby's Dream Land, and here is where the platforming starts to become very tricky, since bottomless pits can be found everywhere and lots of flying enemies pollute the skies. This stage features several large spaces, some of which involve winding paths and others being quite vertical. It transitions from a daytime cloudscape into a floating palace set against a starry night sky, with the main dividing line being the fight against Kracko Jr. — Kracko proper is faced at the very end.
Cutscene[edit]
Kirby falls into a cloud and disappears from view. Shortly after, the cloud starts churning, then starts raining numerous different copies of Kirby, along with some large stars.
Room breakdown[edit]

Bubbly Clouds consists of ten distinct rooms, with two of them being optional side areas and two more being areas where Kirby fights the mid-boss and boss. Each room can be summarized as follows:
The first room is a long lateral path made of isolated cloud platforms and littered with various enemies, including Shotzos, Scarfies, and Parasol Waddle Dees. Kirby will have to travel to the right by jumping over gaps and dealing with any enemies that get in his way in order to reach the door at the end of a long stone walkway.
The second room is an interior castle hall leading off to the right, guarded by boomerang-wielding foes and lined with spikes in places. From there, it leads outside to a walkway patrolled by different foes. The door can be found nestled in a cloud after the walkway ends.
The third room is a long cloud tunnel which loops on itself from left to right while generally leading upward. Kirby will have to deel with Kooklers as he travels upward, and passes by a small pool of water before leading up to a door flanked by two pillars. By the water pool is a hidden door that leads to a big dark side area featuring a Mint Leaf and several other items on pillars to collect from enemies on patrol.
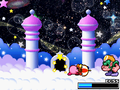
The fourth room is a small area where Kracko Jr. must be fought. Defeating him yields a Warp Star which takes Kirby for a ride into the stars above.
The fifth room begins with Kirby emerging from a waterfall hole, and falling into a pool. To the left is a Mint Leaf, and to the right, the path continues along a wide hall which leads to a large Star Block barricade patrolled by Gordos and holding some snacks. From there, the path narrows into a winding hall, part of which is lined with spikes. A Scarfy guards the door.
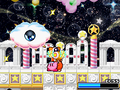
The sixth room is a small courthouse overlooking a starry vista. Up ahead is a bowl of Spicy Food, which Kirby can use to clear a long hall of Star Blocks to reach the door.
The seventh room begins on a small platform hanging over a bottomless pit. The path continues upward into the night sky, past hanging platforms with enemies on them. The door can be found at the top, just under a crescent moon. Entering this moon leads to a secret area where Kirby can fall a great distance and collect items along the way.
The last room is where Kirby battles the boss Kracko. Once hit six times, Kracko explodes, leaving the fourth Sparkling Star for Kirby to collect and finish the stage.
Enemies, Mid-Boss, and Boss[edit]
| ||||||||||||||||||||||||||||||||||||||||||||||||||
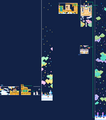
Map gallery[edit]

Map of Room 1

Map of Room 2

Map of Room 3 (loops on itself)
Secret room from Room 3
Map of Room 4, where Kracko Jr. is fought
Map of Room 5

Map of Room 6
Map of Room 7


Kirby Super Star / Kirby Super Star Ultra[edit]
| ||||||||||||
| ||||||||||||
| ||||||||||||
|
| ||||||||||||

Bubbly Clouds is the third stage of Spring Breeze in Kirby Super Star and Kirby Super Star Ultra. It is a largely truncated version of the same level from Kirby's Dream Land and features different enemies and Copy Abilities, though it still preserves a certain lunar secret near the end.
Cutscene[edit]
The intro cutscene is slightly different between these games and Kirby's Dream Land. In this version, Kirby starts sneezing while standing atop the clouds, causing stars to fall each time. On the second sneeze, one bops him on the head, causing him to tumble into the cloud. This cutscene plays out similarly to the intro cutscene for Castle Lololo, which was cut from Spring Breeze.
Synopsis[edit]
The Spring Breeze version of Bubbly Clouds consists of eight rooms and has the same basic structure as the Kirby's Dream Land version, but the rooms themselves are for the most part shorter or otherwise changed. The main differences are as follows:
- The first room is much shorter and contains fewer enemies, with a few Blade Knights patrolling the area and some food to find past the door.
- The second room features the same palace-style as the equivalent room in Kirby's Dream Land, but is combined with the upward structure of the cloud tunnels in Kirby's Dream Land and made much simpler.
- The third room features the same pillar style as the first hidden side area in Kirby's Dream Land, but is much smaller. This leads to the fight with Kracko Jr.
- The fifth room, after Kracko Jr., is similar to its equivalent in Kirby's Dream Land, but is smaller and removes the tight passages between the Star Block wall and the door.
- The sixth room from Kirby's Dream Land is completely absent from this version. Instead, Kirby is taken directly to the equivalent of the seventh room in Kirby's Dream Land. Naturally, this room is not as tall and features different enemies.
- At the bottom of the secret room through the moon, Kirby fights the Mid-Boss Bonkers.
Enemies, Mid-Bosses, and Boss[edit]
| |||||||||||||||||||||||||||||||||||||||||||||||||||||||||||||||||||||

Kirby Super Star gallery[edit]
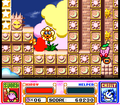
Intro cutscene, in Kirby Super Star
Spotting the Shotzo at the start
Obtaining the Sword Ability
Passing by some bells on the way to the door
Passing through a starry area
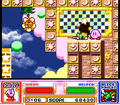
Battle with Kracko Jr.
Riding a Warp Star through the clouds
Breaking through a thick Star Block formation
Grabbing a Maxim Tomato above a chasm
Heading through the doorway tucked in the tight passage
Kirby will need to head up from here.
Jumping through floating stone structures
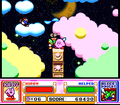
Reaching the door to the boss encounter...
...or Kirby can enter the moon
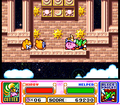
Optional battle with Bonkers
Contending with the cycloptic stormcloud himself in the cloud palace


Kirby Super Star Ultra gallery[edit]
Kirby and Chilly about to enter a door
Kirby and Chilly about to enter a door, again
Kirby and Chilly in a starry room
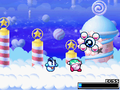
The battle with Kracko Jr.
Kirby and Chilly on a Warp Star, progressing to the next area
Mike Kirby screams through his megaphone
Mike Kirby sings in midair
Mike Kirby shouts "Chesto!" in the cloudy, starry sky
Kirby and Simirror find a secret moon door
Kirby and Simirror fall in a starry sky
The optional battle with Bonkers
The battle with Kracko
Stage map


References in later games[edit]
The following are direct references to Bubbly Clouds in later Kirby games:
Kirby's Adventure / Kirby: Nightmare in Dream Land[edit]

Stage 6 of Rainbow Resort is a truncated homage to Kirby's Dream Land, with its last set of rooms being based on Bubbly Clouds in particular.
Kirby Super Star Ultra[edit]
In addition to the stage itself being in Spring Breeze, the third stage of Revenge of the King - Crash Clouds - is based on Bubbly Clouds.
Kirby: Triple Deluxe[edit]
In the very last stage of Kirby: Triple Deluxe - Royal Road - Stage 8 EX - a tapestry can be unfurled which depicts Kirby and King Dedede battling in Bubbly Clouds in the classic 8-bit monochrome style.
Kirby Fighters series[edit]
- Main article: Bubbly Clouds (Battle Stage)
In all three iterations of Kirby Fighters, one of its Battle Stages is based on the battle with Kracko used in the Spring Breeze version of Bubbly Clouds.
Kirby: Planet Robobot[edit]
In the very last stage of Kirby: Planet Robobot - Access Ark - Stage 8 EX - a screen can be activated which depicts Kirby and Meta Knight battling in Bubbly Clouds in the classic 8-bit monochrome style. It should be noted that this scene is based on the equivalent area of Rainbow Resort - Stage 6 from Kirby's Adventure.
Kirby's Blowout Blast[edit]
Level 4 of Kirby's Blowout Blast is inspired by Bubbly Clouds, and uses the same stage music and boss.
Profiles[edit]
Kirby's Dream Land Instruction Booklet (NA Print)[edit]
The Kingdom of Clouds
You won't find a clear path through these soft billowy clouds. By hiding in the clouds, King Dedede's bullies will find a way to surprise you when you least expect it. The boss Kracko is lightning fast. You'll have to keep moving and keep a clear head in order to beat him!
Trivia[edit]
- This was the first level to have a secret doorway hidden in a crescent moon in the background, starting a trope that would recur in many subsequent Kirby games.
- In Kirby's Dream Land, there is a notable glitch present in this stage. In the room where Kirby emerges from a waterfall, if he swallows the Mint Leaf and moves in just the right way, he will actually be placed in the background and be able to fly behind background elements.
Gallery[edit]
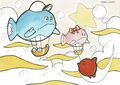
Concept art of Bubbly Clouds (misspelled as "Bubbly Clowds") from Twinkle Popopo, the prototype for Kirby's Dream Land. Note the unhappy whale-airship machines, which might have been inspiration for Kaboola
"A day in Bubbly Clouds" art


Names in other languages[edit]
| Language | Name | Meaning |
|---|---|---|
| Japanese | バブリークラウズ Baburī Kurauzu |
Bubbly Clouds |
| Traditional Chinese | 泡泡雲層 pào pào yún céng |
Bubble Clouds |
| Simplified Chinese | 泡泡云层 pào pào yún céng | |
| Dutch | Bubbelwolken | Bubble clouds |
| French | Nuages Mousseux | Foamy Clouds |
| German | Kugelwolken | Sphere Clouds |
| Italian | Soffici nuvole | Fluffy clouds |
| Korean | 버블리 클라우드 Beobeulli Keullaudeu |
Bubbly Cloud |
| Spanish | Nubes Pastel | Pastel Clouds |
| |||||||||||||||||||||||