Heroes in Another Dimension - Dimension I: Difference between revisions
m (Text replacement - "{{Navbox-SA}}" to "{{Navbox-KSA}}") |
|||
| (18 intermediate revisions by 10 users not shown) | |||
| Line 1: | Line 1: | ||
{{Infobox-KSAStage | {{Infobox-KSAStage | ||
|title=Dimension I | |title=Dimension I | ||
|image=[[File:Dimension I 2.jpg|350px]] | |image=[[File:KSA Heroes Dimension I 2.jpg|350px]] | ||
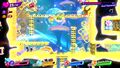
|caption=Kirby performing a [[Friend Throw]] puzzle in '''Dimension I'''. | |caption=Kirby performing a [[Friend Throw]] puzzle in '''Dimension I'''. | ||
|level=[[Heroes in Another Dimension]] | |level=[[Heroes in Another Dimension]] | ||
| Line 10: | Line 9: | ||
|boss=[[Parallel Woods]] | |boss=[[Parallel Woods]] | ||
|midboss=[[Chef Kawasaki]] | |midboss=[[Chef Kawasaki]] | ||
|theme music=[[File:The Legend of Last World General Sample KSA.mp3]] | |||
|theme title="[[The Legend of Last World]]" | |||
|description=Clip of the music that plays in '''Dimension I''' | |||
|previousstage=[[Ability Planet]] | |previousstage=[[Ability Planet]] | ||
|nextstage=[[Heroes in Another Dimension - Dimension II|Dimension II]] | |nextstage=[[Heroes in Another Dimension - Dimension II|Dimension II]] | ||
| Line 31: | Line 33: | ||
*[[Yo-Yo]] | *[[Yo-Yo]] | ||
There are a total of three [[ | There are a total of three [[Dream Rod]]s that can be found in this dimension, with two being in the [[Fire]] room and one in the boss prep room. | ||
==Friend Heart Guide== | ==Friend Heart Guide== | ||
| Line 51: | Line 53: | ||
*Using the Zap Hammer, King Dedede has to run against a sparking [[Wire (object)|Wire]] to collect this heart before it drops into a [[bottomless pit]]. | *Using the Zap Hammer, King Dedede has to run against a sparking [[Wire (object)|Wire]] to collect this heart before it drops into a [[bottomless pit]]. | ||
*Another spark needs to be ran against to save '''two''' hearts. Using a Head Slide might make this easier. | *Another spark needs to be ran against to save '''two''' hearts. Using a Head Slide might make this easier. | ||
*The last spark run requires Dedede to hit three [[ | *The last spark run requires Dedede to hit three [[Stake]]s in quick succession to save the '''three''' hearts from falling. | ||
===[[Meta Knight]] Room 1=== | ===[[Meta Knight]] Room 1=== | ||
| Line 75: | Line 77: | ||
{{col-begin}} | {{col-begin}} | ||
{{col-break|width=50%}} | {{col-break|width=50%}} | ||
*[[Big Kabu]] | |||
*[[Blado]] | *[[Blado]] | ||
*[[Bouncy]] | *[[Bouncy]] | ||
| Line 83: | Line 86: | ||
*[[Chilly]] | *[[Chilly]] | ||
*[[Chip]] | *[[Chip]] | ||
*[[ | *[[Como]] | ||
*[[Driblee]] | *[[Driblee]] | ||
*[[Floaty the Cell Core]] | *[[Floaty the Cell Core]] | ||
*[[Gordo]] | *[[Gordo]] | ||
{{col-break|width=50%}} | {{col-break|width=50%}} | ||
*[[Jammerjab]] | |||
*[[Kabu]] | *[[Kabu]] | ||
*[[Key Dee]] | *[[Key Dee]] | ||
| Line 93: | Line 97: | ||
*[[Poppy Bros. Jr.]] | *[[Poppy Bros. Jr.]] | ||
*[[Puppet Dee]] | *[[Puppet Dee]] | ||
*[[Rolling Waddle Dee]] | |||
*[[Guard (enemy)|Sizzle Guard]] | *[[Guard (enemy)|Sizzle Guard]] | ||
*[[Shotzo]] | *[[Shotzo]] | ||
*[[Sir Kibble]] | *[[Sir Kibble]] | ||
*[[Waddle Dee]] | *[[Waddle Dee]] | ||
*[[Waddle Doo]] | *[[Waddle Doo]] | ||
{{col-end}} | {{col-end}} | ||
| Line 108: | Line 112: | ||
==Gallery== | ==Gallery== | ||
<gallery> | <gallery> | ||
Dimension I 1.jpg|The first heart. | KSA Heroes Dimension I 1.jpg|The first heart. | ||
Dimension I 3.jpg|Bandana Waddle Dee avoids his balled kin. | KSA Heroes Dimension I 3.jpg|Bandana Waddle Dee avoids his balled kin. | ||
Dimension I 4.jpg|King Dedede dives into a pile of boxes. | KSA Heroes Dimension I 4.jpg|King Dedede dives into a pile of boxes. | ||
Dimension I 5.jpg|Meta Knight flies through a sinking tower. | KSA Heroes Dimension I 5.jpg|Meta Knight flies through a sinking tower. | ||
Dimension I 6.jpg|Meta Knight is about to get cooked. | KSA Heroes Dimension I 6.jpg|Meta Knight is about to get cooked. | ||
Dimension I 7.jpg|The Friend Bridge in action. | KSA Heroes Dimension I 7.jpg|The Friend Bridge in action. | ||
Dimension I 8.jpg|Parallel Woods is defeated. | KSA Heroes Dimension I 8.jpg|Parallel Woods is defeated. | ||
KSA-map-8-AD1.jpg|Dimension 1 map | |||
</gallery> | </gallery> | ||
==Video walkthrough== | |||
{{Youtube|I5RH0uUbgO4|300|100% walkthrough of Dimension I.}} | |||
{{clear}} | |||
==Names in other languages== | ==Names in other languages== | ||
{{Names | {{Names | ||
|de=Dimension I | |ja=ディメンションI | ||
|deM=Dimension I | |jaR=Dimenshon I | ||
|jaM=Dimension I | |||
|frE=Dimension I | |||
|frEM=- | |||
|de=Dimension I | |||
|deM=- | |||
|nl=Dimensie I | |||
|nlM=Dimension I | |||
|zhTrad=空間I | |||
|zhTradR=kōng jiān I | |||
|zhSimp=空间I | |||
|zhSimpR=kōng jiān I | |||
|zhM=Dimension I | |||
|es=Dimensión I | |||
|esM=Dimension I | |||
}} | }} | ||
{{clear}} | {{clear}} | ||
| Line 128: | Line 152: | ||
{{Navbox-KSA}} | {{Navbox-KSA}} | ||
[[Category:Stages in Heroes in Another Dimension]] | [[Category:Stages in Heroes in Another Dimension]] | ||
Latest revision as of 18:03, 24 March 2024
| ||||||||||||||
| ||||||||||||||
| ||||||||||||||
|
| ||||||||||||||

Dimension I is the first of four primary stages in Heroes in Another Dimension. It is the only one available to access at the start, and unlocks Dimensions II, III, and IV upon completion. As with the others, there are 30 Friend Hearts to collect in this dimension. The boss of this dimension is Parallel Woods.
Overview[edit]
The dimension takes place in seven primary rooms, not counting the boss and boss prep chambers. The Hero Doors grant the following Copy Abilities/Dream Friends in the following order:
In the boss prep room, the following Copy Essences can be found:
There are a total of three Dream Rods that can be found in this dimension, with two being in the Fire room and one in the boss prep room.
Friend Heart Guide[edit]
The following are in order of appearance:
Starting Room[edit]
- The first heart is out in the open, and must be obtained in order to progress.
Fighter Room[edit]
- Kirby will need to use Friend Throw to bust a metal block and hit a switch, thus revealing this heart beneath.
- Another switch lies beyond a metal block, this time guarded by a crushing hazard. Kirby will need to time his throw.
- This heart is located behind a metal block, which can be broken if Kirby uses Friend Throw from a moving platform.
Bandana Waddle Dee Room[edit]
- This heart can be found under an oddly-shaped moving platform which can crush at the entrance point.
- Past a bouncing Waddle Dee Ball, this heart can be found inside a box.
- A Fuse Cannon lies on the path. To light it, a Sizzle Spear is needed. It leads to a room where a Waddle Dee Ball needs to be guided in a switch puzzle. Solving the puzzle yields three hearts.
- Just after the cannon, a switch can be found inside a wall in the formation ahead, which can be hit to reveal two hearts.
King Dedede Room[edit]
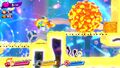
- Using the Zap Hammer, King Dedede has to run against a sparking Wire to collect this heart before it drops into a bottomless pit.
- Another spark needs to be ran against to save two hearts. Using a Head Slide might make this easier.
- The last spark run requires Dedede to hit three Stakes in quick succession to save the three hearts from falling.
Meta Knight Room 1[edit]
- Meta Knight comes across a sinking tower which he must traverse. The first heart is inside the winding path and is easy to get.
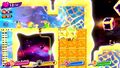
- Near the end of the first tower, this heart is being guarded by a Sizzle Guard in a looping side-hall.
- In the second sinking tower, two hearts can be found in a chamber containing barrels which can only be accessed from the tower's exit point.
- In the third sinking tower, four hearts are being guarded in separate locations by Sizzle Guards, the last of which is off the main path.
Meta Knight Room 2[edit]
- During the enemy ambush, a Key Dee appears with a Key, which will need to be obtained before it is destroyed in a spike pit. After the fight with Chef Kawasaki, this key can be used to unlock a Gate blocking off a heart.
- A heart can be found above the room with the Hero Door in it.
Fire Room[edit]
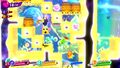
- Kirby and co. will need to form a Friend Bridge and get the Key Dee to the other side to unlock the door. A Waddle Dee blocks this, so it will need to be gotten rid of using the spike trap. Once successful, this heart can be obtained in a room accessible by cannon.
- A second Friend Bridge puzzle needs to be solved, this one involving many intruding Waddle Dees. Once solved, two hearts can be obtained; one in front of the cannon, and the other in the room it leads to.
Enemies & Mid-Bosses[edit]
| Regular Enemies | Mid-Bosses | |||
|---|---|---|---|---|
|
|
|
Gallery[edit]
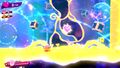
The first heart.
Bandana Waddle Dee avoids his balled kin.
King Dedede dives into a pile of boxes.
Meta Knight flies through a sinking tower.
Meta Knight is about to get cooked.
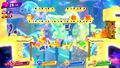
The Friend Bridge in action.
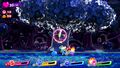
Parallel Woods is defeated.

Dimension 1 map


Video walkthrough[edit]
100% walkthrough of Dimension I.
|
Names in other languages[edit]
| Language | Name | Meaning |
|---|---|---|
| Japanese | ディメンションI Dimenshon I |
Dimension I |
| Traditional Chinese | 空間I kōng jiān I |
Dimension I |
| Simplified Chinese | 空间I kōng jiān I | |
| Dutch | Dimensie I | Dimension I |
| European French | Dimension I | - |
| German | Dimension I | - |
| Spanish | Dimensión I | Dimension I |