|
|
| (48 intermediate revisions by 20 users not shown) |
| Line 1: |
Line 1: |
| {{Infobox-KRtDLLevel | | {{Infobox-KRtDLLevel |
| |image=[[File:Egg Engines.png|260px]] | | |image=[[File:KRtDLD Egg Engines select screenshot.png|350px]] |
| |caption=Screenshot from ''Kirby's Return to Dream Land''. | | |caption=Screenshot of '''Egg Engines''' on the [[World Map]] from ''[[Kirby's Return to Dream Land Deluxe]]''. |
| |level=6 | | |level=6 |
| |world=[[Halcandra]] | | |world=[[Halcandra]] |
| |stages=6 | | |stages=6 |
| |part=None | | |part={{N}} |
| |spheres=21 | | |spheres=21 |
| |mid-boss= [[Sphere Doomer]] (6-1 , 6-3), [[Dubior]] (6-2), [[King Doo]] (6-3), [[Moundo]] (6-3), [[Kibble Blade]] (6-4) | | |mid-boss= [[Sphere Doomer]] (6-1 , 6-3), [[Dubior]] (6-2), [[King Doo]] (6-3), [[Moundo]] (6-3), [[Kibble Blade]] (6-4) |
| Line 12: |
Line 12: |
| |previous=[[Nutty Noon]] | | |previous=[[Nutty Noon]] |
| |next=[[Dangerous Dinner]] | | |next=[[Dangerous Dinner]] |
| | |theme music=[[File:Egg Engines sample KRtDL.oga]] |
| | |theme title="[[Egg Engines (theme)|Egg Engines]]" |
| | |description=The stage select theme for Egg Engines. |
| }} | | }} |
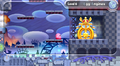
| Level 6: '''Egg Engines''' is the sixth level in ''[[Kirby's Return to Dream Land]]'' and the first level in [[Halcandra]]. Egg Engines is an industrial level with a lot of machinery. The boss of this level is [[Metal General]]. In Extra Mode, [[HR-D3]] is fought after Metal General. There are twenty one [[Energy Sphere]]s in this level, three in stage 1, four each in stage 2 and 3, and five each in stage 4 and 5. | | Level 6: '''Egg Engines''' is the sixth level in ''[[Kirby's Return to Dream Land]]'' and its remake ''[[Kirby's Return to Dream Land Deluxe]]'', and the first level in [[Halcandra]]. Egg Engines is an industrial level with a lot of machinery. The boss of this level is [[Metal General]]. In Extra Mode, [[HR-D3]] is fought after Metal General. There are twenty one [[Energy Sphere]]s in this level, three in stage 1, four each in stage 2 and 3, and five each in stage 4 and 5. |
| | | {{clear|left}} |
| ==Stages== | | ==Stages== |
| {{construction}}
| |
| For details on each stage individually, click the name of the stage. | | For details on each stage individually, click the name of the stage. |
| {| class="sortable wikitable" border=1 cellpadding=2 | | {| class="sortable wikitable" border=1 cellpadding=2 |
| !class=unsortable|Stage | | !class=sortable|Stage |
| !class=unsortable|Energy Spheres / Ship Parts | | !class=sortable|Energy Spheres / Ship Parts |
| !class=unsortable|Super Ability | | !class=sortable|Super Ability |
| | !class=sortable|Boss/Mid-Boss |
| !class=unsortable|Notes | | !class=unsortable|Notes |
| |- | | |- |
| |[[Egg Engines - Stage 1|Stage 1]] | | |{{center|[[File:KRtDLD Egg Engines Stage 1 select screenshot.png|200px]]<br>'''[[Egg Engines - Stage 1|Stage 1]]'''}} |
| |3 | | |3 |
| |[[Monster Flame]] | | |[[Monster Flame]] |
| | |[[Sphere Doomer]] (Ice) |
| | | | | |
|
| |
| |- | | |- |
| |[[Egg Engines - Stage 2|Stage 2]] | | |{{center|[[File:KRtDLD Egg Engines Stage 2 select screenshot.png|200px]]<br>'''[[Egg Engines - Stage 2|Stage 2]]'''}} |
| |4 | | |4 |
| |None. | | |{{N}} |
| | |[[Dubior]] |
| | | | | |
|
| |
| |- | | |- |
| |[[Egg Engines - Stage 3|Stage 3]] | | |{{center|[[File:KRtDLD Egg Engines Stage 3 select screenshot.png|200px]]<br>'''[[Egg Engines - Stage 3|Stage 3]]'''}} |
| |4 | | |4 |
| |[[Flare Beam]] | | |[[Flare Beam]] |
| | |[[King Doo]]<br>[[Moundo]]<br>[[Sphere Doomer]] (Ice) |
| | | | | |
|
| |
| |- | | |- |
| |[[Egg Engines - Stage 4|Stage 4]] | | |{{center|[[File:KRtDLD Egg Engines Stage 4 select screenshot.png|200px]]<br>'''[[Egg Engines - Stage 4|Stage 4]]'''}} |
| |5 | | |5 |
| |None. | | |{{N}} |
| |There is a secret [[HAL Room]] in this stage. | | |[[Kibble Blade]] |
| | | | |
| |- | | |- |
| |[[Egg Engines - Stage 5|Stage 5]] | | |{{center|[[File:KRtDLD Egg Engines Stage 5 select screenshot.png|200px]]<br>'''[[Egg Engines - Stage 5|Stage 5]]'''}} |
| |5 | | |5 |
| |None. | | |{{N}} |
| | | | |{{N}} |
| | | |There is a secret [[HAL Room]] in this stage. |
| |- | | |- |
| |[[Metal General|Stage 6 - Metal General]] | | |{{center|[[File:KRtDLD Egg Engines Stage 6 select screenshot.png|200px]]<br>'''[[Egg Engines - Stage 6|Stage 6]]'''}} |
| |None.
| | |{{N}} |
| |None.
| | |{{N}} |
| |In [[Extra Game|Extra Mode]], [[HR-D3]] is fought after Metal General EX.
| | |[[Metal General]]<br>[[HR-D3]] (Extra Mode only) |
| | |
| |}
| |
| | |
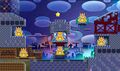
| [[File:EE Lobby.jpg|thumb|left|250px|A portion of the Egg Engines Lobby.]] | |
| | |
| {{clear}}
| |
| | |
| ===Stage 4===
| |
| [[File:EE Stage 4.jpg|thumb|right|250px|Kirby traverses a waterworks tunnel in Stage 4.]]
| |
| Section 1: The stage begins as Kirby and his friends fall down a brickwork chute into what appears to be the factory pipeline. At the bottom is a water current that carries Kirby to the right, then downward past some [[Glunk]]s and Gordos. The current continues in a spiral pattern until the air pocket containing the door to the next sections is reached, guarded by a [[Clayn]].
| |
| | |
| Section 2: The door leads to a dark area of the pipeline. After navigating a tricky hallway, Kirby happens upon a [[Hot Head]], whose Fire ability can help light things up. A [[Candle]] can later be found which can help in the absence of Fire. With it, Kirby can see what he is dropping down into and avoid getting hit. To the right, a [[Sodory]] guards a [[Hammer]] Copy Pedestal. With Hammer, Kirby can drop below and uncover some Metal Block encased areas to access an Energy Sphere. To the left lies the door to the next section, guarded by another Clayn. However, should Kirby see it, there is another exit in the area.
| |
| | |
| Section 3: The door leads to a hallway that goes off to the right. Another path, full of water, can be seen below, accessible only if Kirby went through the other door. Each hallway is blocked off regularly by breakable blocks and various enemies, but only the bottom path contains an Energy Sphere. Also on the bottom path are a couple Pedestals containing the [[Parasol]] and [[Fighter]] abilities. Each path ends in a separate door that leads to the next section.
| |
| | |
| Section 4: Both doors lead to a narrow hallway mostly filled with water as a current continues to push toward the right. This leads to a hallway with both an upper and lower portion. Choosing either leads to different enemies to fight, but eventually, a chamber is reached where Kirby must battle [[Kibble Blade]]. Defeating him yields the [[Cutter]] ability, which is needed to access a switch past a current of water to unlock another Energy Sphere. Swimming in the water leads to the door to the next section.
| |
| | |
| Section 5: The door leads to an underwater maze. Kirby must navigate carefully through each room in order to find the next Energy Sphere before he goes too far. To the right is the door to the next section.
| |
| | |
| Section 6: The door leads to another underwater tunnel, whose current immediately takes Kirby into a room with a hungry [[Barbar]] in it. As Kirby progresses to the right, he must avoid more Barbar as he activates Bomb Blocks with his water gun. One Barbar in particular is guarding an optional doorway that leads to the stage's last Energy Sphere. The last current carries Kirby through a great deal of Barbar before finally ending up in a room with the stage exit.
| |
| | |
| ====Enemies, Mid-bosses, and Abilities====
| |
| {| style="border: 3px solid #E47575; {{round}};background: #F69D99" cellspacing="2"
| |
| ! width="420px" | '''Regular Enemies'''
| |
| ! width="180px" | '''Mid-Boss'''
| |
| |- bgcolor="E47575" | |
| |
| |
| {{col-begin}} | |
| {{col-break|width=33%}} | |
| *[[Glunk]]
| |
| *[[Hot Head]]
| |
| *[[Noddy]]
| |
| *[[Blipper]]
| |
| *[[Chilly]]
| |
| *[[Shotzo]]
| |
| {{col-break|width=33%}}
| |
| *[[Gordo]]
| |
| *[[Babut]]
| |
| *[[Sodory]]
| |
| *[[Squishy]]
| |
| *[[Barbar]]
| |
| {{col-break|width=34%}}
| |
| *[[Clayn]]
| |
| *[[Waddle Dee]]
| |
| *[[Lanzer]]
| |
| *[[Barracu]]
| |
| *[[Sparky]]
| |
| {{col-end}}
| |
| | | | | |
| {{col-begin|width=50%}}
| |
| *[[Kibble Blade]]
| |
| {{col-end}}
| |
| |-
| |
| |-
| |
| ! width="420px"| '''Abilities'''
| |
| ! width="180px" | '''Super Ability'''
| |
| |- bgcolor="#E47575"
| |
| |
| |
| {{col-begin}}
| |
| {{col-break|width=50%}}
| |
| *[[Fire]]
| |
| *[[Sword]]
| |
| *[[Spear]]
| |
| *[[Parasol]]
| |
| *[[Cutter]]
| |
| {{col-break|width=50%}}
| |
| *[[Sleep]]
| |
| *[[Hammer]]
| |
| *[[Ice]]
| |
| *[[Fighter]]
| |
| *[[Spark]]
| |
| {{col-end}}
| |
| |
| |
| {{col-begin}}
| |
| *N/A
| |
| {{col-end}}
| |
| |}
| |
|
| |
| ===Stage 5===
| |
| [[File:EE Stage 5.jpg|thumb|right|250px|Kirby jumps to avoid getting squished in one of the crushing chambers in Stage 5.]]
| |
| Section 1: The stage begins in the factory interior, where Waddle Dees can be seen running on some small conveyor belts. Further down the hall, a [[Waddle Doo]] can be swallowed for the [[Beam]] ability. Past that is a room where a large piston slowly presses the floor. More enemies and pistons are encountered as the hall continues to the right. At the end, a ceiling switch can be used to cause a piston to fall and crush a mass of Waddle Dees guarding the door to the next section.
| |
|
| |
| Section 2: The door leads to a room with nothing in it at first. A ceiling then appears from above and starts sinking, with the intent of crushing whatever is below. There is a small inlet that Kirby and his friends can use to avoid getting crushed. Once it hits the ground, it flies back up. Another ceiling then comes down with an inlet in a different location. This is followed by more, with different shapes and speeds. The fifth ceiling contains an Energy Sphere to the left, which Kirby can grab is he is quick enough. After that ceiling recedes, a door appears leading to the next section.
| |
|
| |
| Section 3: The door leads to another factory hallway leading to the right. A conveyor belt conveys several Waddle Dees to get in Kirby's way. Further to the right are individual conveyors suspended over a bottomless pit, and a [[Sir Kibble]], a [[Leafan]] and a [[Rocky]] guarding the path. Past a few more standard enemies, an [[Owgulf]] can be seen fluttering about. The last conveyor belt moves exceptionally fast, carrying anything on it to the left edge. Along the way, an optional door can be found which leads to a room with an [[Energy Sphere]]. The door to the next section is located not far beyond.
| |
|
| |
| Section 4: The door leads to a room that works much like the one in Section 2. This time, the Energy Sphere is found in the third ceiling, rather high up in the inlet. After five attempts to squish, the door to the next section appears.
| |
|
| |
| Section 5: The door leads to a chamber with a Bomb Block plug at the right, concealing a ladder that leads down. Kirby will need to open walls that release Gordos, then hide from said Gordos as he progresses downward. A [[Whippy]] can be found along this path, providing the [[Whip]] ability. Along the way, Kirby will encounter an [[Invisibility Stone]], to help avoid more Gordos and blasts from [[Gigatzo]]s. Past an Invisibility Stone Gate, another Energy Sphere can be accessed, guarded by some [[Degout]]s. The door to the next section is located at the bottom of the chute.
| |
|
| |
| Section 6: The door leads to another squishing room. This time, however, the platforms come down in pieces and multiples, and Kirby is in just as much danger if he rides one back up as he is if under one. The fourth and final wave has several ceilings come down from the right to the left. The last Energy Sphere appears near the right, if Kirby can get it fast enough, and just before the last ceilings come down, the stage exit appears for Kirby to escape through.
| |
|
| |
| ====Secret Section====
| |
| {{spoilers}}
| |
| Much like in [[Cookie Country]], there is a secret section in this stage. From Section 3, at the far end of the area, a conveyor brings down several Waddle Dees from a chamber in the ceiling above the normal door. If Kirby goes to this chamber, there is a hidden doorway to the far right. The door leads to an exterior part of the factory, though still walled in. The original [[Green Greens]] music will be playing and the path continues to the right. Kirby will need to make use of a few cannons and attempt to grab items that fall from barriers in the ceiling that break. At the far right, a Star Block formation in the shape of the word 'HAL' can be found, along with a Waddle Dee and Copy Pedestals for the [[Whip]], [[Water]], [[Leaf]] and [[Spear]] abilities. Breaking the star blocks yields several tasty collectibles. A door to the right of this formation will take Kirby to Section 4.
| |
|
| |
| ====Enemies, Mid-bosses, and Abilities====
| |
| {| style="border: 3px solid #E47575; {{round}};background: #F69D99" cellspacing="2"
| |
| ! width="420px" | '''Regular Enemies'''
| |
| ! width="180px" | '''Mid-Boss'''
| |
| |- bgcolor="E47575"
| |
| |
| |
| {{col-begin}}
| |
| {{col-break|width=33%}}
| |
| *[[Waddle Dee]]
| |
| *[[Galbo]]
| |
| *[[Sir Kibble]]
| |
| *[[ArmorDee]]
| |
| *[[Degout]]
| |
| *[[Bouncy]]
| |
| *[[Noddy]]
| |
| {{col-break|width=33%}}
| |
| *[[Waddle Doo]]
| |
| *[[Bowby]]
| |
| *[[Leafan]]
| |
| *[[Broom Hatter]]
| |
| *[[Bronto Burt]]
| |
| *[[Gordo]]
| |
| *[[Whippy]]
| |
| {{col-break|width=34%}}
| |
| *[[Sheld]]
| |
| *[[Walky]]
| |
| *[[Rocky]]
| |
| *[[Owgulf]]
| |
| *[[Tick]]
| |
| *[[Knuckle Joe]]
| |
| *[[Gigatzo]]
| |
| {{col-end}}
| |
| |
| |
| {{col-begin|width=50%}}
| |
| *N/A
| |
| {{col-end}}
| |
| |-
| |
| |-
| |
| ! width="420px"| '''Abilities'''
| |
| ! width="180px" | '''Super Ability'''
| |
| |- bgcolor="#E47575"
| |
| |
| |
| {{col-begin}}
| |
| {{col-break|width=50%}}
| |
| *[[Beam]]
| |
| *[[Mike]]
| |
| *[[Leaf]]
| |
| *[[Wing]]
| |
| *[[Fighter]]
| |
| *[[Sleep]]
| |
| *[[Spear]]
| |
| {{col-break|width=50%}}
| |
| *[[Fire]]
| |
| *[[Cutter]]
| |
| *[[Stone]]
| |
| *[[Needle]]
| |
| *[[Whip]]
| |
| *[[Water]]
| |
| {{col-end}}
| |
| |
| |
| {{col-begin}}
| |
| *N/A
| |
| {{col-end}}
| |
| |} | | |} |
|
| |
|
| ===Stage 6 (Boss: [[Metal General]], [[HR-D3]])=== | | == Gallery == |
| [[File:Metal General Intro.jpg|thumb|right|250px|Metal General powers up.]]
| | <gallery> |
| The stage begins in an elevator in the factory. It automatically takes Kirby and his friends up to a room with a conveyor belt floor. In this room are Pedestals with the following abilities: [[Hi-Jump]], [[Beam]], [[Ninja]] and [[Sword]]. The conveyor then leads to another elevator that goes up to the door to the boss room.
| | KRtDL Egg Engines map screenshot.png|Egg Engines on the World Map in ''Kirby's Return to Dream Land'' |
| | | KRtDL Egg Engines lobby screenshot.png|A portion of the Egg Engines level hub in ''Kirby's Return to Dream Land'' |
| The boss room itself is merely a platform located in the wasteland, with walls on both sides but no ceiling. The [[Metal General]] is already present in the room, though deactivated. Approaching causes a strange glow to emanate into the General's body, activating him and beginning the fight. The General has a variety of attacks, including various dive-bombs using his jets and a laser sword which he can wield with great finesse. He can also create energy shields and fire lasers and missiles at Kirby. The missiles can be inhaled to get the [[Bomb]] ability.
| | KRTDL-map-B-6-0.jpg|Full view of the level hub in ''Kirby's Return to Dream Land'' |
| | | </gallery> |
| Once knocked down to half health, the General begins to spark and stutter. He summons a giant rocket and boards it, flying off into the distance. He will then attempt to ram Kirby with it from the background, and finish by crashing it into the ground, releasing a large field of lingering flames in the process. He will also release lightning mines, which can be swallowed for the [[Spark]] ability and summon UFOs to aid him. Once defeated, he explodes, and the level is complete.
| |
| | |
| ====EX Fight====
| |
| {{spoilers}}
| |
| Metal General EX sports a red paint job, as opposed to the normal one's blue color. His attacks are generally faster and last longer, and he also has the ability to summon multiple rockets at a time. When defeated, however, he does not explode immediately. Instead, he flies off into the background, and the walls of the arena lower. He then returns with a new and much larger robot to fight Kirby, known as [[HR-D3]], which the General pilots.
| |
| | |
| In the first phase, HR-D3 fights in the background, and can only be hit when it attempts to punch or drill Kirby with its arms. As it takes damage, it will lose pieces in various areas. From the background, it can also fire lasers from its eyes and the General will attempt to fire more missiles at Kirby. It can also do a spinning attack with its arms that is tough to counter. Once its health bar is depleted, HR-D3 loses its headpiece and falls away.
| |
| | |
| It then reappears with a new health bar on the stage itself and stomps about the stage, finishing with an attempt to body-slam Kirby and his friends. During this fight, HR-D3 will continue to lose pieces, and end up as a barely functioning skeleton near the end of the fight. It will continue to do many of its attacks from before, but this time, it is much harder to dodge, due to its massive size. Once defeated, it loses its arms and stabilizer and falls over, then explodes with the General inside it, thus finishing the level.
| |
|
| |
|
| ==Names in Other Languages== | | ==Names in other languages== |
| {{Names | | {{Names |
| |ja=エッガーエンジンズ | | |ja=エッガーエンジンズ |
| |jaR=Eggā Enjinzu | | |jaR=Eggā Enjinzu |
| |jaM=Egger Engines | | |jaM=Egger Engines<br><small>The Japanese version writes the level name in English as such.</small> |
| |es=Artefactos Almendra | | |esA=Artefactos Almendra |
| |esM=Almond Artifacts | | |esAM=Almond Artifacts |
| |fr=Imbroglio Industriel | | |esE=Maquinaria Menta |
| |frM=Industrial Entanglement | | |esEM=Mint Machinery |
| | |frA=Imbroglio industriel |
| | |frAM=Industrial entanglement |
| | |frE=Imbroglio Industriel |
| | |frEM=Industrial Entanglement |
| | |de=Eier-Elektrik |
| | |deM=Eggs Electrics |
| | |it=Industrie Involtino |
| | |itM=Roulade Industries |
| | |ko=달걀 엔진 |
| | |koR=Dalgyal Enjin |
| | |koM=Egg Engine<br><small>In the Korean version of ''Kirby's Return to Dream Land'' and its remake, the name is written in English as "Egger Engines".</small> |
| | |pt=Engrenagens Espetinho |
| | |ptM=Kebab Gears<br><small>Specifically, "espetinho" in Brazil refers to any kind of cooked food in a skewer, usually meat but not always.</small> |
| | |zhTrad=惡戰爾後 |
| | |zhTradR=è zhàn ěr hòu |
| | |zhSimp=恶战尔后 |
| | |zhSimpR=è zhàn ěr hòu |
| | |zhM=Aftermath of a fierce war<br><small>In the Chinese versions of ''Kirby's Return to Dream Land Deluxe'', the name is written in English as "Egger Engines".</small> |
| | |nl=Aardbeiautomaten |
| | |nlM=Strawberry machines |
| }} | | }} |
| <br clear=all>
| |
|
| |
|
| {{KirbyRtDL}} | | {{clear}} |
| [[Category:Places]]
| | |
| | {{Navbox-KRtDL/KRtDLD}} |
| [[Category:Halcandra locations]] | | [[Category:Halcandra locations]] |
| [[Category:Levels in Kirby's Return to Dream Land]]
| |