The Battle of Blizzard Bridge: Difference between revisions
m (Text replacement - "Gotcha Capsule" to "Capsule") |
m (→Missions: Minor fix.) |
||
| (13 intermediate revisions by 5 users not shown) | |||
| Line 1: | Line 1: | ||
{{Infobox-KatFLStage | {{Infobox-KatFLStage | ||
|image=[[File:KatFL The Battle of Blizzard Bridge select screenshot.png|350px]] | |image=[[File:KatFL The Battle of Blizzard Bridge select screenshot.png|350px]] | ||
| Line 9: | Line 8: | ||
|mouthful=[[Car Mouth]]<br>[[Cone Mouth]]<br>[[Dome Mouth]]<br>[[Pipe Mouth]]<br>[[Vending Mouth]] | |mouthful=[[Car Mouth]]<br>[[Cone Mouth]]<br>[[Dome Mouth]]<br>[[Pipe Mouth]]<br>[[Vending Mouth]] | ||
|theme music=[[File:KatFL The Battle of Blizzard Bridge.mp3]] | |theme music=[[File:KatFL The Battle of Blizzard Bridge.mp3]] | ||
|theme title=[[The Battle of Blizzard Bridge (theme)]] | |theme title="[[The Battle of Blizzard Bridge (theme)|The Battle of Blizzard Bridge]]" | ||
|description=Main theme for the stage. | |description=Main theme for the stage. | ||
|previousstage=[[Windy, Freezing Seas]] | |previousstage=[[Windy, Freezing Seas]] | ||
|nextstage=[[An Unexpected Beast King]] | |nextstage=[[An Unexpected Beast King]] | ||
}} | }} | ||
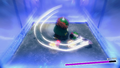
'''The Battle of Blizzard Bridge''' is the fourth stage of [[Winter Horns]] in ''[[Kirby and the Forgotten Land]]''. In this stage, Kirby crosses a long broken bridge and battles all four of the game's [[Mid-Boss]]es along the way, in a twist on the classic [[Tower of Mid-Bosses]] stage format. While doing this, he can find hidden | '''The Battle of Blizzard Bridge''' is the fourth stage of [[Winter Horns]] in ''[[Kirby and the Forgotten Land]]''. In this stage, Kirby crosses a long broken bridge and battles all four of the game's [[Mid-Boss]]es along the way, in a twist on the classic [[Tower of Mid-Bosses]] stage format. While doing this, he can find hidden side areas where Waddle Dees are being held captive. | ||
There are | There are two Capsules from Vol. 1 and one from Vol. 2 to collect in this stage, and five [[Mission (Kirby and the Forgotten Land)|missions]] to complete. There are a total of 11 Waddle Dees to rescue here, when including the mission objectives. The blueprint for [[Frosty Ice]] can be found here. | ||
== Stage overview == | ==Stage overview== | ||
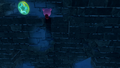
[[File:KatFL The Battle of Blizzard Bridge screenshot 01.png|thumb|left|250px|Kirby at the mouth of the bridge.]] | [[File:KatFL The Battle of Blizzard Bridge screenshot 01.png|thumb|left|250px|Kirby at the mouth of the bridge.]] | ||
This stage consists of one long main area, with a short introductory area and four hidden side areas. | This stage consists of one long main area, with a short introductory area and four hidden side areas. | ||
| Line 26: | Line 25: | ||
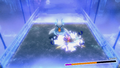
The main area of the bridge is one long continuous walkway, broken up by four battles with [[Mid-Boss]]es, with breaks and other enemies in-between. The bosses are fought in this order: [[Wild Edge]], [[Fleurina]], [[Wild Bonkers]], then [[Wild Frosty|Twin Wild Frosty]]. After each fight, Kirby has an opportunity to use the ability he gains from each in side areas to rescue some Waddle Dees. After the last battle, Kirby can collect the blueprint for [[Frosty Ice]] and is free to head to the gold cage at the far end of the bridge. | The main area of the bridge is one long continuous walkway, broken up by four battles with [[Mid-Boss]]es, with breaks and other enemies in-between. The bosses are fought in this order: [[Wild Edge]], [[Fleurina]], [[Wild Bonkers]], then [[Wild Frosty|Twin Wild Frosty]]. After each fight, Kirby has an opportunity to use the ability he gains from each in side areas to rescue some Waddle Dees. After the last battle, Kirby can collect the blueprint for [[Frosty Ice]] and is free to head to the gold cage at the far end of the bridge. | ||
===Secret Path=== | |||
Like many other "Towers" throughout the series, The Battle of Blizzard Bridge has a secret path through the stage, which is tougher than the main path, but offers greater rewards. In order to access this path, Kirby needs to find some footholds to jump onto in the area at the start where the Maxim Tomato is. From there, he needs to get onto a high walkway and then jump into an open window. | |||
From this point on, Kirby is traveling along the high towers of the bridge via [[Warp Star]], rather than going on foot on the bridge itself. Every battle he faces is against twin variants of each Mid-Boss, with the exception of Wild Frosty, who is first fought by himself, and then fought as twins with [[Shotzo]]s supporting. One of these twins fights in the exact same fashion as in the [[Isolated Isles: Forgo Dreams|isolated isles of Forgo Dreams]], while the other twin fights in the same way as in the rest of Story Mode. Kirby has access to the same side areas and objectives as in the normal path, but these side areas have also been made more difficult. | |||
From this point on, Kirby is traveling along the high towers of the bridge via [[Warp Star]], rather than going on foot on the bridge itself. Every battle he faces | |||
At the end of the last fight, Kirby can reach a separate gold cage behind a dome. Opening the dome and hitting the switch inside showers Kirby in many extra goodies for completing this harder path. | At the end of the last fight, Kirby can reach a separate gold cage behind a dome. Opening the dome and hitting the switch inside showers Kirby in many extra goodies for completing this harder path. | ||
{{clear|left}} | |||
===Differences between difficulties=== | |||
=== Differences between difficulties === | |||
There do not appear to be any differences in the number of enemies between Spring-Breeze Mode and Wild Mode. | There do not appear to be any differences in the number of enemies between Spring-Breeze Mode and Wild Mode. | ||
=== Missions === | ===Missions=== | ||
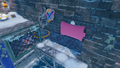
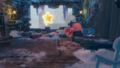
[[File:KatFL The Battle of Blizzard Bridge screenshot 07.png|thumb|250px|Kirby finding one of the wanted posters in a side room.]] | [[File:KatFL The Battle of Blizzard Bridge screenshot 07.png|thumb|250px|Kirby finding one of the wanted posters in a side room.]] | ||
The Battle of Blizzard Bridge has five missions to complete, as follows: | The Battle of Blizzard Bridge has five missions to complete, as follows: | ||
| Line 46: | Line 43: | ||
**Waddle Dee 1: This Waddle Dee can be found in the first side area. Kirby will need to cut the cone down from the vine, bring it to the lowest floor, and use it to break the floor open. | **Waddle Dee 1: This Waddle Dee can be found in the first side area. Kirby will need to cut the cone down from the vine, bring it to the lowest floor, and use it to break the floor open. | ||
**Waddle Dee 2: This Waddle Dee can be found in the second side area. Kirby needs to use Tornado to activate the Windmill Switch and then hit the regular switch behind the gate that opens. Then he needs to quickly gain [[Vending Mouth]] and waddle along the sinking platform to break the blue shutter. | **Waddle Dee 2: This Waddle Dee can be found in the second side area. Kirby needs to use Tornado to activate the Windmill Switch and then hit the regular switch behind the gate that opens. Then he needs to quickly gain [[Vending Mouth]] and waddle along the sinking platform to break the blue shutter. | ||
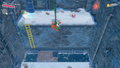
**Waddle Dee 3: This Waddle Dee can be found in the third side area. Kirby needs to use Hammer to pound a series of stakes to make the walls on the upper walkway slide back, and then quickly gain [[Car Mouth]] and use it to drive over to the Waddle Dee before the | **Waddle Dee 3: This Waddle Dee can be found in the third side area. Kirby needs to use Hammer to pound a series of stakes to make the walls on the upper walkway slide back, and then quickly gain [[Car Mouth]] and use it to drive over to the Waddle Dee before the Clocker's timer expires. | ||
**Waddle Dee 4: This Waddle Dee can be found down a hole in the bridge right before the battle with Twin Frosty. Kirby needs to hop down there, save him, and then hover back up. | **Waddle Dee 4: This Waddle Dee can be found down a hole in the bridge right before the battle with Twin Wild Frosty. Kirby needs to hop down there, save him, and then hover back up. | ||
***On the Secret Path, this Waddle Dee can be found by finding the glowing area after defeating Twin Wild Bonkers and following the effect to the next tower. | ***On the Secret Path, this Waddle Dee can be found by finding the glowing area after defeating Twin Wild Bonkers and following the effect to the next tower. | ||
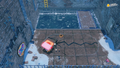
**Waddle Dee 5: This Waddle Dee can be found in the fourth side area, accessible using the Ice ability. Kirby needs to first freeze the Kabu and then kick it to hit the switch. This will raise a platform which can be used during [[Pipe Mouth]] to crash through a breakable wall. | **Waddle Dee 5: This Waddle Dee can be found in the fourth side area, accessible using the Ice ability. Kirby needs to first freeze the Kabu and then kick it to hit the switch. This will raise a platform which can be used during [[Pipe Mouth]] to crash through a breakable wall. | ||
| Line 55: | Line 52: | ||
**Poster 3: Located in the third side area, to the left on the wall behind the Mookie. | **Poster 3: Located in the third side area, to the left on the wall behind the Mookie. | ||
**Poster 4: Located in the fourth side area, just above the passage that Pipe-Mouth Kirby uncovers. | **Poster 4: Located in the fourth side area, just above the passage that Pipe-Mouth Kirby uncovers. | ||
*'''"Beat Twin Frosty without getting hit"''' - Kirby must battle and defeat Twin Wild Frosty without ever taking damage during the fight. | *'''"Beat Twin Wild Frosty without getting hit"''' - Kirby must battle and defeat Twin Wild Frosty without ever taking damage during the fight. If done on the secret path, this includes taking damage from the Shotzos and their cannon fire. | ||
*'''"Take a detour and find a Maxim Tomato"''' - Kirby must find the hidden Maxim Tomato. It can be found at the start of the stage, off to the left. | *'''"Take a detour and find a Maxim Tomato"''' - Kirby must find the hidden Maxim Tomato. It can be found at the start of the stage, off to the left. | ||
=== Enemies and Abilities === | ===Enemies and Abilities=== | ||
{| style="border: 3px solid #E47575; {{round}};background: #F69D99" cellspacing="2" | {| style="border: 3px solid #E47575; {{round}};background: #F69D99" cellspacing="2" | ||
! width="420px" | '''Regular Enemies''' | ! width="420px" | '''Regular Enemies''' | ||
| Line 121: | Line 118: | ||
|} | |} | ||
== Gallery == | ==Gallery== | ||
=== Normal path === | ===Normal path=== | ||
<gallery> | <gallery> | ||
KatFL The Battle of Blizzard Bridge screenshot 02.png|Battle with Wild Edge | KatFL The Battle of Blizzard Bridge screenshot 02.png|Battle with Wild Edge | ||
| Line 138: | Line 135: | ||
</gallery> | </gallery> | ||
=== Secret Path === | ===Secret Path=== | ||
<gallery> | <gallery> | ||
KatFL The Battle of Blizzard Bridge Secret Path screenshot 01.png|Climbing up to find a secret walkway | KatFL The Battle of Blizzard Bridge Secret Path screenshot 01.png|Climbing up to find a secret walkway | ||
| Line 149: | Line 146: | ||
</gallery> | </gallery> | ||
=== Video walkthrough === | ===Video walkthrough=== | ||
{{Youtube|-mA_iNRxckY|300|100% walkthrough of The Battle of Blizzard Bridge (normal path).}} | {{Youtube|-mA_iNRxckY|300|100% walkthrough of The Battle of Blizzard Bridge (normal path).}} | ||
{{Youtube|QW7uMgU2m6U|300|100% walkthrough of The Battle of Blizzard Bridge (secret path).}} | {{Youtube|QW7uMgU2m6U|300|100% walkthrough of The Battle of Blizzard Bridge (secret path).}} | ||
| Line 156: | Line 153: | ||
==Names in other languages== | ==Names in other languages== | ||
{{names | {{names | ||
|ja= | |ja=ブリザードブリッヂの{{furi|戦|たたか}}い | ||
|jaR=Burizādo Buriddji no Tatakai | |jaR=Burizādo Buriddji no Tatakai | ||
|jaM=The Battle of Blizzard Bridge | |jaM=The Battle of Blizzard Bridge | ||
| Line 166: | Line 163: | ||
|ko=블리자드 브리지에서의 전투 | |ko=블리자드 브리지에서의 전투 | ||
|koR=Beullijadeu Beurijieseoui Jeontu | |koR=Beullijadeu Beurijieseoui Jeontu | ||
|koM=The Battle | |koM=The Battle of Blizzard Bridge | ||
|fr=Bataille sur le pont du blizzard | |fr=Bataille sur le pont du blizzard | ||
|frM=Battle on the blizzard bridge | |frM=Battle on the blizzard bridge | ||
| | |esE=Lucha en el Puente de Cristal | ||
| | |esEM=Brawl at the Crystal Bridge | ||
|esA=Lucha en el Puente Gélido | |||
|esAM=Brawl at the Frozen Bridge | |||
|de=Schlacht auf der Blizzardbrücke | |de=Schlacht auf der Blizzardbrücke | ||
|deM=Battle on the Blizzard bridge | |deM=Battle on the Blizzard bridge | ||
|it=Battaglia sul ponte ghiacciato | |||
|itM=Battle on the frozen bridge | |||
|nl=De strijd om de sneeuwstormbrug | |||
|nlM=The battle of the snowstorm bridge | |||
}} | }} | ||
{{clear}} | {{clear}} | ||
{{Navbox-KatFL}} | {{Navbox-KatFL}} | ||
Revision as of 17:50, 16 February 2024
| ||||||||||||||||
| ||||||||||||||||
| ||||||||||||||||
|
| ||||||||||||||||

The Battle of Blizzard Bridge is the fourth stage of Winter Horns in Kirby and the Forgotten Land. In this stage, Kirby crosses a long broken bridge and battles all four of the game's Mid-Bosses along the way, in a twist on the classic Tower of Mid-Bosses stage format. While doing this, he can find hidden side areas where Waddle Dees are being held captive.
There are two Capsules from Vol. 1 and one from Vol. 2 to collect in this stage, and five missions to complete. There are a total of 11 Waddle Dees to rescue here, when including the mission objectives. The blueprint for Frosty Ice can be found here.
Stage overview

This stage consists of one long main area, with a short introductory area and four hidden side areas.
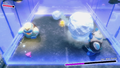
In the introductory area, Kirby stands at the entrance to the ominous bridge in the fog. If he looks around, he might be able to find a snack before proceeding onto the bridge proper.
The main area of the bridge is one long continuous walkway, broken up by four battles with Mid-Bosses, with breaks and other enemies in-between. The bosses are fought in this order: Wild Edge, Fleurina, Wild Bonkers, then Twin Wild Frosty. After each fight, Kirby has an opportunity to use the ability he gains from each in side areas to rescue some Waddle Dees. After the last battle, Kirby can collect the blueprint for Frosty Ice and is free to head to the gold cage at the far end of the bridge.
Secret Path
Like many other "Towers" throughout the series, The Battle of Blizzard Bridge has a secret path through the stage, which is tougher than the main path, but offers greater rewards. In order to access this path, Kirby needs to find some footholds to jump onto in the area at the start where the Maxim Tomato is. From there, he needs to get onto a high walkway and then jump into an open window.
From this point on, Kirby is traveling along the high towers of the bridge via Warp Star, rather than going on foot on the bridge itself. Every battle he faces is against twin variants of each Mid-Boss, with the exception of Wild Frosty, who is first fought by himself, and then fought as twins with Shotzos supporting. One of these twins fights in the exact same fashion as in the isolated isles of Forgo Dreams, while the other twin fights in the same way as in the rest of Story Mode. Kirby has access to the same side areas and objectives as in the normal path, but these side areas have also been made more difficult.
At the end of the last fight, Kirby can reach a separate gold cage behind a dome. Opening the dome and hitting the switch inside showers Kirby in many extra goodies for completing this harder path.
Differences between difficulties
There do not appear to be any differences in the number of enemies between Spring-Breeze Mode and Wild Mode.
Missions

The Battle of Blizzard Bridge has five missions to complete, as follows:
- "Clear the stage" - Kirby must complete the stage.
- "Save the hidden Waddle Dees" - Kirby must find and rescue the five hidden Waddle Dees in silver cages. Their locations are as follows:
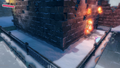
- Waddle Dee 1: This Waddle Dee can be found in the first side area. Kirby will need to cut the cone down from the vine, bring it to the lowest floor, and use it to break the floor open.
- Waddle Dee 2: This Waddle Dee can be found in the second side area. Kirby needs to use Tornado to activate the Windmill Switch and then hit the regular switch behind the gate that opens. Then he needs to quickly gain Vending Mouth and waddle along the sinking platform to break the blue shutter.
- Waddle Dee 3: This Waddle Dee can be found in the third side area. Kirby needs to use Hammer to pound a series of stakes to make the walls on the upper walkway slide back, and then quickly gain Car Mouth and use it to drive over to the Waddle Dee before the Clocker's timer expires.
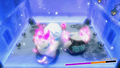
- Waddle Dee 4: This Waddle Dee can be found down a hole in the bridge right before the battle with Twin Wild Frosty. Kirby needs to hop down there, save him, and then hover back up.
- On the Secret Path, this Waddle Dee can be found by finding the glowing area after defeating Twin Wild Bonkers and following the effect to the next tower.
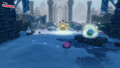
- Waddle Dee 5: This Waddle Dee can be found in the fourth side area, accessible using the Ice ability. Kirby needs to first freeze the Kabu and then kick it to hit the switch. This will raise a platform which can be used during Pipe Mouth to crash through a breakable wall.
- "Remove 4 wanted posters" - Kirby must locate and remove four of the Beast Pack's wanted posters throughout the stage. Their locations are as follows:
- Poster 1: Located in the first side area, at the bottom to the left.
- Poster 2: Located in the second side area, high above the door. It can be reached after saving the Waddle Dee.
- Poster 3: Located in the third side area, to the left on the wall behind the Mookie.
- Poster 4: Located in the fourth side area, just above the passage that Pipe-Mouth Kirby uncovers.
- "Beat Twin Wild Frosty without getting hit" - Kirby must battle and defeat Twin Wild Frosty without ever taking damage during the fight. If done on the secret path, this includes taking damage from the Shotzos and their cannon fire.
- "Take a detour and find a Maxim Tomato" - Kirby must find the hidden Maxim Tomato. It can be found at the start of the stage, off to the left.
Enemies and Abilities
| Regular Enemies | Bosses & Mid-Bosses | ||||
|---|---|---|---|---|---|
|
| ||||
| Abilities | Mouthful Mode(s) | ||||
|
|
|
Gallery
Normal path
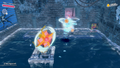
Battle with Wild Edge
Entering the first side area
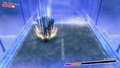
Breaking the floor using Cone Mouth
Battle with Fleurina
Using Tornado in the second side area
Battle with Wild Bonkers
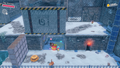
Attacking the Mookie in the third side area
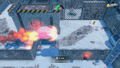
Leaping over the gap using Car Mouth
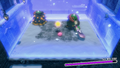
Battle with Twin Wild Frosty
Finding the last side area
Crashing into the wall using Pipe Mouth
Grabbing the last Capsule before finishing the stage


Secret Path
Climbing up to find a secret walkway
Relaxing in the break room before the fights
Battle with Twin Wild Edge

Battle with Twin Fleurina
Battle with Twin Wild Bonkers
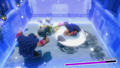
Battle with Twin Wild Frosty and the Shotzos
Kirby reaping the rewards at the end


Video walkthrough
100% walkthrough of The Battle of Blizzard Bridge (normal path).
|
100% walkthrough of The Battle of Blizzard Bridge (secret path).
|
Names in other languages
| Language | Name | Meaning |
|---|---|---|
| Japanese | ブリザードブリッヂの戦い Burizādo Buriddji no Tatakai |
The Battle of Blizzard Bridge |
| Traditional Chinese | 暴風雪橋梁之戰 Bàofēngxuě Qiáoliáng zhī Zhàn |
The Battle of Blizzard Bridge |
| Simplified Chinese | 暴风雪桥梁之战 Bàofēngxuě Qiáoliáng zhī Zhàn | |
| Dutch | De strijd om de sneeuwstormbrug | The battle of the snowstorm bridge |
| French | Bataille sur le pont du blizzard | Battle on the blizzard bridge |
| German | Schlacht auf der Blizzardbrücke | Battle on the Blizzard bridge |
| Italian | Battaglia sul ponte ghiacciato | Battle on the frozen bridge |
| Korean | 블리자드 브리지에서의 전투 Beullijadeu Beurijieseoui Jeontu |
The Battle of Blizzard Bridge |
| Latin American Spanish | Lucha en el Puente Gélido | Brawl at the Frozen Bridge |
| European Spanish | Lucha en el Puente de Cristal | Brawl at the Crystal Bridge |