Kirby: Planet Robobot/gallery: Difference between revisions
m (→Box art) |
m (→Characters) |
||
| (61 intermediate revisions by 16 users not shown) | |||
| Line 1: | Line 1: | ||
{{DISPLAYTITLE:''Kirby: Planet Robobot''/gallery}} | |||
A gallery of images relating to ''[[Kirby: Planet Robobot]]''. | A gallery of images relating to ''[[Kirby: Planet Robobot]]''. | ||
== Logos == | == Logos == | ||
<gallery> | <gallery> | ||
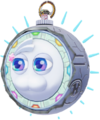
KPR logo.png| | KPR logo.png|English logo | ||
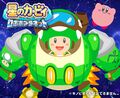
KPR Japanese logo.jpg|Japanese logo | KPR Japanese logo.jpg|Japanese logo | ||
</gallery> | </gallery> | ||
| Line 9: | Line 10: | ||
==Box art== | ==Box art== | ||
<gallery> | <gallery> | ||
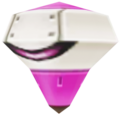
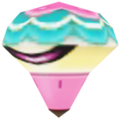
KPR Box.png|US box art | |||
KPR Japanese box art.png|Japanese box art | |||
KPR AU Box.png|Australian box art | KPR AU Box.png|Australian box art | ||
</gallery> | </gallery> | ||
== Artwork== | ==Artwork== | ||
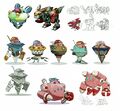
=== Characters === | ===Characters=== | ||
<gallery> | <gallery> | ||
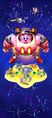
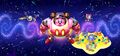
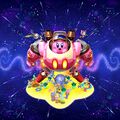
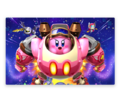
KPR Robobot Main artwork.png|Main image on Japanese Website | KPR Robobot Main artwork.png|Main image on the Japanese Website | ||
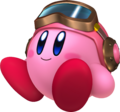
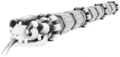
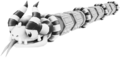
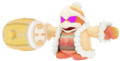
KPR Kirby artwork.png| | KPR Kirby helmetless artwork.png|[[Kirby]] | ||
KPR Robobot artwork.png| | KPR Kirby artwork.png|Kirby with the goggles he wears in the Robobot Armor | ||
KPR Robobot Beam artwork.png| | KPR Kirby artwork 2.png|Kirby sitting down | ||
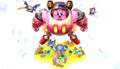
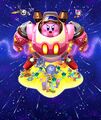
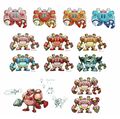
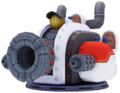
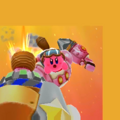
KPR Robobot Fire artwork.png| | KPR Robobot artwork.png|Kirby in the [[Robobot Armor]] | ||
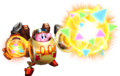
KPR Robobot Sword artwork.png| | KPR Robobot Beam artwork.png|The Robobot Armor's Beam Mode | ||
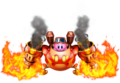
KPR Robobot Spark artwork.png| | KPR Robobot Fire artwork.png|The Robobot Armor's Fire Mode | ||
KPR Robobot Jet artwork.png| | KPR Robobot Sword artwork.png|The Robobot Armor's Sword Mode | ||
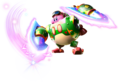
KPR Robobot Cutter artwork.png| | KPR Robobot Spark artwork.png|The Robobot Armor's Spark Mode | ||
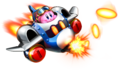
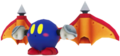
KPR Robobot Bomb artwork.png| | KPR Robobot Jet artwork.png|The Robobot Armor's Jet Mode | ||
KPR Robobot Wheel artwork.png| | KPR Robobot Cutter artwork.png|The Robobot Armor's Cutter Mode | ||
KPR Poison artwork.png| | KPR Robobot Bomb artwork.png|The Robobot Armor's Bomb Mode | ||
KPR Doctor artwork.png| | KPR Robobot Wheel artwork.png|The Robobot Armor's Wheel Mode | ||
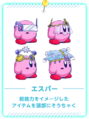
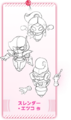
KPR ESP artwork.png| | KPR Poison artwork.png|The [[Poison]] ability | ||
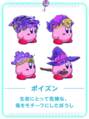
KPR Mirror artwork.png| | KPR Doctor artwork.png|The [[Doctor]] ability | ||
CrashKTDX.png|The [[Crash]] ability | |||
KPR ESP artwork.png|The [[ESP]] ability | |||
KPR Mirror artwork.png|The [[Mirror]] ability | |||
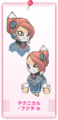
KPR Meta Knight artwork.png|Meta Knight | KPR Meta Knight artwork.png|Meta Knight | ||
KPR Meta Knight artwork 2.png|Meta Knight | KPR Meta Knight artwork 2.png|Meta Knight | ||
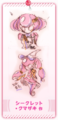
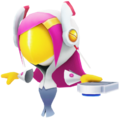
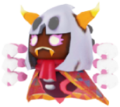
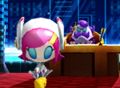
KPR Susie artwork.png|[[Susie]] | KPR Susie artwork.png|[[Susie]] with her hands folded | ||
KPR Susie artwork 2.png|Susie | KPR Susie artwork 2.png|Susie standing | ||
KPR Susie artwork 3.png|Susie feeling happy | |||
KPR Susie artwork 4.png|Susie feeling very happy | |||
KPR Susie artwork 5.png|Susie pointing at the screen | |||
KPR Susie artwork 6.png|Susie flying | |||
KPR Susie Pixel artwork.png|Pixel art of Susie | |||
</gallery> | </gallery> | ||
===Enemies=== | ===Enemies=== | ||
<gallery> | <gallery> | ||
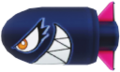
KPR Cyborg Bronto Burt artwork.png|Cyborg variant of Bronto Burt | KPR Cyborg Bronto Burt artwork.png|Cyborg variant of [[Bronto Burt]] | ||
KPR Cyborg Scarfy artwork.png|Cyborg variant of Scarfy | KPR Cyborg Scarfy artwork.png|Cyborg variant of [[Scarfy]] | ||
KPR Hard Hat Waddle Dee artwork.png|Waddle Dee wearing a hard hat | KPR Hard Hat Waddle Dee artwork.png|[[Waddle Dee]] wearing a hard hat | ||
KPR Walker Waddle Dee artwork.png|Waddle Dee | KPR Walker Waddle Dee artwork.png|[[Walker Waddle Dee]] | ||
</gallery> | |||
===Other=== | |||
<gallery> | |||
KTD Maxim Tomato artwork.png|A [[Maxim Tomato]]<br>(artwork reused from ''[[Kirby: Triple Deluxe]]'') | |||
KPR Code Cube artwork.png|A [[Code Cube]] | |||
KPR Invincible Candy artwork.png|An [[Invincible Candy]] | |||
KPR Star Block artwork.png|A [[Star Block]] | |||
</gallery> | |||
===amiibo=== | |||
<gallery> | |||
KPR Kirby amiibo artwork.png|Kirby | |||
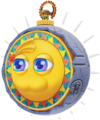
KPR King Dedede amiibo artwork.png|[[King Dedede]] | |||
KPR amiibo Waddle Dee.png|Waddle Dee | |||
</gallery> | </gallery> | ||
===Miscellaneous=== | ===Miscellaneous=== | ||
<gallery> | <gallery> | ||
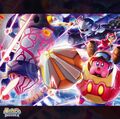
KPR key art.jpg|Key art used for the game's cover | |||
KPR key art 2.jpg|Alternate version of key art | |||
KPR key art 3.jpg|Alternate version of key art | |||
KPR key art 4.jpg|Alternate version of key art | |||
KPR key art 5.jpg|Alternate version of key art | |||
KPROS card 3 back.jpg|Kirby battling [[Star Dream]], included with the ''[[Kirby: Planet Robobot Original Soundtrack]]'' | |||
KPR Vs Star Dream Concept Art Sketch.png|Original sketch of the previous artwork | |||
KPR Play Nintendo wallpaper.jpg|[[Play Nintendo]] wallpaper | KPR Play Nintendo wallpaper.jpg|[[Play Nintendo]] wallpaper | ||
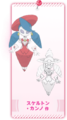
KPR 3DS Video Game Personality Quiz.jpg|[[mariowiki:Nintendo 3DS Video Game Personality Quiz|Play Nintendo]] Action & Adventure gaming style game suggestion | |||
KPR LINE artwork.jpg|Promotional artwork from Nintendo | KPR Past Adventures.png|Icon used for [[Past Adventures]] menus in future games | ||
KPR LINE artwork.jpg|Promotional artwork from Nintendo's [[LINE]] account | |||
</gallery> | |||
===Concept Art=== | |||
<gallery> | |||
KPR ESP Concept artwork.png|Concept art of [[ESP]] Kirby | |||
KPR Doctor Concept artwork.png|Concept art of [[Doctor]] Kirby | |||
KPR Poison Concept artwork.png|Concept art of [[Poison]] Kirby | |||
Robobot Early Concept Art.png|Early concept art for the [[Robobot Armor]] | |||
Robobot Concept Art.png|Concept art for the Robobot Armor | |||
Robobot Concept Art 2.png|Concept art for the Robobot Armor | |||
Robobot Concept Art 3.png|Concept art for the Robobot Armor | |||
Robobot Armor concept art 1 KPR.jpg|Various designs for the Robobot Armor | |||
Robobot Armor concept art 2 KPR.jpg|Various concept art of Robobot Armor. The design with two massive arms becomes more prevalent at this point. | |||
Robobot Armor concept art 3 KPR.jpg|Various concept art of Robobot Armor. The color experiments with one hand being a claw and the other being a drill design can be seen. This didn't make into the game. | |||
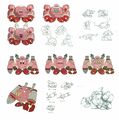
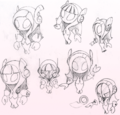
KPR Susie concept artwork 1.png|Early design of [[Susie]] by Akihiro Kanno | |||
KPR Susie concept artwork 2.png|Early design of Susie by [[Shinya Kumazaki]] | |||
KPR Susie concept artwork 3.png|Early design of Susie by Tsuyoshi Fujita | |||
KPR Susie concept artwork 4.png|Early design of Susie by Etsuko Sato | |||
KPR Susie concept artwork 5.png|Final design of Susie by [[Kenichiro Kita]], featuring various hairstyles | |||
KPR Susie concept render 1.png|Test render of Susie with an unused hairstyle and the unused version of "alien" eyes | |||
KPR Susie concept render 2.png|Test render of Susie with an unused hairstyle and the final version of her eyes | |||
KPR President Haltmann concept artwork 1.png|Early designs of [[President Haltmann]] by Shinya Kumazaki | |||
KPR President Haltmann concept artwork 2.png|Final design of President Haltmann by Shinya Kumazaki | |||
KPR Access Ark concept art.jpg|Concept art for the [[Access Ark (ship)|Access Ark]] | |||
KPR Access Ark concept model designs.jpg|Concept art of various models for the Access Ark | |||
KPR Access Ark entrance concept.jpg|Concept art for the Access Ark entrance | |||
KPR Access Ark hatch concepts.jpg|Concept art for various Access Ark hatch designs | |||
KPR Access Ark final hatch concept.jpg|Concept art for the Access Ark's hatch | |||
KPR Star Dream Concept.png|Early concept art of [[Star Dream]] | |||
KPR Star Dream Draft.png|Concept art of Star Dream | |||
KPR Star Dream Storyboard.png|A storyboard depicting the final part of the battle with Star Dream | |||
KPROS card 3 front.jpg|Concept art of Star Dream, included with the ''[[Kirby: Planet Robobot Original Soundtrack]]'' | |||
KPR Art and Style Concept Art.jpg|Kirby battling [[Susie]] | |||
TKC Fighters Concept.png|Early sketch art for roles in [[Team Kirby Clash]] | |||
</gallery> | |||
==Models== | |||
===Protagonists=== | |||
<gallery> | |||
KPR Meta Knight model.png|[[Meta Knight]] | |||
</gallery> | |||
===[[Robobot Armor]]=== | |||
<gallery> | |||
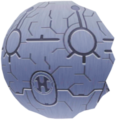
KPR Halberd Mode model.png|[[Halberd Mode]] (high-poly model used in cutscenes) | |||
KPR Halberd Mode lowpoly model.png|Halberd Mode (low-poly model used during gameplay) | |||
</gallery> | |||
===Enemies=== | |||
<gallery> | |||
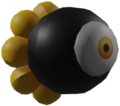
KPR Bronto Burt model.png|[[Bronto Burt]] | |||
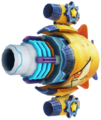
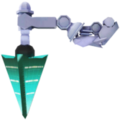
KPR Capsule J3 model.png|[[Capsule J3]] | |||
KPR Chemitory model.png|[[Chemitory]] | |||
KPR Big Chip model.png|[[Chippurus]] | |||
KPR Big Chip top model.png|Chippurus from the top | |||
KPR Clown Acrobot model.png|[[Clown Acrobot]] | |||
KPR Degout model.png|[[Degout]] | |||
KPR Elec model.png|[[Elec]] | |||
KPR Flamer model.png|[[Flamer]] | |||
KPR Mamatee model.png|[[Mamatee]] | |||
KPR NESP model.png|[[NESP]] | |||
KPR Pacto model.png|[[Pacto]] | |||
KPR Pacto mouth open model.png|Pacto with its mouth open | |||
KPR Soarar model.png|[[Soarar]] | |||
KPR Venog model.png|[[Venog]] | |||
KPR Wheelie model.png|[[Wheelie]] | |||
</gallery> | |||
===Mid-Bosses=== | |||
<gallery> | |||
KPR King Doo model.png|[[King Doo]] | |||
KPR King Doo 2 model.png|King Doo 2.0 | |||
KPR Miasmoros model.png|[[Miasmoros]] | |||
KPR Miasmoros 2 model.png|Miasmoros 2.0 | |||
</gallery> | |||
===Bosses=== | |||
<gallery> | |||
KPR Gigavolt Model.png|[[Gigavolt]] | |||
KPR Clanky Woods model.png|[[Clanky Woods]] | |||
KPR Clanky Woods 2 model.png|Clanky Woods 2.0 | |||
KPR Holo-Kracko model.png|[[Holo Defense API|Holo-Kracko]] | |||
KPR Holo-Kracko 2 model.png|Holo-Kracko 2.0 | |||
KPR Holo-Ice Dragon model.png|Holo-Ice Dragon | |||
KPR Holo-Ice Dragon 2 model.png|Holo-Ice Dragon 2.0 | |||
KPR Holo-Coily Rattler model.png|Holo-Coily Rattler | |||
KPR Holo-Coily Rattler 2 model.png|Holo-Coily Rattler 2.0 | |||
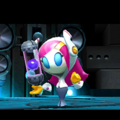
KPR Susie model.png|[[Susie]] | |||
KPR Susie visor model.png|Susie with her visor on | |||
KPR Core Kabula model.png|[[Kabula|Core Kabula]] | |||
KPR Core Kabula Massive Laser model.png|Core Kabula preparing her Massive Laser | |||
KPR Mecha Knight model.png|[[Mecha Knight]] | |||
KPR Mecha Knight sword model.png|Mecha Knight's sword | |||
KPR Dedede Clone model.png|[[Dedede Clone]] | |||
KPR Dedede Clone 2 model.png|Dedede Clone 2.0 | |||
KPR D3 Cannon model.png|[[Dedede Clones & D3|D3 Cannon]] | |||
KPR D3 Cannon 2 model.png|D3 Cannon 2.0 | |||
KPR Mecha Knight+ model.png|[[Mecha Knight+]] | |||
KPR Mecha Knight+ claw tail model.png|Mecha Knight+'s claw tail | |||
KPR Mecha Knight+ unmasked model.png|Mecha Knight+ unmasked | |||
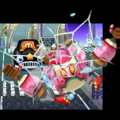
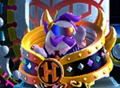
KPR President Haltmann model.png|[[President Haltmann]] | |||
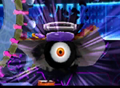
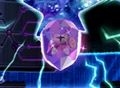
KPR Star Dream model.png|[[Star Dream]] | |||
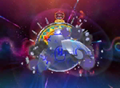
KPR Access Ark model.png|The [[Access Ark (ship)|Access Ark]] with Star Dream attached | |||
KPR Access Ark piece model.png|A piece of the Access Ark | |||
KPR Access Ark leg model.png|One of the Access Ark's legs | |||
KPR Stock Mecha Knight model.png|[[Stock Mecha Knight]] | |||
KPR Dark Matter Clone model.png|[[Dark Matter Clone]] | |||
KPR Dark Matter Clone defeat model.png|Dark Matter Clone upon defeat | |||
KPR Sectonia Clone model.png|[[Sectonia Clone]] | |||
KPR Sectonia Clone defeat model.png|Sectonia Clone upon defeat | |||
KPR Galacta Knight model.png|[[Galacta Knight]] | |||
KPR Star Dream Soul OS model.png|[[Star Dream Soul OS]] | |||
KPR Access Ark Soul OS model.png|The Access Ark with Star Dream Soul OS attached | |||
KPR Star Dream Soul OS heart model.png|Star Dream Soul OS's heart | |||
KPR Star Dream Soul OS heart split model.png|Star Dream Soul OS's heart split in half, during an attack | |||
KPR Star Dream Soul OS heart exposed model.png|Star Dream Soul OS's heart without its armor, upon defeat | |||
</gallery> | |||
===Enemy and mid-boss effects=== | |||
<gallery> | |||
KPR Chemitory pill model.png|One of [[Chemitory]]'s pills | |||
KPR Miasmoros goop model.png|One of [[Miasmoros]]' goop blobs | |||
KPR Miasmoros 2 goop model.png|One of Miasmoros 2.0's goop blobs | |||
</gallery> | |||
===Boss effects=== | |||
<gallery> | |||
KPR Susie drone model.png|One of [[Susie]]'s drones | |||
KPR Susie 2 drone model.png|One of Susie 2.0's drones | |||
KPR Kabula missile model.png|One of [[Kabula|Core Kabula]]'s missiles | |||
KPR Kabula missile side model.png|One of Core Kabula's missiles from the side | |||
KPR Dedede Clone goo model.png|A (temporarily) defeated [[Dedede Clone]] | |||
KPR Dedede Clone 2 goo model.png|A (temporarily) defeated Dedede Clone 2.0 | |||
KPR Haltmann Susie drone model.png|One of [[President Haltmann]]'s Susie drones | |||
</gallery> | |||
===Items=== | |||
<gallery> | |||
KTD 1-Up model.png|[[1-Up]] | |||
KTD French 1-Up model.png|1-Up (French) | |||
KTD German 1-Up model.png|1-Up (German) | |||
KTD Latin American Spanish 1-Up model.png|1-Up (Latin American Spanish) | |||
KTD Iberian Spanish 1-Up model.png|1-Up (Iberian Spanish) | |||
KPR Meta Knight 1-Up model.png|A 1-Up from [[Meta Knightmare Returns]] | |||
KPR French Meta Knight 1-Up model.png|A 1-Up from Meta Knightmare Returns (French) | |||
KPR German Meta Knight 1-Up model.png|A 1-Up from Meta Knightmare Returns (German) | |||
KPR Latin American Spanish Meta Knight 1-Up model.png|A 1-Up from Meta Knightmare Returns (Latin American Spanish) | |||
KPR European Spanish Meta Knight 1-Up model.png|A 1-Up from Meta Knightmare Returns (Castilian Spanish) | |||
KPR Battery model.png|[[Battery (Kirby: Planet Robobot)|Battery]] | |||
KPR Maxim Tomato model.png|[[Maxim Tomato]] | |||
KPR Remocoroid controller model.png|[[Remocoroid]] controller | |||
KPR Reviving Tomato model.png|[[Reviving Tomato]] | |||
</gallery> | |||
===Objects=== | |||
<gallery> | |||
KPR Remocoroid model.png|[[Remocoroid]] | |||
</gallery> | |||
===Stage hazards=== | |||
<gallery> | |||
KPR fire chicken model.png|A fire chicken from [[Gigabyte Grounds - Stage 2]] | |||
</gallery> | |||
===Stage objects=== | |||
<gallery> | |||
KPR Star Dream slashed model.png|[[Star Dream]] slashed by [[Galacta Knight]] in [[Meta Knightmare Returns]] | |||
</gallery> | |||
===[[Team Kirby Clash]]=== | |||
<gallery> | |||
KPR Whispy Woods apple model.png|[[Apple]] | |||
KPR Whispy Woods propeller apple model.png|Propeller apple | |||
KPR Capiller model.png|[[Capiller]] | |||
KTD Pyribbit model.png|[[Pyribbit]] | |||
KPR Pyribbit volcano model.png|Pyribbit's volcano | |||
</gallery> | |||
===Other=== | |||
<gallery> | |||
KPR Halberd model.png|The [[Halberd]] | |||
KPR Play Coin model.png|[[Nintendo 3DS|Play Coin]] | |||
</gallery> | |||
===Unused=== | |||
<gallery> | |||
KPR 3D Helmet Cannon model.png|[[3D Helmet Cannon]] | |||
KPR Timed Dynamite model.png|[[Timed Dynamite]] | |||
Kirby Planet Robobot Waddle Doo SwimHelper.gif|[[King Doo]]'s unused animation | |||
</gallery> | </gallery> | ||
==Screenshots== | ==Screenshots== | ||
<gallery> | <gallery> | ||
KPR Opening Cutscene Dedede.png| | KPR Opening Cutscene Dedede.png|Screenshot from the "First Contact" cutscene | ||
KPR Opening Cutscene Meta Knight.png| | KPR Opening Cutscene Meta Knight.png|Screenshot from the "First Contact" cutscene | ||
KPR Opening Cutscene Kirby.png| | KPR Opening Cutscene Kirby.png|Screenshot from the "First Contact" cutscene | ||
KPR Opening Cutscene Access Ark.png| | KPR Opening Cutscene Access Ark.png|Screenshot from the "First Contact" cutscene | ||
KPR Opening Cutscene Halberd.png| | KPR Opening Cutscene Halberd.png|Screenshot from the "First Contact" cutscene | ||
KPR Opening Cutscene Run.png| | KPR Opening Cutscene Run.png|Screenshot from the "First Contact" cutscene | ||
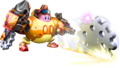
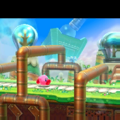
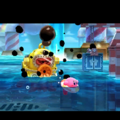
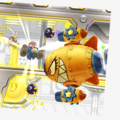
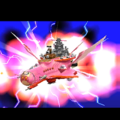
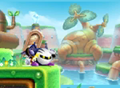
KPR Official Screenshot 1.png|Kirby in [[Overload Ocean - Stage 4]] with the [[Parasol]] ability | |||
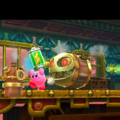
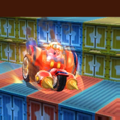
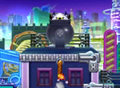
KPR Official Screenshot 2.png|Kirby dons the [[Robobot Armor]] | |||
KPR Official Screenshot 3.png|Kirby uses the suit to smash some cars driven by Waddle Dees in [[Resolution Road - Stage 1]] | |||
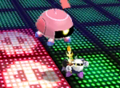
KPR Official Screenshot 4.png|Kirby using the [[Poison]] ability in [[Resolution Road - Stage 3]] | |||
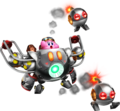
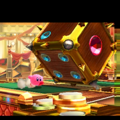
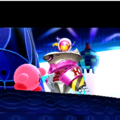
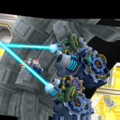
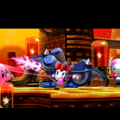
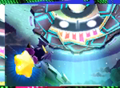
KPR Official Screenshot 5.png|Kirby fights [[Gigavolt]] | |||
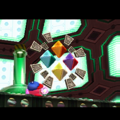
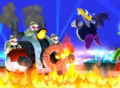
KPR Official Screenshot 6.png|Kirby battles [[Clanky Woods]] using the [[Doctor]] ability | |||
KPR Official Screenshot 7.png|Kirby obtains the custom [[Hammer]] ability from a [[King Dedede]] amiibo | |||
KPR Official Screenshot 8.png|A screenshot from the "[[Susie]], Executive Assistant" cutscene | |||
</gallery> | |||
==Credits pictures== | |||
===Story Mode=== | |||
<gallery> | |||
KPR Main Credits picture 1.png|Kirby running in [[Patched Plains]] | |||
KPR Main Credits picture 2.png|Kirby activating the Robobot Armor | |||
KPR Main Credits picture 3.png|Kirby running from an [[Iron Ball]] while holding a battery | |||
KPR Main Credits picture 4.png|Kirby entering a screw-shaped laboratory | |||
KPR Main Credits picture 5.png|Sword Kirby battling Clanky Woods | |||
KPR Main Credits picture 6.png|A giant die approaching Kirby | |||
KPR Main Credits picture 7.png|ESP Kirby facing [[Holo Defense API]] | |||
KPR Main Credits picture 8.png|[[Flotzo Borg]] attempting to attack a swimming Kirby | |||
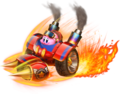
KPR Main Credits picture 9.png|Wheel Mode Kirby driving | |||
KPR Main Credits picture 10.png|Kirby facing Susie | |||
KPR Main Credits picture 11.png|Doctor Kirby attacking [[Miasmoros]] | |||
KPR Main Credits picture 12.png|Kirby controlling a [[Remocoroid]] | |||
KPR Main Credits picture 13.png|Jet Mode Kirby against [[C.O.G.S.]] | |||
KPR Main Credits picture 14.png|Jet Mode Kirby against [[Core Kabula]] | |||
KPR Main Credits picture 15.png|[[Mecha Knight]] preparing for battle | |||
KPR Main Credits picture 16.png|Robobot Armor breaks the [[fourth wall]] | |||
KPR Main Credits picture 17.png|Susie holding the test tube containing [[Dedede Clone]] | |||
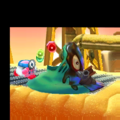
KPR Main Credits picture 18.png|The three Dedede Clones standing there, menacingly | |||
KPR Main Credits picture 19.png|Kirby on his Warp Star flying towards the [[Access Ark (ship)|Access Ark]] | |||
KPR Main Credits picture 20.png|Kirby looking at a magnificent portrait of [[President Haltmann]] | |||
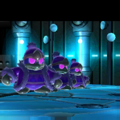
KPR Main Credits picture 21.png|Kirby in a [[HAL Room]] | |||
KPR Main Credits picture 22.png|Susie showcasing [[Mecha Knight+]] | |||
KPR Main Credits picture 23.png|President Haltmann introducing himself to Kirby | |||
KPR Main Credits picture 24.png|Haltmann throwing out a lot of Haltmanns | |||
KPR Main Credits picture 25.png|Susie taking [[Star Dream]]'s program controller | |||
KPR Main Credits picture 26.png|Activating [[Halberd Mode]] | |||
KPR Main Credits picture 27.png|Encountering Star Dream | |||
KPR Main Credits picture 28.png|The Access Ark's face revealed | |||
KPR Main Credits picture 29.png|Meta Knight releasing Robobot Armor Kirby from the Halberd | |||
KPR Main Credits picture 30.png|Kirby preparing the Final Screw Mode | |||
KPR Main Credits picture 31.png|Teaser image for [[Meta Knightmare Returns]] | |||
KPR Main Credits picture 32.png|Kirby waving farewell | |||
</gallery> | |||
===Meta Knightmare Returns=== | |||
<gallery> | |||
KPR Extra Credits picture 1.png|Meta Knight standing in Patched Plains | |||
KPR Extra Credits picture 2.png|Meta Knight avoiding the [[Security Laser]]s | |||
KPR Extra Credits picture 3.png|Meta Knight facing [[Kibble Blade]] 2.0 | |||
KPR Extra Credits picture 4.png|Meta Knight entering a boss door | |||
KPR Extra Credits picture 5.png|Meta Knight battling Clanky Woods 2.0 | |||
KPR Extra Credits picture 6.png|Meta Knight in a [[Rest Area]] | |||
KPR Extra Credits picture 7.png|Meta Knight against [[Telepathos]] 2.0 | |||
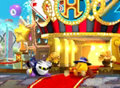
KPR Extra Credits picture 8.png|Meta Knight and [[Broom Hatter]] in front of a casino | |||
KPR Extra Credits picture 9.png|Meta Knight and one of the Holo-Doomers 2.0 flying in different directions | |||
KPR Extra Credits picture 10.png|Meta Knight swimming with a [[Squishy]] | |||
KPR Extra Credits picture 11.png|Three [[Metal Acro]]s approaching Meta Knight | |||
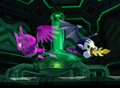
KPR Extra Credits picture 12.png|Meta Knight facing Susie 2.0 | |||
KPR Extra Credits picture 13.png|Meta Knight running while holding a [[3D Laser Bar]] | |||
KPR Extra Credits picture 14.png|[[Blocky]] 2.0 squishing Meta Knight | |||
KPR Extra Credits picture 15.png|Meta Knight faces [[Stock Mecha Knight]] | |||
KPR Extra Credits picture 16.png|Meta Knight in a [[cannon]] | |||
KPR Extra Credits picture 17.png|Meta Knight versus [[Dubior]] 2.0 | |||
KPR Extra Credits picture 18.png|Meta Knight flying from [[Dedede Clones & D3]] 2.0's Disaster Flame | |||
KPR Extra Credits picture 19.png|Meta Knight on a Warp Star heading to the Access Ark | |||
KPR Extra Credits picture 20.png|Meta Knight battling [[Security Force]] 2.0 | |||
KPR Extra Credits picture 21.png|Meta Knight running in the Access Ark's laboratory | |||
KPR Extra Credits picture 22.png|Meta Knight attacks Holo-Ice Dragon 2.0 | |||
KPR Extra Credits picture 23.png|Meta Knight entering the heart of the company | |||
KPR Extra Credits picture 24.png|Pres. Haltmann 2.0 on his Executive Suit | |||
KPR Extra Credits picture 25.png|Meta Knight posing in a HAL Room | |||
KPR Extra Credits picture 26.png|[[Dark Matter Clone]] roars | |||
KPR Extra Credits picture 27.png|Meta Knight battles [[Sectonia Clone]] | |||
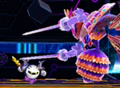
KPR Extra Credits picture 28.png|[[Galacta Knight Returns]] slashes Star Dream | |||
KPR Extra Credits picture 29.png|The sealed Galacta Knight goes to [[Another Dimension]] | |||
KPR Extra Credits picture 30.png|Teaser image for [[Star Dream Soul OS]] in the [[True Arena]] | |||
KPR Extra Credits picture 31.png|Susie performing [[The Noble Haltmann]] | |||
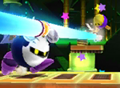
KPR Extra Credits picture 32.png|Meta Knight standing on the Halberd | |||
</gallery> | |||
==Other== | |||
===President Haltmann portraits=== | |||
<gallery> | |||
KPR Haltmann portrait 1.png|thumb|Haltmann thoughtfully standing | |||
KPR Haltmann portrait 2.png|thumb|Haltmann proudly standing | |||
KPR Haltmann portrait 3.png|thumb|Haltmann sitting | |||
</gallery> | |||
===Behind the scenes=== | |||
<gallery> | |||
KPR staff photo.png|thumb|HAL Laboratory staff pictured with a ''Kirby: Planet Robobot'' poster | |||
KPR Famitsu platinum.png|thumb|The Famitsu platinum medal received for the game's extremely positive review scores | |||
</gallery> | </gallery> | ||
| Line 77: | Line 384: | ||
{{Youtube|NcaXiFu7Cto|300|Pax East 2016 gameplay footage}} | {{Youtube|NcaXiFu7Cto|300|Pax East 2016 gameplay footage}} | ||
{{Youtube|rFdoV-LkRNA|300|Overview Trailer (North America)}} | {{Youtube|rFdoV-LkRNA|300|Overview Trailer (North America)}} | ||
{{Youtube| | {{Youtube|5eiLiFf6XgQ|300|Kirby Series Amiibo Teaser (NA)}} | ||
{{Youtube| | {{Youtube|mp0ttxBSLYs|300|Kirby Kicks Bot Trailer}} | ||
{{Youtube|JrnkwNRIDNw|300|Let's Robot - Nintendo Minute}} | {{Youtube|JrnkwNRIDNw|300|Let's Robot - Nintendo Minute}} | ||
{{Youtube|ziF2FtsXUOU|300|Overview Trailer (UK)}} | {{Youtube|ziF2FtsXUOU|300|Overview Trailer (UK)}} | ||
| Line 86: | Line 393: | ||
{{Youtube|JM4pU7-xJbM|300|Kirby: Planet Robobot - Build a Bot}} | {{Youtube|JM4pU7-xJbM|300|Kirby: Planet Robobot - Build a Bot}} | ||
{{Navbox-Galleries}} | |||
{{Navbox-KPR}} | |||
[[Category:Galleries]] | [[Category:Galleries]] | ||
[[Category:Kirby: Planet Robobot]] | [[Category:Kirby: Planet Robobot]] | ||
Latest revision as of 19:52, 17 May 2024
A gallery of images relating to Kirby: Planet Robobot.
Logos[edit]

English logo
Japanese logo
Box art[edit]
US box art
Japanese box art
Australian box art


Artwork[edit]
Characters[edit]
Main image on the Japanese Website
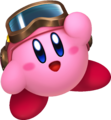
Kirby with the goggles he wears in the Robobot Armor
Kirby sitting down
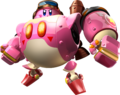
Kirby in the Robobot Armor
The Robobot Armor's Beam Mode
The Robobot Armor's Fire Mode
The Robobot Armor's Sword Mode

The Robobot Armor's Spark Mode
The Robobot Armor's Jet Mode
The Robobot Armor's Cutter Mode
The Robobot Armor's Bomb Mode
The Robobot Armor's Wheel Mode

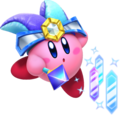
The Poison ability

The Doctor ability

The Crash ability

The ESP ability
The Mirror ability
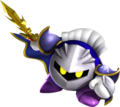
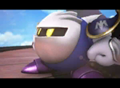
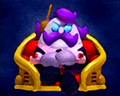
Meta Knight
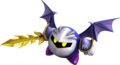
Meta Knight

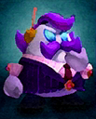
Susie with her hands folded

Susie standing

Susie feeling happy

Susie feeling very happy

Susie pointing at the screen

Susie flying

Pixel art of Susie


Enemies[edit]
Cyborg variant of Bronto Burt

Cyborg variant of Scarfy

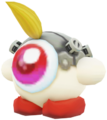
Waddle Dee wearing a hard hat


Other[edit]

A Maxim Tomato
(artwork reused from Kirby: Triple Deluxe)


amiibo[edit]

Kirby
Waddle Dee


Miscellaneous[edit]
Key art used for the game's cover
Alternate version of key art

Alternate version of key art
Alternate version of key art
Alternate version of key art
Kirby battling Star Dream, included with the Kirby: Planet Robobot Original Soundtrack
Original sketch of the previous artwork
Play Nintendo wallpaper
Play Nintendo Action & Adventure gaming style game suggestion
Icon used for Past Adventures menus in future games
Promotional artwork from Nintendo's LINE account


Concept Art[edit]
Concept art of ESP Kirby

Concept art of Doctor Kirby
Concept art of Poison Kirby
Early concept art for the Robobot Armor
Concept art for the Robobot Armor
Concept art for the Robobot Armor
Concept art for the Robobot Armor
Various designs for the Robobot Armor
Various concept art of Robobot Armor. The design with two massive arms becomes more prevalent at this point.
Various concept art of Robobot Armor. The color experiments with one hand being a claw and the other being a drill design can be seen. This didn't make into the game.
Early design of Susie by Akihiro Kanno
Early design of Susie by Shinya Kumazaki
Early design of Susie by Tsuyoshi Fujita
Early design of Susie by Etsuko Sato
Final design of Susie by Kenichiro Kita, featuring various hairstyles

Test render of Susie with an unused hairstyle and the unused version of "alien" eyes

Test render of Susie with an unused hairstyle and the final version of her eyes
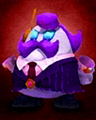
Early designs of President Haltmann by Shinya Kumazaki
Final design of President Haltmann by Shinya Kumazaki
Concept art for the Access Ark
Concept art of various models for the Access Ark
Concept art for the Access Ark entrance
Concept art for various Access Ark hatch designs
Concept art for the Access Ark's hatch

Early concept art of Star Dream
Concept art of Star Dream
A storyboard depicting the final part of the battle with Star Dream
Concept art of Star Dream, included with the Kirby: Planet Robobot Original Soundtrack
Kirby battling Susie
Early sketch art for roles in Team Kirby Clash


Models[edit]
Protagonists[edit]

Robobot Armor[edit]
Halberd Mode (high-poly model used in cutscenes)
Halberd Mode (low-poly model used during gameplay)


Enemies[edit]
Chippurus from the top
Pacto with its mouth open


Mid-Bosses[edit]
King Doo 2.0
Miasmoros 2.0


Bosses[edit]
Clanky Woods 2.0
Holo-Kracko 2.0

Holo-Ice Dragon

Holo-Ice Dragon 2.0
Holo-Coily Rattler
Holo-Coily Rattler 2.0
Susie with her visor on
Core Kabula preparing her Massive Laser

Mecha Knight's sword
Dedede Clone 2.0
D3 Cannon 2.0
Mecha Knight+'s claw tail
Mecha Knight+ unmasked
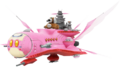
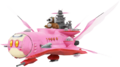
The Access Ark with Star Dream attached
A piece of the Access Ark
One of the Access Ark's legs
Dark Matter Clone upon defeat
Sectonia Clone upon defeat
The Access Ark with Star Dream Soul OS attached
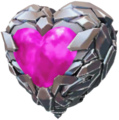
Star Dream Soul OS's heart
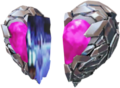
Star Dream Soul OS's heart split in half, during an attack

Star Dream Soul OS's heart without its armor, upon defeat


Enemy and mid-boss effects[edit]


Boss effects[edit]
One of Susie's drones
One of Susie 2.0's drones

One of Core Kabula's missiles
One of Core Kabula's missiles from the side

A (temporarily) defeated Dedede Clone

A (temporarily) defeated Dedede Clone 2.0

One of President Haltmann's Susie drones


Items[edit]

1-Up (French)

1-Up (German)

1-Up (Latin American Spanish)

1-Up (Iberian Spanish)

A 1-Up from Meta Knightmare Returns

A 1-Up from Meta Knightmare Returns (French)

A 1-Up from Meta Knightmare Returns (German)

A 1-Up from Meta Knightmare Returns (Latin American Spanish)

A 1-Up from Meta Knightmare Returns (Castilian Spanish)
Remocoroid controller


Objects[edit]

Stage hazards[edit]

A fire chicken from Gigabyte Grounds - Stage 2
Stage objects[edit]
Star Dream slashed by Galacta Knight in Meta Knightmare Returns

Team Kirby Clash[edit]

Propeller apple

Pyribbit's volcano


Other[edit]

The Halberd


Unused[edit]
King Doo's unused animation


Screenshots[edit]

Screenshot from the "First Contact" cutscene
Screenshot from the "First Contact" cutscene
Screenshot from the "First Contact" cutscene
Screenshot from the "First Contact" cutscene
Screenshot from the "First Contact" cutscene
Screenshot from the "First Contact" cutscene
Kirby in Overload Ocean - Stage 4 with the Parasol ability
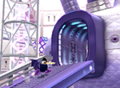
Kirby dons the Robobot Armor
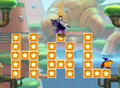
Kirby uses the suit to smash some cars driven by Waddle Dees in Resolution Road - Stage 1
Kirby using the Poison ability in Resolution Road - Stage 3
Kirby fights Gigavolt

Kirby battles Clanky Woods using the Doctor ability
Kirby obtains the custom Hammer ability from a King Dedede amiibo

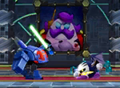
A screenshot from the "Susie, Executive Assistant" cutscene


Credits pictures[edit]
Story Mode[edit]
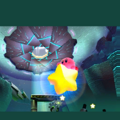
Kirby running in Patched Plains

Kirby activating the Robobot Armor
Kirby running from an Iron Ball while holding a battery
Kirby entering a screw-shaped laboratory

Sword Kirby battling Clanky Woods
A giant die approaching Kirby
ESP Kirby facing Holo Defense API
Flotzo Borg attempting to attack a swimming Kirby
Wheel Mode Kirby driving
Kirby facing Susie
Doctor Kirby attacking Miasmoros
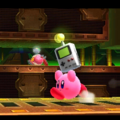
Kirby controlling a Remocoroid
Jet Mode Kirby against C.O.G.S.
Jet Mode Kirby against Core Kabula
Mecha Knight preparing for battle
Robobot Armor breaks the fourth wall
Susie holding the test tube containing Dedede Clone
The three Dedede Clones standing there, menacingly
Kirby on his Warp Star flying towards the Access Ark
Kirby looking at a magnificent portrait of President Haltmann
Kirby in a HAL Room
Susie showcasing Mecha Knight+
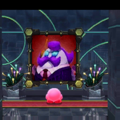
President Haltmann introducing himself to Kirby
Haltmann throwing out a lot of Haltmanns
Susie taking Star Dream's program controller
Activating Halberd Mode
Encountering Star Dream
The Access Ark's face revealed
Meta Knight releasing Robobot Armor Kirby from the Halberd
Kirby preparing the Final Screw Mode
Teaser image for Meta Knightmare Returns
Kirby waving farewell


Meta Knightmare Returns[edit]
Meta Knight standing in Patched Plains
Meta Knight avoiding the Security Lasers
Meta Knight facing Kibble Blade 2.0
Meta Knight entering a boss door
Meta Knight battling Clanky Woods 2.0
Meta Knight in a Rest Area
Meta Knight against Telepathos 2.0
Meta Knight and Broom Hatter in front of a casino
Meta Knight and one of the Holo-Doomers 2.0 flying in different directions
Meta Knight swimming with a Squishy

Three Metal Acros approaching Meta Knight
Meta Knight facing Susie 2.0
Meta Knight running while holding a 3D Laser Bar
Blocky 2.0 squishing Meta Knight

Meta Knight faces Stock Mecha Knight
Meta Knight in a cannon
Meta Knight versus Dubior 2.0
Meta Knight flying from Dedede Clones & D3 2.0's Disaster Flame
Meta Knight on a Warp Star heading to the Access Ark
Meta Knight battling Security Force 2.0
Meta Knight running in the Access Ark's laboratory
Meta Knight attacks Holo-Ice Dragon 2.0
Meta Knight entering the heart of the company
Pres. Haltmann 2.0 on his Executive Suit
Meta Knight posing in a HAL Room
Dark Matter Clone roars
Meta Knight battles Sectonia Clone

Galacta Knight Returns slashes Star Dream
The sealed Galacta Knight goes to Another Dimension
Teaser image for Star Dream Soul OS in the True Arena
Susie performing The Noble Haltmann
Meta Knight standing on the Halberd


Other[edit]
President Haltmann portraits[edit]
Haltmann thoughtfully standing
Haltmann proudly standing
Haltmann sitting


Behind the scenes[edit]
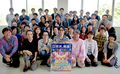
HAL Laboratory staff pictured with a Kirby: Planet Robobot poster
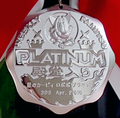
The Famitsu platinum medal received for the game's extremely positive review scores


Videos[edit]
Reveal Trailer
|
First gameplay footage of Kirby 3D Rumble
|
IGN footage from Wondercon 2016
|
Japanese overview trailer
|
Pax East 2016 gameplay footage
|
Overview Trailer (North America)
|
Kirby Series Amiibo Teaser (NA)
|
Kirby Kicks Bot Trailer
|
Let's Robot - Nintendo Minute
|
Overview Trailer (UK)
|
Robobot Rampage Trailer
|
Kirby series Amiibo trailer (UK)
|
Team Kirby Clash & Kirby 3D Rumble (UK)
|
Kirby: Planet Robobot - Build a Bot
|
| ||||||||||||||||||||||||||||||||