Gathering of the Beast Council: Difference between revisions
m (Adding boss appearances to the infobox.) |
m (Minor fixes) |
||
| (2 intermediate revisions by 2 users not shown) | |||
| Line 8: | Line 8: | ||
|blueprint=[[Storm Tornado]] | |blueprint=[[Storm Tornado]] | ||
|theme music=[[File:KatFL Enter the Fiery Forbidden Lands.mp3]] | |theme music=[[File:KatFL Enter the Fiery Forbidden Lands.mp3]] | ||
|theme title=[[Enter the Fiery Forbidden Lands (theme)]] | |theme title="[[Enter the Fiery Forbidden Lands (theme)|Enter the Fiery Forbidden Lands]]" | ||
|description=Main theme for the stage. | |description=Main theme for the stage. | ||
|previousstage=[[Burning, Churning Power Plant]] | |previousstage=[[Burning, Churning Power Plant]] | ||
| Line 15: | Line 15: | ||
'''Gathering of the Beast Council''' is the fourth stage of [[Redgar Forbidden Lands]] in ''[[Kirby and the Forgotten Land]]''. In this stage, Kirby has a rematch with three previous [[Beast Pack]] executives: [[Gorimondo]], [[Sillydillo]], and [[Clawroline]], and travels between each fight via a [[Mouthful Mode]]. This stage in particular appears to take place in a ruined off-shoot of [[Wondaria Remains|Wondaria]], with signage and paraphernalia for the park seen throughout, as well as an encore appearance of [[Coaster Mouth]]. | '''Gathering of the Beast Council''' is the fourth stage of [[Redgar Forbidden Lands]] in ''[[Kirby and the Forgotten Land]]''. In this stage, Kirby has a rematch with three previous [[Beast Pack]] executives: [[Gorimondo]], [[Sillydillo]], and [[Clawroline]], and travels between each fight via a [[Mouthful Mode]]. This stage in particular appears to take place in a ruined off-shoot of [[Wondaria Remains|Wondaria]], with signage and paraphernalia for the park seen throughout, as well as an encore appearance of [[Coaster Mouth]]. | ||
There are two Capsules from Vol. 1, one from Vol. 2, and one from Vol. 3 to collect in this stage, and five [[Mission]] | There are two Capsules from Vol. 1, one from Vol. 2, and one from Vol. 3 to collect in this stage, and five [[Mission (Kirby and the Forgotten Land)|missions]] to complete. There are a total of 11 Waddle Dees to rescue here, when including the mission objectives. The blueprint for [[Storm Tornado]] can be found in this stage. | ||
== Stage overview == | ==Stage overview== | ||
[[File:KatFL Gathering of the Beast Council screenshot 04.png|thumb|left|250px|In this stage, Kirby has to rematch three bosses he faced in previous levels. Here, he is fighting Sillydillo again.]] | [[File:KatFL Gathering of the Beast Council screenshot 04.png|thumb|left|250px|In this stage, Kirby has to rematch three bosses he faced in previous levels. Here, he is fighting Sillydillo again.]] | ||
This stage features three distinct areas. | This stage features three distinct areas. | ||
| Line 26: | Line 26: | ||
In the third area, Kirby gets a pick between essences for [[Ice]], [[Ranger]], [[Bomb]], and [[Tornado]] before stepping onto a stage where he has to rematch [[Clawroline]], who starts in her second phase. Once Clawroline is defeated, Kirby can move forward and find a roller coaster to use for [[Coaster Mouth]], but he should root around the platform for a bit first so he can find the blueprint for [[Storm Tornado]]. Once on the coaster, Kirby is taken along a very long and dangerous straight ride where he will be beset by falling lava balls and [[Gigatzo]] fire. Along the way, there are six [[switch]]es to hit, and if Kirby hits all of them, he can free an extra Waddle Dee at the end of the stage before reaching the gold cage. | In the third area, Kirby gets a pick between essences for [[Ice]], [[Ranger]], [[Bomb]], and [[Tornado]] before stepping onto a stage where he has to rematch [[Clawroline]], who starts in her second phase. Once Clawroline is defeated, Kirby can move forward and find a roller coaster to use for [[Coaster Mouth]], but he should root around the platform for a bit first so he can find the blueprint for [[Storm Tornado]]. Once on the coaster, Kirby is taken along a very long and dangerous straight ride where he will be beset by falling lava balls and [[Gigatzo]] fire. Along the way, there are six [[switch]]es to hit, and if Kirby hits all of them, he can free an extra Waddle Dee at the end of the stage before reaching the gold cage. | ||
{{clear|left}} | |||
===Differences between difficulties=== | |||
=== Differences between difficulties === | |||
There do not appear to be any differences in the number of enemies between Spring-Breeze Mode and Wild Mode in this stage. | There do not appear to be any differences in the number of enemies between Spring-Breeze Mode and Wild Mode in this stage. | ||
=== Missions === | ===Missions=== | ||
[[File:KatFL Gathering of the Beast Council screenshot 01.png|thumb|250px|Kirby curving off the main path to root for secrets.]] | [[File:KatFL Gathering of the Beast Council screenshot 01.png|thumb|250px|Kirby curving off the main path to root for secrets.]] | ||
Gathering of the Beast Council has five missions to complete, as follows: | Gathering of the Beast Council has five missions to complete, as follows: | ||
| Line 46: | Line 45: | ||
*'''"Beat Clawroline without getting hit"''' - Kirby must defeat Clawroline without ever taking damage. | *'''"Beat Clawroline without getting hit"''' - Kirby must defeat Clawroline without ever taking damage. | ||
=== Enemies and Abilities === | ===Enemies and Abilities=== | ||
{| style="border: 3px solid #E47575; {{round}};background: #F69D99" cellspacing="2" | {| style="border: 3px solid #E47575; {{round}};background: #F69D99" cellspacing="2" | ||
! width="420px" | '''Regular Enemies''' | ! width="420px" | '''Regular Enemies''' | ||
| Line 105: | Line 104: | ||
|} | |} | ||
== Gallery == | ==Gallery== | ||
<gallery> | <gallery> | ||
KatFL Gathering of the Beast Council screenshot 02.png|Kirby using Time Crash on Gorimondo to make short work of him | KatFL Gathering of the Beast Council screenshot 02.png|Kirby using Time Crash on Gorimondo to make short work of him | ||
| Line 116: | Line 115: | ||
</gallery> | </gallery> | ||
=== Video walkthrough === | ===Video walkthrough=== | ||
{{Youtube|XO1SzC9h2Z8|300|100% walkthrough of Gathering of the Beast Council.}} | {{Youtube|XO1SzC9h2Z8|300|100% walkthrough of Gathering of the Beast Council.}} | ||
| Line 123: | Line 122: | ||
==Names in other languages== | ==Names in other languages== | ||
{{names | {{names | ||
|ja=幹部招集 | |ja={{furi|幹部招集|かんぶしょうしゅう}} | ||
|jaR=Kanbu Shōshū | |jaR=Kanbu Shōshū | ||
|jaM=Executive Assembly | |jaM=Executive Assembly | ||
Latest revision as of 18:32, 19 January 2024
| ||||||||||||||||
| ||||||||||||||||
| ||||||||||||||||
|
| ||||||||||||||||

Gathering of the Beast Council is the fourth stage of Redgar Forbidden Lands in Kirby and the Forgotten Land. In this stage, Kirby has a rematch with three previous Beast Pack executives: Gorimondo, Sillydillo, and Clawroline, and travels between each fight via a Mouthful Mode. This stage in particular appears to take place in a ruined off-shoot of Wondaria, with signage and paraphernalia for the park seen throughout, as well as an encore appearance of Coaster Mouth.
There are two Capsules from Vol. 1, one from Vol. 2, and one from Vol. 3 to collect in this stage, and five missions to complete. There are a total of 11 Waddle Dees to rescue here, when including the mission objectives. The blueprint for Storm Tornado can be found in this stage.
Stage overview[edit]

This stage features three distinct areas.
In the first area, Kirby heads up a barren valley and then gets a choice of Copy Essence: Ranger, Sword, Hammer, or Ice, to battle with Gorimondo up ahead, who is waiting for him and already in his second phase. However, Kirby can find a Copy Essence for Crash as well if he looks hard enough. Once Gorimondo is defeated, a car appears that Kirby can use for Car Mouth. From here, Kirby needs to drive along a winding road with lots of enemies and falling lava balls besetting it in order to reach the next area.
In the second area, Kirby climbs a series of short cliffs and can pick between Copy Essences for Drill, Cutter, Fire, and Needle before climbing up a long ladder. At the top, Kirby has to rematch Sillydillo, who starts automatically in its third phase. Once Sillydillo goes down for the count, Kirby can proceed forward and find a pipe to use for Pipe Mouth. After the Pipe Mouth section, Kirby can move on to the next area.
In the third area, Kirby gets a pick between essences for Ice, Ranger, Bomb, and Tornado before stepping onto a stage where he has to rematch Clawroline, who starts in her second phase. Once Clawroline is defeated, Kirby can move forward and find a roller coaster to use for Coaster Mouth, but he should root around the platform for a bit first so he can find the blueprint for Storm Tornado. Once on the coaster, Kirby is taken along a very long and dangerous straight ride where he will be beset by falling lava balls and Gigatzo fire. Along the way, there are six switches to hit, and if Kirby hits all of them, he can free an extra Waddle Dee at the end of the stage before reaching the gold cage.
Differences between difficulties[edit]
There do not appear to be any differences in the number of enemies between Spring-Breeze Mode and Wild Mode in this stage.
Missions[edit]

Gathering of the Beast Council has five missions to complete, as follows:
- "Clear the stage" - Kirby must complete the stage.
- "Save the hidden Waddle Dees" - Kirby must find and rescue the five hidden Waddle Dees in silver cages. Their locations are as follows:
- Waddle Dee 1: This Waddle Dee can be retrieved during the Car Mouth section. Kirby simply needs to reach the end of the track fast enough.
- Waddle Dee 2: This Waddle Dee can be found in a treasure chest to the right of where Sillydillo is fought.
- Waddle Dee 3: This Waddle Dee can be found at the end of the Pipe Mouth section, if Kirby doesn't jump at the last juncture.
- Waddle Dee 4: This Waddle Dee can be found atop one of the towers that Clawroline uses in her fight (the upper-left one). Kirby can find a ladder on that tower after the fight.
- Waddle Dee 5: This Waddle Dee can be found at the end of the stage. To free him, Kirby needs to have hit all of the switches during the Coaster Mouth section.
- "Venture deep into the secret passage" - Kirby must head to the end of the secret tunnel that appears to the right before the battle with Gorimondo.
- "Defeat Sillydillo in 1:30" - Kirby must defeat Sillydillo within a minute and 30 seconds.
- "Beat Clawroline without getting hit" - Kirby must defeat Clawroline without ever taking damage.
Enemies and Abilities[edit]
| Regular Enemies | Bosses & Mid-Bosses | ||||
|---|---|---|---|---|---|
|
|
| ||||
| Abilities | Mouthful Mode(s) | ||||
|
|
|
Gallery[edit]
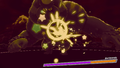
Kirby using Time Crash on Gorimondo to make short work of him
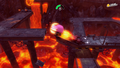
Making a jump using Car Mouth
Rolling down the path using Pipe Mouth

Dodging knives thrown by Clawroline

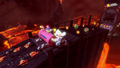
Rooting around for goodies at the Coaster Mouth platform

Riding past Gigatzo fire on Coaster Mouth

Reaching the end of the ride, and the stage


Video walkthrough[edit]
100% walkthrough of Gathering of the Beast Council.
|
Names in other languages[edit]
| Language | Name | Meaning |
|---|---|---|
| Japanese | 幹部招集 Kanbu Shōshū |
Executive Assembly |
| Traditional Chinese | 幹部招集 Gànbù Zhāojí |
Executive Assembly |
| Simplified Chinese | 干部招集 Gànbù Zhāojí | |
| Dutch | Bijeenkomst van de beestenraad | Meeting of the beast council |
| French | Plénum du conseil des bêtes | The beast council plenum |
| German | Versammlung des Bestienrats | Gathering of the Beast council |
| Italian | Bestie in assemblea | Beasts in assembly |
| Korean | 간부 소집 Ganbu Sojip |
Executive Assembly |
| Spanish | Asamblea del Consejo de Bestias | Beast Council Assembly |