Patched Plains - Stage 3: Difference between revisions
(added images) |
m (→Gallery: Added a Gigavolt image) |
||
| (18 intermediate revisions by 10 users not shown) | |||
| Line 1: | Line 1: | ||
{{Infobox-KPRStage | {{Infobox-KPRStage | ||
|image=[[File:KPR Patched Plains Stage 3 1.png|350px]] | |image=[[File:KPR Patched Plains Stage 3 1.png|350px]] | ||
|caption=Kirby | |caption=Kirby boards a train, the interior of which is the setting for most of this stage. | ||
|level=[[Patched Plains]] | |level=[[Patched Plains]] | ||
|robobot={{Y}} | |robobot={{Y}} | ||
| Line 8: | Line 7: | ||
|sticker=4 | |sticker=4 | ||
|goldsticker=[[Sailor Waddle Dee]] | |goldsticker=[[Sailor Waddle Dee]] | ||
| | |boss=[[Gigavolt]] | ||
|theme music=[[File:Steel Beat sample KPR.oga]] | |||
|theme title="[[Steel Beat]]" | |||
|description=Clip of the music that primarily plays in Patched Plains - Stage 3. | |||
|previousstage=[[Patched Plains - Stage 2]] | |previousstage=[[Patched Plains - Stage 2]] | ||
|nextstage=[[Patched Plains - Stage 4]] | |nextstage=[[Patched Plains - Stage 4]] | ||
}} | }} | ||
'''Patched Plains - Stage 3''' is the third stage of [[Patched Plains]] in ''[[Kirby: Planet Robobot]]''. There are three [[Code Cube]]s and four [[Sticker (Kirby: Planet Robobot)|sticker]]s in this stage. The rare sticker is one depicting [[Sailor Waddle Dee]]. [[Chemitory]] and the [[Doctor]] ability are first seen here. | |||
'''Patched Plains - Stage 3''' is the third stage of [[Patched Plains]]. There are three [[Code Cube]]s and four [[Sticker (Kirby: Planet Robobot)|sticker]]s in this stage. The | |||
==Overview== | ==Overview== | ||
The stage begins with Kirby boarding a train just as it is about to head off. | The stage begins with Kirby boarding a train just as it is about to head off. | ||
From there, Kirby worms his way through the cars, using [[Battery|batteries]] to power various devices and avoiding being knocked out of the train by [[Iron Ball]]s. At the front end of the train, Kirby can find a [[Warp Star]] which will take him out and to the next area, though [[HAL Room|secrets do abound]] if Kirby cares to look for them. | From there, Kirby worms his way through the cars, using [[Battery (Kirby: Planet Robobot)|batteries]] to power various devices and avoiding being knocked out of the train by [[Iron Ball]]s. At the front end of the train, Kirby can find a [[Warp Star]] which will take him out and to the next area, though [[HAL Room|secrets do abound]] if Kirby cares to look for them. | ||
Once back out on the plains, Kirby can pick up a suit of [[Robobot Armor]] if he didn't already obtain one. This will be used up ahead to battle first the [[Vol]]s, then the towering [[Gigavolt]]. Once the giant robot is defeated, the stage exit will appear. | Once back out on the plains, Kirby can pick up a suit of [[Robobot Armor]] if he didn't already obtain one. This will be used up ahead to battle first the [[Vol]]s, then the towering [[Gigavolt]]. Once the giant robot is defeated, the stage exit will appear. | ||
===Code Cube & | ===Code Cube & Rare Sticker Guide=== | ||
*'''Code Cube 1''' - In the first series of train cars, a teleportation device can be found. Kirby will need to power it using a battery, causing the cube to appear within reach. | *'''Code Cube 1''' - In the first series of train cars, a teleportation device can be found. Kirby will need to power it using a battery, causing the cube to appear within reach. | ||
*'''Code Cube 2''' - From the first series of cars, Kirby can find a pipe that leads to an alternate door forward. Taking this door, Kirby can collect a battery in the next area, and use it to access a side door using a teleporter device. Through the door is the cube, past a series of [[Gordo]]s. | *'''Code Cube 2''' - From the first series of cars, Kirby can find a pipe that leads to an alternate door forward. Taking this door, Kirby can collect a battery in the next area, and use it to access a side door using a teleporter device. Through the door is the cube, past a series of [[Gordo]]s. | ||
*'''Code Cube 3''' - In the last train car area, Kirby will need to use the [[Robobot Armor]] to move a block out of the way, revealing a small passage to a teleporter device. Further up is another small passage which leads to a battery. Bringing these two things together yields this cube. | *'''Code Cube 3''' - In the last train car area, Kirby will need to use the [[Robobot Armor]] to move a block out of the way, revealing a small passage to a teleporter device. Further up is another small passage which leads to a battery. Bringing these two things together yields this cube. | ||
*''' | *'''Rare Sticker''' - In the room where the second [[Code Cube]] is, Kirby can find a duct in the ceiling which leads to a separate room containing the [[Robobot Armor]]. Using this armor, Kirby can return to the main path and bust through a metal block in the ceiling, allowing him to get on top of the train outside. The sticker can be found to the left from here. | ||
==Enemies, Bosses and Abilities== | ==Enemies, Bosses and Abilities== | ||
| Line 85: | Line 86: | ||
{{col-begin}} | {{col-begin}} | ||
{{col-break|width=50%}} | {{col-break|width=50%}} | ||
*[[Beam | *[[Beam Mode|Beam]] | ||
*[[Bomb | *[[Bomb Mode|Bomb]] | ||
*[[Cutter | *[[Cutter Mode|Cutter]] | ||
{{col-break|width=50%}} | {{col-break|width=50%}} | ||
*[[Fire | *[[Fire Mode|Fire]] | ||
*[[Spark | *[[Spark Mode|Spark]] | ||
{{col-end}} | {{col-end}} | ||
|} | |} | ||
==Trivia== | |||
*The numbers depicted on the train car that Kirby enters at the beginning of the stage are 400-0111, which corresponds to the postal code for Ryuoshinmachi, Kai, Yamanashi, where the Yamanashi headquarters of [[HAL Laboratory]] are located. A similar [[easter egg]] is used in [[Access Ark - Stage 4|Stage 4]] of Access Ark. | |||
**Coincidentally, both stages also have [[HAL Room]]s. | |||
==Gallery== | ==Gallery== | ||
<gallery> | <gallery> | ||
KPR Patched Plains Stage 3 2.png|Kirby infiltrates the train. | KPR Patched Plains Stage 3 2.png|Kirby infiltrates the train. | ||
KPR Patched Plains Stage 3 3.png| | KPR Patched Plains Stage 3 3.png|Kirby gets too close to an Iron Ball. | ||
KPR Patched Plains Stage 3 4.png| | KPR Patched Plains Stage 3 4.png|Kirby uses the Robobot Armor to clear a path by dropping a large metal block. | ||
KPR Patched Plains Stage 3 5.png|Kirby takes | KPR Patched Plains Stage 3 5.png|Kirby takes on two [[Vol]]s. | ||
KPR Gigavolt.png|[[Kirby]] fighting against Gigavolt. | |||
KPR-map13.jpg|Stage map | |||
</gallery> | </gallery> | ||
{{Navbox- | {{Navbox-KPR}} | ||
Latest revision as of 09:38, 18 February 2024
| ||||||||||||||||||
| ||||||||||||||||||
| ||||||||||||||||||
|
| ||||||||||||||||||

Patched Plains - Stage 3 is the third stage of Patched Plains in Kirby: Planet Robobot. There are three Code Cubes and four stickers in this stage. The rare sticker is one depicting Sailor Waddle Dee. Chemitory and the Doctor ability are first seen here.
Overview[edit]
The stage begins with Kirby boarding a train just as it is about to head off.
From there, Kirby worms his way through the cars, using batteries to power various devices and avoiding being knocked out of the train by Iron Balls. At the front end of the train, Kirby can find a Warp Star which will take him out and to the next area, though secrets do abound if Kirby cares to look for them.
Once back out on the plains, Kirby can pick up a suit of Robobot Armor if he didn't already obtain one. This will be used up ahead to battle first the Vols, then the towering Gigavolt. Once the giant robot is defeated, the stage exit will appear.
Code Cube & Rare Sticker Guide[edit]
- Code Cube 1 - In the first series of train cars, a teleportation device can be found. Kirby will need to power it using a battery, causing the cube to appear within reach.
- Code Cube 2 - From the first series of cars, Kirby can find a pipe that leads to an alternate door forward. Taking this door, Kirby can collect a battery in the next area, and use it to access a side door using a teleporter device. Through the door is the cube, past a series of Gordos.
- Code Cube 3 - In the last train car area, Kirby will need to use the Robobot Armor to move a block out of the way, revealing a small passage to a teleporter device. Further up is another small passage which leads to a battery. Bringing these two things together yields this cube.
- Rare Sticker - In the room where the second Code Cube is, Kirby can find a duct in the ceiling which leads to a separate room containing the Robobot Armor. Using this armor, Kirby can return to the main path and bust through a metal block in the ceiling, allowing him to get on top of the train outside. The sticker can be found to the left from here.
Enemies, Bosses and Abilities[edit]
| Regular Enemies | Boss | ||||
|---|---|---|---|---|---|
|
|
| ||||
| Abilities | Robobot Armor Modes | ||||
|
|
|
Trivia[edit]
- The numbers depicted on the train car that Kirby enters at the beginning of the stage are 400-0111, which corresponds to the postal code for Ryuoshinmachi, Kai, Yamanashi, where the Yamanashi headquarters of HAL Laboratory are located. A similar easter egg is used in Stage 4 of Access Ark.
- Coincidentally, both stages also have HAL Rooms.
Gallery[edit]
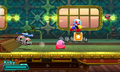
Kirby infiltrates the train.

Kirby gets too close to an Iron Ball.
Kirby uses the Robobot Armor to clear a path by dropping a large metal block.

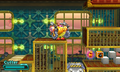
Kirby takes on two Vols.

Kirby fighting against Gigavolt.
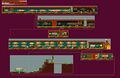
Stage map


