|
|
| (45 intermediate revisions by 18 users not shown) |
| Line 1: |
Line 1: |
| {{articleabout|the level from [[Kirby: Planet Robobot]]|the similarly named world from [[Kirby's Epic Yarn]]|[[Patch Land]]}}
| |
| {{Infobox-KPRLevel | | {{Infobox-KPRLevel |
| |image=[[File:Patched Plains.jpg|300px]] | | |image=[[File:KPR Patched Plains World Hub.png|300px]] |
| |caption=Screenshot from ''Kirby: Planet Robobot''. | | |caption=Screenshot of '''Patched Plains''' from ''[[Kirby: Planet Robobot]]''. |
| |level=1 | | |level=1 |
| |stages=5 | | |stages=5 |
| |exstages=1 | | |exstages=1 |
| |codecube=11 | | |codecube=11 |
| |mid-boss=[[Invader Armor]] (1-2), [[Gigavolt]] (1-3), [[King Doo]] (1-4), [[Kibble Blade]] 2.0 (1-EX) | | |mid-boss=[[Invader Armor]] (1-2), [[King Doo]] (1-4), [[Kibble Blade]] 2.0 (1-EX) |
| |robobotarmor=1-2, 1-3, 1-4, 1-EX | | |robobotarmor=1-2, 1-3, 1-4, 1-EX |
| |boss=[[Clanky Woods]] | | |theme music=[[File:Patched Plains sample KPR.oga]] |
| | |theme title="[[The Noble Haltmann|Patched Plains]]" |
| | |description=The stage select theme for Patched Plains. |
| | |boss=[[Gigavolt]] (1-3), [[Clanky Woods]] (1-5) |
| |next=[[Resolution Road]] | | |next=[[Resolution Road]] |
| }} | | }}{{About|the level from [[Kirby: Planet Robobot]]|the similarly named world from [[Kirby's Epic Yarn]]|[[Patch Land]]}} |
| '''Patched Plains''' (known in Japan as '''Plain Proptom''') is the first level of ''[[Kirby: Planet Robobot]]''. It has four regular stages, a boss stage, and an EX stage. The level is characterized by green metallic plains, and also features a train and a laboratory. There are eleven [[Code Cube]]s to collect in this level, with one in Stage 1 and Stage EX, and three in Stage 2, Stage 3 and Stage 4. The boss is [[Clanky Woods]]. | | '''Patched Plains''' is the first level of ''[[Kirby: Planet Robobot]]''. It has four regular stages, a boss stage, and an EX stage. The level is characterized by green metallic plains, and also features a train and a laboratory. There are 11 [[Code Cube]]s to collect in this level, with one in Stage 1 and Stage EX, and three in Stage 2, Stage 3 and Stage 4. The boss is [[Clanky Woods]]. |
|
| |
|
| ==Stages== | | ==Stages== |
| {{construction}}
| |
| For details on each stage individually, click the name of the stage. | | For details on each stage individually, click the name of the stage. |
| {| class="sortable wikitable" border=1 cellpadding=2 | | {| class="sortable wikitable" border=1 cellpadding=2 |
| Line 21: |
Line 22: |
| !class=unsortable|Unlock Req. | | !class=unsortable|Unlock Req. |
| !class=unsortable|Code Cubes | | !class=unsortable|Code Cubes |
| !class=unsortable|Robobot Arm{{ou}}r? | | !class=unsortable|Robobot Armor? |
| | !class=unsortable|Bosses/Mid-Bosses |
| !class=unsortable|Notes | | !class=unsortable|Notes |
| |- | | |- |
| |[[Patched Plains - Stage 1|Stage 1]] | | |{{center|[[File:KPR Patched Plains Stage 1 select.png|200px]]<br>[[Patched Plains - Stage 1|Stage 1]]}} |
| |N/A | | |N/A |
| |1 | | |1 |
| |{{N}} | | |{{N}} |
| | |[[Clanky Woods]] (chase) |
| |This stage contains tutorial signs. | | |This stage contains tutorial signs. |
|
| |
| |- | | |- |
| |[[Patched Plains - Stage 2|Stage 2]] | | |{{center|[[File:KPR Patched Plains Stage 2 select.png|200px]]<br>[[Patched Plains - Stage 2|Stage 2]]}} |
| |Complete Stage 1 | | |Complete Stage 1. |
| |3 | | |3 |
| |{{Y}} | | |{{Y}} |
| | |[[Invader Armor]] |
| | | | | |
|
| |
| |- | | |- |
| |[[Patched Plains - Stage 3|Stage 3]] | | |{{center|[[File:KPR Patched Plains Stage 3 select.png|200px]]<br>[[Patched Plains - Stage 3|Stage 3]]}} |
| |Complete Stage 2 | | |Complete Stage 2. |
| |3 | | |3 |
| |{{Y}} | | |{{Y}} |
| | | | |[[Gigavolt]] |
| | | |A [[HAL Room]] is hidden in this stage. |
| |- | | |- |
| |[[Patched Plains - Stage 4|Stage 4]] | | |{{center|[[File:KPR Patched Plains Stage 4 select.png|200px]]<br>[[Patched Plains - Stage 4|Stage 4]]}} |
| |Complete Stage 3 | | |Complete Stage 3. |
| |3 | | |3 |
| |{{Y}} | | |{{Y}} |
| | | | |[[King Doo]] |
| | | |A [[Smash Bros. room]] is hidden in this stage. |
| |- | | |- |
| |Stage 5: [[Clanky Woods]] | | |{{center|[[File:KPR Patched Plains Stage 5 select.png|200px]]<br>[[Patched Plains - Stage 5|Stage 5]]}} |
| |Collect # [[Code Cube]]s from prior Patched Plains stages and complete Stage 4. | | |Collect 4 [[Code Cube]]s from prior Patched Plains stages and complete Stage 4. |
| |0 | | |0 |
| |{{N}} | | |{{N}} |
| |Completing this stage unlocks [[Resolution Road]] | | |[[Clanky Woods]] |
| | | |Completing this stage unlocks [[Resolution Road]]. |
| |- | | |- |
| |[[Patched Plains - Stage EX|Stage 6 EX]] | | |{{center|[[File:KPR Patched Plains Stage 6 EX select.png|200px]]<br>[[Patched Plains - Stage 6 EX|Stage 6 EX]]}} |
| |Collect all Code Cubes from prior Patched Plains stages. | | |Collect all Code Cubes from prior Patched Plains stages. |
| |1 | | |1 |
| |{{Y}} | | |{{Y}} |
| | |[[Kibble Blade]] 2.0 |
| |This is an EX stage, so completing it is not required to finish the game. | | |This is an EX stage, so completing it is not required to finish the game. |
|
| |
| |} | | |} |
| | {{clear|right}} |
|
| |
|
| ===Stage 2=== | | ==In Meta Knightmare Returns== |
| [[File:Patched Plains 2.jpg|thumb|right|250px|Kirby finds his first emptied suit of [[Robobot Armor]] in Stage 2.]] | | All stages of Patched Plains are played in one sequence in [[Meta Knightmare Returns]] except for certain sections involving the [[Robobot Armor]]. Through this sequence, five [[Sticker (Kirby: Planet Robobot)|sticker]]s can be found. |
| '''Section 1:''' The stage begins on a series of slanted metal catwalks. Kirby must use a 3D Warp Star to jump to each one successively, then proceed through the door to the next section.
| |
|
| |
|
| '''Section 2:''' The door leads to an elevated walkway, where a [[Parasol Waddle Dee]] can be seen just to the right. From there, the path continues down a pipe-laden hillside, past some bomb-wielding enemies and a [[Bomber]] waiting to fall on Kirby's head. Eventually, a clearing is reached where Bandana Waddle Dee provides an [[Assist Star]], and two [[Copy Pedestal]]s can be accessed for the [[Fire]] and [[Sword]] abilities. Further right, a flat bridge appears, where an armada of invaders can be seen in the background. One of them is dropped in Kirby's location, and engages him in a fight. This [[Invader Armor]] consists of a pilot inside a larger mech suit, and attacks with punches and slams. Defeating it launches the pilot out of the suit, leaving it behind for Kirby to utilize instead. As he jumps into the seat, the suit transforms, changing into a smoother pink bot, the [[Robobot Armor]]. From there, the path leads further right past a number of enemies and obstacles, all of which are easily dispatched by the armor's attacks. The door to the next section can be found at the end, which can only be opened using the armor.
| | In addition, many enemies are re-sized - changing their [[Health]] and also possibly movement speed - and [[Clanky Woods]] and the [[Mid-Bosses]] are changed to their 2.0 forms. |
|
| |
|
| '''Section 3:''' The door leads to an interior area, where more enemies and obstacles wait to be plowed through. Among them are more Waddle Dees carrying spike bars. These can now be dispatched using that armor's superior strength. Along the way, Kirby can try out a number of different modes for the armor, including [[Fire (Robobot Armor)|Fire]], [[Spark (Robobot Armor)|Spark]] and [[Beam (Robobot Armor)|Beam]]. At the end of the path, a 3D Warp Star appears to take Kirby into another hollow barrel. Unlike before, there is no way for the Armor to cross the gap in the foreground as, unlike Kirby, it cannot hover indefinitely. Inside the first cylinder is a Code Cube. From there, the path resumes in the foreground, past many more enemies, until a crank elevator is reached at the right end of the path. Kirby can use the armor to crank it and proceed upward to reach the door to the next section.
| | Finally, in place of [[Code Cube]]s, side areas yield Meta-Points, which can be used to power [[Meta Knight]]'s special abilities. |
|
| |
|
| '''Section 4:''' The door leads to an interior area in the background. Kirby must progress to the left to reach the foreground, where he will then go right. Here, he can use the suit to crank some platforms into place, moving them between the two planes. The path then returns to the background on order to progress upward to eventually reach a blue docking station. Here, Kirby can exit his armor, which he will need to do in order to fit through the tube that leads to the next section.
| | ==Gallery== |
| | <gallery> |
| | KPR Patched Plains Level Hub.png|A portion of the Patched Plains Stage Select area |
| | KPR Clanky Woods battle 1.png|Kirby contends with [[Clanky Woods]] on the semi-circular platform |
| | Pupupu Train Patched Plains Head Mark Sticker.jpg|"Patched Plains" head mark sticker from the "Kirby Pupupu Train" 2017 events |
| | Pupupu Train Head Mark Acrylic Keychains.jpg|Acrylic keychains of the head mark stickers from the "Kirby Pupupu Train" 2017 events |
| | </gallery> |
|
| |
|
| '''Section 5:''' The tube leads to a small chamber with another tube and a [[Rocky]] on top of it. Through the tube is an open sloped area leading down to the right. From there, Kirby will have to contend with [[Gigatzo]]s suspended on wooden beams. Along the path, a bomb block barrier can be opened up to reveal an unused suit of Robobot Armor. Using this armor, Kirby can smash the beams to get rid of the Gigatzos perched on them. Kirby should be careful, however, since one of the beams has a [[Treasure Chest]] on it that contains another Code Cube. From there, the door to the next section is just to the right.
| | ==Names in other languages== |
| | | {{Names |
| '''Section 6:''' The door leads to an interior area, with a path downward blocked by a platform with a screw in it. Kirby can use the armor to unscrew the platform and move forward. From there, more platforms with screws in them appear to the right, but these ones rotate instead of disappearing when screwed. Using these will allow Kirby to progress further right, eventually leading to an area with a platform held up by a large chain. Kirby will need either the [[Sword (Robobot Armor)|Sword]] or [[Cutter (Robobot Armor)|Cutter]] mode to cut this chain, which will cause the platform to fall and open up a new path. From here, Kirby will need to disembark from the armor again to fit through a tube and make a path for the armor to move forward through an optional doorway, leading to the third Code Cube. From there, another crank elevator leads to the stage exit, hidden behind a bomb block barrier.
| | |ja=プレイン プロプトン |
| | | |jaR=Purein Puroputon |
| ====Enemies, Mid-bosses, and Abilities====
| | |jaM=Plain Proptom<br><small>This is the official English rendering of the Japanese name in-game. The Japanese rendering of "Proptom" is one character transposition away from [[wikipedia:ja:プロンプト|プロンプト]] or "prompt", as in the [[wikipedia:command prompt|command prompt]] that displays on starting up older computers.</small> |
| {| style="border: 3px solid #E47575; {{round}};background: #F69D99" cellspacing="2"
| | |fr=Plaine Pixel |
| ! width="420px" | '''Regular Enemies'''
| | |frM=Pixel Plain |
| ! width="180px" | '''Mid-Boss'''
| | |it=Sentiero Processore |
| |- bgcolor="E47575" | | |itM=Processor Path |
| | | | |es=Pradera Períferica |
| {{col-begin}}
| | |esM=Peripheral Praire |
| {{col-break|width=33%}}
| | |ko=패치드 플레인즈 |
| *[[Blade Knight]]
| | |koR=Paechideu Peulleinjeu |
| *[[Bomber]]
| | |koM=Patched Plains |
| *[[Bronto Burt]]
| | |de=Ruhe auf dem Radar |
| *[[Broom Hatter]]
| | |deM=Rest on the Radar |
| *[[Waddle Dee|Cannon Mech Waddle Dee]]
| | }} |
| *[[Cappy]]
| |
| *[[Dekabu]]
| |
| {{col-break|width=33%}}
| |
| *[[Galbo]]
| |
| *[[Gigatzo]]
| |
| *[[Gordo]]
| |
| *[[Kabu]]
| |
| *[[Waddle Dee|Mech Waddle Dee]]
| |
| *[[Parasol Waddle Dee]]
| |
| *[[Poppy Bros. Jr.]]
| |
| {{col-break|width=34%}}
| |
| *[[Rocky]]
| |
| *[[Shotzo]]
| |
| *[[Sir Kibble]]
| |
| *[[Sparky]]
| |
| *[[Waddle Dee]]
| |
| *[[Waddle Doo]]
| |
| {{col-end}}
| |
| |
| |
| {{col-begin|width=50%}}
| |
| *[[Invader Armor]]
| |
| {{col-end}}
| |
| |-
| |
| ! width="300px"| '''Normal Abilities'''
| |
| ! width="300px" | '''Robobot Armor Modes'''
| |
| |- bgcolor="#E47575"
| |
| |
| |
| {{col-begin}}
| |
| {{col-break|width=50%}}
| |
| *[[Beam]]
| |
| *[[Bomb]]
| |
| *[[Crash]]
| |
| *[[Cutter]]
| |
| {{col-break|width=50%}}
| |
| *[[Fire]]
| |
| *[[Parasol (ability)|Parasol]]
| |
| *[[Stone]]
| |
| *[[Sword]]
| |
| {{col-end}}
| |
| |
| |
| {{col-begin}}
| |
| {{col-break|width=50%}}
| |
| *[[Beam (Robobot Armor)|Beam]]
| |
| *[[Bomb (Robobot Armor)|Bomb]]
| |
| *[[Cutter (Robobot Armor)|Cutter]]
| |
| {{col-break|width=50%}}
| |
| *[[Fire (Robobot Armor)|Fire]]
| |
| *[[Spark (Robobot Armor)|Spark]]
| |
| *[[Sword (Robobot Armor)|Sword]]
| |
| {{col-end}}
| |
| |}
| |
| | |
| ===Stage 3===
| |
| [[File:Patched Plains 3.jpg|thumb|right|250px|Kirby prepares to bomb a rather large [[Chip]] in Stage 3.]]
| |
| '''Section 1:''' The stage begins at a train station. Just to the right, the back of the train can be seen. Kirby boards the train just as it is about to leave to proceed to the next section.
| |
| | |
| '''Section 2:''' Inside the train, Kirby finds himself in a small room with a [[Battery]]. To the right, a sawblade device sits in front of an obstruction. Kirby can use the battery to power the device and make a way forward. From there, the path opens up to a wide hall, where a [[Pillah]] attempts to pelt Kirby with its pills. These can be swallowed to grant Kirby the first new ability, [[Doctor]]. This will allow him to throw pills of his own, along with other medical surprises. As the path continues to the right, Kirby can hop between foreground and background at various points to avoid spiky floors. Further in, Kirby will need to carry another battery past a golden bullet-shaped obstacle, which threatens to either splat him on the screen, or knock him out of the train through a window. Past another sawblade, two container devices can be seen, one of which holds a Code Cube. The one in the foreground holds a [[Gordo]] and also has an input for a battery. If Kirby got the second battery from the previous area, he can activate the device to cause the Gordo to swap with the Code Cube. From there, past a [[Clown Acrobot]], the door to the next section can be reached... though there appears to be another path.
| |
| | |
| '''Section 3:''' The door leads to another open hallway area. In the background is a battery, which Kirby cannot reach unless he had started there. In the next room is another swapper device, which contains an optional doorway that leads to a Code Cube and... something else. The path continues to the right past this device, through more enemies and obstacles. Along the way, a shaft can be seen with a large silver block at the top. This can be accessed if Kirby has acquired some special equipment to deal with it. Otherwise, the door to the next section is at the right end of the train car.
| |
| | |
| '''Section 4:''' The door leads to another train car, with the path leading right past some [[Shotzo]]s that can be blocked using bomb blocks. From there, the path goes up some crates past a large silver block with handles and a Gigatzo. Kirby can use the Robobot Armor to pick up and carry this block. After invalidating the Gigatzo, another silver handled block can be seen further right blocking a swapper device with another Code Cube inside. To power the device, a battery can be found further right under a platform holding a docking station. At the right end of the path, the front car of the train is finally reached, with the operating Waddle Dee asleep at the helm. A switch can be pressed to reveal a Warp Star that will carry Kirby (and his armor) off the train and to the next section.
| |
| | |
| '''Section 5:''' The Warp Star lands Kirby in another green plain area. Past some enemies and up a steep hill, a platform waits to be unscrewed, leading to an open area. Here, Kirby is ambushed by two [[Volte]]s. To defeat them, Kirby must jump on their heads and unscrew the bolts on them. Once both are defeated, a giant robot appears in the background, bearing a similar look to the smaller Voltes. Known as [[Gigavolt]], this colossus attacks Kirby by slamming its hands into the ground. Kirby has to defeat it by blowing off the covering on the hands and unscrewing them. Once both hands are gone, Kirby proceeds to the head and dismantles it. Once defeated, the stage exit appears for Kirby to enter.
| |
| | |
| =====Secret Area=====
| |
| {{spoilers}}
| |
| In Section 4, there is a hidden path that leads to a [[HAL Room]]. To reach it, Kirby must activate the Warp Star at the end of the train, then backtrack without the Robobot Armor. A new pathway will be revealed. From there, the HAL Room leads into Section 5.
| |
| | |
| ====Enemies, Mid-bosses, and Abilities====
| |
| {| style="border: 3px solid #E47575; {{round}};background: #F69D99" cellspacing="2"
| |
| ! width="420px" | '''Regular Enemies'''
| |
| ! width="180px" | '''Mid-Boss'''
| |
| |- bgcolor="E47575"
| |
| |
| |
| {{col-begin}}
| |
| {{col-break|width=33%}}
| |
| *[[Big Chip]]
| |
| *[[Bronto Burt]]
| |
| *[[Chip]]
| |
| *[[Clown Acrobot]]
| |
| *[[Flamer]]
| |
| *[[Galbo]]
| |
| {{col-break|width=33%}}
| |
| *[[Gigatzo]]
| |
| *[[Gordo]]
| |
| *[[Kabu]]
| |
| *[[Pillah]]
| |
| *[[Poppy Bros. Jr.]]
| |
| {{col-break|width=34%}}
| |
| *[[Propeller]]
| |
| *[[Sir Kibble]]
| |
| *[[Sparky]]
| |
| *[[Volte]]
| |
| *[[Waddle Dee]]
| |
| *[[Waddle Doo]]
| |
| {{col-end}}
| |
| |
| |
| {{col-begin|width=50%}}
| |
| *[[Gigavolt]]
| |
| {{col-end}}
| |
| |-
| |
| ! width="420px"| '''Abilities'''
| |
| ! width="300px" | '''Robobot Armor Modes'''
| |
| |- bgcolor="#E47575"
| |
| |
| |
| {{col-begin}}
| |
| {{col-break|width=50%}}
| |
| *[[Beam]]
| |
| *[[Bomb]]
| |
| *[[Circus]]
| |
| *[[Cutter]]
| |
| *[[Doctor]]
| |
| {{col-break|width=50%}}
| |
| *[[Fire]]
| |
| *[[Hammer]]
| |
| *[[Jet]]
| |
| *[[Mirror]]
| |
| {{col-end}}
| |
| |
| |
| {{col-begin}}
| |
| {{col-break|width=50%}}
| |
| *[[Beam (Robobot Armor)|Beam]]
| |
| *[[Bomb (Robobot Armor)|Bomb]]
| |
| *[[Cutter (Robobot Armor)|Cutter]]
| |
| {{col-break|width=50%}}
| |
| *[[Fire (Robobot Armor)|Fire]]
| |
| *[[Spark (Robobot Armor)|Spark]]
| |
| {{col-end}}
| |
| |}
| |
| | |
| ===Stage 4===
| |
| [[File:Patched Plains 4.jpg|thumb|right|250px|Kirby climbs toward a bothersome [[Spynum]] in the laboratory in Stage 4.]]
| |
| '''Section 1:''' The stage begins outside a screw-shaped laboratory, as the camera ominously zooms in toward Kirby's position at the bottom of a walkway leading to the entrance. From there, the pink puff will need to make his way up the walkway, which wraps around the building for a brief moment until reaching the door.
| |
| | |
| '''Section 2:''' The door leads to the laboratory interior, garnished with green tubes and flasks. The path leads to the right past some laser security and a [[Clubmech]]. The door to the next section can be found up a grate, which Kirby can climb.
| |
| | |
| '''Section 3:''' The door leads to an open area, with a large screen in the background. Pressing a switch to the right turns it on, revealing a series of symbols suggesting a path to a treasure chest. The chest contains a Code Cube, so Kirby must follow the instructions in order to get the cube. In the process, there will be several enemies and obstacles in the way. The door to the next section can be found after the chest is reached.
| |
| | |
| '''Section 4:''' The door leads to an area of the lab consisting primarily of grates and suspended platforms. Kirby will have to climb past enemies and other hazards as he moves up and to the right. In the middle of a field of lasers is an [[Invincibility Candy]] that will allow Kirby to easily rush through the rest of the area. The door to the next section can be found just to the right past several enemies, but there is also a Code Cube through a spike pit below.
| |
| | |
| '''Section 5:''' The door leads to an open area with a path to the right past numerous enemies. Bandana Waddle Dee appears to provide an Assist Star. Further right, The Mid-Boss [[King Doo]] appears in a more narrow hallway. If Kirby is still under the effects of Invincibility Candy, King Doo does not stand a chance. Once defeated, the king can be swallowed for the [[Beam]] ability. The path continues upward and to the right past more lasers. An electrical fork can be seen sticking out of the ground, which can be surged by any electric-based ability. This will cause electricity to surge through the wire and open a door to the right, allowing access to a Sticker. The door to the next section can be found just above.
| |
| | |
| '''Section 6:''' The door leads to an open hallway which leads to the right. In a sub-chamber through a tube, a suit of Robobot Armor can be manned. Using this suit, Kirby can carry a large block with a piece of wire inside. If he places it in the right locations, he can open a door to a Code Cube by electrifying the wire. From there, the path leads upward past more lasers, with the stage exit located just above.
| |
| | |
| ====Enemies, Mid-bosses, and Abilities====
| |
| {| style="border: 3px solid #E47575; {{round}};background: #F69D99" cellspacing="2"
| |
| ! width="420px" | '''Regular Enemies'''
| |
| ! width="180px" | '''Mid-Boss'''
| |
| |- bgcolor="E47575" | |
| |
| |
| {{col-begin}}
| |
| {{col-break|width=33%}}
| |
| *[[Bronto Burt]]
| |
| *[[Chilly]]
| |
| *[[Clubmech]]
| |
| *[[Galbo]]
| |
| {{col-break|width=33%}}
| |
| *[[Knuckle Joe]]
| |
| *[[Propeller]]
| |
| *[[Shotzo]]
| |
| {{col-break|width=34%}}
| |
| *[[Sparky]]
| |
| *[[Spynum]]
| |
| *[[Waddle Doo]]
| |
| {{col-end}}
| |
| |
| |
| {{col-begin|width=50%}}
| |
| *[[King Doo]]
| |
| {{col-end}}
| |
| |-
| |
| ! width="420px"| '''Abilities'''
| |
| ! width="300px" | '''Robobot Armor Modes'''
| |
| |- bgcolor="#E47575" | |
| |
| |
| {{col-begin}}
| |
| {{col-break|width=50%}}
| |
| *[[Archer]]
| |
| *[[Beam]]
| |
| *[[Cutter]]
| |
| *[[Fighter]]
| |
| {{col-break|width=50%}}
| |
| *[[Fire]]
| |
| *[[Ice]]
| |
| *[[Spark]]
| |
| {{col-end}}
| |
| |
| |
| {{col-begin}}
| |
| {{col-break|width=50%}}
| |
| *[[Beam (Robobot Armor)|Beam]]
| |
| {{col-break|width=50%}}
| |
| *[[Spark (Robobot Armor)|Spark]]
| |
| {{col-end}}
| |
| |} | |
| | |
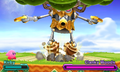
| ===Stage 5 (Boss: [[Clanky Woods]])===
| |
| [[File:Clanky Woods Fight 1.jpg|thumb|right|250px|Kirby contends with [[Clanky Woods]] on the semi-circular platform.]]
| |
| To enter this stage, Kirby needs to have collected at least 4 [[Code Cube]]s from the previous stages to disrupt the firewall.
| |
| | |
| The stage begins in a small metal chamber with the green fields and a lake out in the background. Kirby will need to enter a pipe to reach an area in the foreground where Bandana Waddle Dee will give him an item. Another tube leads to a lower chamber where the [[Spark]], [[Doctor]] and [[Cutter]] abilities are available on [[Copy Pedestal]]s. The next tube take Kirby to the ground floor, where a very large ominous red door with the [[Haltmann Works Company]] logo on it lies. As Kirby approaches, spotlights on the door activate, point at him, then the door opens to let him in.
| |
| | |
| The door leads to a rather bare semi-circular ring platform high up in the sky. Kirby walks on stage and looks around, when Clanky Woods appears behind him, jumping onto the platform. It lets out a roar, and the fight begins.
| |
| | |
| The fight itself take place in three distinct phases. The first is a straightforward fight on the platform as Clanky fires missiles at him and drills into the ground to hurl boulders. The second phase happens when Clanky drops down and brings up the other half of the ring platform, torning the fight into a chase around the ring. The third phase begins when Clanky, nearly depleted on health, raises most of the ring sections into walls to prevent Kirby from going anywhere, then tries lobbing attacks at him from the center platform.
| |
| | |
| Once Clanky is defeated, it breaks down, and becomes unable to move, crying tears of oil. From there, the first of the Haltmann Works' UFO legs is damaged, and Kirby can move on to the next level, [[Resolution Road]].
| |
| | |
| ===Stage 6 EX===
| |
| [[File:Patched Plains EX.jpg|thumb|right|250px|Kirby duels with [[Kibble Blade]] 2.0 on top of a train in Stage EX.]]
| |
| '''Section 1:''' The stage begins in the laboratory, as Kirby falls down a vertical shaft directly into a suit of Robobot Armor. After unscrewing a barrier, a crank elevator is revealed which leads back upward. The door to the next section can be found at the top.
| |
| | |
| '''Section 2:''' The door leads to the plains area, where Kirby must progress through a series of narrow tunnels. Here, a number of challenges relating to the [[Bomb (Robobot Armor)|Bomb]] Mode are met, which will unlock various goodies. At the bottom, a number of platforms can be shifted between the foreground and background by means of cranks. The door to the next section can be reached through a narrow passageway, belo one last bomb challenge.
| |
| | |
| '''Section 3:''' The door leads to a train area, where Kirby must store away the Robobot Armor to progress forward. Here is where [[Simirror]] and the re-introduced [[Mirror]] ability are first encountered. Along the path, a number of obstacles need to be avoided, but Mirror can be used to reflect a lot of the projectiles. The door to the next section can be found at the right end of the path.
| |
| | |
| '''Section 4:''' Back in the plains, a [[Rocky]] greets Kirby by sliding down a slope toward him. Here, a number of tilted cylinders are traversed. One of them has a Sticker on the outside, so Kirby will need to find a way to get out there if he wants that sticker. The door to the next section is guarded by a [[Noddy]], so here could be an appropriate place for a quick nap.
| |
| | |
| '''Section 5:''' The door leads back to the laboratory, where Kirby must now traverse a grated area full of hazards. At the end of this long and painful road is a tube leading to the next section.
| |
| | |
| '''Section 6:''' The tube leads to another train section. In the next room, Kirby can pick between the [[Archer]] and [[Mirror]] abilities. Moving forward, he meets Bandana Waddle Dee, who gives him another Assist Star. From there, he climbs a ladder leading onto the roof of the train. Progressing left past some collectibles, Kirby must then fight [[Kibble Blade]] 2.0 as the wind continuously pushes him to the left. Once Kibble Blade is defeated, Kirby can proceed further left to re-enter the train. In the last car, he can Push a switch to obtain a number of goodies, including the one Code Cube in this stage. From there, a tube leads to the back of the car, where the stage exit can be reached.
| |
| | |
| ====Enemies, Mid-bosses, and Abilities====
| |
| {| style="border: 3px solid #E47575; {{round}};background: #F69D99" cellspacing="2"
| |
| ! width="420px" | '''Regular Enemies'''
| |
| ! width="180px" | '''Mid-Boss'''
| |
| |- bgcolor="E47575"
| |
| |
| |
| {{col-begin}}
| |
| {{col-break|width=33%}}
| |
| *[[Blade Knight]]
| |
| *[[Bronto Burt]]
| |
| *[[Chilly]]
| |
| *[[Labo]]
| |
| *[[Dekabu]]
| |
| *[[Gordo]]
| |
| {{col-break|width=33%}}
| |
| *[[Hot Head]]
| |
| *[[Kabu]]
| |
| *[[Noddy]]
| |
| *[[Poppy Bros. Jr.]]
| |
| *[[Rocky]]
| |
| {{col-break|width=34%}}
| |
| *[[Scarfy]]
| |
| *[[Shotzo]]
| |
| *[[Simirror]]
| |
| *[[Sir Kibble]]
| |
| *[[Waddle Dee]]
| |
| {{col-end}}
| |
| |
| |
| {{col-begin|width=50%}}
| |
| *[[Kibble Blade]] 2.0
| |
| {{col-end}}
| |
| |-
| |
| ! width="420px"| '''Abilities'''
| |
| ! width="180px" | '''Robobot Armor Modes'''
| |
| |- bgcolor="#E47575"
| |
| |
| |
| {{col-begin}}
| |
| {{col-break|width=50%}}
| |
| *[[Archer]]
| |
| *[[Bomb]]
| |
| *[[Cutter]]
| |
| *[[Fire]]
| |
| *[[Ice]]
| |
| {{col-break|width=50%}}
| |
| *[[Mirror]]
| |
| *[[Sleep]]
| |
| *[[Stone]]
| |
| *[[Sword]]
| |
| {{col-end}}
| |
| |
| |
| {{col-begin}}
| |
| *[[Bomb (Robobot Armor)|Bomb]]
| |
| {{col-end}}
| |
| |}
| |
|
| |
|
| ==Trivia==
| | {{Navbox-KPR}} |
| [[File:Patched Plains Stage Select.jpg|thumb|right|250px|A portion of the Patched Plains Stage Select area.]]
| |
| *The song that plays throughout Stage 4 is a remix of the [[Sand Canyon]] 3 theme theme from ''[[Kirby's Dream Land 3]]''.
| |
| *Two songs from Stage EX were taken directly from ''[[Kirby Air Ride]]''.
| |
|
| |
|
| <br clear=all>
| | [[Category:Popstar locations]] |
| {{KirbyPR}}
| |
| [[Category:Places]] | |
| [[Category:Levels in Kirby: Planet Robobot]]
| |
| [[Category:Pop Star locations]]
| |