Wild World: Difference between revisions
m (→Stage 5) |
m (Empty space fix) |
||
| (28 intermediate revisions by 14 users not shown) | |||
| Line 1: | Line 1: | ||
{{Infobox-KTDLevel | {{Infobox-KTDLevel | ||
|image=[[File:Wild World Entry. | |image=[[File:Wild World Entry.png|300px]] | ||
|caption=Screenshot from ''Kirby: Triple Deluxe''. | |caption=Screenshot from ''Kirby: Triple Deluxe''. | ||
|level=4 | |level=4 | ||
| Line 6: | Line 6: | ||
|exstages=1 | |exstages=1 | ||
|sunstone=19 | |sunstone=19 | ||
|mid-boss=[[Hornhead]] (4-1), [[Grand Wheelie]] (4-2), [[Ace | |mid-boss=[[Hornhead]] (4-1), [[Grand Wheelie]] (4-2), [[Ace Phanta]] (4-3), [[Blocky]] (4-4), [[Flame Galboros]] (4-5), [[Bonkers]] DX (4-EX) | ||
|hypernova=4-3 | |hypernova=4-3 | ||
|boss=[[Coily Rattler]] | |boss=[[Coily Rattler]] | ||
| Line 12: | Line 12: | ||
|next=[[Endless Explosions]] | |next=[[Endless Explosions]] | ||
}} | }} | ||
'''Wild World''' is the fourth level of ''[[Kirby: Triple Deluxe]]'' and the fourth of the six lands in the kingdom of [[Floralia]]. It has five regular stages, a boss stage, and an EX stage. The level is characterized by dense vivid jungles, a haunted mansion, and a sandy temple complex. There are nineteen [[Sun Stone]]s to collect in this level, with two in Stage EX, three each in Stages 1, 2 and 4, and four each in Stages 3 and 5. The boss is [[Coily Rattler]]. | '''Wild World''' is the fourth level of ''[[Kirby: Triple Deluxe]]'' and the fourth of the six lands in the kingdom of [[Floralia]]. It has five regular stages, a [[boss]] stage, and an EX stage. The level is characterized by dense vivid jungles, a haunted mansion, and a sandy temple complex. There are nineteen [[Sun Stone]]s to collect in this level, with two in Stage EX, three each in Stages 1, 2, and 4, and four each in Stages 3 and 5. The boss is [[Coily Rattler]]. | ||
{{clear|left}} | |||
==Stages== | ==Stages== | ||
For details on each stage individually, click the name of the stage. | For details on each stage individually, click the name of the stage. | ||
{| class="sortable wikitable" border=1 cellpadding=2 | {| class="sortable wikitable" border=1 cellpadding=2 | ||
| Line 22: | Line 22: | ||
!class=unsortable|Sun Stones | !class=unsortable|Sun Stones | ||
!class=unsortable|Hypernova? | !class=unsortable|Hypernova? | ||
!class=unsortable|Boss/Mid-Boss | |||
!class=unsortable|Notes | !class=unsortable|Notes | ||
|- | |- | ||
|[[Wild World - Stage 1|Stage 1]] | |{{center|[[File:KTD Wild World Stage 1 select.png|200px]]<br>'''[[Wild World - Stage 1|Stage 1]]'''}} | ||
|N/A | |N/A | ||
|3 | |3 | ||
|{{N}} | |{{N}} | ||
|[[Hornhead]] | |||
| | | | ||
|- | |- | ||
|[[Wild World - Stage 2|Stage 2]] | |{{center|[[File:KTD Wild World Stage 2 select.png|200px]]<br>'''[[Wild World - Stage 2|Stage 2]]'''}} | ||
| | |Complete Stage 1. | ||
|3 | |3 | ||
|{{N}} | |{{N}} | ||
|[[Grand Wheelie]] | |||
| | | | ||
|- | |- | ||
|[[Wild World - Stage 3|Stage 3]] | |{{center|[[File:KTD Wild World Stage 3 select.png|200px]]<br>'''[[Wild World - Stage 3|Stage 3]]'''}} | ||
| | |Complete Stage 2. | ||
|4 | |4 | ||
|{{Y}} | |{{Y}} | ||
|[[Ace Phanta|King Phanta]] | |||
| | | | ||
|- | |- | ||
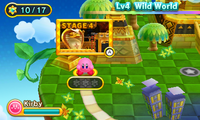
|[[Wild World - Stage 4|Stage 4]] | |{{center|[[File:KTD Wild World Stage 4 select.png|200px]]<br>'''[[Wild World - Stage 4|Stage 4]]'''}} | ||
| | |Complete Stage 3. | ||
|3 | |3 | ||
|{{N}} | |{{N}} | ||
|[[Blocky]] | |||
| | | | ||
|- | |- | ||
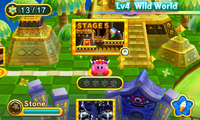
|[[Wild World - Stage 5|Stage 5]] | |{{center|[[File:KTD Wild World Stage 5 select.png|200px]]<br>'''[[Wild World - Stage 5|Stage 5]]'''}} | ||
| | |Complete Stage 4. | ||
|4 | |4 | ||
|{{N}} | |{{N}} | ||
|[[Flame Galboros]] | |||
| | | | ||
|- | |- | ||
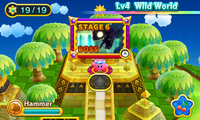
|Stage 6 | |{{center|[[File:KTD Wild World Stage 6 select.png|200px]]<br>'''[[Wild World - Stage 6|Stage 6]]'''}} | ||
|Collect | |Collect 8 [[Sun Stone]]s from prior Wild World stages and complete Stage 5. | ||
|0 | |0 | ||
|{{N}} | |{{N}} | ||
|Completing this stage unlocks [[Endless Explosions]] | |[[Coily Rattler]] | ||
|Completing this stage unlocks [[Endless Explosions]]. | |||
|- | |- | ||
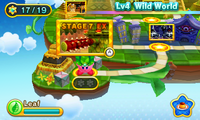
|[[Wild World - Stage EX|Stage 7 EX]] | |{{center|[[File:KTD Wild World Stage 7 EX select.png|200px]]<br>'''[[Wild World - Stage 7 EX|Stage 7 EX]]'''}} | ||
| | |Collect all prior Wild World Sun Stones. | ||
|2 | |2 | ||
|{{N}} | |{{N}} | ||
|[[Bonkers]] DX | |||
|This is an EX stage, so completing it is not required to finish the game. | |This is an EX stage, so completing it is not required to finish the game. | ||
|} | |} | ||
== | ==In Dededetour!== | ||
[[ | All stages of Wild World are played in one sequence in [[Dededetour!]] except for [[Wild World - Stage 7 EX|Stage EX]] and the sections of stages where [[Hypernova]] is used. Through this sequence, 3 [[Keychain]]s can be found. | ||
In addition, many enemies are re-sized - changing their [[Health]] and also possibly movement speed - and [[Coily Rattler]] and the [[Mid-Bosses]] are changed to their DX forms. | |||
Finally, in place of [[Sun Stone]]s, Warp Holes can be found in many areas allowing [[King Dedede]] to skip parts of the stages. In Wild World, there are 4 Warp Holes in total. | |||
== | ==Names in other languages== | ||
{{Names | |||
|ja=ワイルド ワールド | |||
|jaR=Wairudo Wārudo | |||
|jaM=Wild World | |||
|fr=Univers Ubuesque | |||
|frM=Ubiquitous Universe | |||
|de=Hüter des Hochlands | |||
|deM=Guardian of the Highlands | |||
|it=Rovine Rocciose | |||
|itM=Rocky Ruins | |||
|ko=와일드 월드 | |||
|koR=Waildeu Woldeu | |||
|koM=Wild World | |||
|es=Ruta Recóndita | |||
{ | |esM=Recondite Route | ||
}} | |||
| | |||
| | |||
| | |||
| | |||
| | |||
| | |||
{{clear}} | |||
{{Navbox-KTD}} | |||
{{ | |||
[[Category:Places]] | [[Category:Places]] | ||
[[Category:Levels in Kirby: Triple Deluxe]] | [[Category:Levels in Kirby: Triple Deluxe]] | ||
[[Category:Floralia | [[Category:Floralia locations]] | ||
[[Category:Popstar locations]] | |||
Latest revision as of 20:50, 17 December 2023
| ||||||||||||||||||||
| ||||||||||||||||||||
|
| ||||||||||||||||||||
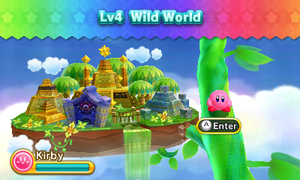
Wild World is the fourth level of Kirby: Triple Deluxe and the fourth of the six lands in the kingdom of Floralia. It has five regular stages, a boss stage, and an EX stage. The level is characterized by dense vivid jungles, a haunted mansion, and a sandy temple complex. There are nineteen Sun Stones to collect in this level, with two in Stage EX, three each in Stages 1, 2, and 4, and four each in Stages 3 and 5. The boss is Coily Rattler.
Stages[edit]
For details on each stage individually, click the name of the stage.
| Stage | Unlock Req. | Sun Stones | Hypernova? | Boss/Mid-Boss | Notes |
|---|---|---|---|---|---|
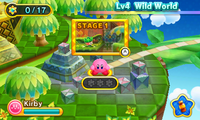
| N/A | 3 | Hornhead | |||
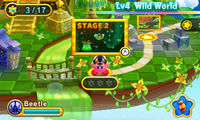
| Complete Stage 1. | 3 | Grand Wheelie | |||
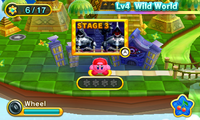
| Complete Stage 2. | 4 | King Phanta | |||
| Complete Stage 3. | 3 | Blocky | |||
| Complete Stage 4. | 4 | Flame Galboros | |||
| Collect 8 Sun Stones from prior Wild World stages and complete Stage 5. | 0 | Coily Rattler | Completing this stage unlocks Endless Explosions. | ||
| Collect all prior Wild World Sun Stones. | 2 | Bonkers DX | This is an EX stage, so completing it is not required to finish the game. |
In Dededetour![edit]
All stages of Wild World are played in one sequence in Dededetour! except for Stage EX and the sections of stages where Hypernova is used. Through this sequence, 3 Keychains can be found.
In addition, many enemies are re-sized - changing their Health and also possibly movement speed - and Coily Rattler and the Mid-Bosses are changed to their DX forms.
Finally, in place of Sun Stones, Warp Holes can be found in many areas allowing King Dedede to skip parts of the stages. In Wild World, there are 4 Warp Holes in total.
Names in other languages[edit]
| Language | Name | Meaning |
|---|---|---|
| Japanese | ワイルド ワールド Wairudo Wārudo |
Wild World |
| French | Univers Ubuesque | Ubiquitous Universe |
| German | Hüter des Hochlands | Guardian of the Highlands |
| Italian | Rovine Rocciose | Rocky Ruins |
| Korean | 와일드 월드 Waildeu Woldeu |
Wild World |
| Spanish | Ruta Recóndita | Recondite Route |
