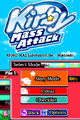
Kirby Mass Attack/gallery: Difference between revisions
m (→Videos) |
|||
| (14 intermediate revisions by 8 users not shown) | |||
| Line 265: | Line 265: | ||
KMA Angry Gravestone Buzzybat sprite.png|Buzzybat (angry gravestone) | KMA Angry Gravestone Buzzybat sprite.png|Buzzybat (angry gravestone) | ||
KMA Dead Buzzybat sprite.png|Buzzybat (dead) | KMA Dead Buzzybat sprite.png|Buzzybat (dead) | ||
KMA Child Ship.png|Child Ship | |||
Colossal Stactus Sprite.png|Colossal Stactus | Colossal Stactus Sprite.png|Colossal Stactus | ||
Giga Clanksprout.png|Giga Clanksprout | Giga Clanksprout.png|Giga Clanksprout | ||
| Line 276: | Line 277: | ||
KMA Li'lbat sprite.png|Li'lbat | KMA Li'lbat sprite.png|Li'lbat | ||
Mothership.png|Mothership | Mothership.png|Mothership | ||
Pricklebat.png|Pricklebat | Pricklebat.png|Pricklebat | ||
KMA Big Pricklebat sprite.png|Pricklebat (big) | KMA Big Pricklebat sprite.png|Pricklebat (big) | ||
| Line 310: | Line 310: | ||
KMA EOS Kracko Jr. sprite.png|Kracko Jr. | KMA EOS Kracko Jr. sprite.png|Kracko Jr. | ||
KMA KQ Max Flexer Sprite.png|Max Flexer | KMA KQ Max Flexer Sprite.png|Max Flexer | ||
KMA Sword Knight Sprite.png|Sword Knight | KMA Minimarx sprite.png|Minimarx | ||
KSSU Sword Knight Sprite (purple).png|Sword Knight | |||
</gallery> | </gallery> | ||
| Line 348: | Line 349: | ||
KMA Grapes sprite.png|Grapes (unused) | KMA Grapes sprite.png|Grapes (unused) | ||
KMA Hint in Bubble sprite.png|Hint in a bubble | KMA Hint in Bubble sprite.png|Hint in a bubble | ||
KMA Invincible Candy Sprite.png|Invincible Candy | |||
KMA Jumbo Candy Sprite.png|Jumbo Candy | KMA Jumbo Candy Sprite.png|Jumbo Candy | ||
KMA Key sprite.png|Key | KMA Key sprite.png|Key | ||
| Line 539: | Line 541: | ||
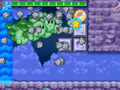
KMA Green Grounds Stage 8 screenshot 23.png|The Kirbys escape the cave thanks to a cannon | KMA Green Grounds Stage 8 screenshot 23.png|The Kirbys escape the cave thanks to a cannon | ||
Green Grounds Stage 9 KMA.png | Green Grounds Stage 9 KMA.png | ||
KMA Stage 9 Green Grounds 1.png|The Kirbys come across a [[Warwiggle]] at the beginning of the stage. | |||
KMA Stage 9 Green Grounds 2.png|Using the [[Jumbo Candy]], the Kirbys destroy some blocks. | |||
KMA Stage 9 Green Grounds 3.png| | |||
KMA Stage 9 Green Grounds 4.png|A [[Warwiggle]] can be instantly defeated with the Jumbo Candy. | |||
KMA Stage 9 Green Grounds 5.png|The Kirbys are sure to have complete destruction, even destroying the local plant life. | |||
KMA Stage 9 Green Grounds 6.png|The Kirbys come across a [[Key]] atop a floating platform. | |||
KMA Stage 9 Green Grounds 7.png| | |||
KMA Stage 9 Green Grounds 8.png| | |||
KMA Stage 9 Green Grounds 9.png|The Kirbys find their final obstacle, a [[Big Warwiggle]] who guards the exit. | |||
KMA Stage 9 Green Grounds 10.png|Big Warwiggle goes upside-down to crush more Kirbys. | |||
KMA Stage 9 Green Grounds 11.png|Big Warwiggle snakes through the dirt, trying to catch a Kirby or two off-guard. | |||
KMA Stage 9 Green Grounds 12.png|Unfortunenly, it looks like Big Warwiggle was the one caught off-guard here. | |||
Green Grounds Stage 10 KMA.png | Green Grounds Stage 10 KMA.png | ||
KMA Stage 10 Green Grounds 1.png|The Kirbys come across their first bit of water in the game. | |||
KMA Stage 10 Green Grounds 2.png|Some clams spawn some bubbles for Kirby so he has time to push the [[Heave-Ho Block]]. | |||
KMA Stage 10 Green Grounds 3.png|A whirlpool sucks up the Kirbys, sending them deeper into the area. | |||
KMA Stage 10 Green Grounds 4.png|The Kirbys try to dodge some [[Squister]], but it seems they are a little late. | |||
KMA Stage 10 Green Grounds 5.png|A lone [[Awasuki]] has been spotted. | |||
KMA Stage 10 Green Grounds 6.png|A familiar-looking formation of green apples appears. | |||
KMA Stage 10 Green Grounds 7.png|The Kirbys rampage through the stage through the usage of a [[Jumbo Candy]]. | |||
KMA Stage 10 Green Grounds 8.png| | |||
KMA Stage 10 Green Grounds 9.png|The Kirbys push a [[Heave-Ho Block]] to get to their next goal. | |||
KMA Stage 10 Green Grounds 10.png| | |||
KMA Stage 10 Green Grounds 11.png|A small tunnel gives the Kirbys a [[key]], and a chance to breathe. | |||
KMA Stage 10 Green Grounds 12.png|[[Gordo]]s fill the room as the Kirbys make haste for the exit. | |||
KMA Stage 10 Green Grounds 13.png| | |||
KMA Stage 10 Green Grounds 14.png| | |||
KMA Stage 10 Green Grounds 15.png|[[Tortletummy]] naps as the Kirbys approach. | |||
KMA Stage 10 Green Grounds 16.png|Tortletummy shoots electric shocks at Kirbys and uses currents to push them back. | |||
KMA Stage 10 Green Grounds 17.png|Tortletummy is now vulnerable to attack. | |||
KMA Stage 10 Green Grounds 18.png|Tortletummy fumes with rage as he sends out stronger attacks. | |||
KMA Stage 10 Green Grounds 19.png|When finally defeated, the Tortletummy turns into nothing but a few bubbles. | |||
KMA Stage 10 Green Grounds 20.png| | |||
KMA Stage 10 Green Grounds 21.png|A geyser carries the Kirby gang back to the surface, as well as the goal. | |||
KMA Whispy Woods.png|[[Whispy Woods]] | KMA Whispy Woods.png|[[Whispy Woods]] | ||
</gallery> | </gallery> | ||
| Line 547: | Line 582: | ||
Sandy Canyon KMA map.png | Sandy Canyon KMA map.png | ||
Sandy Canyon Stage 1 KMA.png | Sandy Canyon Stage 1 KMA.png | ||
Scoopy KMA | KMA Stage 1 Sandy Canyon 1.png|The Kirbys discover how quicksand works. | ||
KMA Stage 1 Sandy Canyon 2.png|A line is used so the Kirbys may get a [[Maxim Tomato]] before it sinks into the sand. | |||
KMA Stage 1 Sandy Canyon 3.png|The Kirbys attack a line of [[Stactus]]. | |||
KMA Stage 1 Sandy Canyon 4.png| | |||
KMA Stage 1 Sandy Canyon 5.png|After defeating another Stactus line, the Kirbys fall through a pit with the enemy. | |||
KMA Stage 1 Sandy Canyon 6.png| | |||
KMA Stage 1 Sandy Canyon 7.png|A [[Scoopy]] notices the Kirbys. | |||
KMA Stage 1 Sandy Canyon 8.png|A fearsome battle leads the Kirbys to test their touch-screen tapping ability. | |||
KMA Stage 1 Sandy Canyon 9.png|Deafeating the Scoopy creates a stream leading to the surface of the canyon. | |||
KMA Stage 1 Sandy Canyon 10.png|The spout pushes away the rock previously blocking the way. | |||
KMA Stage 1 Sandy Canyon 11.png|A [[Blish]] uses its water jets to push up some [[apple]]s. | |||
KMA Stage 1 Sandy Canyon 12.png|A flying fruit box is spotted. | |||
KMA Stage 1 Sandy Canyon 13.png|The Kirbys battle a [[Crazy Stactus]]. | |||
KMA Stage 1 Sandy Canyon 14.png| | |||
KMA Stage 1 Sandy Canyon 15.png| | |||
KMA Stage 1 Sandy Canyon 16.png|A [[Big Beanbon]] succumbs to the impenetrable force of the Kirbys. | |||
KMA Stage 1 Sandy Canyon 17.png|The Kirbys travel across a log to get to the next part of the level. | |||
KMA Stage 1 Sandy Canyon 18.png|A Spinwheel Flower is destroyed by the Kirbys. | |||
KMA Stage 1 Sandy Canyon 19.png| | |||
Sandy Canyon Stage 2 KMA.png | Sandy Canyon Stage 2 KMA.png | ||
Sandy Canyon Stage 3 KMA.png | Sandy Canyon Stage 3 KMA.png | ||
| Line 688: | Line 741: | ||
Kirby Quest KMA Chapter 1 9.png|Chapter 1 - Stage 9 | Kirby Quest KMA Chapter 1 9.png|Chapter 1 - Stage 9 | ||
Kirby Quest KMA Chapter 1 10.png|Chapter 1 - Stage 10 | Kirby Quest KMA Chapter 1 10.png|Chapter 1 - Stage 10 | ||
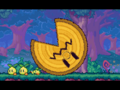
Kirby Quest KMA Chapter 1 end.png|Chapter 1 - | Kirby Quest KMA Chapter 1 end.png|Chapter 1 - End Screen | ||
Kirby Quest KMA Chapter 2 1.png|Chapter 2 - Stage 1 | Kirby Quest KMA Chapter 2 1.png|Chapter 2 - Stage 1 | ||
Kirby Quest KMA Chapter 2 2.png|Chapter 2 - Stage 2 | Kirby Quest KMA Chapter 2 2.png|Chapter 2 - Stage 2 | ||
| Line 699: | Line 752: | ||
Kirby Quest KMA Chapter 2 9.png|Chapter 2 - Stage 9 | Kirby Quest KMA Chapter 2 9.png|Chapter 2 - Stage 9 | ||
Kirby Quest KMA Chapter 2 10.png|Chapter 2 - Stage 10 | Kirby Quest KMA Chapter 2 10.png|Chapter 2 - Stage 10 | ||
Kirby Quest KMA Chapter 2 end.png|Chapter 2 - | Kirby Quest KMA Chapter 2 end.png|Chapter 2 - End Screen | ||
Kirby Quest KMA Chapter 3 1.png|Chapter 3 - Stage 1 | Kirby Quest KMA Chapter 3 1.png|Chapter 3 - Stage 1 | ||
Kirby Quest KMA Chapter 3 2.png|Chapter 3 - Stage 2 | Kirby Quest KMA Chapter 3 2.png|Chapter 3 - Stage 2 | ||
| Line 710: | Line 763: | ||
Kirby Quest KMA Chapter 3 9.png|Chapter 3 - Stage 9 | Kirby Quest KMA Chapter 3 9.png|Chapter 3 - Stage 9 | ||
Kirby Quest KMA Chapter 3 10.png|Chapter 3 - Stage 10 | Kirby Quest KMA Chapter 3 10.png|Chapter 3 - Stage 10 | ||
Kirby Quest KMA Chapter 3 end.png|Chapter 3 - | Kirby Quest KMA Chapter 3 end.png|Chapter 3 - End Screen | ||
Kirby Quest KMA Chapter 4 1.png|Chapter 4 - Stage 1 | Kirby Quest KMA Chapter 4 1.png|Chapter 4 - Stage 1 | ||
Kirby Quest KMA Chapter 4 2.png|Chapter 4 - Stage 2 | Kirby Quest KMA Chapter 4 2.png|Chapter 4 - Stage 2 | ||
| Line 725: | Line 778: | ||
KMA Kirby Quest Kabuki.png|[[Kabuki]] Kirby attacking Galaxia | KMA Kirby Quest Kabuki.png|[[Kabuki]] Kirby attacking Galaxia | ||
Kirby Quest KMA Chapter 4 10a.png|Chapter 4 - Stage 10 | Kirby Quest KMA Chapter 4 10a.png|Chapter 4 - Stage 10 | ||
Kirby Quest KMA Chapter 4 10b.png|Chapter 4 - Stage 10 | Kirby Quest KMA Chapter 4 10b.png|Chapter 4 - Stage 10 (Real Dark Matter) | ||
Kirby Quest KMA Chapter 4 end.png|Chapter 4 - The | Kirby Quest KMA Chapter 4 end.png|Chapter 4 - The End | ||
Kirby Quest KMA Game Over.png|The Game Over screen. | Kirby Quest KMA Game Over.png|The Game Over screen. | ||
</gallery> | </gallery> | ||
| Line 795: | Line 848: | ||
<gallery> | <gallery> | ||
KMA Famitsu scan.jpg|The scan of an article in Famitsu | KMA Famitsu scan.jpg|The scan of an article in Famitsu | ||
</gallery> | |||
==Audio== | |||
===Main stage and boss themes=== | |||
<gallery> | |||
KMA Meadow Breeze.mp3|[[Kirby Collecting|Meadow Breeze]] | |||
Room Guarder KMA.mp3|[[Room Guarder|Fearsome Foe]] | |||
KMA Tree to Tree.mp3|[[Tree to Tree]] | |||
KMA Woods Wayfarer.mp3|[[Woods Wayfarer (theme from Kirby Mass Attack)|Woods Wayfarer]] | |||
KMA Dark Clouds.mp3|[[Woods Wayfarer (theme from Kirby Mass Attack)|Dark Clouds]] | |||
KMA Underground.mp3|[[Kirby Collecting|Underground]] | |||
KMA The Skull Gang.mp3|[[The Skull Gang]] | |||
KMA Fetching Fruit.mp3|[[Fetching Fruit]] | |||
KMA King Dedede's Theme Sample.mp3|[[King Dedede's Theme|Tough Enemy]] | |||
KMA Desert Scorcher.mp3|[[Mosugaba's song|Desert Scorcher]] | |||
KMA Lovely Oasis.mp3|[[Kirby Collecting|Lovely Oasis]] | |||
KMA Ruins Ahead.mp3|[[Ruins Ahead]] | |||
KMA Night Desert Sample.oga|[[Air Ride: Sky Sands|Night Desert]] | |||
KMA Lonely Desert.mp3|[[Swallowed Exit|Lonely Desert]] | |||
KMA Swallowed Exit.mp3|[[Swallowed Exit]] | |||
KMA Lifted Upward.mp3|[[Mosugaba's song|Lifted Upward]] | |||
KMA Ruins at Night.mp3|[[Air Ride: Frozen Hillside|Ruins at Night]] | |||
KMA Southern Shore.mp3|[[Southern Shore]] | |||
KMA Pachinko theme.mp3|[[Kirby Collecting|Dedede Pachinko]] | |||
KMA Surfing Stars.mp3|[[Kirby Collecting|Surfing Stars]] | |||
KMA At the Bottom.mp3|[[At the Bottom]] | |||
KMA Sunken Ship.mp3|[[At the Bottom|Sunken Ship]] | |||
KMA Snowy Zone.mp3|[[Snowy Zone]] | |||
KMA Icy Realm.mp3|[[Air Ride: Frozen Hillside|Icy Realm]] | |||
KMA Fun Castle.mp3|[[Fun Castle]] | |||
KMA Scalding Spring.mp3|[[Air Ride: Magma Flows|Scalding Spring]] | |||
KMA Skull Tower.mp3|[[At the Bottom|Skull Tower]] | |||
KMA Foes Spring Up.mp3|[[The Skull Gang|Foes Spring Up]] | |||
KMA Climbing Trees.mp3|[[Climbing Trees]] | |||
KMA Terrifying Fiend.mp3|[[The Skull Gang|Terrifying Fiend]] | |||
</gallery> | |||
===Extra area and menu themes=== | |||
<gallery> | |||
KMA Kirby Collecting.mp3|[[Kirby Collecting]] | |||
KMas Jump Out Sample.mp3|[[Entrance|Jump Out]] | |||
KMas Rally Forth Sample.mp3|[[Entrance|Rally Forth]] | |||
Daroach Reunion KMA.mp3|[[Squeak Squad Appears!|Daroach Reunion]] | |||
KMA Goal in Sight.mp3|[[Sparkling Stars (theme)|Goal in Sight]] | |||
KMA Dark Island.mp3|[[The Skull Gang|Dark Island]] | |||
</gallery> | |||
===Sub-Game themes=== | |||
<gallery> | |||
KMA Big Gold Star.mp3|[[Kirby's Triumphant Return|Big Gold Star]] | |||
KMA Kirby Quest Main Theme.mp3|[[Kirby Quest (theme)|Kirby Quest]] | |||
KMA Kirby Conflict.mp3|[[Kirby Quest (theme)|Kirby Conflict]] | |||
KMA Fate's Crossroad.mp3|[[Kirby Quest (theme)|Fate's Crossroad]] | |||
KMA Action Heaven.mp3|[[Kirby Quest (theme)|Action Heaven]] | |||
KMA Strongest Sword.mp3|[[Kirby Quest (theme)|Strongest Sword]] | |||
KMA Time to Shine.mp3|[[Kirby Quest (theme)|Time to Shine]] | |||
KMA Shining Trophy.mp3|[[Galaxy Area|Shining Trophy]] | |||
</gallery> | |||
===Special themes=== | |||
<gallery> | |||
KMA Unrivaled Size.mp3|[[Unrivaled Size]] | |||
KMA Invincible.mp3|[[Kirby Collecting|Invincible Candy]] | |||
KMA Game Over theme.mp3|[[Kirby Collecting|Game Over]] | |||
KMA Skulls Swing In.mp3|[[The Skull Gang|Skulls Swing In]] | |||
KMA Rainbow Riches sample.oga|[[Green Greens (theme)|Rainbow Riches]] | |||
KMA Eerie Island sample.oga|[[Green Greens (theme)|Eerie Island]] | |||
KMA Stone Statue RoMK Title.mp3|Stone Statue ([[Revenge of Meta Knight: Title]]) | |||
KMA Down to One Kirby's Triumphant Return.mp3|[[Kirby's Triumphant Return|Down to One]] | |||
KMA Down to One.oga|Down to One ([[Green Greens (theme)|Green Greens]]) | |||
KMA Staff Collection.mp3|[[Kirby Collecting|Staff Collection]] | |||
KMA Staff Pond.mp3|[[Kirby Collecting|Staff Pond]] | |||
KMA Good Memories.mp3|[[Kirby Collecting|Good Memories]] | |||
KMA Well Played.mp3|[[Kirby Collecting|Well Played]] | |||
Kirby voice sample - KMas.mp3|A sample of [[Kirby's voice]] | |||
</gallery> | |||
===Unused themes=== | |||
<gallery> | |||
KMA Unused Victory Theme.mp3|[[Kirby Collecting|After Boss]] | |||
</gallery> | </gallery> | ||
Revision as of 23:31, 3 March 2024
A gallery of images from Kirby Mass Attack.
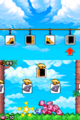
Logos
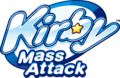
English logo (early)

English logo (final)

Japanese logo

Korean logo
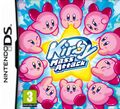
Box Art

North American box art
European box art
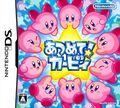
Japanese box art
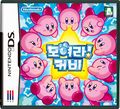
Korean box art


Artwork
Kirbys and allies
Kirby

Kirby

Kirby

Kirby

Kirby
Kirby
Kirby

Kirby
Kirby
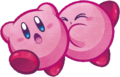
Two Kirbys

Two Kirbys
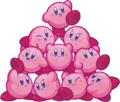
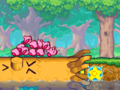
A pyramid of Kirbys
A group of Kirbys
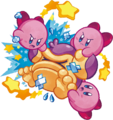
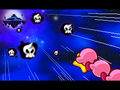
Kirbys attacking an Oohroo
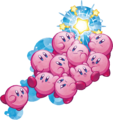
Kirbys surrounding the Japanese logo
Bananas
Melon

Grapes (not seen in-game)


Levels


Enemies
Beanbons
Stactus with feet (not seen in-game)
Waddle Dee
Waddle Dee


Mid-Bosses


Bosses


Wallpapers

Wallpaper of Kirbys surrounding the English logo
Wallpaper featuring the four main levels


Sprites
Playable characters and allies

Kirby

Kirby

Kirby, once he has been defeated

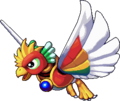
Big Birdee

Birdee


Main game enemies

Awadoron

Awadoron

Awadoron

Awadoron (damaged)

Awasuki

Banishback (small)

Banishback (medium)
Banishback (large)

Battybat

Beanbon

Big Beanbon
Big Blucko

Big Floof

Big Iceton

Big Mummbon

Big Schnoz

Big Soarar

Big Stackle

Big Stactus

Big Waddle Dee

Big Zombon
Bigger Schnoz

Biripper

Biripper
Blamboom

Blish

Blucko

Bohboh

Bombpeller

Buufuu

Clanksprout

Clanksprout
Crazy Stactus
Crazy Stactus (yellow variant)

Cryball

Dekofloof

Eelongo

Flapbon

Flare

Flickerfloof
Floaty Woods

Floof
Freezy Rex

Fuufuu

Geg

Gloombat

Glutbulb

Gobchomplin

Gold Beanbon

Gold Waddle Dee
Gondolus

Gravy

Gravy

Gruegloom

Gruegloom (exposed)

Gruegloom (background)

Ice Dice

Ice Dinos

Iceton

Icicle

Ill Gate

Jellifrizz

Jellifrizz (mini)

Kyuin

Kyuin

Kyuin

Little Woods
Magu

Mech Geg
Mega Grindarr

Missile Roller

Mono Soarar

Mosomoso

Mosomoso (space)

Mosomoso (flared up)

Mummbon

Nolly

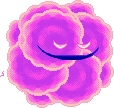
Oohroo

Oohroo (with banana)

Oohroo (space)

Paka Geg

Puff

Posula

Posula (space)

Pult
Rock Hand

Roguemole

Schnoz

Schwarz

Scoopy

Shadowbite

Shellmic

Small Soarar

Snoozroot

Snoozroot (fire)

Snoozroot (puku)

Snoozroot (sand)

Space Jellifrizz

Space Jellifrizz (mini)
Spiky Geg

Squister (blue)

Squister (purple)

Stactus

Stactus

Stactus

Stappy

Stickle

Stickle

Stoneik

Stoneik (10)
Stumpee

Tacotzo

Tappy
Tower Woods

Tury

Waddle Dee

Waddle Dee portrait

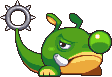
Warwiggle
Wicky Woods
Wobbly Woods

Zombon


Main game mid-bosses and affiliated
Big Warwiggle

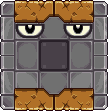
Block Waddle Dee

Block Waddle Dee (damaged)

Block Waddle Dee (exposed)

Buzzybat

Buzzybat (angry)
Buzzybat (gravestone)

Buzzybat (angry gravestone)

Buzzybat (dead)

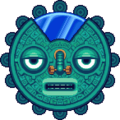
Child Ship

Colossal Stactus
Giga Clanksprout
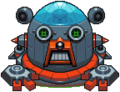
Great Gear

Hamsturr

Helmetmole

Mogmole

Mogmole

Moley
King Eelongo

Li'lbat
Mothership

Pricklebat

Pricklebat (big)
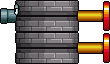
Quad Gun

Rolling Pawn (large)

Rolling Pawn (small)

Skullseer

Rolling Spike (disarmed)

Rolling Spike (armed)

Steelsnapper

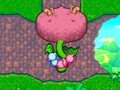
Tortletummy

Tortletummy Thorn


Main game bosses and affiliated

King Dedede

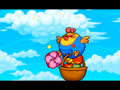
Lady Ivy

Skullion
Skullord


Sub-game enemies

Bigger Beanbon (Kirby Quest)

Big Kabu

Crap

Crap (crumpled)

Bronto Burt

Chef Shiitake

Galaxia

Kabu

Kracko Jr.

Max Flexer

Minimarx

Sword Knight

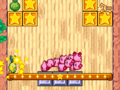
Sub-game bosses

Axe Knight (Strato Patrol EOS)
Dark Matter

Dark Matter Blade
Dedede Robot

Javelin Knight (Strato Patrol EOS)

Kracko

Mace Knight (Strato Patrol EOS)

Marx

Meta Knight (Strato Patrol EOS)

Meta Knight unmasked (Strato Patrol EOS)

Meta Knight (Kirby Quest)

Mr. Shine

Mr. Bright

Shine and Bright's combined form
Nightmare Wizard
Robo Moley

Trident Knight (Strato Patrol EOS)
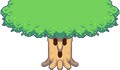
Whispy Woods (Strato Patrol EOS)

Other

DS icon

Apple

Bananas

Big Blucko (unused)

Big Mosomoso (unused)

Captain Waddle Doo

Dekofloof's cake

Escargoon

Fruit in a bubble

Grapes (unused)

Hint in a bubble

Invincible Candy

Jumbo Candy

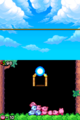
Key
Kirby riding a horde of Gators (Kirby Quest)

Kirby riding Moto Shotzo (Kirby Quest)

Kirby driving a Tankbot (Kirby Quest)
Dyna Blade (Kirby Quest)

Maxim Tomato

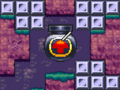
Maxim Tomato in a bubble

Medal

Melon

N.M.E. Sales Guy

Orange Dice (unused)

Orange Dinos (unused)

Rainbow Medal

Skull Key


Screenshots
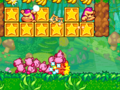
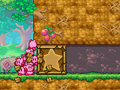
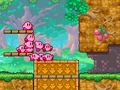
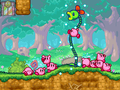
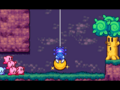
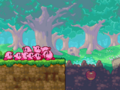
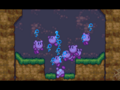
Green Grounds
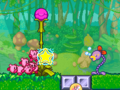
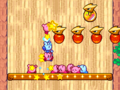
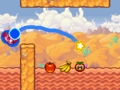
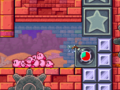
A lone Kirby inhales an apple

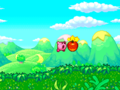
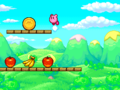
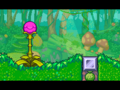
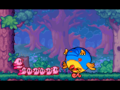
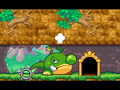
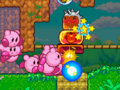
Kirby encounters the first Beanbon in Stage 1
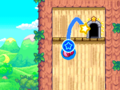
Kirby is dragged up to a door
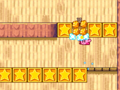
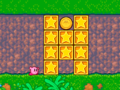
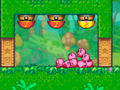
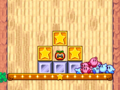
Kirby headbutts some Star Blocks in his way
Kirby pummels a Beanbon
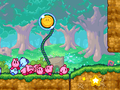
Kirby pulls down a Jerkweed, revealing an apple
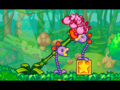
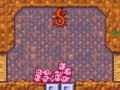
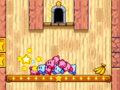
After revisiting the stage, 5 Kirbys start to pull down a massive turnip
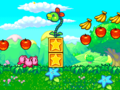
Kirby pummels a Birdee carrying a nut ready to be launched
After ingesting enough fruit from the tree, a new Kirby appears
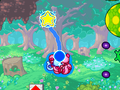
The Kirbys encounter a Recovery Ring
The Kirbys encounter a Snoozroot
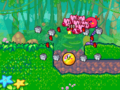
The Kirbys work together to pull a large turnip from the ground
The Kirbys are launched toward Big Birdee
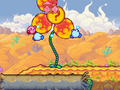
The Kirbys encounter a wild Spire Vine

The Kirbys defeat the Spire Vine by smashing it to the floor, claiming the fruits trapped within
The Kirbys smash two Puku Snoozroots with a Spire Vine
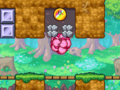
The Kirbys interrupt a snacking Oohroo in Stage 2
A purple Spire Vine that grows tall and then shrinks is seen in its shrunken state
Some Melody Switches appear, begging to be pressed
A Fruit Block appears on-screen
The Kirbys must choose what to destroy with the purple Spire Vine
The Kirbys smashing through metal blocks to access a Rainbow Medal
The stage's shortcut is revealed from behind a broken block

A Big Beanbon pounds the floor after jumping from above
The Kirbys topple a Spire Vine to break a set of metal blocks
A Tappy spins up and down
A Tappy gets tired of spinning and slows down, allowing the Kirbys to pummel it
The Kirbys get stuck in a Spire Vine chain reaction

The Kirbys obtain a medal at the end of a Spire Vine chain
The Kirbys come across a Key guarded by two Oohroos
The Kirbys encounter a large red Spire Vine
The Kirbys shatter some metal blocks with a large red Spire Vine, which is destined to be shattered too afterwards
A Kirby uses a Key to open a treasure chest
The Kirbys find another medal in an alcove
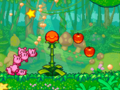
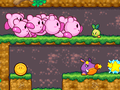
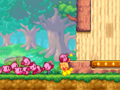
The Kirbys assault a Beanbon walking along the forest floor
A gate opens, allowing the Kirbys to access a door at the end of the passage

The switch brings up a grate full of apples in front of the first Spideroo
The Kirbys rush through a series of attacking Spideroos
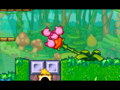
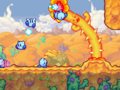
Ironically, a cannon absorbs the Kirbys
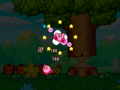
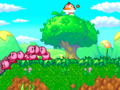
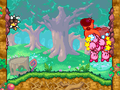
Up and above the tree the Kirbys go
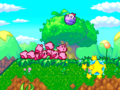
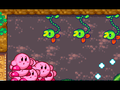
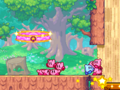
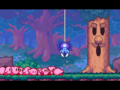
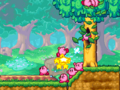
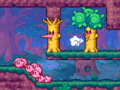
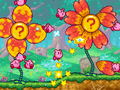
Two Birdees protect their tree from the mass attack.
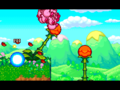
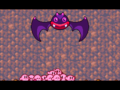
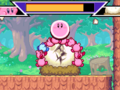
Big Birdee, enraged, appears in front of the Kirbys

Big Birdee attacks, similarly to how her younger family members do
Down and below the Kirbys drag Big Birdee
Big Birdee lies defeated before flying away from the heroes
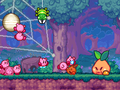
Some Kirbys try to get away with a cobweb cocoon while a green Spideroo seeks to get away with a Kirby
The Kirbys discover the entrance to a room filled with fruit
The Kirbys face off against a Spideroo next to the unlocked shortcut
A bunch of foes brawl with the Kirbys as they try to untangle a bigger cobweb cocoon
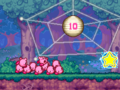
An enormous cobweb is encountered, which displays a curious number
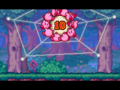
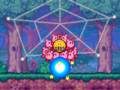
10 Kirbys bring down the cobweb cocoon
The Kirbys pull on a Jerkweed to access the main entrance of the cave while some apples above lead to an alternate path
A Beanbon guards the key to a treasure chest
The Kirbys at the alternate entrance of the cave, past the final Tappy of the stage
The Kirbys enter the door to the side chamber hidden between propeller weeds
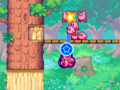
When in the side chamber, the Kirbys encounter propeller weeds and fruit
The Kirbys wait for the Jerkweed to retract its thorns
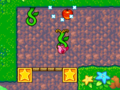
A group of Posulas do battle with the Kirbys
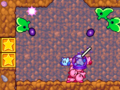
The Kirbys unlock the stage's shortcut, leading to the Battybat encounter
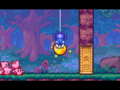
Battybat makes an appearance

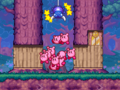
10 Kirbys try to pluck a big turnip
The Kirbys pull on a Jerkweed to break metal blocks and access the middle path
A Gold Beanbon spots the Kirbys in the rightmost path.
The Kirbys encounter one of the Big Beanbons guarding the stage's exit
The Kirbys start breaking a dirt-made Heave-Ho Block
The Kirbys weighting down a weighted platform to open the path forward
The first Schnoz is encountered with a Heave-Ho Block in sight

The Kirbys push and drop the Heave-Ho Block on top of the Schnoz
A Oohroo being pummeled between wighted platforms
The Kirbys find a split path with a spring cannon
A Big Schnoz shows his strength against the Kirbys
The Kirbys find various Jerkweed and a block containing the stage's shortcut
The Kirbys find a Jumbo Candy hidden in a Jerkweed
Some Snoozroots confront the Jumbo Kirbys upside-down
The Jumbo Kirbys rush through the blocks ahead
The Kirbys lower down the sinking chamber
The Kirbys run along the forest toward the stage's exit
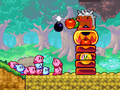
A Bigger Schnoz blocks the stage's exit
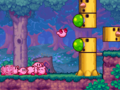
The Kirbys go to tackle a Warwiggle
The Kirbys get carried along the mushroom path
A Big Beanbon jumps on the mushrooms
The Kirbys jump to the apples and mushrooms
The Kirbys get absorbed by a vortex after taking the Skull key
The Kirby brawl with the Skullys for the treasure chest
A Snoozroot disguised as Spinwheel Flower gets revealed next to the stage's shortcut

A spiky-petaled Spinwheel Flower makes presence
The Kirbys get carried along the Posula path
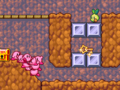
The Mogmoles point the path to the Kirbys while hiding when they get close
The door and floor disappear, making the Kirbys fall downward
The Mogmoles laughably meet the Kirbys onto the arena
The Kirbys battle the bomb-armed Mogmoles
Moley and the Helmetmoles appear on the arena
Moley tries to throw a bomb at the Kirbys

The Kirbys throw Moley at the floor
The Kirbys meeting a Beanbon at the entrance of the elevator
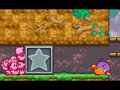
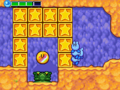
The key is trapped inside Star Blocks on the side
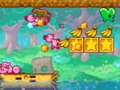
Some Mono Soarars battle with the Kirbys
The Kirbys strive to survive in the elevator
A Maxim Tomato is protected by various blocks
The end of the elevator, with two secondary paths
A Recovery Ring rests on the left
The Kirbys try to crack an egg open lying on the right
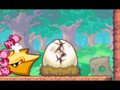
After failing to crack the egg, a Big Soarar thrusts at the Kirbys
The Big Soarar carries the egg away
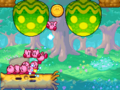
The first formation of Soarars
The second one comes from the left
The third formation goes in a wavy motion
The Soarars guarding the fourth piece of the door
Mono Soarars attacking the Kirbys after picking a Soarar card
The door has been assembled
A Spideroo appears to aid the woods
The Kirbys must chose their cannon path

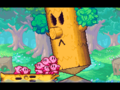
A Little Woods and the Kirbys meet face to face
The Kirbys reveal the stage's shortcut in a tree
The Kirbys raid Floaty Woods' leafs through a hole on his face

Floaty Woods is being tipped over
The Kirbys feast on bananas and Posulas along with their woody raft
Wobbly Woods tries to crush the Kirbys
The Kirbys use Wobbly Woods as a bridge
Two Beanbons sacrifice to show Stumpee's mechanics
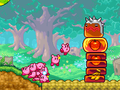
The Kirbys deal with a Tower Woods
Two Little Woods guard the Skull Key
A Kirby grabs the Skull Key to seek a chest
The Kirbys brawl with the Skullys
The Kirbys reveal a secret passage under Little Woods's leafs
A Stumpee clear the way to another secret passage
The Kirbys wait for another Stumpee to open a non-secret passage
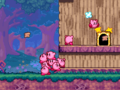
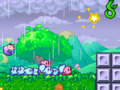
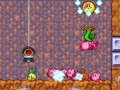
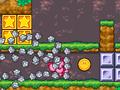
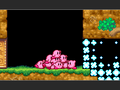
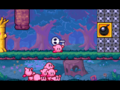
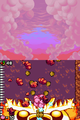
The Kirbys escape the cave thanks to a cannon
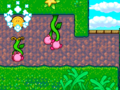
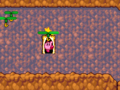
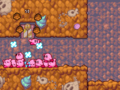
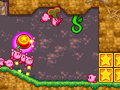
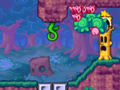
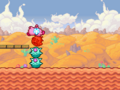
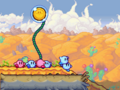
The Kirbys come across a Warwiggle at the beginning of the stage.

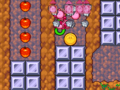
Using the Jumbo Candy, the Kirbys destroy some blocks.
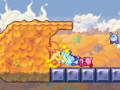
A Warwiggle can be instantly defeated with the Jumbo Candy.
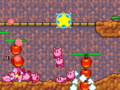
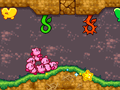
The Kirbys are sure to have complete destruction, even destroying the local plant life.
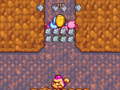
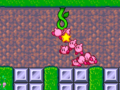
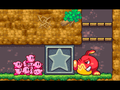
The Kirbys come across a Key atop a floating platform.
The Kirbys find their final obstacle, a Big Warwiggle who guards the exit.
Big Warwiggle goes upside-down to crush more Kirbys.
Big Warwiggle snakes through the dirt, trying to catch a Kirby or two off-guard.

Unfortunenly, it looks like Big Warwiggle was the one caught off-guard here.
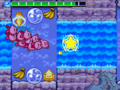
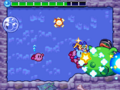
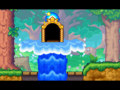
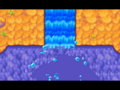
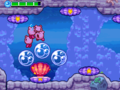
The Kirbys come across their first bit of water in the game.
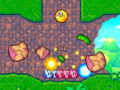
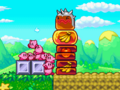
Some clams spawn some bubbles for Kirby so he has time to push the Heave-Ho Block.
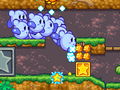
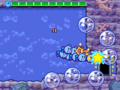
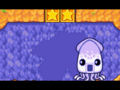
A whirlpool sucks up the Kirbys, sending them deeper into the area.
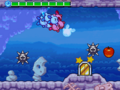
The Kirbys try to dodge some Squister, but it seems they are a little late.
A lone Awasuki has been spotted.
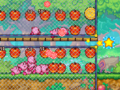
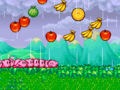
A familiar-looking formation of green apples appears.
The Kirbys rampage through the stage through the usage of a Jumbo Candy.
The Kirbys push a Heave-Ho Block to get to their next goal.

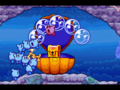
A small tunnel gives the Kirbys a key, and a chance to breathe.
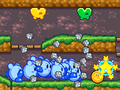
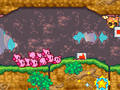
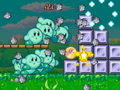
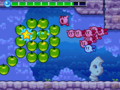
Gordos fill the room as the Kirbys make haste for the exit.
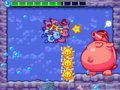
Tortletummy naps as the Kirbys approach.
Tortletummy shoots electric shocks at Kirbys and uses currents to push them back.
Tortletummy is now vulnerable to attack.
Tortletummy fumes with rage as he sends out stronger attacks.
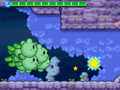
When finally defeated, the Tortletummy turns into nothing but a few bubbles.
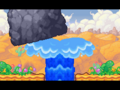
A geyser carries the Kirby gang back to the surface, as well as the goal.


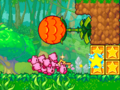
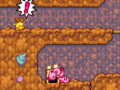
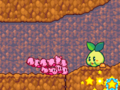
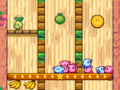
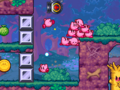
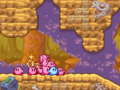
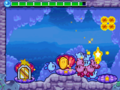
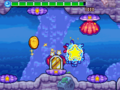
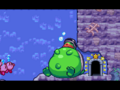
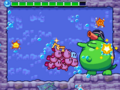
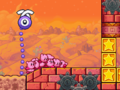
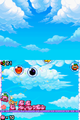
Sandy Canyon

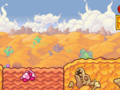
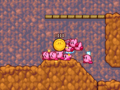
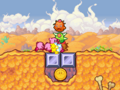
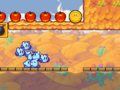
The Kirbys discover how quicksand works.
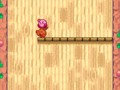
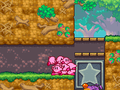
A line is used so the Kirbys may get a Maxim Tomato before it sinks into the sand.
The Kirbys attack a line of Stactus.
After defeating another Stactus line, the Kirbys fall through a pit with the enemy.
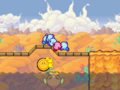
A Scoopy notices the Kirbys.

A fearsome battle leads the Kirbys to test their touch-screen tapping ability.
Deafeating the Scoopy creates a stream leading to the surface of the canyon.
The spout pushes away the rock previously blocking the way.
A flying fruit box is spotted.
The Kirbys battle a Crazy Stactus.
A Big Beanbon succumbs to the impenetrable force of the Kirbys.

The Kirbys travel across a log to get to the next part of the level.
A Spinwheel Flower is destroyed by the Kirbys.
The Kirbys engage Bigger Stactus in the ruins of the stage
The Kirbys narrowly dodge a Clanksprout emerging from quicksand
The Kirbys use a Block Bomb to blast away a barricade.

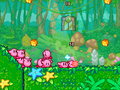
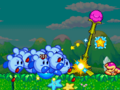
The Kirbys encountering the Wee Birdees at the start of the stage


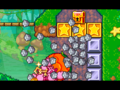
Dedede Resort


One of the Kirbys getting hooked by Tury's line at the start of the stage
Mono Soarars attacking when the Kirbys hit the wrong card


Volcano Valley
The Kirbys encountering a Grindarr with a freezy stare


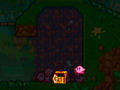
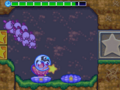
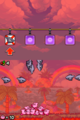
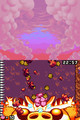
Necro Nebula

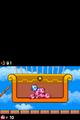
Menus
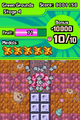
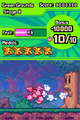
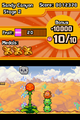
The file selection screen, with a 100% completed file displayed
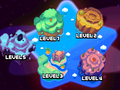
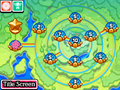
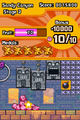
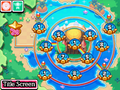
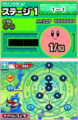
The world map
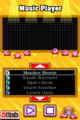
The Music Player
The Game Over screen


Cutscenes
Necrodeus appearing
Skullys chasing the Kirbys
Kirby using the Rainbow Medals
The Kirbys traveling to Necro Nebula
The Japanese version exclusive enemy roll call
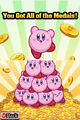
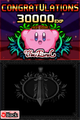
Got All Medals!
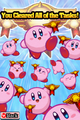
Cleared All Tasks!


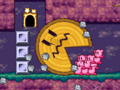
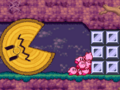
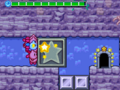
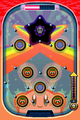
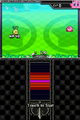
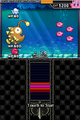
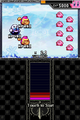
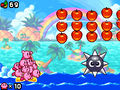
Sub-Games
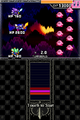
Field Frenzy
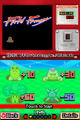
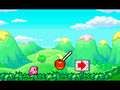
Title Card for Field Frenzy
Gameplay


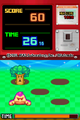
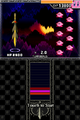
Kirby Brawl Ball
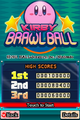
Title Card for Kirby Brawlball
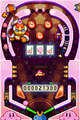
Screenshot of the main board during gameplay.


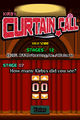
Kirby Curtain Call
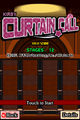
Title card for Kirby Curtain Call


Dash Course
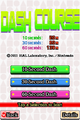
Title Card for Dash Course
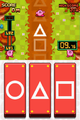
Gameplay


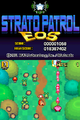
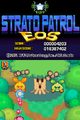
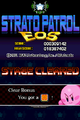
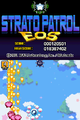
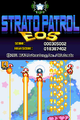
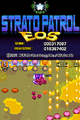
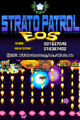
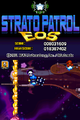
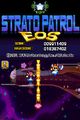
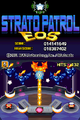
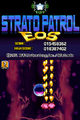
Strato Patrol EOS
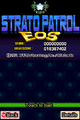
Title card for Strato Patrol EOS


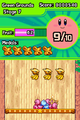
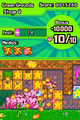
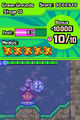
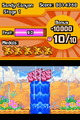
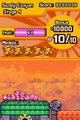
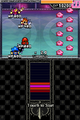
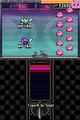
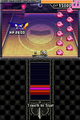
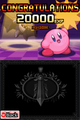
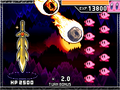
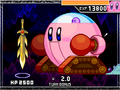
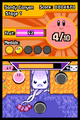
Kirby Quest
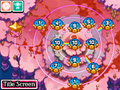
Title Card for Kirby Quest

Details
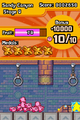
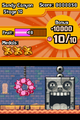
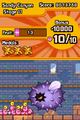
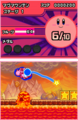
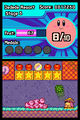
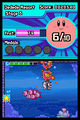
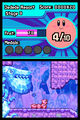
Chapter 1 - Stage 1
Chapter 1 - Stage 2
Chapter 1 - Stage 3
Chapter 1 - Stage 4
Chapter 1 - Stage 5
Chapter 1 - Stage 6
Chapter 1 - Stage 7
Chapter 1 - Stage 8
Chapter 1 - Stage 9
Chapter 1 - Stage 10
Chapter 1 - End Screen
Chapter 2 - Stage 1

Chapter 2 - Stage 2

Chapter 2 - Stage 3
Chapter 2 - Stage 4
Chapter 2 - Stage 5
Chapter 2 - Stage 6
Chapter 2 - Stage 7
Chapter 2 - Stage 8

Chapter 2 - Stage 9
Chapter 2 - Stage 10
Chapter 2 - End Screen
Chapter 3 - Stage 1
Chapter 3 - Stage 2
Chapter 3 - Stage 3

Chapter 3 - Stage 4
Chapter 3 - Stage 5
Chapter 3 - Stage 6
Chapter 3 - Stage 7
Chapter 3 - Stage 8
Chapter 3 - Stage 9
Chapter 3 - Stage 10
Chapter 3 - End Screen
Chapter 4 - Stage 1
Chapter 4 - Stage 2
Chapter 4 - Stage 3
Chapter 4 - Stage 4
Chapter 4 - Stage 5
Chapter 4 - Stage 6
Chapter 4 - Stage 7
Chapter 4 - Stage 8
Chapter 4 - Stage 9
Chapter 4 - Stage 9 (Galaxia)
Galaxia attacking
Kirby attacking Galaxia with the Tankbot
Kabuki Kirby attacking Galaxia
Chapter 4 - Stage 10
Chapter 4 - Stage 10 (Real Dark Matter)
Chapter 4 - The End
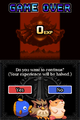
The Game Over screen.


Survival Rush
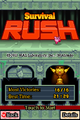
Title Card for Survival Rush
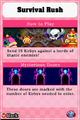
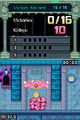
Instructions screen
The main area with the three doors
The healing ring, used for replenishing lost health
The room with three Maxim Tomatoes, used for replenishing lost Kirbys
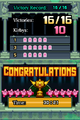
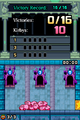
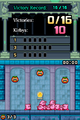
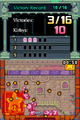
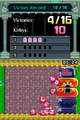
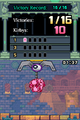
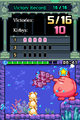
Victory screen
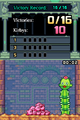
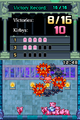
Battle against Bigger Stactus
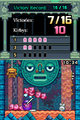
Battle against Block Waddle Dee
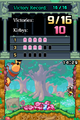
Battle against Big Warwiggle
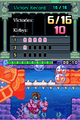
Battle against Giga Clanksprout
Battle against Skullseer
Battle against Buzzybat
Battle against Great Gear
Battle against Moley
Battle against King Eelongo

Battle against Steelsnapper
Battle against Tortletummy
Battle against Whispy Woods
Battle against Lady Ivy
Battle against King Dedede
Battle against Skullord
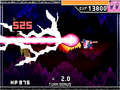
The final battle against Necrodeus


Manual


Official Screenshots
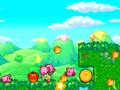
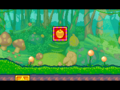
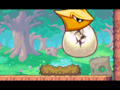
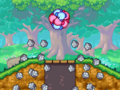
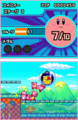
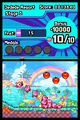
An overworld map of the first level, Green Grounds, showing its stages

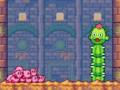
Giant Stactuses may not be friendly
A bomb with pie countdown
Kirby's heroic heart in action
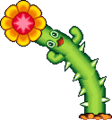
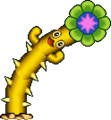
Spinwheel Flower
Shells and bubbles
Sandy Canyon
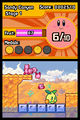
Kirbys battling a Scoopy in Sandy Canyon - Stage 1
Warp Star surfing game
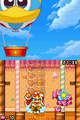
Dedede Resort
Dedede Resort
Aiming for a Rainbow Medal
Vs. Steelsnapper
Chased by Freezy Rex
Battle with King Dedede
Battle with King Dedede


Scans

The scan of an article in Famitsu

Audio
Main stage and boss themes
Sub-Game themes
Special themes
Stone Statue (Revenge of Meta Knight: Title)
Down to One (Green Greens)
A sample of Kirby's voice
Unused themes
Videos
| |||||||||||||||||||||||||||||