Rainbow Resort - Stage 2: Difference between revisions
No edit summary |
Pinkyoshifan (talk | contribs) m (Text replacement - "(<tab name=".*)'(.*">)" to "$1’$2") |
||
| (24 intermediate revisions by 12 users not shown) | |||
| Line 1: | Line 1: | ||
{{Infobox-KAStage | {{Infobox-KAStage | ||
|image=[[File:Tower of Mid-Bosses | |image=[[File:KNiDL Tower of Mid-Bosses screenshot.png]] | ||
|caption=Kirby standing outside the tower. (''Nightmare in Dream Land'') | |caption=Kirby standing outside the tower. (''Kirby: Nightmare in Dream Land'') | ||
|level=[[Rainbow Resort]] | |level=[[Rainbow Resort]] | ||
|midboss=All (except [[Grand Wheelie]] and [[Meta-Knights]]) | |midboss=All (except [[Grand Wheelie]] and [[Meta-Knights]]) | ||
|switch={{N}} | |switch={{N}} | ||
|theme music= | |||
<tabs> | |||
<tab name="Kirby’s Adventure"> | |||
[[File:KA Mid-Boss Battle.mp3]]<br>"[[Mid-Boss Battle]]" | |||
</tab> | |||
<tab name="Kirby: Nightmare in Dream Land"> | |||
[[File:KNiDL Tower of Midbosses Sample.oga]]<br>"[[King Dedede's Theme|Tower of Mid-Bosses]]" | |||
</tab> | |||
</tabs> | |||
|description=Clips of the themes that play in Rainbow Resort - Stage 2 | |||
|previousstage=[[Rainbow Resort - Stage 1]] | |previousstage=[[Rainbow Resort - Stage 1]] | ||
|nextstage=[[Rainbow Resort - Stage 3]] | |nextstage=[[Rainbow Resort - Stage 3]] | ||
| Line 10: | Line 20: | ||
'''Rainbow Resort - Stage 2''' is the second stage of [[Rainbow Resort]] in ''[[Kirby's Adventure]]'' and its remake, ''[[Kirby: Nightmare in Dream Land]]''. This stage is a [[Tower of Mid-Bosses]] (the first of its kind in the [[Kirby (series)|''Kirby'' series]]), holding every [[Mid-Boss]] in the game except for [[Grand Wheelie]] and the [[Meta-Knights]]. | '''Rainbow Resort - Stage 2''' is the second stage of [[Rainbow Resort]] in ''[[Kirby's Adventure]]'' and its remake, ''[[Kirby: Nightmare in Dream Land]]''. This stage is a [[Tower of Mid-Bosses]] (the first of its kind in the [[Kirby (series)|''Kirby'' series]]), holding every [[Mid-Boss]] in the game except for [[Grand Wheelie]] and the [[Meta-Knights]]. | ||
==Overview== | |||
The stage begins at the base of a lone tower. There is no music in ''Kirby's Adventure'', whereas ''Kirby: Nightmare in Dream Land'' adds the sound of wind. Kirby can enter through the main doorway on the tower. | |||
== Overview == | |||
The stage begins at the base of a lone tower. There is no music, | |||
The following rooms consist of a fight with a [[Mid-Boss]], followed by a flight of steps to the next room before reaching the top. The fights take place in the following order: | The following rooms consist of a fight with a [[Mid-Boss]], followed by a flight of steps to the next room before reaching the top. The fights take place in the following order: | ||
| Line 194: | Line 34: | ||
After the last fight, Kirby can fly out the top of the tower to reach a [[Warp Star]] that will take him away. He will then land in an open field and be able to proceed to the exit, though in the way is a [[Blade Knight]] who guards a [[Maxim Tomato]]. | After the last fight, Kirby can fly out the top of the tower to reach a [[Warp Star]] that will take him away. He will then land in an open field and be able to proceed to the exit, though in the way is a [[Blade Knight]] who guards a [[Maxim Tomato]]. | ||
===Alternate | ===Alternate path=== | ||
A secret second path can be taken through this stage. It can be accessed by squeezing through a barred window on the upper portion of the tower at the start (in ''Kirby's Adventure'' there is no window, and the door is completely invisible). This will pit Kirby against a different shorter set of Mid-Bosses in the following order: | A secret second path can be taken through this stage. It can be accessed by squeezing through a barred window on the upper portion of the tower at the start (in ''Kirby's Adventure'' there is no window, and the door is completely invisible). This will pit Kirby against a different shorter set of Mid-Bosses in the following order: | ||
| Line 210: | Line 49: | ||
<tab name="Enemy"> | <tab name="Enemy"> | ||
{| class="wikitable" | {| class="wikitable" | ||
!Sprite ('' | !Sprite (''KA''/''KNiDL'') | ||
!Name | !Name | ||
!Copy Ability | !Copy Ability | ||
|- | |- | ||
|align=center|[[File: | |align=center|[[File:KA Blade Knight sprite.png]] [[File:KNiDL Blade Knight sprite.png]] | ||
|[[Blade Knight]] | |[[Blade Knight]] | ||
|[[Sword]] | |[[Sword]] | ||
| Line 221: | Line 60: | ||
<tab name="Mid-Bosses"> | <tab name="Mid-Bosses"> | ||
{| class="wikitable" width=25% | {| class="wikitable" width=25% | ||
!Sprite ('' | !Sprite (''KA''/''KNiDL'') | ||
!Name | !Name | ||
!Copy Ability | !Copy Ability | ||
|- | |- | ||
|align=center|[[File: | |align=center|[[File:KA Bonkers sprite.png]] [[File:KA Bonkers sprite 2.png]]<br>[[File:KNiDL Bonkers sprite.png]] | ||
|[[Bonkers]] | |[[Bonkers]] | ||
|[[Hammer]] | |[[Hammer]] | ||
|- | |- | ||
|align=center|[[File: | |align=center|[[File:KA Bugzzy Sprite.png]] [[File:KA Alternate Palette Bugzzy Sprite.png]]<br>[[File:KNiDL Bugzzy sprite.png]] | ||
|[[Bugzzy]] | |[[Bugzzy]] | ||
|[[Backdrop]] | |[[Backdrop]] | ||
|- | |- | ||
|align=center|[[File: | |align=center|[[File:KA Fire Lion sprite 2.png]] [[File:KA Fire Lion sprite.png]]<br>[[File:KNiDL Fire Lion sprite.png]] | ||
|[[Fire Lion]] | |[[Fire Lion]] | ||
|[[Burning|FireBall/Burning]] | |[[Burning|FireBall/Burning]] | ||
|- | |- | ||
|align=center|[[File: | |align=center|[[File:KA Tick Tock sprite.png]] [[File:KNiDL Mr Tick Tock sprite.png]] | ||
|[[Mr. Tick-Tock]] | |[[Mr. Tick-Tock]] | ||
|[[Mike]] | |[[Mike]] | ||
|- | |- | ||
|align=center|[[File: | |align=center|[[File:KA Mr Frosty sprite.png]] [[File:KNiDL Mr Frosty sprite.png]] | ||
|[[Mr. Frosty]] | |[[Mr. Frosty]] | ||
|[[Freeze]] | |[[Freeze]] | ||
|- | |- | ||
|align=center|[[File: | |align=center|[[File:KA Poppy Bros Sr sprite.png]] [[File:KNiDL Poppy Bros Sr sprite.png]] | ||
|[[Poppy Bros. Sr.]] | |[[Poppy Bros. Sr.]] | ||
|[[Crash]] | |[[Crash]] | ||
|- | |- | ||
|align=center|[[File: | |align=center|[[File:KA Rolling Turtle sprite.png]] [[File:KA Rolling Turtle sprite 2.png]]<br>[[File:KNiDL Phan Phan sprite.png]] | ||
|[[Rolling Turtle]] | |[[Rolling Turtle]]/[[Phan Phan]] | ||
|[[ | |[[Throw]] | ||
|} | |} | ||
</tab> | </tab> | ||
| Line 259: | Line 98: | ||
==Gallery== | ==Gallery== | ||
<gallery> | <gallery> | ||
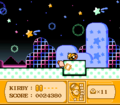
KA Rainbow Resort Stage 2 screenshot 01.png|Kirby stands outside the ominous tower. | |||
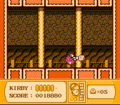
KA Rainbow Resort Stage 2 screenshot 02.png|Kirby begins climbing the tower after defeating Bonkers. | |||
KA Rainbow Resort Stage 2 screenshot 03.png|Kirby gets grabbed and tossed by a red Rolling Turtle in the tower. | |||
KA Rainbow Resort Stage 2 screenshot 04.png|Kirby stumbles onto the hidden reward cache for taking the secret path. | |||
KA Rainbow Resort Stage 2 screenshot 05.png|Kirby flies off into the distance on his Warp Star. | |||
KA Rainbow Resort Stage 2 screenshot 06.png|Kirby dispatches the Blade Knight guarding the Maxim Tomato at the end of the stage. | |||
</gallery> | </gallery> | ||
==Trivia== | |||
*In ''Kirby's Adventure'', there is unused data for harder versions of the three mid-bosses skipped on the secret route, suggesting that they were initially planned to be included.<ref>[[tcrf:Kirby's Adventure/Unused Rooms#Rooms_07F-084|''Kirby's Adventure'' Unused Rooms on The Cutting Room Floor]]</ref> | |||
*Also in ''Kirby's Adventure'', the secret route's 5 [[1-Up]]s will give the player 6 lives instead of 5. This is because the middle-most 1-Up is actually two of them layered on top of each other, most likely by accident. | |||
{{ref}} | |||
{{clear}} | {{clear}} | ||
{{Navbox- | {{Navbox-KA/KNiDL}} | ||
Latest revision as of 12:40, 21 April 2024
| ||||||||||||
| ||||||||||||
| ||||||||||||
|
| ||||||||||||

Rainbow Resort - Stage 2 is the second stage of Rainbow Resort in Kirby's Adventure and its remake, Kirby: Nightmare in Dream Land. This stage is a Tower of Mid-Bosses (the first of its kind in the Kirby series), holding every Mid-Boss in the game except for Grand Wheelie and the Meta-Knights.
Overview[edit]
The stage begins at the base of a lone tower. There is no music in Kirby's Adventure, whereas Kirby: Nightmare in Dream Land adds the sound of wind. Kirby can enter through the main doorway on the tower.
The following rooms consist of a fight with a Mid-Boss, followed by a flight of steps to the next room before reaching the top. The fights take place in the following order:
- Poppy Bros. Sr.
- Mr. Tick-Tock
- Mr. Frosty
- Bonkers
- Rolling Turtle/Phan Phan (depending on version)
- Bugzzy
- Fire Lion
After the last fight, Kirby can fly out the top of the tower to reach a Warp Star that will take him away. He will then land in an open field and be able to proceed to the exit, though in the way is a Blade Knight who guards a Maxim Tomato.
Alternate path[edit]
A secret second path can be taken through this stage. It can be accessed by squeezing through a barred window on the upper portion of the tower at the start (in Kirby's Adventure there is no window, and the door is completely invisible). This will pit Kirby against a different shorter set of Mid-Bosses in the following order:
- Bonkers
- Rolling Turtle/Phan Phan (depending on version)
- Bugzzy
- Fire Lion
After the last fight, Kirby is deposited in a room containing five 1-Ups. From there, it rejoins the main path, and Kirby can proceed to the stage exit.
Enemy and Mid-Bosses[edit]
|
Gallery[edit]
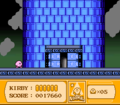
Kirby stands outside the ominous tower.

Kirby begins climbing the tower after defeating Bonkers.
Kirby gets grabbed and tossed by a red Rolling Turtle in the tower.
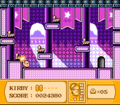
Kirby stumbles onto the hidden reward cache for taking the secret path.
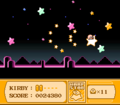
Kirby flies off into the distance on his Warp Star.
Kirby dispatches the Blade Knight guarding the Maxim Tomato at the end of the stage.


Trivia[edit]
- In Kirby's Adventure, there is unused data for harder versions of the three mid-bosses skipped on the secret route, suggesting that they were initially planned to be included.[1]
- Also in Kirby's Adventure, the secret route's 5 1-Ups will give the player 6 lives instead of 5. This is because the middle-most 1-Up is actually two of them layered on top of each other, most likely by accident.