Grape Garden - Stage 3: Difference between revisions
Pinkyoshifan (talk | contribs) m (Text replacement - "(<tab name=".*)'(.*">)" to "$1’$2") |
|||
| (18 intermediate revisions by 8 users not shown) | |||
| Line 1: | Line 1: | ||
{{Infobox-KAStage | {{Infobox-KAStage | ||
|image=[[File:Grape Garden | |image=[[File:KNiDL Grape Garden Stage 3.png]] | ||
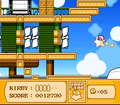
|caption=Kirby traverses the blimp flotilla. (''Nightmare in Dream Land'') | |caption=Kirby traverses the blimp flotilla. (''Kirby: Nightmare in Dream Land'') | ||
|level=[[Grape Garden]] | |level=[[Grape Garden]] | ||
|switch={{Y}} | |switch={{Y}} | ||
|theme music= | |||
<tabs> | |||
<tab name="Kirby’s Adventure"> | |||
[[File:KA Underground Stage Sample.mp3]] | |||
</tab> | |||
<tab name="Kirby: Nightmare in Dream Land"> | |||
[[File:KNiDL Underground Stage Sample.oga]] | |||
</tab> | |||
</tabs> | |||
|theme title="[[Underground Stage]]" | |||
|description=Clips of the music that plays in Grape Garden - Stage 3 | |||
|previousstage=[[Grape Garden - Stage 2]] | |previousstage=[[Grape Garden - Stage 2]] | ||
|nextstage=[[Grape Garden - Stage 4]] | |nextstage=[[Grape Garden - Stage 4]] | ||
| Line 12: | Line 23: | ||
This stage takes place in four main areas. The first is on the ground in a dry place. Here, Kirby can find the first [[Cannon|Fuse Cannon]], though its use is optional. | This stage takes place in four main areas. The first is on the ground in a dry place. Here, Kirby can find the first [[Cannon|Fuse Cannon]], though its use is optional. | ||
In the second area, Kirby finds himself high in the air, flying between blimps propelled by the wind. There are many places to go here, with three doorways along the bottom of the area. The leftmost leads to an optional room which contains a [[Maxim Tomato]], and the rightmost leads to a room with a [[Big Switch]] inside. The middle door leads forward. | |||
In the | In the third area, Kirby works his way down a long hallway lined with propellers. At the end is a [[Warp Star]] which, once Kirby hops on, causes the blimp to take off, leaving Kirby and his star behind. | ||
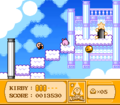
In the last area, the Warp Star lands in a cloud canopy, with cloud steps leading upward. The stage exit is located at the top of the staircase, past a number of [[Laser Ball]]s and other enemies. | |||
==Enemies== | ==Enemies== | ||
{| class="wikitable" | {| class="wikitable" | ||
!Sprite ('' | !Sprite (''KA''/''KNiDL'') | ||
!Name | !Name | ||
!style="border-style: solid; border-width: 1px 3px 1px 1px"|Copy Ability | !style="border-style: solid; border-width: 1px 3px 1px 1px"|Copy Ability | ||
!Sprite ('' | !Sprite (''KA''/''KNiDL'') | ||
!Name | !Name | ||
!Copy Ability | !Copy Ability | ||
|- | |- | ||
|align=center|[[File: | |align=center|[[File:KA Bomber sprite.png]] [[File:KNiDL Bomber sprite.png]] | ||
|[[Bomber]] | |[[Bomber]] | ||
|style="border-style: solid; border-width: 1px 3px 1px 1px"|[[Crash]] | |style="border-style: solid; border-width: 1px 3px 1px 1px"|[[Crash]] | ||
|align=center|[[File: | |align=center|[[File:KA Laser Ball sprite.png]] [[File:KNiDL Laser Ball sprite.png]] | ||
|[[Laser Ball]] | |[[Laser Ball]] | ||
|[[Laser]] | |[[Laser]] | ||
|- | |- | ||
|align=center|[[File: | |align=center|[[File:KA Bounder sprite.png]] [[File:KNiDL Gip sprite.png]] | ||
|[[Bounder]]/[[Gip]] | |[[Bounder]]/[[Gip]] | ||
|style="border-style: solid; border-width: 1px 3px 1px 1px"|None | |style="border-style: solid; border-width: 1px 3px 1px 1px"|None | ||
|align=center|[[File: | |align=center|[[File:KA Parasol sprite.png]] [[File:KNiDL Parasol enemy sprite.png]] | ||
|[[Parasol (enemy)|Parasol]] | |[[Parasol (enemy)|Parasol]] | ||
|[[ | |[[Parasol]] | ||
|- | |- | ||
|align=center|[[File: | |align=center|[[File:KA Bronto Burt sprite.png]] [[File:KNiDL Bronto Burt sprite.png]] | ||
|[[Bronto Burt]] | |[[Bronto Burt]] | ||
|style="border-style: solid; border-width: 1px 3px 1px 1px"|None | |style="border-style: solid; border-width: 1px 3px 1px 1px"|None | ||
|align=center|[[File: | |align=center|[[File:KA Shotzo sprite.png]] [[File:KNiDL Shotzo sprite.png]] | ||
|[[Shotzo]] | |[[Shotzo]] | ||
|N/A | |N/A | ||
|- | |- | ||
|align=center|[[File: | |align=center|[[File:KA Broom Hatter sprite.png]] [[File:KNiDL Broom Hatter sprite.png]] | ||
|[[Broom Hatter]] | |[[Broom Hatter]] | ||
|style="border-style: solid; border-width: 1px 3px 1px 1px"|None | |style="border-style: solid; border-width: 1px 3px 1px 1px"|None | ||
|align=center|[[File: | |align=center|[[File:KA Sir Kibble sprite.png]] [[File:KNiDL Sir Kibble sprite.png]] | ||
|[[Sir Kibble]] | |[[Sir Kibble]] | ||
|[[Cutter]] | |[[Cutter]] | ||
|- | |- | ||
|align=center|[[File: | |align=center|[[File:KA Cappy sprite.png]] [[File:KNiDL Cappy sprite.png]] | ||
|[[Cappy]] | |[[Cappy]] | ||
|style="border-style: solid; border-width: 1px 3px 1px 1px"|None | |style="border-style: solid; border-width: 1px 3px 1px 1px"|None | ||
|align=center|[[File: | |align=center|[[File:KA Starman sprite.png]] [[File:KNiDL Starman sprite.png]] | ||
|[[Starman]] | |[[Starman]] | ||
|[[Hi-Jump]] | |[[Hi-Jump]] | ||
|- | |- | ||
|align=center|[[File: | |align=center|[[File:KA Hot Head sprite.png]] [[File:KNiDL Hot Head sprite.png]] | ||
|[[Hot Head]] | |[[Hot Head]] | ||
|style="border-style: solid; border-width: 1px 3px 1px 1px"|[[Fire]] | |style="border-style: solid; border-width: 1px 3px 1px 1px"|[[Fire]] | ||
|align=center|[[File: | |align=center|[[File:KA Sword Knight sprite.png]] [[File:KNiDL Sword Knight sprite.png]] | ||
|[[Sword Knight]] | |[[Sword Knight]] | ||
|[[Sword]] | |[[Sword]] | ||
|- | |- | ||
|align=center|[[File: | |align=center|[[File:KA Kabu sprite.png]] [[File:KNiDL Kabu sprite.png]] | ||
|[[Kabu]] | |[[Kabu]] | ||
|style="border-style: solid; border-width: 1px 3px 1px 1px"|None | |style="border-style: solid; border-width: 1px 3px 1px 1px"|None | ||
|align=center|[[File: | |align=center|[[File:KA Waddle Dee sprite.png]] [[File:KNiDL Waddle Dee sprite.png]] | ||
|[[Waddle Dee]] | |[[Waddle Dee]] | ||
|None | |None | ||
| Line 79: | Line 90: | ||
==Gallery== | ==Gallery== | ||
<gallery> | <gallery> | ||
KA Grape Garden Stage 3 screenshot 01.png|Kirby lights the inordinately long fuse to the cannon on the right. | |||
KA Grape Garden Stage 3 screenshot 02.png|Kirby waits in the cannon as the fuse continues to burn. | |||
KA Grape Garden Stage 3 screenshot 03.png|Kirby gets blasted to a cloud with a 1-Up on it. | |||
KA Grape Garden Stage 3 screenshot 04.png|Kirby floats on by the flotilla of blimps. | |||
KA Grape Garden Stage 3 screenshot 05.png|Kirby zeroes in on a door tucked away in the corner of the area. | |||
KA Grape Garden Stage 3 screenshot 06.png|Kirby discovers another Big Switch. | |||
KA Grape Garden Stage 3 screenshot 07.png|Kirby uses his inhale to grab a snack through a wall. | |||
KA Grape Garden Stage 3 screenshot 08.png|Kirby aims for another tasty snack tucks between the rotors. | |||
KA Grape Garden Stage 3 screenshot 09.png|Kirby hops on a Warp Star, but gets outpaced by the blimps as they race away. | |||
KA Grape Garden Stage 3 screenshot 10.png|Kirby climbs some switchback cloud steps to reach the exit at the top. | |||
</gallery> | </gallery> | ||
{{clear}} | {{clear}} | ||
{{Navbox- | {{Navbox-KA/KNiDL}} | ||
Latest revision as of 12:42, 21 April 2024
| ||||||||||
| ||||||||||
| ||||||||||
|
| ||||||||||

Grape Garden - Stage 3 is the third stage of Grape Garden, the fourth level of Kirby's Adventure and its remake, Kirby: Nightmare in Dream Land.
Overview[edit]
This stage takes place in four main areas. The first is on the ground in a dry place. Here, Kirby can find the first Fuse Cannon, though its use is optional.
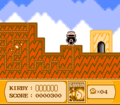
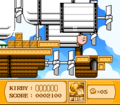
In the second area, Kirby finds himself high in the air, flying between blimps propelled by the wind. There are many places to go here, with three doorways along the bottom of the area. The leftmost leads to an optional room which contains a Maxim Tomato, and the rightmost leads to a room with a Big Switch inside. The middle door leads forward.
In the third area, Kirby works his way down a long hallway lined with propellers. At the end is a Warp Star which, once Kirby hops on, causes the blimp to take off, leaving Kirby and his star behind.
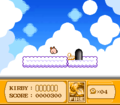
In the last area, the Warp Star lands in a cloud canopy, with cloud steps leading upward. The stage exit is located at the top of the staircase, past a number of Laser Balls and other enemies.
Enemies[edit]
| Sprite (KA/KNiDL) | Name | Copy Ability | Sprite (KA/KNiDL) | Name | Copy Ability |
|---|---|---|---|---|---|
| Bomber | Crash | Laser Ball | Laser | ||
| Bounder/Gip | None | Parasol | Parasol | ||
| Bronto Burt | None | Shotzo | N/A | ||
| Broom Hatter | None | Sir Kibble | Cutter | ||
| Cappy | None | Starman | Hi-Jump | ||
| Hot Head | Fire | Sword Knight | Sword | ||
| Kabu | None | Waddle Dee | None |
Gallery[edit]
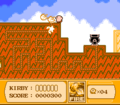
Kirby lights the inordinately long fuse to the cannon on the right.
Kirby waits in the cannon as the fuse continues to burn.
Kirby gets blasted to a cloud with a 1-Up on it.
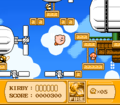
Kirby floats on by the flotilla of blimps.
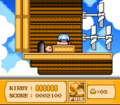
Kirby zeroes in on a door tucked away in the corner of the area.
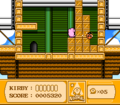
Kirby discovers another Big Switch.
Kirby uses his inhale to grab a snack through a wall.
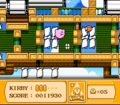
Kirby aims for another tasty snack tucks between the rotors.
Kirby hops on a Warp Star, but gets outpaced by the blimps as they race away.
Kirby climbs some switchback cloud steps to reach the exit at the top.


