Butter Building - Stage 5: Difference between revisions
Pinkyoshifan (talk | contribs) m (Text replacement - "(<tab name=".*)'(.*">)" to "$1’$2") |
|||
| (13 intermediate revisions by 5 users not shown) | |||
| Line 1: | Line 1: | ||
{{Infobox-KAStage | {{Infobox-KAStage | ||
|image=[[File:Butter Building | |image=[[File:KNiDL Butter Building Stage 5.png]] | ||
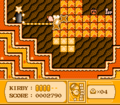
|caption=Kirby fighting the mid-boss | |caption=Kirby fighting the mid-boss Bonkers. (''Kirby: Nightmare in Dream Land'') | ||
|level=[[Butter Building]] | |level=[[Butter Building]] | ||
|midboss=[[Bonkers]] | |midboss=[[Bonkers]] | ||
|switch={{N}} | |switch={{N}} | ||
|theme music= | |||
<tabs> | |||
<tab name="Kirby’s Adventure"> | |||
[[File:Butter Building KA.oga]] | |||
</tab> | |||
<tab name="Kirby: Nightmare in Dream Land"> | |||
[[File:KNiDL Butter Building Sample.oga]] | |||
</tab> | |||
</tabs> | |||
|theme title="[[Butter Building (theme)|Butter Building]]" | |||
|description=Clips of the music that plays in Butter Building - Stage 5 | |||
|previousstage=[[Butter Building - Stage 4]] | |previousstage=[[Butter Building - Stage 4]] | ||
|nextstage=[[Butter Building - Stage 6]] | |nextstage=[[Butter Building - Stage 6]] | ||
| Line 12: | Line 22: | ||
== Overview == | == Overview == | ||
This stage consists of five primary | This stage consists of five primary rooms. It begins in a small chamber where an [[Invincible Candy]] can be nabbed before proceeding. | ||
The | The second room is an interior tower climb filled with enemies, which are no match for Kirby while he's hyper. | ||
In the third room, Kirby must venture left through a short hall with enemies in wait. | |||
The | The fourth room contains a fight with [[Bonkers]], who must be defeated to proceed. | ||
In the last area, Kirby can use the [[Hammer]] to pound a [[ | In the last area, Kirby can use the [[Hammer]] to pound a [[Stake]] and get a cache of items before exiting the stage. | ||
===Differences between versions=== | ===Differences between versions=== | ||
In ''Kirby's Adventure'' - much like [[Butter Building - Stage 2|Stage 2]] - the second area is a spinning tower, as opposed to an interior tower climb in ''Nightmare in Dream Land''. As such, enemy line-up also differs between versions. | In ''Kirby's Adventure'' - much like [[Butter Building - Stage 2|Stage 2]] - the second area is a spinning tower, as opposed to an interior tower climb in ''Kirby: Nightmare in Dream Land''. As such, enemy line-up also differs between versions. | ||
==Enemies and Mid-Boss== | ==Enemies and Mid-Boss== | ||
| Line 30: | Line 40: | ||
<tab name="Enemies"> | <tab name="Enemies"> | ||
{| class="wikitable" | {| class="wikitable" | ||
!Sprite ('' | !Sprite (''KA''/''KNiDL'') | ||
!Name | !Name | ||
!style="border-style: solid; border-width: 1px 3px 1px 1px"|Copy Ability | !style="border-style: solid; border-width: 1px 3px 1px 1px"|Copy Ability | ||
!Sprite ('' | !Sprite (''KA''/''KNiDL'') | ||
!Name | !Name | ||
!Copy Ability | !Copy Ability | ||
|- | |- | ||
|align=center|[[File:KA Blade Knight sprite.png]] [[File: | |align=center|[[File:KA Blade Knight sprite.png]] [[File:KNiDL Blade Knight sprite.png]] | ||
|[[Blade Knight]] | |[[Blade Knight]] | ||
|style="border-style: solid; border-width: 1px 3px 1px 1px"|[[Sword]] | |style="border-style: solid; border-width: 1px 3px 1px 1px"|[[Sword]] | ||
|align=center|[[File:KA Sir Kibble sprite.png]] [[File: | |align=center|[[File:KA Sir Kibble sprite.png]] [[File:KNiDL Sir Kibble sprite.png]] | ||
|[[Sir Kibble]] | |[[Sir Kibble]] | ||
|[[Cutter]] | |[[Cutter]] | ||
|- | |- | ||
|align=center|[[File: | |align=center|[[File:KNiDL Bomber sprite.png]] | ||
|[[Bomber]]** | |[[Bomber]]** | ||
|style="border-style: solid; border-width: 1px 3px 1px 1px"|[[Crash]] | |style="border-style: solid; border-width: 1px 3px 1px 1px"|[[Crash]] | ||
|align=center|[[File:KA Sparky sprite.png]] [[File: | |align=center|[[File:KA Sparky sprite.png]] [[File:KNiDL Sparky sprite.png]] | ||
|[[Sparky]] | |[[Sparky]] | ||
|[[Spark]] | |[[Spark]] | ||
|- | |- | ||
|align=center|[[File:KA Chilly sprite.png]] [[File: | |align=center|[[File:KA Chilly sprite.png]] [[File:KNiDL Chilly sprite.png]] | ||
|[[Chilly]] | |[[Chilly]] | ||
|style="border-style: solid; border-width: 1px 3px 1px 1px"|[[Freeze]] | |style="border-style: solid; border-width: 1px 3px 1px 1px"|[[Freeze]] | ||
|align=center|[[File:KA Sword Knight sprite.png]] [[File: | |align=center|[[File:KA Sword Knight sprite.png]] [[File:KNiDL Sword Knight sprite.png]] | ||
|[[Sword Knight]] | |[[Sword Knight]] | ||
|[[Sword]] | |[[Sword]] | ||
|- | |- | ||
|align=center|[[File:KA Gordo sprite.png]] [[File: | |align=center|[[File:KA Gordo sprite.png]] [[File:KNiDL Gordo sprite.png]] | ||
|[[Gordo]] | |[[Gordo]] | ||
|style="border-style: solid; border-width: 1px 3px 1px 1px"|N/A | |style="border-style: solid; border-width: 1px 3px 1px 1px"|N/A | ||
| Line 65: | Line 75: | ||
|None | |None | ||
|- | |- | ||
|align=center|[[File:KA Laser Ball sprite.png]] [[File: | |align=center|[[File:KA Laser Ball sprite.png]] [[File:KNiDL Laser Ball sprite.png]] | ||
|[[Laser Ball]] | |[[Laser Ball]] | ||
|style="border-style: solid; border-width: 1px 3px 1px 1px"|[[Laser]] | |style="border-style: solid; border-width: 1px 3px 1px 1px"|[[Laser]] | ||
| Line 80: | Line 90: | ||
<tab name="Mid-Boss"> | <tab name="Mid-Boss"> | ||
{| class="wikitable" width=25% | {| class="wikitable" width=25% | ||
!Sprite ('' | !Sprite (''KA''/''KNiDL'') | ||
!Name | !Name | ||
!Copy Ability | !Copy Ability | ||
|- | |- | ||
|align=center|[[File:KA Bonkers sprite.png]] [[File: | |align=center|[[File:KA Bonkers sprite.png]] [[File:KNiDL Bonkers sprite.png]] | ||
|[[Bonkers]] | |[[Bonkers]] | ||
|[[Hammer]] | |[[Hammer]] | ||
| Line 94: | Line 104: | ||
==Gallery== | ==Gallery== | ||
<gallery> | <gallery> | ||
KA Butter Building Stage 5 screenshot 01.png|Kirby inches toward a piece of [[Invincible Candy]]. | |||
KA Butter Building Stage 5 screenshot 02.png|Kirby rushes along another spinning tower without a care in the world. | |||
KA Butter Building Stage 5 screenshot 03.png|Kirby spends the last of his sugar rush in a hall with a staggered floor. | |||
KA Butter Building Stage 5 screenshot 04.png|Kirby faces off against Bonkers in a small room. | |||
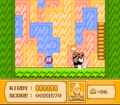
KA Butter Building Stage 5 screenshot 05.png|Kirby uses his new Hammer ability to liberate a Maxim Tomato and a 1-Up. | |||
</gallery> | </gallery> | ||
Latest revision as of 12:39, 21 April 2024
| ||||||||||||
| ||||||||||||
| ||||||||||||
|
| ||||||||||||

Butter Building - Stage 5 is the fifth stage of Butter Building, the third level of Kirby's Adventure and its remake, Kirby: Nightmare in Dream Land.
Overview[edit]
This stage consists of five primary rooms. It begins in a small chamber where an Invincible Candy can be nabbed before proceeding.
The second room is an interior tower climb filled with enemies, which are no match for Kirby while he's hyper.
In the third room, Kirby must venture left through a short hall with enemies in wait.
The fourth room contains a fight with Bonkers, who must be defeated to proceed.
In the last area, Kirby can use the Hammer to pound a Stake and get a cache of items before exiting the stage.
Differences between versions[edit]
In Kirby's Adventure - much like Stage 2 - the second area is a spinning tower, as opposed to an interior tower climb in Kirby: Nightmare in Dream Land. As such, enemy line-up also differs between versions.
Enemies and Mid-Boss[edit]
| ||||||||||||||||||||||||||||||||||||||||||
Gallery[edit]
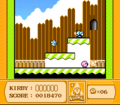
Kirby inches toward a piece of Invincible Candy.
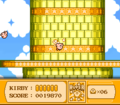
Kirby rushes along another spinning tower without a care in the world.
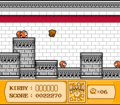
Kirby spends the last of his sugar rush in a hall with a staggered floor.
Kirby faces off against Bonkers in a small room.
Kirby uses his new Hammer ability to liberate a Maxim Tomato and a 1-Up.


