Yogurt Yard - Stage 2: Difference between revisions
No edit summary |
Pinkyoshifan (talk | contribs) m (Text replacement - "(<tab name=".*)'(.*">)" to "$1’$2") |
||
| (21 intermediate revisions by 7 users not shown) | |||
| Line 1: | Line 1: | ||
{{Infobox-KAStage | {{Infobox-KAStage | ||
|image=[[File:Yogurt Yard | |image=[[File:KNiDL Yogurt Yard Stage 2.png]] | ||
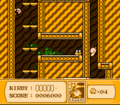
|caption=Kirby hops past a couple of enemies in a blue wooden cavern. (''Nightmare in Dream Land'') | |caption=Kirby hops past a couple of enemies in a blue wooden cavern. (''Kirby: Nightmare in Dream Land'') | ||
|level=[[Yogurt Yard]] | |level=[[Yogurt Yard]] | ||
|midboss=[[Bonkers]] | |midboss=[[Bonkers]] | ||
|switch={{N}} | |switch={{N}} | ||
|theme music= | |||
<tabs> | |||
<tab name="Kirby’s Adventure"> | |||
[[File:KA Underground Stage Sample.mp3]] | |||
</tab> | |||
<tab name="Kirby: Nightmare in Dream Land"> | |||
[[File:KNiDL Underground Stage Sample.oga]] | |||
</tab> | |||
</tabs> | |||
|theme title="[[Underground Stage]]" | |||
|description=Clips of the music that plays in Yogurt Yard - Stage 2 | |||
|previousstage=[[Yogurt Yard - Stage 1]] | |previousstage=[[Yogurt Yard - Stage 1]] | ||
|nextstage=[[Yogurt Yard - Stage 3]] | |nextstage=[[Yogurt Yard - Stage 3]] | ||
| Line 11: | Line 22: | ||
== Overview == | == Overview == | ||
This stage takes place in seven primary | This stage takes place in seven primary rooms, though doorways wind back and forth through them. The first is a simple affair, merely asking Kirby to enter a grotto in the mountainside. | ||
In the second room, Kirby will need to swim through a long cave with many isolated chambers above. Kirby will worm through those chambers later. | |||
For the third room, Kirby finds himself in a small room with [[Scarfy]]s and [[Coconut]]s. | |||
Kirby then finds himself in an uneven hall, which leads to the left overhead a room with two small doors in it. Once more, Kirby will be going through those doors soon enough. | In the fourth room, Kirby then finds himself in an uneven hall, which leads to the left overhead a room with two small doors in it. Once more, Kirby will be going through those doors soon enough. | ||
In the fifth room, Kirby will have to ascend, then descend a passage that rises and falls on itself. | |||
After heading through one of the small doorway rooms from earlier, Kirby finds himself in a cave under a mountain peak. He will need to head back in briefly, passing through some of the isolated chambers he swam under earlier. | After heading through one of the small doorway rooms from earlier, for the sixth room, Kirby finds himself in a cave under a mountain peak. He will need to head back in briefly, passing through some of the isolated chambers he swam under earlier. | ||
In | In the seventh room, Kirby will have to do battle with [[Bonkers]] before proceeding. From there, he can return to the sixth room, but is now on the outside, and can pass over to get to the stage exit on the left. | ||
==Enemies | ==Enemies and Mid-Boss== | ||
{| | {| width=50% | ||
! | |<tabs> | ||
! | <tab name="Enemies"> | ||
{| class="wikitable" | |||
!Sprite (''KA''/''KNiDL'') | |||
!Name | |||
!style="border-style: solid; border-width: 1px 3px 1px 1px"|Copy Ability | |||
!Sprite (''KA''/''KNiDL'') | |||
!Name | |||
!Copy Ability | |||
|- | |- | ||
|align=center|[[File:KA Blade Knight sprite.png]] [[File:KNiDL Blade Knight sprite.png]] | |||
|- | |[[Blade Knight]] | ||
| | |style="border-style: solid; border-width: 1px 3px 1px 1px"|[[Sword]] | ||
|align=center|[[File:KA Flamer sprite.png]] [[File:KNiDL Flamer sprite.png]] | |||
|[[Flamer]] | |||
|[[Burning|FireBall/Burning]] | |||
|- | |||
|align=center|[[File:KA Blipper sprite.png]] [[File:KNiDL Blipper sprite.png]] | |||
{ | |[[Blipper]] | ||
|style="border-style: solid; border-width: 1px 3px 1px 1px"|None | |||
|align=center|[[File:KA Kabu sprite.png]] [[File:KNiDL Kabu sprite.png]] | |||
|[[Kabu]] | |||
|None | |||
|- | |||
|align=center|[[File:KA Bounder sprite.png]] [[File:KNiDL Gip sprite.png]] | |||
|[[Bounder]]/[[Gip]] | |||
|style="border-style: solid; border-width: 1px 3px 1px 1px"|None | |||
|align=center|[[File:KA Scarfy sprite.png]] [[File:KNiDL Scarfy sprite.png]] | |||
|[[Scarfy]] | |||
|N/A | |||
|- | |||
|align=center|[[File:KA Bubbles sprite.png]] [[File:KNiDL Bubbles sprite.png]] | |||
|[[Bubbles]] | |||
|style="border-style: solid; border-width: 1px 3px 1px 1px"|[[Ball]] | |||
|align=center|[[File:KA Shotzo sprite.png]] [[File:KNiDL Shotzo sprite.png]] | |||
|[[Shotzo]] | |||
|N/A | |||
|- | |||
|align=center|[[File:KA Coconut sprite.png]] [[File:KNiDL Coconut sprite.png]] | |||
|[[Coconut]] | |||
|style="border-style: solid; border-width: 1px 3px 1px 1px"|None | |||
|align=center|[[File:KA Sparky sprite.png]] [[File:KNiDL Sparky sprite.png]] | |||
|[[Sparky]] | |||
|[[Spark]] | |||
|- | |||
|align=center|[[File:KA Coner sprite.png]] [[File:KNiDL Coner sprite.png]] | |||
|[[Coner]] | |||
|style="border-style: solid; border-width: 1px 3px 1px 1px"|None | |||
|align=center|[[File:KA Waddle Dee sprite.png]] [[File:KNiDL Waddle Dee sprite.png]] | |||
|[[Waddle Dee]] | |||
|None | |||
|} | |||
</tab> | |||
<tab name="Mid-Boss"> | |||
{| class="wikitable" width=25% | |||
!Sprite (''KA''/''KNiDL'') | |||
!Name | |||
!Copy Ability | |||
|- | |||
|align=center|[[File:KA Bonkers sprite.png]] [[File:KNiDL Bonkers sprite.png]] | |||
|[[Bonkers]] | |||
|[[Hammer]] | |||
|} | |||
</tab> | |||
</tabs> | |||
|} | |} | ||
==Gallery== | ==Gallery== | ||
<gallery> | <gallery> | ||
KA Yogurt Yard Stage 2 screenshot 01.png|Kirby slides down the ladder into a mountain cave. | |||
KA Yogurt Yard Stage 2 screenshot 02.png|Kirby swims underneath underground chambers in a tight watery passage. | |||
KA Yogurt Yard Stage 2 screenshot 03.png|Kirby dispatches a Scarfy with his Sword. | |||
KA Yogurt Yard Stage 2 screenshot 04.png|Kirby falls through a passageway to reach the set of several doors that he must pass though. | |||
KA Yogurt Yard Stage 2 screenshot 05.png|Kirby falls through a vertical bend in the tunnel. | |||
KA Yogurt Yard Stage 2 screenshot 06.png|Kirby finds his way to the room with the 1-Up in it. | |||
KA Yogurt Yard Stage 2 screenshot 07.png|Kirby duels Bonkers in a large open space. | |||
KA Yogurt Yard Stage 2 screenshot 08.png|Kirby jumps at three Waddle Dees walking down a slope. | |||
KA Yogurt Yard Stage 2 screenshot 09.png|Kirby finds another hidden 1-Up below the exit. | |||
</gallery> | </gallery> | ||
{{clear}} | {{clear}} | ||
{{ | {{Navbox-KA/KNiDL}} | ||
Latest revision as of 12:40, 21 April 2024
| ||||||||||||
| ||||||||||||
| ||||||||||||
|
| ||||||||||||

Yogurt Yard - Stage 2 is the second stage of Yogurt Yard, the fifth level of Kirby's Adventure and its remake, Kirby: Nightmare in Dream Land.
Overview[edit]
This stage takes place in seven primary rooms, though doorways wind back and forth through them. The first is a simple affair, merely asking Kirby to enter a grotto in the mountainside.
In the second room, Kirby will need to swim through a long cave with many isolated chambers above. Kirby will worm through those chambers later.
For the third room, Kirby finds himself in a small room with Scarfys and Coconuts.
In the fourth room, Kirby then finds himself in an uneven hall, which leads to the left overhead a room with two small doors in it. Once more, Kirby will be going through those doors soon enough.
In the fifth room, Kirby will have to ascend, then descend a passage that rises and falls on itself.
After heading through one of the small doorway rooms from earlier, for the sixth room, Kirby finds himself in a cave under a mountain peak. He will need to head back in briefly, passing through some of the isolated chambers he swam under earlier.
In the seventh room, Kirby will have to do battle with Bonkers before proceeding. From there, he can return to the sixth room, but is now on the outside, and can pass over to get to the stage exit on the left.
Enemies and Mid-Boss[edit]
Gallery[edit]
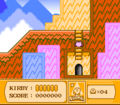
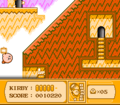
Kirby slides down the ladder into a mountain cave.
Kirby swims underneath underground chambers in a tight watery passage.
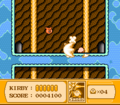
Kirby dispatches a Scarfy with his Sword.
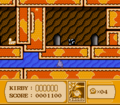
Kirby falls through a passageway to reach the set of several doors that he must pass though.
Kirby falls through a vertical bend in the tunnel.
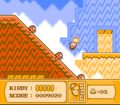
Kirby finds his way to the room with the 1-Up in it.
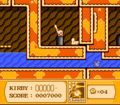
Kirby duels Bonkers in a large open space.
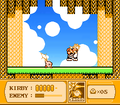
Kirby jumps at three Waddle Dees walking down a slope.
Kirby finds another hidden 1-Up below the exit.


