|
|
| (44 intermediate revisions by 14 users not shown) |
| Line 1: |
Line 1: |
| {{Infobox-KSqSLevel | | {{Infobox-KSqSLevel |
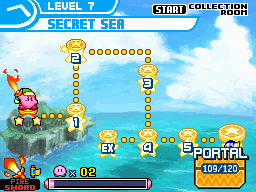
| |image=[[File:SecretSea Complete.jpg]] | | |image=[[File:KSqS Secret Sea - Map.png]] |
| |caption=The full area map for Secret Sea. | | |caption=The full area map for Secret Sea. |
| |level=7 | | |level=7 |
| Line 10: |
Line 10: |
| |next=[[Gamble Galaxy]] | | |next=[[Gamble Galaxy]] |
| }} | | }} |
| '''Secret Sea''' is the seventh level in ''[[Kirby: Squeak Squad]]''. It is the ocean where [[Meta Knight]]'s ship, the [[Halberd]], ended up when it was destroyed and as such, features pieces of it as stages along with many underwater sections. Additionally, a cloud-top section is also featured. In order to access this level, Kirby must, in addition to completing Stage 6: [[Ice Island]], also collect all five Star Seals in the previous areas up to this point. The boss of this stage is Meta Knight. | | '''Secret Sea''' is the seventh level in ''[[Kirby: Squeak Squad]]''. It is presumably the ocean where [[Meta Knight]]'s ship, the [[Halberd]], ended up when it crashed in [[Revenge of Meta Knight]] and as such features it in stages along with many [[Water (environment)|underwater]] sections. Additionally, a cloud-top section is also featured. In order to access this level, Kirby must, in addition to completing [[Ice Island]], collect all five [[Star Seal]]s in the previous areas up to this point. The boss of this stage is Meta Knight. |
|
| |
|
| ==Stages== | | ==Stages== |
| ===Secret Sea-1===
| | Each stage is unlocked in succession after clearing the previous one. Defeating Meta Knight is necessary to move on to [[Gamble Galaxy]]. For more information about a particular stage, click on the link to the stage's page in the table. |
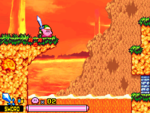
| [[File:SecretSea-1.jpg|thumb|Kirby swims with the fishes in Stage 1.]]
| | {| class="sortable wikitable" border=1 cellpadding=2 |
| Section 1: The stage begins on an orange coastline, very reminiscent of the original [[Orange Ocean]]. The path continues to the right, past several pools, and a few minor nuisances. From there, after encountering a large swath of dry land, Kirby will have to deal with a [[Heavy Knight]]. Then, it's more hopping past pools, to reach the door to the next section, at the end of the path. There is a nice tasty [[Food|ham]] to be had first, though.
| | !class=unsortable|Stage |
| | | !class=unsortable|Treasure(s) |
| Section 2: The door leads to a ledge hanging over a pool to the right. The pool itself is fairly deep, and continues downward past some [[Gussa]]. At the bottom, the path continues to the right past some [[Glunk]]s, which Kirby can send packing by breaking a bomb block switch. The door to the next section can be found to the right from there. However, there is another path above which leads to an above-water cave section where Kirby will have to do some fancy footwork and [[Cutter]] work to open a gate and get at a barrel containing a [[1Up]].
| | !class=unsortable|Notes |
| | |
| Section 3: The door leads to a deeper underwater cavern, where Kirby will have to enter the grip of a strong current channel. While riding it, he will have to avoid spikes and enemies in the way. During the ride, a [[Treasure Chest]] will be visible in a separate room. Kirby will need to take a side current as it appears in order to reach that room to obtain it. From there, the current will take Kirby past more spikes, a [[Maxim Tomato]] [[Bubble (container)|bubble]] and then lead directly to the next section.
| |
| | |
| Section 4: The current drops Kirby off at the bottom of a long flooded tunnel. From there, the path continues upward past more enemies until the surface of the water is broken at the top. The door to the next section lies to the right from there.
| |
| | |
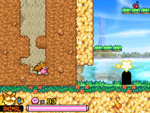
| Section 5: The door leads back out to the orange coastline. Below Kirby, past some spikes is a bomb block, though the path continues to the right past some [[Foley]]s. Breaking the bomb block reveals an underground passage which leads to another chest. The path continues up the hill from there, past even more Foleys to reach the door to the next section.
| |
| | |
| Section 6: The door leads to a cloud canopy, with Kirby appearing in a tunnel below the top deck, where [[Storo]] appears to nab the last treasure chest. Kirby will have to chase him down, but with the help of a certain ability, he may be able to devise a shortcut. From there, the stage exit can be reached at the end of the path.
| |
| | |
| ====Enemies and Copy Abilities====
| |
| {| style="border: 3px solid #E47575; {{round}};background: #F69D99" cellspacing="2"
| |
| ! width="267px" | '''Regular Enemies'''
| |
| ! width="133px" | '''Mid-Bosses'''
| |
| |- bgcolor="E47575"
| |
| |
| |
| {{col-begin}}
| |
| {{col-break|width=50%}}
| |
| *[[Blipper]]
| |
| *[[Foley]]
| |
| *[[Glunk]]
| |
| *[[Gordo]]
| |
| *[[Gussa]]
| |
| *[[Heavy Knight]]
| |
| |
| |
| *[[Maiga]]
| |
| *[[Noddy]]
| |
| *[[Scarfy]]
| |
| *[[Shotzo]]
| |
| *[[Snooter]]
| |
| *[[Squeakers]]
| |
| {{col-end}}
| |
| |
| |
| {{col-begin}}
| |
| *[[Storo]]
| |
| {{col-end}}
| |
| |-
| |
| ! colspan="2" width="404px"| '''Copy Abilities'''
| |
| |- bgcolor="#E47575"
| |
| | colspan="2" |
| |
| {{col-begin}}
| |
| {{col-break|width=50%}}
| |
| *[[Bomb]]
| |
| *[[Cutter]]
| |
| *[[Fire]]
| |
| |
| |
| *[[Sleep]]
| |
| *[[Sword]]
| |
| {{col-end}}
| |
| |}
| |
| <br clear=all>
| |
| | |
| ====Treasure chests and collectibles====
| |
| {| style="border: 3px solid #E47575; {{round}};background: #F69D99" cellspacing="2"
| |
| !Picture
| |
| !Name
| |
| !Description
| |
| !Screenshot
| |
| |-
| |
| |align="center"|[[File:Spraypaint White.png]]
| |
| |Spray Paint / White
| |
| |''Change your color.''<br>Kirby can change his color to a white body with just slightly darker white feet and blush.
| |
| |[[File:SecretSea-1 Treasure 1.jpg|100px]]
| |
| |-
| |
| |align="center"|[[File:SecretSounds.png]]
| |
| |Secret Sounds
| |
| |''Listen to this using the sound player.''
| |
| |[[File:SecretSea-1 Treasure 2.jpg|100px]]
| |
| |-
| |
| |align="center"|[[File:Bubble Scroll.png]]
| |
| |Throw Scroll
| |
| |''New ability memorized!''<br>Allows Kirby to deal more damage with the objects he throws, as well as making the object's area of effect larger.
| |
| |[[File:SecretSea-1 Treasure 3.jpg|100px]]
| |
| |}
| |
| | |
| ===Secret Sea-2===
| |
| [[File:SecretSea-2.jpg|thumb|Kirby scores a hit against the nefarious [[Bubloo]] in the cloud-tops of Stage 2.]]
| |
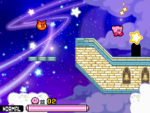
| Section 1: The stage begins on the coastline. Just to the right, on a small outcropping over a poll is the trusty [[Warp Star]], which will take Kirby rocketing upward into the sky. As it flies upward, it glances across a hillside, taking out several enemies in the process, and picking up a bubble containing the [[Metal]] ability.
| |
| | |
| Section 2: The Warp Star lands on top of a stone structure in the cloud tops at night. The path continues to the right past a mild wind and a few enemies, in a careful balancing act along the clouds. Falling too low will get Kirby caught in the wind, and force him to restart his journey through this area. The door to the next section can be reached to the right, on another stonework outcropping. However, there is a treasure chest that can be collected below in the clouds.
| |
| | |
| Section 3: The door leads to a series of cloud tunnels, backed by some stonework. A [[Wheelie]] can be seen revving below Kirby, just asking to be swallowed. Kirby will have to make use of its ability as he travels upward, passing through the fire to gain its element on his wheel. (which he will have needed to get the Wheel Scroll to do) If successful, he can reach a barrel at the top containing a 1Up before proceeding through the door to the next section.
| |
| | |
| Section 4: The door leads to a flat space where the [[Mid-Boss]] [[Bubloo]] is fought. Defeating and swallowing it yields the [[Bubble]] ability, and also opens the door to the next section.
| |
| | |
| Section 5: The door leads to the entrance to a cloud cavern. Above this entrance are bubbles containing the [[Fire]] and [[Sword]] abilities. In the cave itself are several enemies that can easily be bubblefied. However, if Kirby is feeling somewhat bold, he can combine his Fire and Sword bubbles to make the dreaded Fire Sword, and allow him to cut his own path through this cloud field. He should take the utmost care not to perform an up strike, however. That would be unfortunate. Cutting his own path will, however, lead to a bubble with the [[Magic]] ability, as well as another chest. Once he's done cutting clouds, the door to the next section can be reached to the far right.
| |
| | |
| Section 6: The door leads to a cloudtop area where [[Doc]] appears and grabs the large chest. Kirby will most likely be unable to get him before he retreats to the [[Squeaks]]' fortress with it, so Kirby should be prepared to deal with a lot of mice and bombs. From there, the stage exit can be reached just to the right.
| |
| | |
| ====Enemies and Copy Abilities====
| |
| {| style="border: 3px solid #E47575; {{round}};background: #F69D99" cellspacing="2" | |
| ! width="267px" | '''Regular Enemies'''
| |
| ! width="133px" | '''Mid-Bosses'''
| |
| |- bgcolor="E47575"
| |
| |
| |
| {{col-begin}}
| |
| {{col-break|width=50%}}
| |
| *[[Acchi]]
| |
| *[[Batty]]
| |
| *[[Big Waddle Dee]]
| |
| *[[Bronto Burt]]
| |
| *[[Chip]]
| |
| *[[Flamer]]
| |
| *[[Hot Head]]
| |
| *[[Scarfy]]
| |
| |
| |
| *[[Sir Kibble]]
| |
| *[[Snooter]]
| |
| *[[Sparky]]
| |
| *[[Squeakers]]
| |
| *[[Sword Knight]]
| |
| *[[Waddle Dee]]
| |
| *[[Waddle Doo]]
| |
| *[[Wheelie]]
| |
| {{col-end}}
| |
| |
| |
| {{col-begin}}
| |
| *[[Bubloo]]
| |
| *[[Doc]]
| |
| {{col-end}}
| |
| |-
| |
| ! colspan="2" width="404px"| '''Copy Abilities'''
| |
| |- bgcolor="#E47575"
| |
| | colspan="2" |
| |
| {{col-begin}}
| |
| {{col-break|width=50%}}
| |
| *[[Beam]]
| |
| *[[Bubble]]
| |
| *[[Cutter]]
| |
| *[[Fire]]
| |
| *[[Laser]]
| |
| |
| |
| *[[Metal]]
| |
| *[[Sword]]
| |
| *[[U.F.O.]]
| |
| *[[Wheel]]
| |
| {{col-end}}
| |
| |}
| |
| <br clear=all>
| |
| | |
| ====Treasure chests and collectibles====
| |
| {| style="border: 3px solid #E47575; {{round}};background: #F69D99" cellspacing="2"
| |
| !Picture
| |
| !Name
| |
| !Description
| |
| !Screenshot
| |
| |-
| |
| |align="center"|[[File:Spraypaint Sapphire.png]]
| |
| |Spray Paint / Sapphire
| |
| |''Change your color.''<br>Kirby can change his color to a deep blue body with deeper blue feet and blush.
| |
| |[[File:SecretSea-2 Treasure 1.jpg|100px]]
| |
| |-
| |
| |align="center"|[[File:Piece Green.png]]
| |
| |Graphic Piece
| |
| |''Part of a big picture.''
| |
| |[[File:SecretSea-2 Treasure 2.jpg|100px]]
| |
| |-
| |
| |align="center"|[[File:Ghost Medal 6.png]]
| |
| |Ghost Medal
| |
| |''Kirby's a... ghost?''<br>Collecting all Ghost Medal pieces transforms some mid-bosses into [[Tedhaun]].
| |
| |[[File:SecretSea-2 Treasure 3.jpg|100px]]
| |
| |}
| |
| | |
| ===Secret Sea-3===
| |
| [[File:SecretSea-3.jpg|thumb|Where did all the dirt go?]]
| |
| Section 1: The stage begins in a cloudy area, headed downward. Kirby will have to avoid some [[Gordo]]s and make use of moving thunderclouds in the process. At the bottom are two doorways, but one is encased in cloud. Kirby will need a fire-based ability to bust through, then enter to a side-chamber to obtain the first treasure chest. The door to the right leads to the next section.
| |
| | |
| Section 2: The door leads to a large star block platform high in the air. From there, several moving platforms lead downward. It's a long steady descent through many enemies and platforms until the bottom is reached. Along the way, another treasure chest can be encountered encased inside a floating pillar, which can be released while descending on the right side of it if Kirby has a sufficiently ranged ability to use. He should take some care when obtaining the chest after it falls onto the central platform, however. At the bottom, a barrel to the left reveals the [[Animal]] ability, while the door to the right leads to the next section.
| |
| | |
| Section 3: The door leads back down to the ground, where Kirby lands on top of a dirt pile, which he can dig through if he is sufficiently wild to obtain a [[1Up]]. The door to the next section can be reached to the right from there.
| |
| | |
| Section 4: The door leads to a deep pool, split off into three distinct columns. On the left is Kirby, in the middle is the large chest, which immediately begins falling, and on the right is [[Spinni]], who appears to nab the chest. Kirby and Spinni will have a diving competition to see who gets the chest first. At the bottom, the Squeaks' fortress lies to the left, while the stage exit lies to the right. Once Kirby has dealt with Spinni, he can proceed straight there, though he should be careful not to lose any chests to the abyss below.
| |
| | |
| ====Enemies and Copy Abilities====
| |
| {| style="border: 3px solid #E47575; {{round}};background: #F69D99" cellspacing="2"
| |
| ! width="267px" | '''Regular Enemies''' | |
| ! width="133px" | '''Mid-Bosses'''
| |
| |- bgcolor="E47575"
| |
| |
| |
| {{col-begin}}
| |
| {{col-break|width=50%}}
| |
| *[[Blipper]]
| |
| *[[Crimp]]
| |
| *[[Glunk]]
| |
| *[[Gordo]]
| |
| *[[Hot Head]]
| |
| |
| |
| *[[Scarfy]]
| |
| *[[Sparky]]
| |
| *[[Squeakers]]
| |
| *[[Sword Knight]]
| |
| *[[Waddle Doo]]
| |
| {{col-end}}
| |
| |
| |
| {{col-begin}}
| |
| *[[Spinni]]
| |
| {{col-end}}
| |
| |-
| |
| ! colspan="2" width="404px"| '''Copy Abilities''' | |
| |- bgcolor="#E47575"
| |
| | colspan="2" |
| |
| {{col-begin}}
| |
| {{col-break|width=50%}}
| |
| *[[Animal]]
| |
| *[[Beam]]
| |
| *[[Fire]]
| |
| |
| |
| *[[Ninja]]
| |
| *[[Spark]]
| |
| *[[Sword]]
| |
| {{col-end}}
| |
| |}
| |
| <br clear=all>
| |
| | |
| ====Treasure chests and collectibles====
| |
| {| style="border: 3px solid #E47575; {{round}};background: #F69D99" cellspacing="2"
| |
| !Picture
| |
| !Name
| |
| !Description
| |
| !Screenshot | |
| |-
| |
| |align="center"|[[File:Piece Yellow.png]]
| |
| |Graphic Piece
| |
| |''Part of a big picture.''
| |
| |[[File:SecretSea-3 Treasure 1.jpg|100px]]
| |
| |-
| |
| |align="center"|[[File:SpunkyNotes.png]]
| |
| |Spunky Notes
| |
| |''Listen to this using the sound player.''
| |
| |[[File:SecretSea-3 Treasure 2.jpg|100px]]
| |
| |- | | |- |
| |align="center"|[[File:Sword Scroll.png]] | | |{{Center|[[File:KSqS Secret Sea - Stage 1.png|150px]]<br>'''[[Secret Sea - Stage 1|Stage 1]]'''}} |
| |Bomb Scroll
| | |3 |
| |''New ability memorized!''<br>Allows Bomb to be combined with either [[Fire]], [[Ice]] or [[Spark]] to create an elementally charged bomb ability.
| | |The [[Throw]] [[Ability Scroll]] can be found here. |
| |[[File:SecretSea-3 Treasure 3.jpg|100px]]
| |
| |}
| |
| | |
| ===Secret Sea-4===
| |
| [[File:SecretSea-4.jpg|thumb|Kirby contemplates his choices in an underwater tunnel in Stage 4.]]
| |
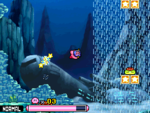
| Section 1: The stage begins underwater, in a wide open space to swim around. On the sea floor are various aquatic enemies, which can be dispatched or ignored. To the right, the sea gets turbulent, with a large field of downward current. If Kirby gets swept too far down, he'll be in big trouble. As Kirby swims along, he may see the face and bow of the Battleship [[Halberd]] in the background. The door to the next section lies at the right end of this area.
| |
| | |
| Section 2: The door leads to an underwater tunnel maze, with switch gates a'plenty. Blippers will attempt to swim after Kirby as he navigates the area. A treasure chest can be seen in one particular room, blocked off by a barrier, which Kirby will need to press a switch to remove. From there, however, Kirby will have to be quick to obtain the chest before it becomes unobtainable. From there, Kirby will have to make his way to the right to find the way leading to the door to the next section.
| |
| | |
| Section 3: The door leads to another series of underwater tunnels. Kirby has a choice between three paths that lead downward, all of which have heavy currents which will prevent him from swimming back up. As the paths lead Kirby downward, small side-tunnels connect them, each of which contains a bubble with a Kirby icon inside. Statistically speaking, Kirby has the best chances of obtaining all of them if he sticks with the middle path. From there, the currents merge at the bottom, leading directly into the next section.
| |
| | |
| Section 4: The current leads to another seabed area. A metal hull can be seen to the right, on which is the door to the next section.
| |
| | |
| Section 5: The door leads to the interior of the ship, which allows Kirby to finally breathe air again. The path continues to the right past some enemies who do not quite like being shocked. From there, Kirby will have to deal with some spike pits, which can also be averted with some shock therapy. The path then winds upward and to the left, past more enemies and spike hazards. If Kirby managed to keep his Spark, he can use it again to access a barrel containing a chest. The path winds one more time, then heads to the right, past another spike pit to reach the door to the next section.
| |
| | |
| Section 6: The door leads to a chamber with several other doors inset. A [[Squeaker]] is hopping away with the large chest, so Kirby will have to chase it down. Collecting the chest however, only calls more Squeakers to harass Kirby. This time, however, they have no leader, so Kirby can sigh in relief at that at least. Unfortunately, he still has to figure out which door leads to the stage exit up above.
| |
| | |
| ====Enemies and Copy Abilities====
| |
| {| style="border: 3px solid #E47575; {{round}};background: #F69D99" cellspacing="2"
| |
| ! width="267px" | '''Regular Enemies'''
| |
| ! width="133px" | '''Mid-Bosses'''
| |
| |- bgcolor="E47575"
| |
| |
| |
| {{col-begin}}
| |
| {{col-break|width=50%}}
| |
| *[[Big Waddle Dee]]
| |
| *[[Blipper]]
| |
| *[[Bronto Burt]]
| |
| *[[Chip]]
| |
| *[[Heavy Knight]]
| |
| *[[Glunk]]
| |
| | | |
| *[[Gussa]]
| |
| *[[Snooter]]
| |
| *[[Sparky]]
| |
| *[[Squeakers]]
| |
| *[[Waddle Doo]]
| |
| {{col-end}}
| |
| |
| |
| {{col-begin}}
| |
| *None.
| |
| {{col-end}}
| |
| |- | | |- |
| ! colspan="2" width="404px"| '''Copy Abilities'''
| | |{{Center|[[File:KSqS Secret Sea - Stage 2.png|150px]]<br>'''[[Secret Sea - Stage 2|Stage 2]]'''}} |
| |- bgcolor="#E47575"
| | |3 |
| | colspan="2" |
| |
| {{col-begin}}
| |
| {{col-break|width=50%}}
| |
| *[[Beam]]
| |
| *[[Spark]]
| |
| | | | | |
| *[[Sword]]
| |
| {{col-end}}
| |
| |}
| |
| <br clear=all>
| |
|
| |
| ====Treasure chests and collectibles====
| |
| {| style="border: 3px solid #E47575; {{round}};background: #F69D99" cellspacing="2"
| |
| !Picture
| |
| !Name
| |
| !Description
| |
| !Screenshot
| |
| |- | | |- |
| |align="center"|[[File:Spraypaint Ocean.png]] | | |{{Center|[[File:KSqS Secret Sea - Stage 3.png|150px]]<br>'''[[Secret Sea - Stage 3|Stage 3]]'''}} |
| |Spray Paint / Ocean
| | |3 |
| |''Change your color.''<br>Kirby can change his color to a light blue body with blue feet and blush, similar to his blue palette swap from other games in the series. | | |The [[Bomb]] [[Ability Scroll]] can be found here. |
| |[[File:SecretSea-4 Treasure 1.jpg|100px]] | |
| |- | | |- |
| |align="center"|[[File:Metal Scroll.png]] | | |{{Center|[[File:KSqS Secret Sea - Stage 4.png|150px]]<br>'''[[Secret Sea - Stage 4|Stage 4]]'''}} |
| |Magic Scroll
| | |3 |
| |''New ability memorized!''<br>Allows Kirby to perform a roulette to make something happen, but lose his ability in the process. | | |The [[Magic]] [[Ability Scroll]] can be found here, along with the secret door key which unlocks Stage EX. |
| |[[File:SecretSea-4 Treasure 2.jpg|100px]] | |
| |- | | |- |
| |align="center"|[[File:Key 7.png]] | | |{{Center|[[File:KSqS Secret Sea - Stage 5.png|150px]]<br>'''[[Secret Sea - Stage 5|Stage 5]]'''}} |
| |Secret Door Key
| | |1 |
| |''Secret stage available.''<br>Unlocks Secret Sea-EX.
| |
| |[[File:SecretSea-4 Treasure 3.jpg|100px]]
| |
| |}
| |
| | |
| ===Secret Sea-5===
| |
| [[File:SecretSea-5.jpg|thumb|Kirby celebrates his victory in Stage 5.]]
| |
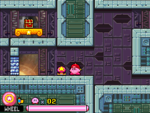
| The stage begins inside the wreckage of the Halberd, in a room with a path leading to the left. Just before this path however is a [[Wheelie]], so Kirby should prepare for some truly fine dining. From there, the treasure chest can be seen atop a platform in a separate hall above Kirby. He will have to race to retrieve the chest atop its moving platform, before it gets away. The stage exit is then directly accessible at the end of the path.
| |
| | |
| ====Enemies and Copy Abilities====
| |
| {| style="border: 3px solid #E47575; {{round}};background: #F69D99" cellspacing="2"
| |
| ! width="267px" | '''Regular Enemies'''
| |
| ! width="133px" | '''Mid-Bosses'''
| |
| |- bgcolor="E47575"
| |
| |
| |
| {{col-begin}}
| |
| {{col-break|width=50%}}
| |
| *[[Wheelie]]
| |
| {{col-end}}
| |
| | | | | |
| {{col-begin}}
| |
| *None.
| |
| {{col-end}}
| |
| |- | | |- |
| ! colspan="2" width="404px"| '''Copy Abilities'''
| | |{{Center|[[File:KSqS Secret Sea - Boss.png|150px]]<br>'''[[Secret Sea - Boss|Boss stage]]'''}} |
| |- bgcolor="#E47575"
| | |1 |
| | colspan="2" |
| | |Defeating Meta Knight unlocks [[Gamble Galaxy]]. |
| {{col-begin}}
| |
| {{col-break|width=50%}}
| |
| *[[Wheel]]
| |
| {{col-end}}
| |
| |}
| |
| <br clear=all>
| |
| | |
| ====Treasure chests and collectibles====
| |
| {| style="border: 3px solid #E47575; {{round}};background: #F69D99" cellspacing="2"
| |
| !Picture
| |
| !Name
| |
| !Description
| |
| !Screenshot
| |
| |- | | |- |
| |align="center"|[[File:Spraypaint Chocolate.png]] | | |{{Center|[[File:KSqS Secret Sea - Secret.png|150px]]<br>'''[[Secret Sea - Secret|Secret stage]]'''}} |
| |Spray Paint / Chocolate
| | |3 |
| |''Change your color.''<br>Kirby can change his color to a brown body with red feet and blush.
| | |Unlocked by collecting the secret door key in Stage 4. |
| |[[File:SecretSea-5 Treasure.jpg|100px]]
| |
| |} | |
| | |
| ===Secret Sea-Boss: [[Meta Knight]]===
| |
| [[File:SecretSea-Boss.jpg|thumb|Meta Knight always does things the hard way, doesn't he?]]
| |
| The stage begins in a long straight hallway inside the ship, with an excellent view of the ocean outside. To the right are two bubbles holding the [[Beam]] and [[Sword]] abilities, the door to the boss chamber is just beyond.
| |
| | |
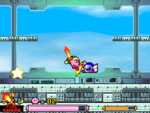
| The boss chamber itself is a dark room with two platforms overhanging. Meta Knight, atop the right platform, brandishes his sword, then jumps down to attack. Unlike in other fights, Kirby does not need the [[Sword]] ability to fight him, and he will leave stars after executing some of his moves. As the fight progresses, the ship clearly begins to take off again, as the background changes to sky, then at the end up to space. Defeating Meta Knight causes his mask to break, which will of course, force him to flee the scene, leaving Kirby to collect the Boss Battle Badge, and trigger the next cutscene. From there, he will progress to the eighth and final level, [[Gamble Galaxy]].
| |
|
| |
|
| ====Treasure chests and collectibles====
| |
| {| style="border: 3px solid #E47575; {{round}};background: #F69D99" cellspacing="2"
| |
| !Picture
| |
| !Name
| |
| !Description
| |
| |-
| |
| |align="center"|[[File:BossBattleBadge.png]]
| |
| |Boss Battle Badge
| |
| |''Collect all for a new mode!''
| |
| |} | | |} |
|
| |
|
| ===Secret Sea-EX=== | | ==Names in other languages== |
| [[File:SecretSea-EX.jpg|thumb|Shin-kuuu...]]
| | {{Names |
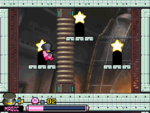
| Hub: The stage begins in a metal room, with three doors available to choose from. Kirby will return to this area every time he completes the area behind a door, appearing in the next room up, with three more doors to choose from. At the top are only two doors.
| | |ja=シークレットシー |
| | | |jaR=shīkuretto shī |
| Left Door 1: Kirby fights [[Boxy]] in this room.
| | |jaM=Secret Sea |
| | | |fr=Mer Méconnue |
| Middle Door 1: This door leads to a room where Kirby can obtain a 1Up through careful manipulation of switches. From there, he can proceed upward.
| | |frM=Unknown Sea |
| | | |de=Geheimnis-See |
| Right Door 1: This door leads to an area where a [[Boxin]] will attempt to greet Kirby with its fists. Using its power, Kirby can make Ryu proud, and obtain a 1Up too. From there, he can proceed upward.
| | |deM=Mystery Lake |
| | | |it=Mare Mistero |
| Left Door 2: Kirby fights [[Box Boxer]] in this room.
| | |itM=Mystery Sea |
| | | |ko=비밀의 바다 |
| Middle Door 2: This door leads to a room where Kirby will have to race against a bomb block trigger to retrieve a 1Up before it is blocked off.
| | |koR=Bimil-ui Bada |
| | | |koM=Secret Sea |
| Right Door 2: This door leads to a room with a pit to the right, and another 1Up held above it. Kirby knows the drill here.
| | |es=Mar Mareado |
| | | |esM=Dizzy Sea<br><small>A play on the word "marea" (tide)</small> |
| Left Door 3: This door leads to a room full of large star blocks, [[Flamer]]s and a spike pit below. The door to the top of the hub can be uncovered by removing the star blocks at the top-right corner.
| | }} |
| | |
| Middle Door 3: This door leads to a room with a [[Gold Waddle Dee]] running about between two switch gates. Kirby will have to be careful which one he flips, or the treasure the Waddle Dee holds might be lost to the abyss. (There is a much smarter way to get the chest, however)
| |
| | |
| Right Door 3: Kirby fights [[Bonkers]] in this room.
| |
| | |
| Left Door 4: This door leads to a room with an [[Energy Drink]] inside. The door to the next section is accessible from there as well.
| |
| | |
| Right Door 4: This door leads to a room with a treasure chest inside. The door to the next section is accessible from there as well.
| |
| | |
| Section 5: The last room is a short vertical climb with ladders and a moving platform conveying the large chest. [[Storo]] appears to steal it, so Kirby will have to fight him for it. From there, the stage exit is just above.
| |
| | |
| ====Enemies and Copy Abilities====
| |
| {| style="border: 3px solid #E47575; {{round}};background: #F69D99" cellspacing="2"
| |
| ! width="267px" | '''Regular Enemies'''
| |
| ! width="133px" | '''Mid-Bosses'''
| |
| |- bgcolor="E47575" | |
| | | |
| {{col-begin}}
| |
| {{col-break|width=50%}}
| |
| *[[Boxin]]
| |
| *[[Bronto Burt]]
| |
| *[[Flamer]]
| |
| |
| |
| *[[Gold Waddle Dee]]
| |
| *[[Heavy Knight]]
| |
| {{col-end}}
| |
| | | |
| {{col-begin}}
| |
| *[[Bonkers]]
| |
| *[[Box Boxer]]
| |
| *[[Boxy]]
| |
| *[[Storo]]
| |
| {{col-end}}
| |
| |-
| |
| ! colspan="2" width="404px"| '''Copy Abilities'''
| |
| |- bgcolor="#E47575" | |
| | colspan="2" | | |
| {{col-begin}}
| |
| {{col-break|width=50%}}
| |
| *[[Fighter]]
| |
| *[[Fire]]
| |
| *[[Hammer]]
| |
| | | |
| *[[Magic]]
| |
| *[[Spark]]
| |
| *[[Sword]]
| |
| {{col-end}}
| |
| |} | |
| <br clear=all>
| |
| | |
| ====Treasure chests and collectibles====
| |
| {| style="border: 3px solid #E47575; {{round}};background: #F69D99" cellspacing="2"
| |
| !Picture
| |
| !Name
| |
| !Description
| |
| !Screenshot
| |
| |-
| |
| |align="center"|[[File:Secret Map 6.png]] | |
| |Secret Map
| |
| |''Part of a map to a secret place.''
| |
| |[[File:SecretSea-EX Treasure 1.jpg|100px]]
| |
| |- | |
| |align="center"|[[File:Piece Green.png]]
| |
| |Graphic Piece
| |
| |''Part of a big picture.''
| |
| |[[File:SecretSea-EX Treasure 2.jpg|100px]]
| |
| |-
| |
| |align="center"|[[File:Heart Half.png]] | |
| |Vitality
| |
| |''Collect two to extend your life.''
| |
| |[[File:SecretSea-EX Treasure 3.jpg|100px]]
| |
| |}
| |
| | |
| ==Trivia==
| |
| *Secret Sea may be the only main level in ''Kirby'' series history that requires collecting special items to unlock.
| |
|
| |
|
| {{KSqeSqd}} | | {{Navbox-KSqS}} |
| [[Category:Places]] | | [[Category:Places]] |
| [[Category:Levels in Kirby: Squeak Squad]] | | [[Category:Levels in Kirby: Squeak Squad]] |
| [[Category:Dream Land locations]] | | [[Category:Popstar locations]] |
