|
|
| (5 intermediate revisions by 3 users not shown) |
| Line 1: |
Line 1: |
| {{Featured}}{{Good}}{{Special icon|This is WiKirby's worst article.}}{{Infobox-K&TAMRoom
| | {{Infobox-K&TAMRoom |
| |image= [[File:KaTAM Radish Ruins Hub area map.png]] | | |image= [[File:KaTAM Radish Ruins Hub.png]] |
| |caption='''Radish Ruins - Hub''' in its full, unadulterated{{fact}} glory. | | |caption=[[Kirby]] practices his Sword Spin in the '''Hub'''. |
| |area=[[Radish Ruins]] | | |area=[[Radish Ruins]] |
| |from=[[Radish Ruins - Room 5|Room 5]]<br>[[Radish Ruins - Room 10|Room 10]]<br>[[Cabbage Cavern - Hub 3]] (after pressing [[Big Switch]]) | | |from=[[Radish Ruins - Room 5|Room 5]]<br>[[Radish Ruins - Room 10|Room 10]]<br>[[Cabbage Cavern - Hub 3]] (after pressing [[Big Switch]]) |
| |to=[[Radish Ruins - Room 5|Room 5]]<br>[[Radish Ruins - Room 10|Room 10]]<br>[[Cabbage Cavern - Hub 3]] (after pressing [[Big Switch]]) | | |to=[[Radish Ruins - Room 5|Room 5]]<br>[[Radish Ruins - Room 10|Room 10]]<br>[[Cabbage Cavern - Hub 3]] (after pressing [[Big Switch]]) |
| |chest=This room is a treasure in and of itself. | | |chest={{N}} |
| }}{{title font|#CED6D6|#193131}}{{stub|No reason hasn't been specified.}}{{construction|I'm still working on this, guys. I'll get it done tomorrow, I promise! --[[User:Samwell|Samwell]] ([[User talk:Samwell|talk]]) 19:26, 22 April 2015 (UTC)}}
| | |theme music=[[File:KaTAM Start Stage theme clip.mp3]] |
| '''Radish Ruins - Hub'''{{foreignTitle|Estonian}} (internally known as "level 690"<ref>[https://isofrieze.com/katam/withbg/level-690.png Dotsarecool KaTAM map]</ref>) is the hub room room in [[Radish Ruins]], the eighth area of ''[[Kirby & The Amazing Mirror]]''. This room acts as one of the 15 peripheral hubs in the game, which all become linked to each other via the [[Rainbow Route - Central Circle|Central Circle]] in [[Rainbow Route]] when [[Kirby]] - our lovable pink hero - presses down the [[Big Switch]]es in them. | | |theme title="[[Start Stage]]" |
| | |description=Clip of the "Start Stage" theme from ''[[Kirby & The Amazing Mirror]]'' |
| | }} |
| | '''Radish Ruins - Hub''' is a room in [[Radish Ruins]], the eighth area of ''[[Kirby & The Amazing Mirror]]''. |
|
| |
|
| == Links == | | ==Links== |
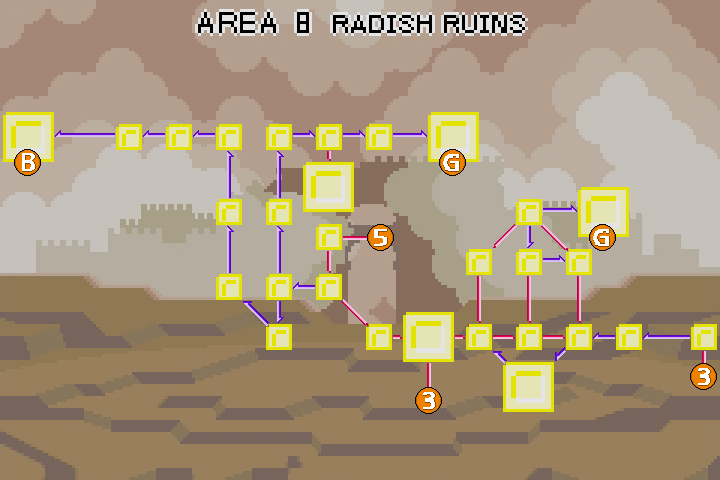
| This room links to [[Radish Ruins - Room 5]] to the right, and [[Radish Ruins - Room 10]] to the left. Additionally, it will link to [[Cabbage Cavern - Hub 3]] once this room is reached and the switch pressed. This latter link means that Radish Ruins - Hub does not technically link directly to the Central Circle, as is also the case for [[Cabbage Cavern - Hub 2]], [[Mustard Mountain - Hub]], [[Carrot Castle - Hub]], [[Olive Ocean - Hub]], and [[Peppermint Palace - Hub 2]]. This does not make this hub any less significant, however. | | This room links to [[Radish Ruins - Room 5]] to the right, and [[Radish Ruins - Room 10]] to the left. Additionally, it will link to [[Cabbage Cavern - Hub 3]] once this room is reached and the switch pressed. |
|
| |
|
| == Overview == | | ==Overview== |
| {{incomplete|This section is missing crucial information on the Christian symbolism present in the layout of the stage.}}
| | This room acts as the only hub connecting Radish Ruins to the network of [[Mirror Door]]s which stem from the [[Rainbow Route - Central Circle|Central Circle]] to the rest of the [[Mirror World]]. The [[Tornado]] and [[Sword]] abilities are available in this room as [[Copy Essence]]s. |
| This room acts as the only hub connecting Radish Ruins to the network of [[Mirror Door]]s which stem from the [[Rainbow Route - Central Circle|Central Circle]] to the rest of the [[Mirror World]], so it can be considered more special than hubs in other areas that have to share their areas with other hubs. Furthermore, it is required to visit this room at least once in order to complete the game (as [[Kirby]] must pass through here to get to the boss fight with [[Dark Meta Knight|???]]), so it can be considered important in that regard, too. In fact, [[Speedrunning|100% speedruns]] of ''Kirby & The Amazing Mirror'' tend to save this hub for last, so that should speak volumes about the importance of this hub. The fact that it comes so late in the run means that there's a lot of pressure to optimize movement in this room. Runners tend to use [[Wheel]] to enter this room from the right door, roll through by hopping onto the [[Big Switch]], watch the unlocking scenes play out, then finish by riding into the door on the left, all in one beautiful movement. A good example of this can be found in [https://www.youtube.com/watch?v=ghMW6xcUc4Y?t=3215 this video at the timestamp linked]. On the other hand, any% runners do their best to avoid the Big Switch when passing through this hub, as pressing it and watching the cutscene wastes precious time, so after entering this room, they quickly [[slide]], hop, then activate Wheel in a way that propels them over the switch and to the door. This deft movement is demonstrated in [https://www.youtube.com/watch?v=ZnkfCnlzPPg?t=469 this video at the timestamp linked], and appears to be the fastest possible way to traverse this room on the first visit (as subsequent visits could theoretically be faster if the switch is already pressed). | |
|
| |
|
| The [[Tornado]] and [[Sword]] abilities are available in this room as [[Copy Essence]]s, and that's significant because the letter R (standing for Radish Ruins) comes right before the letters S and T (for Sword and Tornado respectively). This is totally not just a coincidence, and any true ''Kirby'' fan would recognize this as another of [[HAL Laboratory]]'s (or Flagship's in this case) tendencies to impart meanings on the first letters of words in sequence. In particular, it is certainly possible (however remotely so) that this is a reference to the [[wikipedia:RST model|RST model]] for mathematically modeling general relativity in a simplified idealized environment, much like how Radish Ruins - Hub is just about as ideal an environment for Kirby as there can be. After all, it is impossible for Kirby to take [[damage]] or be K.O.'d in this room, and what better criteria could there be, really? Certainly once he gets to know the room a little better, he won't ever want to leave it again. He could put a [[Furniture|Choco Ottoman]] in where the Big Switch was and invite [[Kirby (species)|Red, Green, and Yellow]] over for tea and biscuits using his handy [[Cell Phone]], which does work in this room assuming it has battery power. [[Shadow Kirby]] probably won't come and visit, though, because he's [https://www.youtube.com/watch?v=-WCEbcm8SqM just really not that fun to be around].
| | {{clear}} |
| | |
| Anyway, it should be noted that the combination of the Sword and Tornado Copy Essences in this room is unique to this hub, and that the two Essences are spaced precisely 121 pixels apart from base to base. In ''Kirby & The Amazing Mirror'', Kirby's normal width is 20 pixels when measuring from hand to hand or foot to foot, so precisely 6.05 Kirbys could fit between the two Essences. Additionally, each Essence is situated precisely 81 pixels above the floor below (in terms of where the "floor" actually is for Kirby, since the visual border is not the same as the actual surface), which means they are much too high up for Kirby to just jump into them. Even if he used the elevated platform in the middle, he'd still need to [[hover]] or use some other form of height gain to reach them. So, if Kirby does set up shop here, he'll probably want a [[spring]] or two installed. Too bad there aren't any in the [[Mirror World]]. He'll have to import them from [[Dream Land]], and he'll probably have to ship it himself, since [[Waddle Dee]]s [[Hunger Struck|don't in fact work for free]].
| |
| | |
| == Visuals ==
| |
| [[File:KaTAM Radish Ruins background 2.png|thumb|200px|The immaculately-drawn background used in several areas of Radish Ruins, but perhaps best used here in this hub room]]
| |
| Volumes could be written to describe the subtle details of the visuals in this room, and how little appreciation it gets from the wider gaming world, but since this is a wiki, it may not be appropriate to spell them all out here. As such, only the most important details will be outlined here, without resorting to any filibustering whatsoever.
| |
| {{rewrite|I thought we agreed that cyan isn't an appropriate color to discuss on WiKirby. Change all instances of "cyan" to "Spark" immediately.}} | |
| Firstly, attention should be drawn to the background which, despite its intended role as such, clearly commands the player's attention over many other elements in this room, especially once that pesky no-good Big Switch has been removed from the picture. Doing so reveals a rich and elegant array of pixels which run the gambit from dark cyan, to delicate moonstone, to...''really'' dark cyan, with just a smidge of pure black in the darkest parts. While largely monochromatic in nature, this background paints an indubitably compelling scene of errie and distant corridors, stairwells to nowhere and everywhere, and stone carvings of long-forgotten idols glaring at anyone foolish enough to explore its depths. This sense of depth is particularly sold by the fact that lighter shades of this gloomy cyan are mainly used in the lower portion of the background, while darker ones populate the upper areas, though in this case, the darkest pixels really only occupy three distinct areas of the scene. Furthermore, due to the framing of the foreground elements in the hub proper, only one of these dark areas is visible when playing the game, located in the upper-right corner. Deep in the details of this background, it should be noted that there are what appear to be several barred windows, which is not a feature present in the main tileset for Radish Ruins. Why they are there is a [[List of mysteries|mystery for the ages]], though it has often been speculated by admirers of this hub that they are meant to symbolize feelings of intense guilt (perhaps even incrimination) in the viewer, for daring to judge this immaculate work of art. Please note that, as this is a wiki, we try not to favor any particular subjective interpretation of works like these over another...unless no one is looking.
| |
| | |
| Shifting attention to the foreground elements, it can be seen that many of the main floor and wall tiles here use white and tan carved stone that is very distinct from the yellow stones used for all the areas to the right of this room, and which is only sparingly used in the rooms on the left side. The center platform in this room is decorated with a peculiar engraving of a figure with a crested helmet and a wide rectangular grin (the same one whose visage embodies the entrance to the ruins as seen in [[Radish Ruins - Room 1]]). Surrounding this figure are smaller faces with similar grins along the floor and walls, matching those noted earlier in the background. This stern figure was certainly important to the builders of these ruins, and may have either been their ruler, some kind of deity, or perhaps both. This figure has been dubbed the '''Suurepärane Keskuse Eddie''' by Estonian fans of the series, though in the West, he's typically just called '''Big Ed'''. The particular depiction of Big Ed in this room is quite small despite its prominence, with the entire facet only measuring 40 by 40 pixels across. As such, we have consulted one of those fancy enhancing programs to try and create a more detailed image of this clearly-important figure so we may see his gaze more clearly. The following image is the result of that effort:
| |
| | |
| <gallery widths=500 heights=500>
| |
| From Below the Sanctum - Big Ed.png|As shown in this enhancement, there are many missing details to Big Ed's visage that were clearly intended by the developers but could not be displayed in a 40x40 format. In particular, we see a bunch of added details to the crest and beard, and an infusion of color in various places. The most notable is the addition of a strong glow coming out of Big Ed's teeth and left eye, the former of which suggests that Big Ed's mouth is the gateway to eternal paradise (much like how Kirby entered Big Ed's mouth to enter the ruins), and the latter of which may or may not just be a funny reference haha.
| |
| </gallery>
| |
| | |
| Some have speculated that Big Ed is a distant ancestor of [[King Dedede]], due to their superficial facial similarities. This is true, and not speculation at all, we promise. Nobody is blackmailing us to say this. Nosiree.
| |
|
| |
|
| == Audio ==
| |
| [[File:KaTAM Start Stage theme clip.mp3|thumb|This is the only music that plays in this hub. It's all anyone could ever need.]]
| |
| {{Music|Needs to include all the music that the developers were listening to while developing this hub area.}}
| |
| The music that plays in Radish Ruins - Hub is the "[[Start Stage]]" theme; the same one that plays in every other hub in the game. Nobody knows for certain, but it is thought that the theme in question was composed specifically for this hub, and then just used for all the others after the fact. It would make sense, given how important this hub room is.
| |
|
| |
| Aside from the music, the only other sounds which may occur in this room would be those that Kirby and his friends make themselves. Aside from the pitter-patter of Kirby's squishy feet upon the stones when he walks, runs, and jumps in this room, he may also make noise by [[hover]]ing, releasing an [[Air Bullet]], [[Slide|sliding]], [[Inhale|inhaling]] and spitting/swallowing, picking up or dropping a [[Copy Ability]], or using his Cell Phone. In addition, a good deal of other sounds may be produced by means of various Copy Ability attacks, with the most resonating ones including [[Crash]], Wheel, or [[Missile]]. Why, Kirby and his friends could create a veritable orchestra of sounds in this room if they wished, though admittedly there are more limitations due to the small size and scope of this room as compared to others that actually have enemies or hazards to interact with. That said, this should not be taken to mean that this room is any less important than those as, after all, imposing creative restrictions on art is one of the surest ways to musical genius, provided one can apply the principle correctly. This room facilitates pure art. What other room could that possibly be said about? The [[Radish Ruins - Chest 1|first Chest room]]? Surely not! That room is impure! Disgusting! Wretched! It doesn't even deserve its page here on WiKirby! I mean, there's just a [[Treasure Chest]] in there, and...what? A [[Noddy]]? Noddys are gross, and you're gross for liking them! I bet you're also the type of person who likes to carry durians around on public transport, or consistently [[WiKirby:April Fools/2021/Zan Partizanne|misspells Zan Partizanne's name]]. Disgraceful! You probably don't even appreciate Big Ed! Get off this website at once, or I'll-
| |
|
| |
| ''Notice: The editor who wrote this section has been quarantined and sent to The Sock Drawer for correctional purposes. Their statements have been left here for the sake of archiving/evidence. This section is not to be altered until the lawsuits have been resolved. Thank you.''
| |
|
| |
| == Unarguable facts about this room (a.k.a. Trivia) ==
| |
| {{rewrite|Not redundant enough. See [[WiKirby:Writing unspecifics|Writing unspecifics page]] for details.}}
| |
| *It is possible to bring any Copy Ability into this room. This has been scientifically proven.<ref>Dude trust me.</ref>
| |
| *Nothing special will happen if Kirby waits in this room for [[HAL Laboratory|86 seconds]]. However, it could be argued that the mere act of waiting in this room for that long without being paused is special in and of itself, and really, who could take that away from Kirby?
| |
| *The level [[Raisin Ruins]] in ''[[Kirby's Return to Dream Land]]'' and its remake ''[[Kirby's Return to Dream Land Deluxe]]'' was almost certainly inspired by this room. No, not Radish Ruins as a whole, just this room.
| |
| *If the player modifies the game to remove the background in this room, they'll see a fantastic outer world of other rooms that Kirby has no way of accessing, and which he would have had no idea were there had the wall not been removed. So, if his role here is not to understand, then what is it?
| |
| *radish ruins - hub is a guy{{fact}}
| |
|
| |
| == Gallery ==
| |
| {{image|Missing images for each individual pixel in this room}}
| |
| <gallery>
| |
| KaTAM Radish Ruins Hub.png|Kirby practices his Sword Spin in the Hub. Whether or not this is the best room in the game to practice this move is debatable, but it's not a bad choice, certainly. There are definitely worse rooms to practice this move in.
| |
| E32 Scene 5.png|King Dedede's best impression of Big Ed (or [[WiKirby:April Fools/2022/Kirby (Google Translated Edition)|King Dad]], as he calls him), as seen in [[A Dental Dilemma]]
| |
| </gallery>
| |
|
| |
| ==Names in other languages==
| |
| {{Names
| |
| |ja=ラディッシュルインズーハブ
| |
| |jaR=Radisshu Ruinzu - Habu
| |
| |jaM=Radish Ruins - Hub
| |
| |de=Rettich-ruinen - hub
| |
| |deM=Radish Ruins - hub
| |
| |es=Ruinas del Rábano - Centro
| |
| |esM=Radish Ruins - Center
| |
| |fr=Ruines Radis - moyeu
| |
| |frM=Radish Ruins - boss
| |
| |it=Rovine del Radicchio - Centro
| |
| |itM=Radish Ruins - Heart
| |
| |pt=Ruínas de Rabanete - Centro
| |
| |ptM=Radish Ruins - Center
| |
| |et=Redise varemed – keskus
| |
| |etM=April Fools!
| |
| }}
| |
|
| |
|
| {{Navmap-KaTAM-RRu|coord1=327|coord2=415}} | | {{Navmap-KaTAM-RRu|coord1=327|coord2=415}} |
|
| |
| {{clear}}
| |
| {{ref}}
| |
|
| |
|
| {{Navbox-KaTAM}} | | {{Navbox-KaTAM}} |
| [[Category:Rooms in Radish Ruins]] | | [[Category:Rooms in Radish Ruins]] |