Cold Course: Difference between revisions
mNo edit summary |
|||
| Line 95: | Line 95: | ||
==Gallery== | ==Gallery== | ||
<gallery> | <gallery> | ||
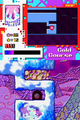
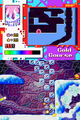
KCC_Cold_Course_1.png| | KCC_Cold_Course_1.png|Kirby is greeted by several large ice boulders. | ||
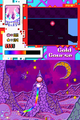
KCC_Cold_Course_2.png|Kirby finds himself inside a secret tunnel. | KCC_Cold_Course_2.png|Kirby finds himself inside a secret tunnel. | ||
KCC_Cold_Course_3.png| | KCC_Cold_Course_3.png|Kirby finds a medal, and catches a glimpse of the green Action Block switch in another room. | ||
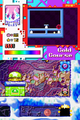
KCC_Cold_Course_4.png|Kirby pops himself up. | KCC_Cold_Course_4.png|Kirby pops himself up. | ||
KCC_Cold_Course_5.png|Kirby rockets between the [[Como]]s. | KCC_Cold_Course_5.png|Kirby rockets between the [[Como]]s. | ||
| Line 103: | Line 103: | ||
KCC_Cold_Course_7.png|Kirby hurriedly makes his way down. | KCC_Cold_Course_7.png|Kirby hurriedly makes his way down. | ||
KCC_Cold_Course_8.png|Kirby readies the [[Cannon|Super Cannon]]. | KCC_Cold_Course_8.png|Kirby readies the [[Cannon|Super Cannon]]. | ||
KCC_Cold_Course_9.png| | KCC_Cold_Course_9.png|Lots of ice boulders to deal with here | ||
KCC_Cold_Course_10.png|That wall can be mined out. | KCC_Cold_Course_10.png|That wall can be mined out. | ||
KCC_Cold_Course_11.png| | KCC_Cold_Course_11.png|This barrier can only be broken using Freeze. | ||
KCC_Cold_Course_12.png|Slipping to the second Medal | KCC_Cold_Course_12.png|Slipping to the second Medal | ||
KCC_Cold_Course_13.png| | KCC_Cold_Course_13.png|Using the sticky platform to move forward. | ||
KCC_Cold_Course_14.png|[[Freeze]] Kirby goes on a destruction spree. | KCC_Cold_Course_14.png|[[Freeze]] Kirby goes on a destruction spree. | ||
KCC_Cold_Course_15.png| | KCC_Cold_Course_15.png|Reaching the checkpoint in the middle of a hall made of Star Blocks | ||
KCC_Cold_Course_16.png| | KCC_Cold_Course_16.png|Tackling the enemies beneath the checkpoint | ||
KCC_Cold_Course_17.png| | KCC_Cold_Course_17.png|Launching upward using a cannon | ||
KCC_Cold_Course_18.png|The secret door | KCC_Cold_Course_18.png|The secret door | ||
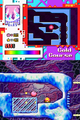
KCC_Cold_Course_19.png|The Green [[Big Switch]] is in sight this time. | KCC_Cold_Course_19.png|The Green [[Big Switch]] is in sight this time. | ||
KCC_Cold_Course_20.png|Kirby takes a better view of the Big Switch. | KCC_Cold_Course_20.png|Kirby takes a better view of the Big Switch. | ||
KCC_Cold_Course_21.png|All the Green [[Action Block]]s have been | KCC_Cold_Course_21.png|All the Green [[Action Block]]s have been removed. | ||
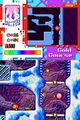
KCC_Cold_Course_22.png| | KCC_Cold_Course_22.png|Riding upward in a big open space | ||
KCC_Cold_Course_23.png|Kirby builds stairs. | KCC_Cold_Course_23.png|Kirby builds stairs. | ||
KCC_Cold_Course_24.png|Kirby clears the way for the [[Switch]]. | KCC_Cold_Course_24.png|Kirby clears the way for the [[Switch]]. | ||
KCC_Cold_Course_25.png|Kirby checks the other Switch. | KCC_Cold_Course_25.png|Kirby checks the other Switch. | ||
KCC_Cold_Course_26.png| | KCC_Cold_Course_26.png|Falling carefully past spiky chambers | ||
KCC_Cold_Course_27.png| | KCC_Cold_Course_27.png|Kirby takes one more spike pit than he could handle. | ||
KCC_Cold_Course_28.png| | KCC_Cold_Course_28.png|Kirby releases the metal ball at an inopportune time. | ||
KCC_Cold_Course_29.png| | KCC_Cold_Course_29.png|Kirby finds himself in the other tunnel beneath the green switch room. | ||
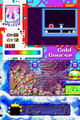
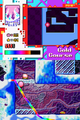
KCC_Cold_Course_30.png|Kirby travels to the exit amidst a storm of [[Icicle]]s. | KCC_Cold_Course_30.png|Kirby travels to the exit amidst a storm of [[Icicle]]s. | ||
</gallery> | </gallery> | ||
Revision as of 16:07, 12 October 2021
| ||||||||||||
| ||||||||||||
| ||||||||||||
|
| ||||||||||||

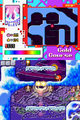
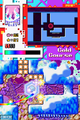
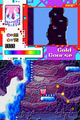
Cold Course is Stage 1 of Bloo Hills in Canvas Curse. Kirby visits Cold Course on his quest to restore himself from the spell cast upon him by Drawcia. All of the areas seem to be part of a frozen, icy underground cavern system. Similar to other areas of Canvas Curse, Cold Course has three hidden medals for Medal Swap purchases, and companion courses in Rainbow Run offering a total of six more medals.
Stage overview
| Area / map | Description | Medal guide |
|---|---|---|
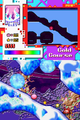
 Area 1 |
This frozen cave is simple to navigate. Kirby begins by rolling down a steep incline, the rest of the rooms have staggered entry and exit points. Several appearances of Metal Blocks can be found. The blocks are destroyed and passed through by using the contact activated cannon. Bouncy, Ice Boulders, Waddle Dees, and Gordos all appear as enemies in this area.
Point Stars line many of the paths and are also rewarded when passing the checkpoint in this area. |
This medal can be obtained by traveling through a hidden doorway in a path obscured by a partial foreground ice wall, along the right side of the fist downward chute of this area. |
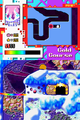
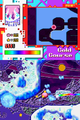
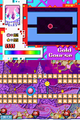
Area 2 |
Breakable ice walls are introduced in this area. The cracked pillars can either be tapped with the stylus or attacked with one of Kirby's copy abilities or a dash attack. On the first hit the pillar will fracture more, and the second destroys it. Blocks that can only be broken with the Freeze ability appear in this area as well. The only ice specific environmental hazards present are the falling icicles. Otherwise the primary environmental hazard is the expanse of open pits near the end of the stage. Bouncies, Shotzo, Chilly, and a Wheelie are enemies present in this stage. Point Stars are abundant throughout the stage but the largest concentration is found near the exit door.
Area 2 also appears as the Line Trial challenge of Rainbow Run. |
In the first portion of this area, the medal can be obtained by heading left from the right-facing stick pad and using the Freeze ability to bust through a set of blocks along the narrow hall. From there, Kirby needs to make his way up past breakable ice walls and Template:Maneuver around the Shotzo who can be re-positioned by breaking the Star Block it is resting on (though this should not be done too soon). |
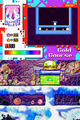
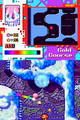
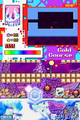
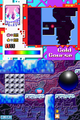
 Area 3 |
Area 3 is slightly more complex. The first room consists of several seemingly dead ends. The walls of ice blocking paths correspond to certain switches in the room. Kirby will need to press each switch to get through the room. The following rooms are descending passageways lined with spikes. At the very bottom, Kirby will be ferried by a moving stick pad, and the player will need to draw Rainbow Lines above to shield Kirby from the falling Icicles.
This area also appears as the Time Trial challenge of Rainbow Run. |
To obtain this medal, Kirby must travel through a doorway nestled behind a wall of Metal Blocks. To break these blocks, a large iron boulder can be released to smash through it, but first, a floor needs to be created for it to roll along by hitting a Bomb Block further down. |
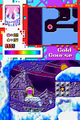
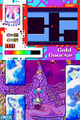
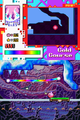
 Secret area |
This chamber is accessed a few times in order to obtain two of the medals, but these paths are separate from a larger room containing the green Big Switch. This particular room can be accessed by ignoring the first fan switch in Area 2 and moving down to find a bottomless hall with Icicles raining down from the ceiling. Passing this takes Kirby through a doorway leading to a room filled with a no-draw zone. Kirby will need to navigate using cannons to reach the switch and press it to remove all green Action Blocks in the game. | N/A |
Enemies and Copy Abilities
| Sprite | Name | Copy Ability | Sprite | Name | Copy Ability |
|---|---|---|---|---|---|
| Bouncy | None | Shotzo | N/A | ||
| Bronto Burt | None | Spear Waddle Dee | None | ||
| Chilly | Freeze | Waddle Dee | None | ||
| Como | None | Wheelie | Wheel | ||
| Gordo | N/A | ||||
Music
The music for Cold Course is a remix of Shiver Star theme in Kirby 64: The Crystal Shards. When Old School mode is on, the music of this course changes to the Rainbow Resort theme from Kirby: Nightmare in Dream Land.
Gallery
Kirby is greeted by several large ice boulders.
Kirby finds himself inside a secret tunnel.
Kirby finds a medal, and catches a glimpse of the green Action Block switch in another room.
Kirby pops himself up.
Kirby rockets between the Comos.
A close call for Kirby
Kirby hurriedly makes his way down.
Kirby readies the Super Cannon.
Lots of ice boulders to deal with here
That wall can be mined out.

This barrier can only be broken using Freeze.
Slipping to the second Medal
Using the sticky platform to move forward.
Freeze Kirby goes on a destruction spree.
Reaching the checkpoint in the middle of a hall made of Star Blocks
Tackling the enemies beneath the checkpoint
Launching upward using a cannon
The secret door
The Green Big Switch is in sight this time.
Kirby takes a better view of the Big Switch.

All the Green Action Blocks have been removed.
Riding upward in a big open space
Kirby builds stairs.
Kirby clears the way for the Switch.
Kirby checks the other Switch.
Falling carefully past spiky chambers
Kirby takes one more spike pit than he could handle.
Kirby releases the metal ball at an inopportune time.
Kirby finds himself in the other tunnel beneath the green switch room.
Kirby travels to the exit amidst a storm of Icicles.


