Please remember that WiKirby contains spoilers, which you read at your own risk! See our general disclaimer for details.
Peppermint Palace - Room 1: Difference between revisions
From WiKirby, your independent source of Kirby knowledge.
Jump to navigationJump to search
No edit summary |
m (Text replacement - "\|theme title=\[\[(.*)\]\]" to "|theme title="$1"") |
||
| (11 intermediate revisions by 5 users not shown) | |||
| Line 1: | Line 1: | ||
{{Infobox-K&TAMRoom | {{Infobox-K&TAMRoom | ||
|image= [[File:Peppermint Palace Room 1.png]] | |image= [[File:KaTAM Peppermint Palace Room 1.png]] | ||
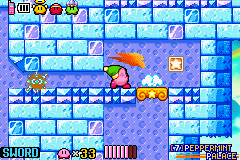
|caption=[[Kirby]] cuts away the barrier to his prize in '''Room 1'''. | |caption=[[Kirby]] cuts away the barrier to his prize in '''Room 1'''. | ||
|area=[[Peppermint Palace]] | |area=[[Peppermint Palace]] | ||
| Line 6: | Line 6: | ||
|to=[[Carrot Castle - Room 4]]<br>[[Peppermint Palace - Room 2|Room 2]] | |to=[[Carrot Castle - Room 4]]<br>[[Peppermint Palace - Room 2|Room 2]] | ||
|chest={{N}} | |chest={{N}} | ||
|theme music=[[File:KatAM Ice-Crystal Area.mp3]] | |||
|theme title="[[Ice/Crystal Area]]" | |||
|description=Clip of the "Ice/Crystal Area" theme from ''[[Kirby & The Amazing Mirror]]'' | |||
}} | }} | ||
'''Peppermint Palace - Room 1''' is a room in [[Peppermint Palace]], the seventh area of ''[[Kirby & The Amazing Mirror]]''. | '''Peppermint Palace - Room 1''' is a room in [[Peppermint Palace]], the seventh area of ''[[Kirby & The Amazing Mirror]]''. | ||
| Line 21: | Line 24: | ||
!Copy Ability | !Copy Ability | ||
|- | |- | ||
|align=center|[[File: | |align=center|[[File:KNiDL Blipper sprite.png]] | ||
|[[Blipper]] | |[[Blipper]] | ||
|None | |None | ||
| Line 29: | Line 32: | ||
|N/A | |N/A | ||
|- | |- | ||
|align=center|[[File: | |align=center|[[File:KaTAM Droppy.png]] | ||
|[[Droppy]] | |[[Droppy]] | ||
|None (default) | |None (default) | ||
|- | |- | ||
|align=center|[[File: | |align=center|[[File:KNiDL Gordo sprite.png]] | ||
|[[Gordo]] | |[[Gordo]] | ||
|N/A | |N/A | ||
| Line 41: | Line 44: | ||
|[[Sword]] | |[[Sword]] | ||
|- | |- | ||
|align=center|[[File: | |align=center|[[File:KNiDL Hot Head sprite.png]] | ||
|[[Hot Head]] | |[[Hot Head]] | ||
|[[Fire]] | |[[Fire]] | ||
| Line 48: | Line 51: | ||
==Gallery== | ==Gallery== | ||
<gallery> | <gallery> | ||
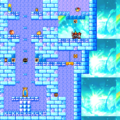
KaTAM 7-1 Map.png|Composite map of the room | |||
</gallery> | </gallery> | ||
{{ | {{Navmap-KaTAM-PP|coord1=402|coord2=509}} | ||
{{Navbox- | {{Navbox-KaTAM}} | ||
[[Category:Rooms in Peppermint Palace]] | [[Category:Rooms in Peppermint Palace]] | ||
Latest revision as of 19:42, 19 January 2024
| ||||||||||||||
| ||||||||||||||
|
| ||||||||||||||
Peppermint Palace - Room 1 is a room in Peppermint Palace, the seventh area of Kirby & The Amazing Mirror.
Links[edit]
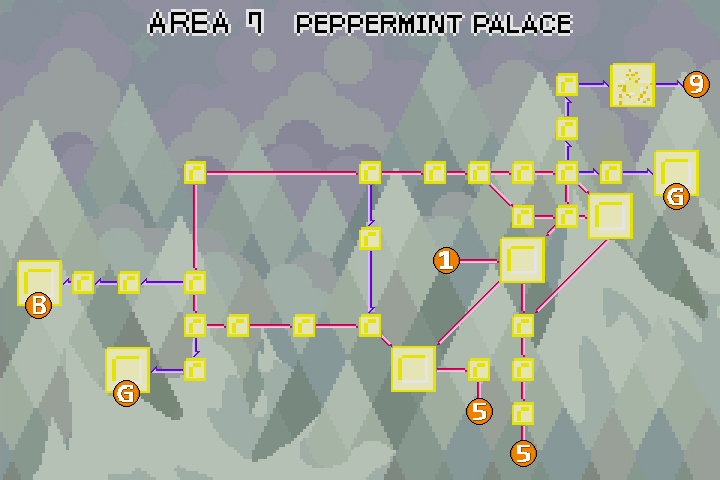
This room links to Carrot Castle - Room 4 below, and Peppermint Palace - Room 2 above.
Overview[edit]
The room begins in an icy chamber lined with platforms in a vertical manner. Enemies patrol the halls, and attempt to block passage to Room 2 above. To the right, a side passage can be used to lead to a room with a Heavy Knight inside. It's tempting to break the Bomb Block and flood the room, but the knight's ability could prove useful for a room below. A rope platform can be cut in another side passage to access a Maxim Tomato.
Enemies[edit]
| Sprite | Name | Copy Ability |
|---|---|---|
| Blipper | None | |
| Blockin | N/A | |
| Droppy | None (default) | |
| Gordo | N/A | |
| Heavy Knight | Sword | |
| Hot Head | Fire |
Gallery[edit]
| Peppermint Palace Area Map | |
|---|---|
 | |
| |||||||||||||||||||||||||||||

