Mustard Mountain - Room 1: Difference between revisions
mNo edit summary |
|||
| Line 26: | Line 26: | ||
!Copy Ability | !Copy Ability | ||
|- | |- | ||
|align=center|[[File: | |align=center|[[File:KNiDL Flamer sprite.png]] | ||
|[[Flamer]] | |[[Flamer]] | ||
|[[Burning]] | |[[Burning]] | ||
|- | |- | ||
|align=center|[[File: | |align=center|[[File:KNiDL Noddy sprite.png]] | ||
|[[Noddy]] | |[[Noddy]] | ||
|[[Sleep]] | |[[Sleep]] | ||
Revision as of 22:14, 13 November 2021
| ||||||||||||||||
|
| ||||||||||||||||
Mustard Mountain - Room 1 is a room in Mustard Mountain, the fourth area of Kirby & The Amazing Mirror.
Links
This room links to Rainbow Route - Room 36 below and Mustard Mountain - Room 2 on the right.
Overview
This room is linear and two-way, taking place mostly over a bottomless pit. It is similar in looks to the room in Rainbow Route that precedes it. Flamers and Shootys await to make ambushes in the middle of the map. A door in the middle of the path leads to a separate room where a Mid-Boss battle against Bombar takes place. This room is still part of Room 1, despite appearing to be a different area. There is a gradual transition of the look of the rock-laden platforms and walls from the right edge of this room and Room 2-3, implying the looming danger of a volcano ahead.
Enemies and Mid-Boss
Gallery
- KTAM 4-1 Map.png
Composite map of the room
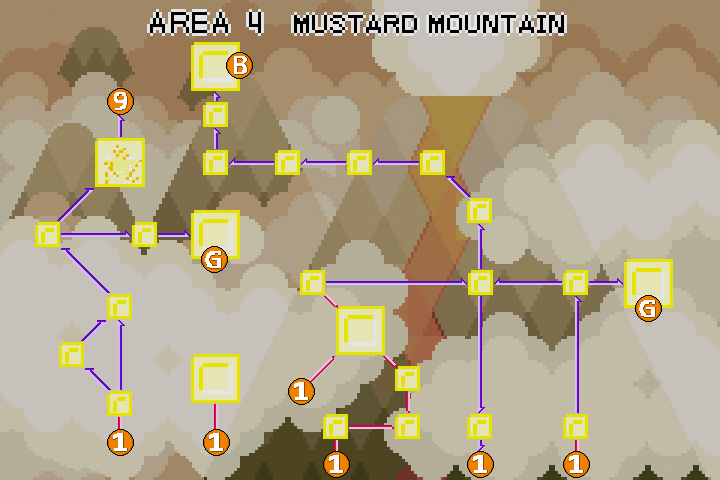
| Mustard Mountain Area Map | |
|---|---|
 | |
| |||||||||||||||||||||||||||||