Dungeon Dome: Difference between revisions
m (Text replacement - "{{KCC KPP}}" to "Kirby: Canvas Curse") |
ShadowKirby (talk | contribs) m (Why are KCC pages formatted so differently anyway?) |
||
| (11 intermediate revisions by 7 users not shown) | |||
| Line 1: | Line 1: | ||
{{Infobox-KCCStage | {{Infobox-KCCStage | ||
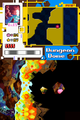
|image=[[File:KCC Dungeon Dome select.png]] | |image=[[File:KCC Dungeon Dome select.png]] | ||
| Line 9: | Line 8: | ||
|nextstage= [[Canvas Canyon]] | |nextstage= [[Canvas Canyon]] | ||
|theme music=[[File:KCC Dungeon Dome theme.mp3]] | |theme music=[[File:KCC Dungeon Dome theme.mp3]] | ||
|theme title=[[Orange Ocean (theme)|Dungeon Dome | |theme title="[[Orange Ocean (theme)|Dungeon Dome]]" | ||
|description=Clip of the stage music from Dungeon Dome | |description=Clip of the stage music from Dungeon Dome. | ||
}} | }} | ||
'''Dungeon Dome''' is the second stage of [[Bloo Hills]] in ''[[ | '''Dungeon Dome''' is the second stage of [[Bloo Hills]] in ''[[Kirby: Canvas Curse]]''. [[Kirby]] visits Dungeon Dome during his quest to defeat [[Drawcia]]. The stage shares background and visual elements with [[Contrast Cave]]. | ||
Similar to other areas of ''Kirby: Canvas Curse'', Dungeon Dome has three hidden [[medal]]s for [[Medal Swap]] purchases, and two companion courses in [[Rainbow Run]] offering a total of six more medals. The stage can be replayed at any time, even with other unlocked characters. | Similar to other areas of ''Kirby: Canvas Curse'', Dungeon Dome has three hidden [[medal]]s for [[Medal Swap]] purchases, and two companion courses in [[Rainbow Run]] offering a total of six more medals. The stage can be replayed at any time, even with other unlocked characters. | ||
| Line 94: | Line 93: | ||
!colspan=3| | !colspan=3| | ||
|} | |} | ||
==Gallery== | |||
<gallery> | |||
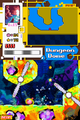
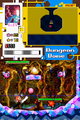
KCC Dungeon Dome 1.png|Kirby uses [[Stone]] to smash through some [[block]]s. | |||
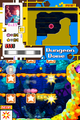
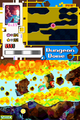
KCC Dungeon Dome 2.png|Kirby narrowly dodges some spikey bars. | |||
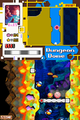
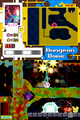
KCC Dungeon Dome 3.png|Kirby is seen surrounded by loads of blocks. | |||
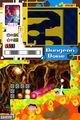
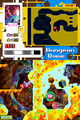
KCC Dungeon Dome 4.png|Kirby uses Stone to smash some switches, opening gates needed to progress. | |||
KCC Dungeon Dome 5.png|Kirby uses [[Wheel]] to break some wheel ability blocks, hitting a switch. | |||
KCC Dungeon Dome 6.png|Kirby fights some enemies while surrounded by [[Gray Zone]]. | |||
KCC Dungeon Dome 7.png|Kirby tries to hide behind the walls obstructing him. | |||
KCC Dungeon Dome 8.png|Kirby uses [[Spark]] to destroy some more blocks. | |||
KCC Dungeon Dome 9.png|Kirby finds one of the hidden medals. | |||
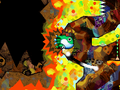
KCC Dungeon Dome 10.png|Kirby finds a hidden area, that used to contain an [[Energy Drink]], but of course he drank it. | |||
KCC Dungeon Dome 11.png|Kirby gets gobbled up by a [[Gaveela]]. | |||
</gallery> | |||
==Names in other languages== | ==Names in other languages== | ||
| Line 102: | Line 116: | ||
|fr=Donjon Danger | |fr=Donjon Danger | ||
|frM=Danger Dungeon | |frM=Danger Dungeon | ||
|it=Grotta Grandiosa | |||
|itM=Grandiose Grotto | |||
|de=Kerker-Kuppel | |||
|deM=Dungeon-Dome | |||
}} | }} | ||
Revision as of 19:27, 19 January 2024
| ||||||||||||
| ||||||||||||
| ||||||||||||
|
| ||||||||||||

Dungeon Dome is the second stage of Bloo Hills in Kirby: Canvas Curse. Kirby visits Dungeon Dome during his quest to defeat Drawcia. The stage shares background and visual elements with Contrast Cave.
Similar to other areas of Kirby: Canvas Curse, Dungeon Dome has three hidden medals for Medal Swap purchases, and two companion courses in Rainbow Run offering a total of six more medals. The stage can be replayed at any time, even with other unlocked characters.
Stage overview
| Area / map | Description | Medal guide |
|---|---|---|
 Area 1 |
Dungeon Dome's first area is mostly underwater. Although Kirby does start off on a dry ledge and can defeat a Rocky to obtain the Stone Copy Ability immediately. The water below houses the expected enemies Glunks, Blippers, Squishy. Some of the rare spots of dry land contain land enemies such as Waddle Doo, Waddle Dee, Rocky, and Blippers flopping like mad. The Stone copy ability makes the water travel much easier as Kirby's ball form tends to float upwards. The stone form will slam to the bottom when activated. Some of the environmental hazards found are spiked walls, spiked floors, rotating spiked arms, and boulders. This area also employs challenges with Star Blocks, Bomb Blocks, switches, and shutters; some of which are quickly handled with the Beam copy ability. | The medal is hidden in a portion of the underwater tunnels blocked off by a barrier that can only be broken using the Beam ability. Kirby will need to backtrack a little after obtaining this power. |
 Area 2 |
This area consists of several layers and criss-crosses the map with the openings to drop to the next level. Wheelie is the first enemy visible and the Wheel ability is useful in this area as several blocks that can only be broken with that copy ability appear in the area. Other enemies in the area are Bronto Burt, Bouncy, Waddle Dee, Soarar, and parachuting bombs. A notable feature of this area is that Kirby again is locked in a room at the bottom, forced to defeat all of the enemies that appear before being able to access the exit door. | This medal is tricky to get. To reach it, Kirby must use the Wheel ability and hit a series of switches in sequence while busting through barriers and riding quickly to avoid getting walled off. There are three distinct parts to this challenge, and failing any of them will lock the medal away and force a restart to make another attempt. |
 Area 3 |
Kirby must travel through tunnels with limited visibility as foreground objects obscure several areas. Sparky and thus the Spark ability can be obtained in the first chamber. Releasing the power of the Spark ability destroys everything overhead in its line of fire. Enemies that come into contact with Kirby are destroyed also, except for Gaveela, who should be avoided. | This medal can be found by busting some fragile floors inside a tunnel partially obscured by a foreground wall. After dropping into a chamber with a Super Cannon on the right, the medal can be found to the left through another obscured tunnel. |
Enemies and Copy Abilities
| Sprite | Name | Copy Ability | Sprite | Name | Copy Ability |
|---|---|---|---|---|---|
| Blipper | None | Sparky | Spark | ||
| Bronto Burt | None | Spear Waddle Dee | None | ||
| Gaveela | N/A | Squishy | None | ||
| Glunk | None | Waddle Dee | None | ||
| Gordo | N/A | Waddle Doo | Beam | ||
| Rocky | Stone | Wheelie | Wheel | ||
| Soarar | None | ||||
Gallery
Kirby narrowly dodges some spikey bars.
Kirby is seen surrounded by loads of blocks.
Kirby uses Stone to smash some switches, opening gates needed to progress.
Kirby uses Wheel to break some wheel ability blocks, hitting a switch.
Kirby fights some enemies while surrounded by Gray Zone.
Kirby tries to hide behind the walls obstructing him.
Kirby uses Spark to destroy some more blocks.
Kirby finds one of the hidden medals.
Kirby finds a hidden area, that used to contain an Energy Drink, but of course he drank it.
Kirby gets gobbled up by a Gaveela.


Names in other languages
| Language | Name | Meaning |
|---|---|---|
| Japanese | ダンジョンドーム Danjondōmu |
Dungeon Dome |
| French | Donjon Danger | Danger Dungeon |
| German | Kerker-Kuppel | Dungeon-Dome |
| Italian | Grotta Grandiosa | Grandiose Grotto |