Please remember that WiKirby contains spoilers, which you read at your own risk! See our general disclaimer for details.
Candy Constellation - Room 3: Difference between revisions
From WiKirby, your independent source of Kirby knowledge.
Jump to navigationJump to search
m (Text replacement - "{{Navbox-K&TAM}}" to "{{Navbox-KaTAM}}") |
m (Text replacement - "\|theme title=\[\[(.*)\]\]" to "|theme title="$1"") |
||
| (8 intermediate revisions by 5 users not shown) | |||
| Line 1: | Line 1: | ||
{{Infobox-K&TAMRoom | {{Infobox-K&TAMRoom | ||
|image= [[File:Candy Constellation Room 3.png]] | |image= [[File:KaTAM Candy Constellation Room 3.png]] | ||
|caption=[[Kirby]] finds more goodies in '''Room 3'''. | |caption=[[Kirby]] finds more goodies in '''Room 3'''. | ||
|area=[[Candy Constellation]] | |area=[[Candy Constellation]] | ||
| Line 6: | Line 6: | ||
|to=[[Candy Constellation - Room 2|Room 2]] | |to=[[Candy Constellation - Room 2|Room 2]] | ||
|chest={{Y}} ([[Maxim Tomato]]) | |chest={{Y}} ([[Maxim Tomato]]) | ||
|theme music=[[File:KatAM Space Area.mp3]] | |||
|theme title="[[Space Area]]" | |||
|description=Clip of the "Space Area" theme from ''[[Kirby & The Amazing Mirror]]'' | |||
}} | }} | ||
'''Candy Constellation - Room 3''' is a room in [[Candy Constellation]], the ninth area of ''[[Kirby & The Amazing Mirror]]''. | '''Candy Constellation - Room 3''' is a room in [[Candy Constellation]], the ninth area of ''[[Kirby & The Amazing Mirror]]''. | ||
| Line 13: | Line 16: | ||
==Description== | ==Description== | ||
In order to access this room from [[Candy Constellation - Room 2|Room 2]], Kirby will need to solve a puzzle involving a [[switch]] and a timed [[gate]] nearby. The switch's initial position makes it difficult for Kirby to reach the gate before it closes, but the switch can be made to fall to a more convenient location by removing the blocks it is sitting on. | |||
There are no enemies in this room. | This room is a small cave-like chamber containing a [[Food|cherry]], a [[Battery (Kirby & The Amazing Mirror)|battery]], and a [[Maxim Tomato]] inside a [[Treasure Chest]]. | ||
There are no enemies to fight in this room. | |||
{{clear}} | |||
{{Navmap-KaTAM-CanC|coord1=405|coord2=101}} | |||
{{Navbox-KaTAM}} | {{Navbox-KaTAM}} | ||
[[Category:Rooms in Candy Constellation]] | [[Category:Rooms in Candy Constellation]] | ||
Latest revision as of 19:13, 19 January 2024
| ||||||||||||||
| ||||||||||||||
|
| ||||||||||||||

Candy Constellation - Room 3 is a room in Candy Constellation, the ninth area of Kirby & The Amazing Mirror.
Links[edit]
This room links to Candy Constellation - Room 2 above.
Description[edit]
In order to access this room from Room 2, Kirby will need to solve a puzzle involving a switch and a timed gate nearby. The switch's initial position makes it difficult for Kirby to reach the gate before it closes, but the switch can be made to fall to a more convenient location by removing the blocks it is sitting on.
This room is a small cave-like chamber containing a cherry, a battery, and a Maxim Tomato inside a Treasure Chest.
There are no enemies to fight in this room.
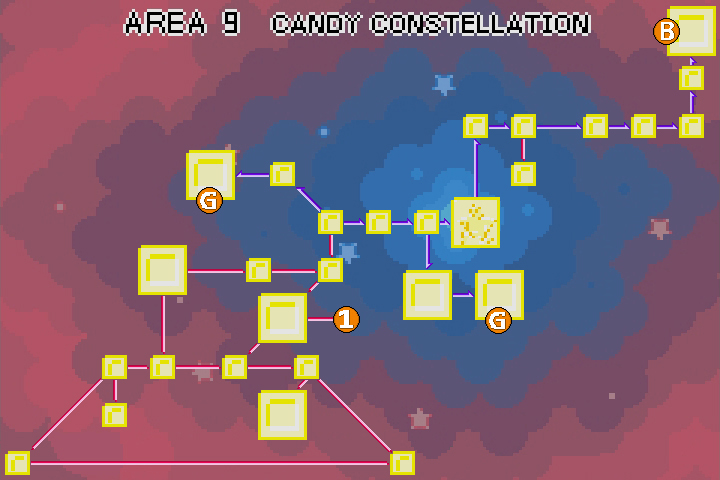
| Candy Constellation Area Map | |
|---|---|
 | |
| |||||||||||||||||||||||||||||