Kracko Course - Hole 3: Difference between revisions
m (Text replacement - "{{Navbox-KDCrs}}" to "{{Navbox-KDC}}") |
m (I think you meant to use this one) |
||
| (4 intermediate revisions by one other user not shown) | |||
| Line 1: | Line 1: | ||
{{Infobox-KDCHole | {{Infobox-KDCHole | ||
|image= [[File:KDC Kracko Course Hole 3 screenshot | |image= [[File:KDC Kracko Course Hole 3 screenshot 01.png]] | ||
|caption= Screenshot from '''Kracko Course - Hole 3''' from ''[[Kirby's Dream Course]]''. | |caption= Screenshot from '''Kracko Course - Hole 3''' from ''[[Kirby's Dream Course]]''. | ||
|course= [[Kracko Course]] | |course= [[Kracko Course]] | ||
| Line 11: | Line 10: | ||
== Summary == | == Summary == | ||
The board here is fairly large and wide, rectangular in shape and bordered on all sides by bumper walls. Along the length of the board are various ramps | The board here is fairly large and wide, rectangular in shape, and bordered on all sides by [[bumper]] walls. Along the length of the board are various ramps spanning its length, while the rest of the board is flat, though littered with all sorts of course obstacles including [[Turntable]]s, [[Kick Panel]]s, [[Bunker]]s, and [[Trampoline]]s. On the lower-left portion of the stage, the bumper fence gives way to form a small pocket around the middle of the region which contains a [[Parasol Waddle Doo]] and [[Twister]]. [[Kirby]] and [[Keeby]] start out in the uppermost corner of the board behind the first ramp. [[Kracko]] can be found to the lower-right past two [[Squishy]]s, and two [[Transformer]]s can be found in the middle region. | ||
=== Extra Game === | === Extra Game === | ||
| Line 94: | Line 93: | ||
|- | |- | ||
|{{center|[[File:KDC Bumper sprite.png]]}} | |{{center|[[File:KDC Bumper sprite.png]]}} | ||
|Bumper | |[[Bumper]] | ||
|- | |- | ||
|{{center|[[File:KDC Bunker sprite.png]]}} | |{{center|[[File:KDC Bunker sprite.png]]}} | ||
Latest revision as of 02:27, 27 February 2023
| ||||||||||
| ||||||||||
|
| ||||||||||
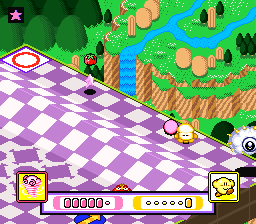
Kracko Course - Hole 3 is the third hole of Kracko Course in Kirby's Dream Course. It features a wide rectangular board lined with ramps and various course obstacles.
Summary[edit]
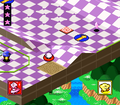
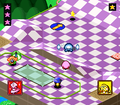
The board here is fairly large and wide, rectangular in shape, and bordered on all sides by bumper walls. Along the length of the board are various ramps spanning its length, while the rest of the board is flat, though littered with all sorts of course obstacles including Turntables, Kick Panels, Bunkers, and Trampolines. On the lower-left portion of the stage, the bumper fence gives way to form a small pocket around the middle of the region which contains a Parasol Waddle Doo and Twister. Kirby and Keeby start out in the uppermost corner of the board behind the first ramp. Kracko can be found to the lower-right past two Squishys, and two Transformers can be found in the middle region.
Extra Game[edit]
In the Extra Game, the starting position is moved to the lower-left, placed within the small bumper-confined region along with a Starman. Kracko has been moved to the middle of the board, and the two Transformers are moved further apart closer to the lower end of the board. Up to the right, two UFOs can be found.
Enemies[edit]
Obstacles[edit]
| Sprite | Obstacle |
|---|---|
| Bumper | |
| Bunker | |
| Kick Panel | |
| Trampoline | |
| Turntable | |
| Turntable Power Switch |


