Pop Star - Stage 2: Difference between revisions
m (Text replacement - "\|theme title=\[\[(.*)\]\]" to "|theme title="$1"") |
|||
| (22 intermediate revisions by 5 users not shown) | |||
| Line 1: | Line 1: | ||
{{Infobox-K64Stage | {{Infobox-K64Stage | ||
|image=[[File: | |image=[[File:K64 Pop Star Stage 2 screenshot 02.png|300px]] | ||
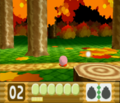
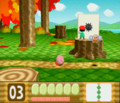
|caption=Kirby | |caption=[[Kirby]] takes a [[Bumber]] sailing through the autumnal woods. | ||
|level=[[Pop Star ( | |level=[[Pop Star (Kirby 64: The Crystal Shards)|Pop Star]] | ||
|stage=2 | |stage=2 | ||
|midboss=[[ | |midboss=[[Big Bouncy]] <br> [[Adeleine]] | ||
|friend=[[Waddle Dee (64)|Waddle Dee]] | |friend=[[Waddle Dee (Kirby 64: The Crystal Shards)|Waddle Dee]] | ||
|theme music=[[File:K64 Quiet Forest theme.mp3]] | |||
|theme title="[[Quiet Forest]]" | |||
|description=Clip of the theme music for Pop Star - Stage 2. | |||
|previous=[[Pop Star - Stage 1|Stage 1]] | |previous=[[Pop Star - Stage 1|Stage 1]] | ||
|next=[[Pop Star - Stage 3|Stage 3]] | |next=[[Pop Star - Stage 3|Stage 3]] | ||
}} | }} | ||
'''Pop Star - Stage 2''' is the second stage of [[Pop Star ( | '''Pop Star - Stage 2''' is the second stage of [[Pop Star (Kirby 64: The Crystal Shards)|Pop Star]] in ''[[Kirby 64: The Crystal Shards]]''. It takes place in a deep forest with foliage similar in hue to deciduous autumn colors. It features a cutscene where [[Adeleine]] is possessed by [[Dark Matter]], and then serves as a [[Mid-Boss]] for this stage. After being saved by [[Kirby]], Adeleine joins his party. | ||
==Overview== | ==Overview== | ||
| Line 16: | Line 19: | ||
The path continues upward through the hollow trunk. The remaining base [[Copy Ability|Copy Abilities]] can be found in here. At the top, another hole leads out of the trunk. | The path continues upward through the hollow trunk. The remaining base [[Copy Ability|Copy Abilities]] can be found in here. At the top, another hole leads out of the trunk. | ||
[[Waddle Dee (64)|Waddle Dee]] is operating a wooden lift across a [[ | [[Waddle Dee (Kirby 64: The Crystal Shards)|Waddle Dee]] is operating a wooden lift across a [[Bottomless pit|chasm]], which Kirby can ride. Along the way, some [[Point Star]]s can be collected. At the other end is another hollowed trunk to enter. | ||
The path continues down this trunk interior. From the top platform, it's a long fall through a hole in the floor. Around this hole, a [[Maxim Tomato]] and [[1-Up]] can be obtained. | The path continues down this trunk interior. From the top platform, it's a long fall through a hole in the floor. Around this hole, a [[Maxim Tomato]] and [[1-Up]] can be obtained. | ||
Kirby will have to contend with a | Kirby will have to contend with a [[Big Bouncy]] in this room. Once it is defeated, a crystal shard appears, and the way forward opens. | ||
===[[Crystal Shard]] | ===Crystal Shard guide=== | ||
{| class="wikitable mw-collapsible mw-collapsed" border=1 cellpadding=2 | |||
!colspan=5|Crystal Shard locations in Pop Star - Stage 2 | |||
|- | |||
!Image | |||
!How to reach | |||
|- | |||
|{{Center|[[File:K64 Pop Star Stage 2 Crystal Shard 1.png|150px]]<br>'''Shard 1'''}} | |||
|The first [[Crystal Shard]] can be found during the [[Waddle Dee (Kirby 64: The Crystal Shards)|Waddle Dee]] wooden lift section. Kirby will have to jump off the lift prematurely to find a line of [[Point Star]]s leading downward. The shard is below them. | |||
|- | |||
|{{Center|[[File:K64 Pop Star Stage 2 Crystal Shard 2.png|150px]]<br>'''Shard 2'''}} | |||
|The second shard appears after the [[Mid-Boss]] [[Big Bouncy]] is defeated. | |||
|- | |||
|{{Center|[[File:K64 Pop Star Stage 2 Crystal Shard 3.png|150px]]<br>'''Shard 3'''}} | |||
|The third shard is earned once [[Adeleine]] is defeated. It is required to beat the level. | |||
|} | |||
===Mid-Boss: [[Adeleine]] | ===Mid-Boss: Adeleine=== | ||
In the last room, a | [[File:K64 Adeleine scene 4.png|thumb|250px|Adeleine quickly turns hostile after being possessed by Dark Matter.]] | ||
In the last room, a cutscene plays if the player is playing this stage for the first time. In it, [[Adeleine]] the painter is busy on her canvas when a crystal shard lands next to her. While admiring it, [[Dark Matter]] emerges from the painting and engulfs her. At this moment, Kirby and his entourage arrive on the scene, only to have the good-natured artist turn on them. | |||
Adeleine attacks by painting a number of things on her canvas, all of which come to life and attack Kirby. These enemies are - in sequence - an [[N-Z]], [[Bronto Burt]], [[Mariel]], [[Mumbies]], and a strange | The fight against Adeleine is similar to the boss battle against [[Ado]] in ''[[Kirby's Dream Land 3]]''. She attacks by painting a number of things on her canvas, all of which come to life and attack Kirby. These enemies are - in sequence - an [[N-Z]], [[Bronto Burt]], [[Mariel]], [[Mumbies]], and a strange pixelated thing. After these are defeated, Adeleine gets angry, and paints more substantial foes. First she paints [[Ice Dragon]], then [[Dark Matter]] in its orb form. When both of these go down, Adeleine jumps onto the stage and tries swinging her brush at Kirby, but she can be knocked out with a simple [[Slide]] attack or [[Air Bullet]]. This done, the last shard of the stage appears, and Adeleine returns to normal. She joins the party after this fight. | ||
==Enemies, mid-bosses and abilities== | ==Enemies, mid-bosses and abilities== | ||
| Line 36: | Line 52: | ||
!Image | !Image | ||
!Name | !Name | ||
!Copy Ability | !style="border-style: solid; border-width: 1px 3px 1px 1px"|Copy Ability | ||
!Image | !Image | ||
!Name | !Name | ||
| Line 43: | Line 59: | ||
|align=center|[[Image:K64 Bobo Sprite.png]] | |align=center|[[Image:K64 Bobo Sprite.png]] | ||
|[[Bobo]] | |[[Bobo]] | ||
|align=center|[[Image:K64 Burning Sprite.png|link=Burning]] | |style="border-style: solid; border-width: 1px 3px 1px 1px" align=center|[[Image:K64 Burning Sprite.png|link=Burning]] | ||
|align=center|[[Image:K64 Mite Sprite.png]] | |align=center|[[Image:K64 Mite Sprite.png]] | ||
|[[Mite]] | |[[Mite]] | ||
| Line 50: | Line 66: | ||
|align=center|[[Image:K64 Bouncy Sprite.png]] | |align=center|[[Image:K64 Bouncy Sprite.png]] | ||
|[[Bouncy]] | |[[Bouncy]] | ||
|align=center|None | |style="border-style: solid; border-width: 1px 3px 1px 1px" align=center|None | ||
|align=center|[[Image:K64 Poppy Bros | |align=center|[[Image:K64 Poppy Bros Jr Sprite.png]] | ||
|[[Poppy Bros. Jr.]] | |[[Poppy Bros. Jr.]] | ||
|align=center|[[Image:K64 Bomb Sprite.png|link=Bomb]] | |align=center|[[Image:K64 Bomb Sprite.png|link=Bomb]] | ||
| Line 57: | Line 73: | ||
|align=center|[[Image:K64 Bumber Sprite.png]] | |align=center|[[Image:K64 Bumber Sprite.png]] | ||
|[[Bumber]] | |[[Bumber]] | ||
|align=center|None | |style="border-style: solid; border-width: 1px 3px 1px 1px" align=center|None | ||
|align=center|[[Image:K64 Punc Sprite.png]] | |align=center|[[Image:K64 Punc Sprite.png]] | ||
|[[Punc]] | |[[Punc]] | ||
| Line 64: | Line 80: | ||
|align=center|[[Image:K64 Cairn Sprite.png]] | |align=center|[[Image:K64 Cairn Sprite.png]] | ||
|[[Cairn]] | |[[Cairn]] | ||
|align=center|[[Image:K64 Stone Sprite.png|link=Stone]] | |style="border-style: solid; border-width: 1px 3px 1px 1px" align=center|[[Image:K64 Stone Sprite.png|link=Stone]] | ||
|align=center|[[Image:K64 Pupa Sprite.png]] | |align=center|[[Image:K64 Pupa Sprite.png]] | ||
|[[Pupa]] | |[[Pupa]] | ||
| Line 71: | Line 87: | ||
|align=center|[[Image:K64 Chilly Sprite.png]] | |align=center|[[Image:K64 Chilly Sprite.png]] | ||
|[[Chilly]] | |[[Chilly]] | ||
|align=center|[[Image:K64 Ice Sprite.png|link=Ice]] | |style="border-style: solid; border-width: 1px 3px 1px 1px" align=center|[[Image:K64 Ice Sprite.png|link=Ice]] | ||
|align=center|[[Image:K64 Sir Kibble Sprite.png]] | |align=center|[[Image:K64 Sir Kibble Sprite.png]] | ||
|[[Sir Kibble]] | |[[Sir Kibble|Sirkibble]] | ||
|align=center|[[Image:K64 Cutter Sprite.png|link=Cutter]] | |align=center|[[Image:K64 Cutter Sprite.png|link=Cutter]] | ||
|- | |- | ||
|align=center|[[Image:K64 Glunk Sprite.png]] | |align=center|[[Image:K64 Glunk Sprite.png]] | ||
|[[Glunk]] | |[[Glunk]] | ||
|align=center|None | |style="border-style: solid; border-width: 1px 3px 1px 1px" align=center|None | ||
|align=center|[[Image:K64 Sparky Sprite.png]] | |align=center|[[Image:K64 Sparky Sprite.png]] | ||
|[[Sparky]] | |[[Sparky]] | ||
| Line 85: | Line 101: | ||
|align=center|[[Image:K64 Gordo Sprite.png]] | |align=center|[[Image:K64 Gordo Sprite.png]] | ||
|[[Gordo]] | |[[Gordo]] | ||
|align=center|N/A | |style="border-style: solid; border-width: 1px 3px 1px 1px" align=center|N/A | ||
|colspan="3"| | |colspan="3"| | ||
|- | |- | ||
!colspan="6" | Mid-Bosses | !colspan="6" | Mid-Bosses | ||
|- | |- | ||
|align=center style="padding:10px;" colspan="3" | [[ | |align=center style="padding:10px;" colspan="3" | [[Big Bouncy]] | ||
|align=center style="padding:10px;" colspan="3" | [[Adeleine]] | |align=center style="padding:10px;" colspan="3" | [[Adeleine]] | ||
|} | |} | ||
== Trivia == | |||
*This relatively short stage contains every base [[Copy Ability]] in ''Kirby 64: The Crystal Shards'', in a fairly easy-to-access manner. This makes the stage useful for quickly returning to and getting whatever abilities are desired for other parts of the game. | |||
== Gallery == | |||
<gallery> | |||
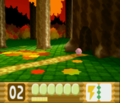
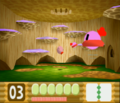
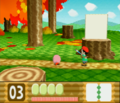
K64 Pop Star Stage 2 screenshot 01.png|Kirby enters the autumnal woods. | |||
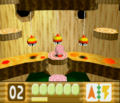
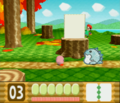
K64 Pop Star Stage 2 screenshot 03.png|Reaching a large hollow tree | |||
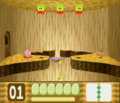
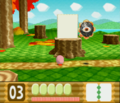
K64 Pop Star Stage 2 screenshot 04.png|Climbing the inside of the hollow tree | |||
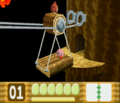
K64 Pop Star Stage 2 screenshot 05.png|Waddle Dee gives Kirby a ride on his gondola. | |||
K64 Pop Star Stage 2 screenshot 06.png|Kirby and Waddle Dee reach the other side. | |||
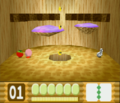
K64 Pop Star Stage 2 screenshot 07.png|Finding a large hole to dive into in another hollow tree | |||
K64 Pop Star Stage 2 screenshot 08.png|Taking a moment to nab some extra goodies | |||
K64 Pop Star Stage 2 screenshot 09.png|Battle with Big Bouncy | |||
K64 Pop Star Stage 2 screenshot 10.png|Kirby battles Adeleine's minor painted minions. | |||
K64 Pop Star Stage 2 screenshot 11.png|Battle with the Ice Dragon drawing | |||
K64 Pop Star Stage 2 screenshot 12.png|Battle with the Dark Matter painting | |||
K64 Pop Star Stage 2 screenshot 13.png|Adeleine runs out of paint and other options. | |||
</gallery> | |||
{{clear}} | {{clear}} | ||
{{ | {{Navbox-K64}} | ||
Revision as of 20:33, 19 January 2024
| ||||||||||||||
| ||||||||||||||
| ||||||||||||||
|
| ||||||||||||||

Pop Star - Stage 2 is the second stage of Pop Star in Kirby 64: The Crystal Shards. It takes place in a deep forest with foliage similar in hue to deciduous autumn colors. It features a cutscene where Adeleine is possessed by Dark Matter, and then serves as a Mid-Boss for this stage. After being saved by Kirby, Adeleine joins his party.
Overview
The stage begins on a path through an autumnal forest. The path leads right past several foes, though this presents an opportunity to try out more Power Combos. Past some Gordos, a Sparky can be seen guarding a doorway into a tree trunk.
The path continues upward through the hollow trunk. The remaining base Copy Abilities can be found in here. At the top, another hole leads out of the trunk.
Waddle Dee is operating a wooden lift across a chasm, which Kirby can ride. Along the way, some Point Stars can be collected. At the other end is another hollowed trunk to enter.
The path continues down this trunk interior. From the top platform, it's a long fall through a hole in the floor. Around this hole, a Maxim Tomato and 1-Up can be obtained.
Kirby will have to contend with a Big Bouncy in this room. Once it is defeated, a crystal shard appears, and the way forward opens.
Crystal Shard guide
| Crystal Shard locations in Pop Star - Stage 2 | ||||
|---|---|---|---|---|
| Image | How to reach | |||
 Shard 1 |
The first Crystal Shard can be found during the Waddle Dee wooden lift section. Kirby will have to jump off the lift prematurely to find a line of Point Stars leading downward. The shard is below them. | |||
 Shard 2 |
The second shard appears after the Mid-Boss Big Bouncy is defeated. | |||
 Shard 3 |
The third shard is earned once Adeleine is defeated. It is required to beat the level. | |||
Mid-Boss: Adeleine

In the last room, a cutscene plays if the player is playing this stage for the first time. In it, Adeleine the painter is busy on her canvas when a crystal shard lands next to her. While admiring it, Dark Matter emerges from the painting and engulfs her. At this moment, Kirby and his entourage arrive on the scene, only to have the good-natured artist turn on them.
The fight against Adeleine is similar to the boss battle against Ado in Kirby's Dream Land 3. She attacks by painting a number of things on her canvas, all of which come to life and attack Kirby. These enemies are - in sequence - an N-Z, Bronto Burt, Mariel, Mumbies, and a strange pixelated thing. After these are defeated, Adeleine gets angry, and paints more substantial foes. First she paints Ice Dragon, then Dark Matter in its orb form. When both of these go down, Adeleine jumps onto the stage and tries swinging her brush at Kirby, but she can be knocked out with a simple Slide attack or Air Bullet. This done, the last shard of the stage appears, and Adeleine returns to normal. She joins the party after this fight.
Enemies, mid-bosses and abilities
| Image | Name | Copy Ability | Image | Name | Copy Ability |
|---|---|---|---|---|---|
| Bobo | Mite | None | |||
| Bouncy | None | Poppy Bros. Jr. | |||
| Bumber | None | Punc | |||
| Cairn | Pupa | N/A | |||
| Chilly | Sirkibble | ||||
| Glunk | None | Sparky | |||
| Gordo | N/A | ||||
| Mid-Bosses | |||||
| Big Bouncy | Adeleine | ||||
Trivia
- This relatively short stage contains every base Copy Ability in Kirby 64: The Crystal Shards, in a fairly easy-to-access manner. This makes the stage useful for quickly returning to and getting whatever abilities are desired for other parts of the game.
Gallery
Kirby enters the autumnal woods.
Reaching a large hollow tree
Climbing the inside of the hollow tree
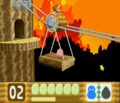
Waddle Dee gives Kirby a ride on his gondola.
Kirby and Waddle Dee reach the other side.
Finding a large hole to dive into in another hollow tree
Taking a moment to nab some extra goodies
Battle with Big Bouncy
Kirby battles Adeleine's minor painted minions.
Battle with the Ice Dragon drawing
Battle with the Dark Matter painting
Adeleine runs out of paint and other options.


