Shiver Star - Stage 3: Difference between revisions
m (Text replacement - "{{o}}" to "o") |
|||
| Line 26: | Line 26: | ||
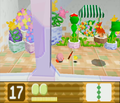
In the next room, [[Adeleine]] paints three different outlines of fruit from behind a glass panel. | In the next room, [[Adeleine]] paints three different outlines of fruit from behind a glass panel. | ||
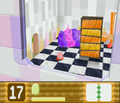
The proceeding room has a bunch of switches on the floor, each a different | The proceeding room has a bunch of switches on the floor, each a different color. Pressing them is not necessary to move forward. | ||
The next area is a sequence of separate rooms all directly linked to each-other. Like before, each room is different, with different enemies and hazards. | The next area is a sequence of separate rooms all directly linked to each-other. Like before, each room is different, with different enemies and hazards. | ||
| Line 159: | Line 159: | ||
K64 Shiver Star Stage 3 screenshot 07.png|Battle with Big [[Pupa]] | K64 Shiver Star Stage 3 screenshot 07.png|Battle with Big [[Pupa]] | ||
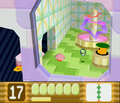
K64 Shiver Star Stage 3 screenshot 08.png|[[Adeleine]] gives Kirby a hint in pictographic fashion. | K64 Shiver Star Stage 3 screenshot 08.png|[[Adeleine]] gives Kirby a hint in pictographic fashion. | ||
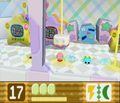
K64 Shiver Star Stage 3 screenshot 09.png|Kirby finds a room full of | K64 Shiver Star Stage 3 screenshot 09.png|Kirby finds a room full of colored switches. | ||
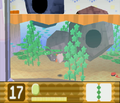
K64 Shiver Star Stage 3 screenshot 10.png|Narrowly avoiding [[Yariko]]'s spear in another room | K64 Shiver Star Stage 3 screenshot 10.png|Narrowly avoiding [[Yariko]]'s spear in another room | ||
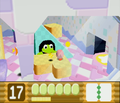
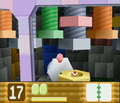
K64 Shiver Star Stage 3 screenshot 11.png|Kirby should watch out. Those wardrobes are not stable. | K64 Shiver Star Stage 3 screenshot 11.png|Kirby should watch out. Those wardrobes are not stable. | ||
Revision as of 11:45, 3 February 2022
| ||||||||||||||
| ||||||||||||||
| ||||||||||||||
|
| ||||||||||||||

Shiver Star - Stage 3 is the third stage of Shiver Star in Kirby 64: The Crystal Shards. This stage takes place inside a giant shopping mall complex, with lots of toy rooms.
Overview
The stage begins out in the snow, outside a huge building. Kirby could hover to the top of its entrance to get a slice of cake. Otherwise, he will walk directly inside.
Inside the building, the next area is a huge plaza, with escalators leading upward. Each one is guarded by different enemies.
The next area consists of several distinct rooms separated by elevators. Each one has its own theme, and its own set of enemies.
The following room contains a giant Pupa. Defeating it yields a crystal shard.
In the next room, Adeleine paints three different outlines of fruit from behind a glass panel.
The proceeding room has a bunch of switches on the floor, each a different color. Pressing them is not necessary to move forward.
The next area is a sequence of separate rooms all directly linked to each-other. Like before, each room is different, with different enemies and hazards.
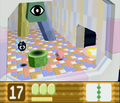
The last room is a circular one, with Shotzos in the middle. Kirby will have to weave and bob to get through here without getting hit.
Crystal Shard guide
| Crystal Shard locations in Shiver Star - Stage 3 | ||||
|---|---|---|---|---|
 Shard 1 |
The first shard can be found in the escalator area, on a walkway to the upper-left. | |||
 Shard 2 |
The second shard appears after defeating the Mid-Boss Pupa. | |||
 Shard 3 |
The third crystal appears when Kirby presses the right three switches in a room full of them. Adeleine will give a hint to which ones need pressing in the room prior (the hint and combination differs each time the stage is played). | |||
Enemies, mid-bosses and abilities
| Image | Name | Copy Ability | Image | Name | Copy Ability | Image | Name | Copy Ability | Image | Name | Copy Ability |
|---|---|---|---|---|---|---|---|---|---|---|---|
| Bivolt | N/A | Flora | None | Mahall | None | Sawyer | |||||
| Bo | None | Glom | N/A | Plugg | Shotzo | N/A | |||||
| Bouncy | None | Gobblin | N/A | Poppy Bros. Jr. | Sirkibble | ||||||
| Bronto Burt | None | Gordo | N/A | Propeller | Tick | ||||||
| Emp | I³ | N/A | Pupa | N/A | Turbite | ||||||
| Fishbone | Kany | None | Putt | None | Yariko | None | |||||
| Flopper | None | ||||||||||
| Mid-Bosses | |||||||||||
| Big Pupa | |||||||||||
Gallery
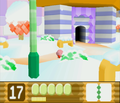
Kirby finds the main entrance to the enemy-filled shopping complex.
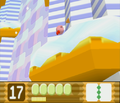
A snack is spotted on the awning above the door.
Entering the first set of rooms from the elevator
Passing by a Glom in another room
Careful timing will be needed to pass these guys.
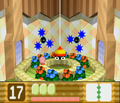
Battle with Big Pupa
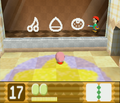
Adeleine gives Kirby a hint in pictographic fashion.
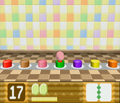
Kirby finds a room full of colored switches.
Narrowly avoiding Yariko's spear in another room
Kirby should watch out. Those wardrobes are not stable.
Swimming through a large fish tank
Moving through a room full of bolts and screws
Moving past Plugg in a room full of televisions

Passing through the final area with Shotzos in the middle and cover to hide behind


