Ripple Star - Stage 1: Difference between revisions
mNo edit summary |
No edit summary |
||
| Line 1: | Line 1: | ||
{{ | {{Good|page}} | ||
{{Infobox-K64Stage | {{Infobox-K64Stage | ||
|image=[[File: | |image=[[File:K64 Ripple Star Stage 1 screenshot 02.png|300px]] | ||
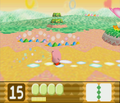
|caption= | |caption=[[Kirby]] walks a path through a col{{o}}rful plain that is familiar in layout. | ||
|level=[[Ripple Star]] | |level=[[Ripple Star]] | ||
|stage=1 | |stage=1 | ||
| Line 19: | Line 19: | ||
Back out on the main path, Kirby will have to contend with more enemies, then cross a stream to reach the stage exit. | Back out on the main path, Kirby will have to contend with more enemies, then cross a stream to reach the stage exit. | ||
===[[Crystal Shard]] | ===Crystal Shard guide=== | ||
{| class="wikitable mw-collapsible mw-collapsed" border=1 cellpadding=2 | |||
!colspan=5|Crystal Shard locations in Ripple Star - Stage 1 | |||
|- | |||
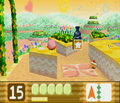
|{{Center|[[File:K64 Ripple Star Stage 1 Crystal Shard 1.png|150px]]<br>'''Shard 1'''}} | |||
|The first [[Crystal Shard]] is out in the open in the first area, just like in Stage 1 of Pop Star. | |||
|- | |||
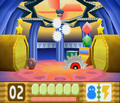
|{{Center|[[File:K64 Ripple Star Stage 1 Crystal Shard 2.png|150px]]<br>'''Shard 2'''}} | |||
|The second shard appears after the Mid-Boss [[Sawyer]] is defeated. | |||
|- | |||
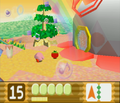
|{{Center|[[File:K64 Ripple Star Stage 1 Crystal Shard 3.png|150px]]<br>'''Shard 3'''}} | |||
|The third shard can be found under an orange-topped black rock in the stream. Kirby will need the [[Needle-Bomb]] ability to break it. | |||
|} | |||
==Enemies, mid-bosses and abilities== | ==Enemies, mid-bosses and abilities== | ||
| Line 94: | Line 103: | ||
==Trivia== | ==Trivia== | ||
*This stage can be seen as a near-identical reprise of the [[Pop Star - Stage 1|first stage of Pop Star]]. | *This stage can be seen as a near-identical reprise of the [[Pop Star - Stage 1|first stage of Pop Star]], sharing the same basic layout, Crystal Shard locations, and music. | ||
== Gallery == | |||
<gallery> | |||
K64 Ripple Star Stage 1 screenshot 01.png|Kirby swallows a snack at the start of the path. | |||
K64 Ripple Star Stage 1 screenshot 03.png|Nabbing a [[Maxim Tomato]] in front of a fancy building | |||
K64 Ripple Star Stage 1 screenshot 04.png|Battle with Big [[Sawyer]] | |||
K64 Ripple Star Stage 1 screenshot 05.png|Exiting the building | |||
K64 Ripple Star Stage 1 screenshot 06.png|Leaping over blocks interspersed with [[Shotzo]]s | |||
</gallery> | |||
{{clear}} | {{clear}} | ||
{{Navbox-K64}} | {{Navbox-K64}} | ||
Revision as of 03:11, 30 January 2021
| ||||||||||||||
| ||||||||||||||
|
| ||||||||||||||

Ripple Star - Stage 1 is the first stage of Ripple Star in Kirby 64: The Crystal Shards. This stage is a walk through a developed city street with lots of flower beds.
Overview
The stage begins out on a floral walkway, very similar in look to the first stage of Pop Star. Kirby will have to deal with a number of enemies as he makes his way to the shack at the other side.
Inside the building, Kirby has to fight the Mid-Boss Sawyer. Defeating it opens the path forward and yields a crystal shard.
Back out on the main path, Kirby will have to contend with more enemies, then cross a stream to reach the stage exit.
Crystal Shard guide
| Crystal Shard locations in Ripple Star - Stage 1 | ||||
|---|---|---|---|---|
 Shard 1 |
The first Crystal Shard is out in the open in the first area, just like in Stage 1 of Pop Star. | |||
 Shard 2 |
The second shard appears after the Mid-Boss Sawyer is defeated. | |||
 Shard 3 |
The third shard can be found under an orange-topped black rock in the stream. Kirby will need the Needle-Bomb ability to break it. | |||
Enemies, mid-bosses and abilities
| Image | Name | Copy Ability | Image | Name | Copy Ability |
|---|---|---|---|---|---|
| Bobo | Plugg | ||||
| Bronto Burt | None | File:K64 Poppy Bros. Jr. Sprite.png | Poppy Bros. Jr. | ||
| Cairn | Propeller | ||||
| Flutter | N/A | Punc | |||
| Galbo | Scarfy | N/A | |||
| Glunk | None | Shotzo | N/A | ||
| Ghost Knight | Sparky | ||||
| Kacti | |||||
| Mid-Bosses | |||||
| Big Sawyer | |||||
Trivia
- This stage can be seen as a near-identical reprise of the first stage of Pop Star, sharing the same basic layout, Crystal Shard locations, and music.
Gallery
Kirby swallows a snack at the start of the path.
Nabbing a Maxim Tomato in front of a fancy building
Battle with Big Sawyer

Exiting the building
Leaping over blocks interspersed with Shotzos


