Red Canyon - Stage 1: Difference between revisions
m (Text replacement - "{{Kirby'sDL2}}" to "{{Navbox-DL2}}") |
m (→Other appearances: Actually... until we have better coverage, this is fine I suppose) |
||
| (18 intermediate revisions by 6 users not shown) | |||
| Line 1: | Line 1: | ||
{{Infobox-KDL2Stage | {{Infobox-KDL2Stage | ||
|image= [[File:Red Canyon | |image= [[File:KDL2 Red Canyon 1-3.png]] | ||
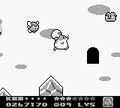
|caption= Kirby and Rick | |caption= [[Kirby]] and [[Rick]] emerge beneath a [[Rocky]] laying in wait. | ||
|level= [[Red Canyon]] | |level= [[Red Canyon]] | ||
|stage= 1 | |stage= 1 | ||
| Line 7: | Line 7: | ||
|rainbow drop= {{N}} | |rainbow drop= {{N}} | ||
|midboss= [[Master Green]] | |midboss= [[Master Green]] | ||
|previous= | |previous= [[Iceberg - Stage 5 (Kirby's Dream Land 2)|Iceberg - Stage 5]] | ||
|next= [[Red Canyon - Stage 2]] | |next= [[Red Canyon - Stage 2|Stage 2]] | ||
}} | }} | ||
'''Red Canyon - Stage 1''' is the first stage of [[Red Canyon]] in ''[[Kirby's Dream Land 2]]''. | '''Red Canyon - Stage 1''' is the first stage of [[Red Canyon]] in ''[[Kirby's Dream Land 2]]''. | ||
| Line 15: | Line 15: | ||
The stage begins in a flat plain, as a [[Bouncy|Bouncy Ty]] approaches [[Kirby]]. The terrain gets decidedly more treacherous as the path continues. Along the way, a side-passage can be found which leads to a room where the [[Mid-Boss]] [[Master Green]] can be fought for the [[Spark]] ability and the freeing of an [[Animal Friend]]. The path continues past perilous crumbling platforms with items that Kirby can collect if he is brave. | The stage begins in a flat plain, as a [[Bouncy|Bouncy Ty]] approaches [[Kirby]]. The terrain gets decidedly more treacherous as the path continues. Along the way, a side-passage can be found which leads to a room where the [[Mid-Boss]] [[Master Green]] can be fought for the [[Spark]] ability and the freeing of an [[Animal Friend]]. The path continues past perilous crumbling platforms with items that Kirby can collect if he is brave. | ||
The door leads to a long rocky tunnel, patrolled by [[Gordo]]s and [[Flamer]]s. A secret chamber can be accessed in this room, which contains two [[Propeller]]s, an [[Energy Drink]] and a [[1-Up]]. The main path snakes around, then down a very perilous shaft filled with Gordos and crumbling platforms, then out into the open air, where Kirby will have to contend with more flying menaces amidst skinny platforms and a doorway in | The door leads to a long rocky tunnel, patrolled by [[Gordo]]s and [[Flamer]]s. A secret chamber can be accessed in this room, which contains two [[Propeller]]s, an [[Energy Drink]] and a [[1-Up]]. The main path snakes around, then down a very perilous shaft filled with Gordos and crumbling platforms, then out into the open air, where Kirby will have to contend with more flying menaces amidst skinny platforms and a doorway in midair. | ||
The last room takes place in a tunnel with [[ | The last room takes place in a tunnel with [[bottomless pit]]s intermittent. Kirby has to dodge more Gordos, [[Shotzo]]s and other things as he works to reach the stage exit on the other side. A [[1-Up]] can be collected near the beginning in case tragedy were to befall our pink hero. A [[Blade]] guards the exit, the first of its kind that Kirby encounters. | ||
==Enemies | ==Enemies and mid-boss== | ||
{| | {| width=50% | ||
|<tabs> | |||
<tab name="Enemies"> | |||
| | {| class="wikitable" | ||
!Sprite | |||
!Name | |||
!style="border-style: solid; border-width: 1px 3px 1px 1px"|Copy Ability | |||
!Sprite | |||
!Name | |||
!Copy Ability | |||
| | |||
|- | |- | ||
|align=center|[[File:KDL2 Blade sprite.png]] | |||
|- | |[[Blade]] | ||
| | |style="border-style: solid; border-width: 1px 3px 1px 1px"|N/A | ||
|align=center|[[File:KDL2 Poppy Bros Jr sprite.png]] | |||
|[[Poppy Bros. Jr.]] | |||
|None | |||
|- | |||
{ | |align=center|[[File:KDL2 Bouncy Ty sprite.png]] | ||
|[[Bouncy|Bouncy Ty]] | |||
|style="border-style: solid; border-width: 1px 3px 1px 1px"|None | |||
|align=center|[[File:KDL2 Propeller Bomb sprite.png]] | |||
|[[Propeller|Propeller Bomb]] | |||
|None | |||
|- | |||
|align=center|[[File:KDL2 Bronto Burt sprite.png]] | |||
|[[Bronto Burt]] | |||
|style="border-style: solid; border-width: 1px 3px 1px 1px"|None | |||
|align=center|[[File:KDL2 Scarfy sprite.png]] | |||
|[[Scarfy]] | |||
|N/A | |||
|- | |||
|align=center|[[File:KDL2 Broom Hatter sprite.png]] | |||
|[[Broom Hatter]] | |||
|style="border-style: solid; border-width: 1px 3px 1px 1px"|None | |||
|align=center|[[File:KDL2 Shotzo sprite.png]] | |||
|[[Shotzo]] | |||
|N/A | |||
|- | |||
|align=center|[[File:KDL2 Flamer sprite.png]] | |||
|[[Flamer]] | |||
|style="border-style: solid; border-width: 1px 3px 1px 1px"|[[Burning]] | |||
|align=center|[[File:KDL2 Sparky sprite.png]] | |||
|[[Sparky]] | |||
|[[Spark]] | |||
|- | |||
|align=center|[[File:KDL2 Gordo sprite.png]] | |||
|[[Gordo]] | |||
|style="border-style: solid; border-width: 1px 3px 1px 1px"|N/A | |||
|align=center|[[File:KDL2 Rocky sprite.png]] | |||
|[[Rocky]] | |||
|[[Stone]] | |||
|- | |||
|align=center|[[File:KDL2 Load Kibble sprite.png]] | |||
|[[Sir Kibble|Load Kibble]] | |||
|style="border-style: solid; border-width: 1px 3px 1px 1px"|[[Cutter]] | |||
|align=center|[[File:KDL2 Waddle Dee sprite.png]] | |||
|[[Waddle Dee]] | |||
|None | |||
|} | |||
</tab> | |||
<tab name="Mid-Boss"> | |||
{| class="wikitable" width=25% | |||
!Sprite | |||
!Name | |||
!Copy Ability | |||
|- | |||
|align=center|[[File:KDL2 Master Green sprite.png]] | |||
|[[Master Green]] | |||
|[[Spark]] | |||
|} | |||
</tab> | |||
</tabs> | |||
|} | |} | ||
==Trivia== | ==Trivia== | ||
*The layout of this stage is adapted into part of [[Animal | *The layout of this stage is adapted into part of [[Animal Friend#Rick & Kine & Coo|Rick & Kine & Coo]]'s Level 3 in [[Guest Star ???? Star Allies Go!]], from ''[[Kirby Star Allies]]''. | ||
==Gallery== | |||
<gallery> | |||
KDL2 Red Canyon 1-1.png|Kirby traverses the perilous terrain. | |||
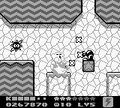
KDL2 Red Canyon 1-2.png|Kirby gets the drop on [[Master Green]]. | |||
KDL2 Red Canyon 1-4.png|Using the Spark Rick combo in the caves | |||
KDL2 Red Canyon 1-5.png|Leaving the caves | |||
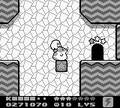
KDL2 Red Canyon 1-6.png|Leap for the door. | |||
KDL2 Red Canyon 1-7.png|In this instance, Shotzo is able to block Rick and Kirby's beam from breaking its Star Block perch. | |||
KDL2 Red Canyon 1-8.png|The stage exit guard is dispatched. | |||
</gallery> | |||
{{clear}} | {{clear}} | ||
{{Navbox- | {{Navbox-KDL2}} | ||
Latest revision as of 17:15, 5 February 2024
| ||||||||||||||||
| ||||||||||||||||
|
| ||||||||||||||||

Red Canyon - Stage 1 is the first stage of Red Canyon in Kirby's Dream Land 2.
Overview[edit]
The stage begins in a flat plain, as a Bouncy Ty approaches Kirby. The terrain gets decidedly more treacherous as the path continues. Along the way, a side-passage can be found which leads to a room where the Mid-Boss Master Green can be fought for the Spark ability and the freeing of an Animal Friend. The path continues past perilous crumbling platforms with items that Kirby can collect if he is brave.
The door leads to a long rocky tunnel, patrolled by Gordos and Flamers. A secret chamber can be accessed in this room, which contains two Propellers, an Energy Drink and a 1-Up. The main path snakes around, then down a very perilous shaft filled with Gordos and crumbling platforms, then out into the open air, where Kirby will have to contend with more flying menaces amidst skinny platforms and a doorway in midair.
The last room takes place in a tunnel with bottomless pits intermittent. Kirby has to dodge more Gordos, Shotzos and other things as he works to reach the stage exit on the other side. A 1-Up can be collected near the beginning in case tragedy were to befall our pink hero. A Blade guards the exit, the first of its kind that Kirby encounters.
Enemies and mid-boss[edit]
|
Trivia[edit]
- The layout of this stage is adapted into part of Rick & Kine & Coo's Level 3 in Guest Star ???? Star Allies Go!, from Kirby Star Allies.
Gallery[edit]
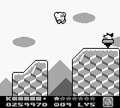
Kirby traverses the perilous terrain.
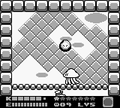
Kirby gets the drop on Master Green.
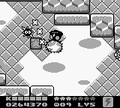
Using the Spark Rick combo in the caves
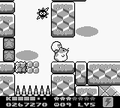
Leaving the caves
Leap for the door.
In this instance, Shotzo is able to block Rick and Kirby's beam from breaking its Star Block perch.
The stage exit guard is dispatched.


| |||||||||||||||||||||||