Ripple Field - Stage 3 (Kirby's Dream Land 2): Difference between revisions
Superbound (talk | contribs) mNo edit summary |
m (Text replacement - "{{Good}}↵" to "") |
||
| (7 intermediate revisions by 3 users not shown) | |||
| Line 1: | Line 1: | ||
{{DISPLAYTITLE: Ripple Field - Stage 3 (''Kirby's Dream Land 2'')}}{{Infobox-KDL2Stage | {{DISPLAYTITLE: Ripple Field - Stage 3 (''Kirby's Dream Land 2'')}}{{Infobox-KDL2Stage | ||
|title=Ripple Field - Stage 3 | |title=Ripple Field - Stage 3 | ||
|image=[[File: | |image=[[File:KDL2 Ripple Field 3-7.png]] | ||
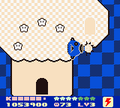
|caption=[[Kirby]] and [[Kine]] navigate the flowing water channel in '''Stage 3'''. | |caption=[[Kirby]] and [[Kine]] navigate the flowing water channel in '''Stage 3'''. | ||
|level=[[Ripple Field (Kirby's Dream Land 2)|Ripple Field]] | |level=[[Ripple Field (Kirby's Dream Land 2)|Ripple Field]] | ||
| Line 31: | Line 30: | ||
!Copy Ability | !Copy Ability | ||
|- | |- | ||
|align=center|[[File: | |align=center|[[File:KDL2 Blipper sprite.png]] | ||
|[[Blipper]] | |[[Blipper]] | ||
|style="border-style: solid; border-width: 1px 3px 1px 1px"|None | |style="border-style: solid; border-width: 1px 3px 1px 1px"|None | ||
|align=center|[[File: | |align=center|[[File:KDL2 Glunk sprite.png]] | ||
|[[Glunk]] | |[[Glunk]] | ||
|None | |None | ||
|- | |- | ||
|align=center|[[File: | |align=center|[[File:KDL2 Bronto Burt sprite.png]] | ||
|[[Bronto Burt]] | |[[Bronto Burt]] | ||
|style="border-style: solid; border-width: 1px 3px 1px 1px"|None | |style="border-style: solid; border-width: 1px 3px 1px 1px"|None | ||
|align=center|[[File: | |align=center|[[File:KDL2 Rocky sprite.png]] | ||
|[[Rocky]] | |[[Rocky]] | ||
|[[Stone]] | |[[Stone]] | ||
|- | |- | ||
|align=center|[[File: | |align=center|[[File:KDL2 Elieel sprite.png]] | ||
|[[Elieel]] | |[[Elieel]] | ||
|style="border-style: solid; border-width: 1px 3px 1px 1px"|None | |style="border-style: solid; border-width: 1px 3px 1px 1px"|None | ||
|align=center|[[File: | |align=center|[[File:KDL2 Sir Slippy sprite.png]] | ||
|[[Slippy|Sir Slippy]] | |[[Slippy|Sir Slippy]] | ||
|None | |None | ||
|- | |- | ||
|align=center|[[File: | |align=center|[[File:KDL2 Flamer sprite.png]] | ||
|[[Flamer]] | |[[Flamer]] | ||
|style="border-style: solid; border-width: 1px 3px 1px 1px"|[[Burning]] | |style="border-style: solid; border-width: 1px 3px 1px 1px"|[[Burning]] | ||
|align=center|[[File: | |align=center|[[File:KDL2 Squishy sprite.png]] | ||
|[[Squishy]] | |[[Squishy]] | ||
|None | |None | ||
|- | |- | ||
|align=center|[[File: | |align=center|[[File:KDL2 Floaty the Drifter sprite.png]] | ||
|[[Floaty the Drifter]] | |[[Floaty the Drifter]] | ||
|style="border-style: solid; border-width: 1px 3px 1px 1px"|[[Parasol]] | |style="border-style: solid; border-width: 1px 3px 1px 1px"|[[Parasol]] | ||
|align=center|[[File: | |align=center|[[File:KDL2 Waddle Dee sprite.png]] | ||
|[[Waddle Dee]] | |[[Waddle Dee]] | ||
|None | |None | ||
| Line 69: | Line 68: | ||
==Gallery== | ==Gallery== | ||
<gallery> | <gallery> | ||
KDL2 Ripple Field 3-1.png|An open body of water | |||
KDL2 Ripple Field 3-2.png|[[Elieel]] rises from a pipe. | |||
KDL2 Ripple Field 3-3.png|Finding an underwater doorway | |||
KDL2 Ripple Field 3-4.png|A side-nook | |||
KDL2 Ripple Field 3-5.png|[[Rocky]] is about to take a dip. | |||
KDL2 Rainbow Drop location 3.png|A hidden doorway is revealed by the light. | |||
KDL2 Ripple Field 3-6.png|The [[Rainbow Drop]] chamber | |||
KDL2 Ripple Field 3-8.png|Kirby reaches the end of the stage. | |||
</gallery> | </gallery> | ||
{{clear}} | {{clear}} | ||
{{Navbox- | {{Navbox-KDL2}} | ||
Latest revision as of 02:20, 21 September 2022
| ||||||||||||||||
| ||||||||||||||||
|
| ||||||||||||||||

- This article is about the stage in Kirby's Dream Land 2. For the stage in Kirby's Dream Land 3, see Ripple Field - Stage 3 (Kirby's Dream Land 3).
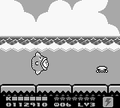
Ripple Field - Stage 3 is the third stage of Ripple Field in Kirby's Dream Land 2. The Rainbow Drop can be found here.
Overview[edit]
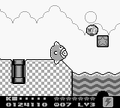
The stage begins in the water, with sparse numbers of islands in-between. The door to the next area can be found in the water at the far right end of the path.
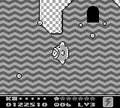
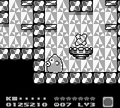
From a shallow pool, the path continues to the right past a horde of Elieel. In the middle of this path, a large underwater chamber can be accessed with a looping current. In the middle, a side-passage can be used if Kine is with Kirby to reach a room with 5 small stars inside. The room is dark, implying something hidden here, but it might be wise to enter with the Stone ability instead. A Rocky can be found at the right end of the path, opposite to where Kirby entered, and above the door to the next area.
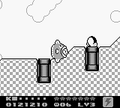
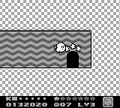
This room consists of a very long water current channel. Each significant bend in the tunnel is patrolled by a Sir Slippy. The stage exit can be found at the end.
Enemies[edit]
| Sprite | Name | Copy Ability | Sprite | Name | Copy Ability |
|---|---|---|---|---|---|
| Blipper | None | Glunk | None | ||
| Bronto Burt | None | Rocky | Stone | ||
| Elieel | None | Sir Slippy | None | ||
| Flamer | Burning | Squishy | None | ||
| Floaty the Drifter | Parasol | Waddle Dee | None |
Gallery[edit]
An open body of water
Elieel rises from a pipe.
Finding an underwater doorway

A side-nook
Rocky is about to take a dip.
A hidden doorway is revealed by the light.
The Rainbow Drop chamber
Kirby reaches the end of the stage.


| |||||||||||||||||||||||