Iceberg - Stage 2 (Kirby's Dream Land 2): Difference between revisions
mNo edit summary |
|||
| (17 intermediate revisions by 7 users not shown) | |||
| Line 1: | Line 1: | ||
{{ | {{DISPLAYTITLE: Iceberg - Stage 2 (''Kirby's Dream Land 2'')}}{{Infobox-KDL2Stage | ||
|title=Iceberg - Stage 2 | |||
{{Infobox-KDL2Stage | |image=[[File:KDL2 Iceberg 2-4.png]] | ||
|title= Iceberg - Stage 2 | |caption=[[Kirby]] and [[Coo]] mind the [[icicle]]s. | ||
|image= [[File:Iceberg | |level=[[Iceberg (Kirby's Dream Land 2)|Iceberg]] | ||
|caption= Kirby and Coo mind the | |stage=2 | ||
|level= [[Iceberg (Kirby's Dream Land 2)|Iceberg]] | |animal=[[Coo]] | ||
|stage= 2 | |rainbow drop={{N}} | ||
|animal= [[Coo]] | |midboss=[[Jumper Shoot]] | ||
|rainbow drop= {{N}} | |previous=[[Iceberg - Stage 1 (Kirby's Dream Land 2)|Stage 1]] | ||
|midboss= [[Jumper Shoot]] | |next=[[Iceberg - Stage 3 (Kirby's Dream Land 2)|Stage 3]] | ||
|previous= [[Iceberg - Stage 1 (Kirby's Dream Land 2)|Stage 1]] | |||
|next= [[Iceberg - Stage 3 (Kirby's Dream Land 2)|Stage 3]] | |||
}} | }} | ||
{{About|the stage in [[Kirby's Dream Land 2]]|the stage in [[Kirby's Dream Land 3]]|[[Iceberg - Stage 2 (Kirby's Dream Land 3)]]}} | |||
'''Iceberg - Stage 2''' is the second stage of [[Iceberg (Kirby's Dream Land 2)|Iceberg]] in ''[[Kirby's Dream Land 2]]''. | '''Iceberg - Stage 2''' is the second stage of [[Iceberg (Kirby's Dream Land 2)|Iceberg]] in ''[[Kirby's Dream Land 2]]''. | ||
| Line 23: | Line 22: | ||
==Enemies, mid-bosses and abilities== | ==Enemies, mid-bosses and abilities== | ||
{| | {| width=50% | ||
! | |<tabs> | ||
! | <tab name="Enemies"> | ||
{| class="wikitable" | |||
| | !Sprite | ||
!Name | |||
!style="border-style: solid; border-width: 1px 3px 1px 1px"|Copy Ability | |||
!Sprite | |||
!Name | |||
!Copy Ability | |||
|- | |||
|align=center|[[File:KDL2 Bronto Burt sprite.png]] | |||
|[[Bronto Burt]] | |||
|style="border-style: solid; border-width: 1px 3px 1px 1px"|None | |||
|align=center|[[File:KDL2 Icicle sprite.png]] | |||
|[[Icicle]] | |||
|None | |||
|- | |||
|align=center|[[File:KDL2 Broom Hatter sprite.png]] | |||
|[[Broom Hatter]] | |||
|style="border-style: solid; border-width: 1px 3px 1px 1px"|None | |||
|align=center|[[File:KDL2 Kabu sprite.png]] | |||
|[[Kabu]] | |||
| | |None | ||
|- | |||
|align=center|[[File:KDL2 Cappy sprite.png]] | |||
|[[Cappy]] | |||
|style="border-style: solid; border-width: 1px 3px 1px 1px"|None | |||
|align=center|[[File:KDL2 Load Kibble sprite.png]] | |||
|[[Sir Kibble|Load Kibble]] | |||
|[[Cutter]] | |||
|- | |- | ||
|align=center|[[File:KDL2 Crack Tweet sprite.png]] | |||
|- | |[[Hatched Chick|Crack-Tweet]] | ||
| | |style="border-style: solid; border-width: 1px 3px 1px 1px"|None | ||
|align=center|[[File:KDL2 Master Pengy sprite.png]] | |||
|[[Pengy|Master Pengy]] | |||
|[[Ice]] | |||
|- | |||
|align=center|[[File:KDL2 Flamer sprite.png]] | |||
|[[Flamer]] | |||
|style="border-style: solid; border-width: 1px 3px 1px 1px"|[[Burning]] | |||
|align=center|[[File:KDL2 Propeller Bomb sprite.png]] | |||
|[[Propeller|Propeller Bomb]] | |||
|None | |||
|- | |||
|align=center|[[File:KDL2 Floaty the Drifter sprite.png]] | |||
|[[Floaty the Drifter]] | |||
|style="border-style: solid; border-width: 1px 3px 1px 1px"|[[Parasol]] | |||
|align=center|[[File:KDL2 Rocky sprite.png]] | |||
|[[Rocky]] | |||
|[[Stone]] | |||
|- | |||
|align=center|[[File:KDL2 Gordo sprite.png]] | |||
|[[Gordo]] | |||
|style="border-style: solid; border-width: 1px 3px 1px 1px"|N/A | |||
|align=center|[[File:KDL2 Spikey sprite.png]] | |||
|[[Spikey]] | |||
|[[Needle]] | |||
|} | |} | ||
</tab> | |||
<tab name="Mid-Boss"> | |||
{| class="wikitable" width=25% | |||
!Sprite | |||
!Name | |||
!Copy Ability | |||
|- | |||
|align=center|[[File:KDL2 Jumpershoot sprite.png]] | |||
|[[Jumper Shoot]] | |||
|[[Parasol]] | |||
|} | |||
</tab> | |||
</tabs> | |||
|} | |||
==Gallery== | |||
<gallery> | |||
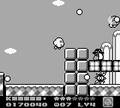
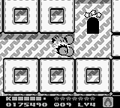
KDL2 Iceberg 2-1.png|Kirby is swept by strong winds. | |||
KDL2 Iceberg 2-2.png|Defeat of [[Jumper Shoot]] | |||
KDL2 Iceberg 2-3.png|Coo helps combat the breeze. | |||
KDL2 Iceberg 2-5.png|Twirling through the barricades | |||
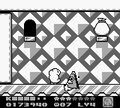
KDL2 Iceberg 2-6.png|An impasse and a doorway | |||
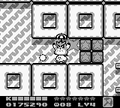
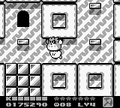
KDL2 Iceberg 2-7.png|Ability selection | |||
KDL2 Iceberg 2-8.png|Reaching the stage exit past the ice blocks | |||
</gallery> | |||
{{clear}} | {{clear}} | ||
{{Navbox- | {{Navbox-KDL2}} | ||
Latest revision as of 19:25, 21 September 2022
| ||||||||||||||||
| ||||||||||||||||
|
| ||||||||||||||||

- This article is about the stage in Kirby's Dream Land 2. For the stage in Kirby's Dream Land 3, see Iceberg - Stage 2 (Kirby's Dream Land 3).
Iceberg - Stage 2 is the second stage of Iceberg in Kirby's Dream Land 2.
Overview[edit]
The stage begins on a wind-swept plain, as Kirby is pushed strongly to the right. Along the way, Kirby can use the Star Blocks to break against the wind as necessary. Past some tricky terrain, two doors can be found at the end of the path. The left one is quite tricky to enter without the aid of Coo, but thankfully, he can be recovered in the door to the right, after Jumper Shoot is taken care of.
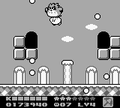
The next room consists of a long path upward, past falling Icicles that will do Kirby harm if they collide with him. The door to the next room lies at the top, along with a graciously-placed Maxim Tomato.
The final room is a long winding tunnel, with several Star Block barricades blocking the tunnel forward. Along the way, a side-chamber can be accessed which contains enemies representing six different copy abilities in the walls. To move forward, Kirby will need to choose Burning to break through the ice blocks in the main tunnel. A side-hall can also be accessed, which splits off to a 1-Up on the left side and a Propeller on the right side. The stage exit can be found past the ice blocks.
Enemies, mid-bosses and abilities[edit]
|
Gallery[edit]
Kirby is swept by strong winds.
Defeat of Jumper Shoot
Coo helps combat the breeze.
Twirling through the barricades
An impasse and a doorway
Ability selection
Reaching the stage exit past the ice blocks


| |||||||||||||||||||||||