Ripple Field - Stage 3 (Kirby's Dream Land 2): Difference between revisions
mNo edit summary |
m (→Enemies) |
||
| Line 31: | Line 31: | ||
!Copy Ability | !Copy Ability | ||
|- | |- | ||
|align=center|[[File: | |align=center|[[File:KDL2 Blipper sprite.png]] | ||
|[[Blipper]] | |[[Blipper]] | ||
|style="border-style: solid; border-width: 1px 3px 1px 1px"|None | |style="border-style: solid; border-width: 1px 3px 1px 1px"|None | ||
|align=center|[[File: | |align=center|[[File:KDL2 Glunk sprite.png]] | ||
|[[Glunk]] | |[[Glunk]] | ||
|None | |None | ||
|- | |- | ||
|align=center|[[File: | |align=center|[[File:KDL2 Bronto Burt sprite.png]] | ||
|[[Bronto Burt]] | |[[Bronto Burt]] | ||
|style="border-style: solid; border-width: 1px 3px 1px 1px"|None | |style="border-style: solid; border-width: 1px 3px 1px 1px"|None | ||
|align=center|[[File: | |align=center|[[File:KDL2 Rocky sprite.png]] | ||
|[[Rocky]] | |[[Rocky]] | ||
|[[Stone]] | |[[Stone]] | ||
|- | |- | ||
|align=center|[[File: | |align=center|[[File:KDL2 Elieel sprite.png]] | ||
|[[Elieel]] | |[[Elieel]] | ||
|style="border-style: solid; border-width: 1px 3px 1px 1px"|None | |style="border-style: solid; border-width: 1px 3px 1px 1px"|None | ||
|align=center|[[File: | |align=center|[[File:KDL2 Sir Slippy sprite.png]] | ||
|[[Slippy|Sir Slippy]] | |[[Slippy|Sir Slippy]] | ||
|None | |None | ||
|- | |- | ||
|align=center|[[File: | |align=center|[[File:KDL2 Flamer sprite.png]] | ||
|[[Flamer]] | |[[Flamer]] | ||
|style="border-style: solid; border-width: 1px 3px 1px 1px"|[[Burning]] | |style="border-style: solid; border-width: 1px 3px 1px 1px"|[[Burning]] | ||
|align=center|[[File: | |align=center|[[File:KDL2 Squishy sprite.png]] | ||
|[[Squishy]] | |[[Squishy]] | ||
|None | |None | ||
|- | |- | ||
|align=center|[[File: | |align=center|[[File:KDL2 Floaty the Drifter sprite.png]] | ||
|[[Floaty the Drifter]] | |[[Floaty the Drifter]] | ||
|style="border-style: solid; border-width: 1px 3px 1px 1px"|[[Parasol]] | |style="border-style: solid; border-width: 1px 3px 1px 1px"|[[Parasol]] | ||
|align=center|[[File: | |align=center|[[File:KDL2 Waddle Dee sprite.png]] | ||
|[[Waddle Dee]] | |[[Waddle Dee]] | ||
|None | |None | ||
Revision as of 21:34, 28 February 2021
| ||||||||||||||||
| ||||||||||||||||
|
| ||||||||||||||||

- This article is about the stage in Kirby's Dream Land 2. For the stage in Kirby's Dream Land 3, see Ripple Field - Stage 3 (Kirby's Dream Land 3).
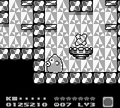
Ripple Field - Stage 3 is the third stage of Ripple Field in Kirby's Dream Land 2. The Rainbow Drop can be found here.
Overview
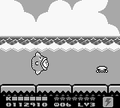
The stage begins in the water, with sparse numbers of islands in-between. The door to the next area can be found in the water at the far right end of the path.
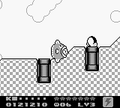
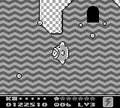
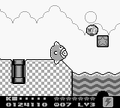
From a shallow pool, the path continues to the right past a horde of Elieel. In the middle of this path, a large underwater chamber can be accessed with a looping current. In the middle, a side-passage can be used if Kine is with Kirby to reach a room with 5 small stars inside. The room is dark, implying something hidden here, but it might be wise to enter with the Stone ability instead. A Rocky can be found at the right end of the path, opposite to where Kirby entered, and above the door to the next area.
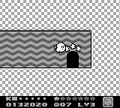
This room consists of a very long water current channel. Each significant bend in the tunnel is patrolled by a Sir Slippy. The stage exit can be found at the end.
Enemies
| Sprite | Name | Copy Ability | Sprite | Name | Copy Ability |
|---|---|---|---|---|---|
| Blipper | None | Glunk | None | ||
| Bronto Burt | None | Rocky | Stone | ||
| Elieel | None | Sir Slippy | None | ||
| Flamer | Burning | Squishy | None | ||
| Floaty the Drifter | Parasol | Waddle Dee | None |
Gallery
An open body of water
Elieel rises from a pipe
Finding an underwater doorway

A side-nook
Rocky is about to take a dip
- KDL2RD3.png
A hidden doorway is revealed by the light
The Rainbow Drop chamber
Kirby reaches the end of the stage


| |||||||||||||||||||||||