Kirby Mass Attack/gallery: Difference between revisions
(I hate navigating this page at this point. Help.) |
Pinkyoshifan (talk | contribs) m (→Other) |
||
| Line 337: | Line 337: | ||
=== Other === | === Other === | ||
<gallery style="image-rendering:pixelated;"> | <gallery style="image-rendering:pixelated;"> | ||
KMA DS Game Icon.png|DS icon | |||
KMA Apple sprite.png|Apple | KMA Apple sprite.png|Apple | ||
KMA Bananas sprite.png|Bananas | KMA Bananas sprite.png|Bananas | ||
Revision as of 16:25, 16 December 2022
A gallery of images from Kirby Mass Attack.
Logos

English logo (early)

English logo (final)

Japanese logo

Korean logo
Box Art

North American box art

European box art
Japanese box art

Korean box art


Artwork
Kirbys and allies
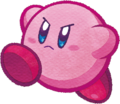
Kirby

Kirby

Kirby

Kirby

Kirby

Kirby

Kirby

Kirby

Kirby

Two Kirbys

Two Kirbys
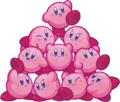
A pyramid of Kirbys
A group of Kirbys
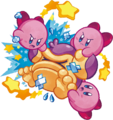
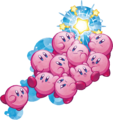
Kirbys attacking an Oohroo

Kirbys surrounding the Japanese logo
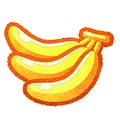
Bananas
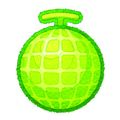
Melon

Grapes (not seen in-game)


Levels


Enemies

Beanbons

Stactus with feet (not seen in-game)

Waddle Dee

Waddle Dee


Mid-Bosses


Bosses


Wallpapers

Wallpaper of Kirbys surrounding the English logo
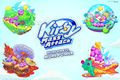
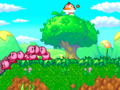
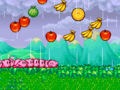
Wallpaper featuring the four main levels


Sprites
Playable characters and allies

Kirby

Kirby

Kirby, once he has been defeated

Big Birdee

Birdee


Main game enemies

Awadoron

Awadoron

Awadoron

Awadoron (damaged)

Awasuki

Banishback (small)

Banishback (medium)

Banishback (large)

Battybat

Beanbon

Big Beanbon
Big Blucko

Big Floof

Big Iceton

Big Mummbon

Big Schnoz

Big Soarar

Big Stackle

Big Stactus

Big Waddle Dee

Big Zombon

Bigger Schnoz

Biripper

Biripper
Blamboom

Blish

Blucko

Bohboh

Bombpeller

Buufuu

Clanksprout

Clanksprout

Crazy Stactus
Crazy Stactus (yellow variant)

Cryball

Dekofloof

Eelongo

Flapbon

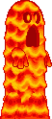
Flare

Flickerfloof
Floaty Woods

Floof

Freezy Rex

Fuufuu

Geg

Gloombat

Glutbulb

Gobchomplin

Gold Beanbon

Gold Waddle Dee
Gondolus

Gravy

Gravy

Gruegloom

Gruegloom (exposed)

Gruegloom (background)

Ice Dice

Ice Dinos

Iceton

Icicle

Ill Gate

Jellifrizz

Jellifrizz (mini)

Kyuin

Kyuin

Kyuin

Little Woods
Magu

Mech Geg
Mega Grindarr

Missile Roller

Mono Soarar

Mosomoso

Mosomoso (space)

Mosomoso (flared up)

Mummbon

Nolly

Oohroo

Oohroo (with banana)

Oohroo (space)

Paka Geg

Puff

Posula

Posula (space)

Pult
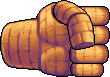
Rock Hand

Roguemole

Schnoz

Schwarz

Scoopy

Shadowbite

Shellmic

Small Soarar

Snoozroot

Snoozroot (fire)

Snoozroot (puku)

Snoozroot (sand)

Space Jellifrizz

Space Jellifrizz (mini)
Spiky Geg

Squister (blue)

Squister (purple)

Stactus

Stactus

Stactus

Stappy

Stickle

Stickle

Stoneik

Stoneik (10)

Stumpee

Tacotzo

Tappy

Tower Woods

Tury

Waddle Dee

Waddle Dee portrait

Warwiggle

Wicky Woods

Wobbly Woods

Zombon


Main game mid-bosses and affiliated

Big Warwiggle

Block Waddle Dee

Block Waddle Dee (damaged)

Block Waddle Dee (exposed)

Buzzybat

Buzzybat (angry)

Buzzybat (gravestone)

Buzzybat (angry gravestone)

Buzzybat (dead)

Colossal Stactus

Giga Clanksprout

Great Gear

Hamsturr

Helmetmole

Mogmole

Mogmole

Moley

King Eelongo

Li'lbat

Mothership
- KMA Oohroo Saucer.png
Oohroo saucer

Pricklebat

Pricklebat (big)
Quad Gun

Rolling Pawn (large)

Rolling Pawn (small)

Skullseer

Rolling Spike (disarmed)

Rolling Spike (armed)

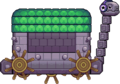
Steelsnapper

Tortletummy

Tortletummy Thorn


Main game bosses and affiliated

King Dedede

Lady Ivy

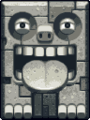
Skullion
Skullord


Sub-game enemies

Bigger Beanbon (Kirby Quest)

Big Kabu

Crap

Crap (crumpled)

Bronto Burt

Chef Shiitake

Galaxia

Kabu

Kracko Jr.

Max Flexer
- KMA Sword Knight Sprite.png
Sword Knight

Sub-game bosses

Axe Knight (Strato Patrol EOS)

Dark Matter

Dark Matter Blade
Dedede Robot

Javelin Knight (Strato Patrol EOS)

Kracko

Mace Knight (Strato Patrol EOS)

Marx

Meta Knight (Strato Patrol EOS)

Meta Knight unmasked (Strato Patrol EOS)

Meta Knight (Kirby Quest)

Mr. Shine

Mr. Bright

Shine and Bright's combined form
Nightmare Wizard

Robo Moley

Trident Knight (Strato Patrol EOS)

Whispy Woods (Strato Patrol EOS)

Other

DS icon

Apple

Bananas

Big Blucko (unused)

Big Mosomoso (unused)

Captain Waddle Doo

Dekofloof's cake

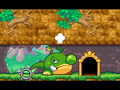
Escargoon

Fruit in a bubble

Grapes (unused)

Hint in a bubble

Jumbo Candy
Kirby riding a horde of Gators (Kirby Quest)

Kirby riding Moto Shotzo (Kirby Quest)

Kirby driving a Tankbot (Kirby Quest)

Maxim Tomato

Maxim Tomato in a bubble

Medal

Melon

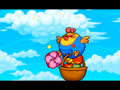
N.M.E. Sales Guy

Orange Dice (unused)

Orange Dinos (unused)

Rainbow Medal

Skull Key


Screenshots
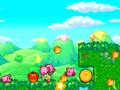
Green Grounds
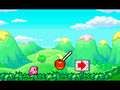
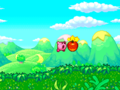
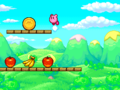
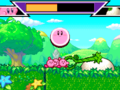
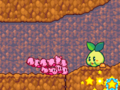
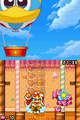
A lone Kirby inhales an apple

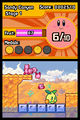
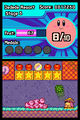
Kirby encounters the first Beanbon in Stage 1
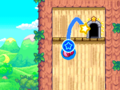
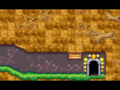
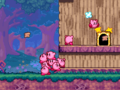
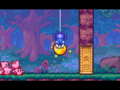
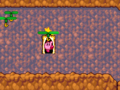
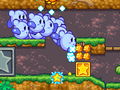
Kirby is dragged up to a door
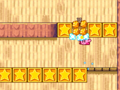
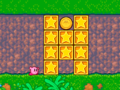
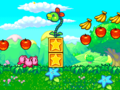
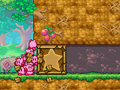
Kirby headbutts some Star Blocks in his way
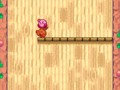
Kirby pummels a Beanbon
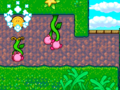
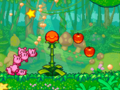
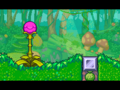
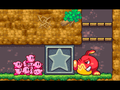
Kirby pulls down a Jerkweed, revealing an apple
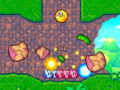
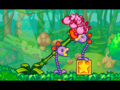
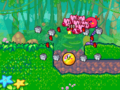
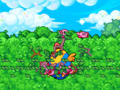
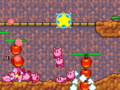
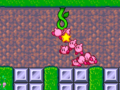
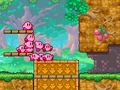
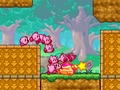
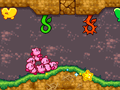
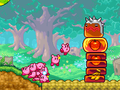
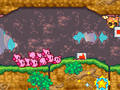
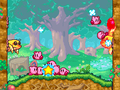
After revisiting the stage, 5 Kirbys start to pull down a massive turnip
Kirby pummels a Birdee carrying a nut ready to be launched
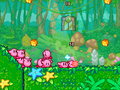
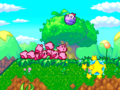
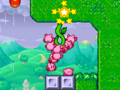
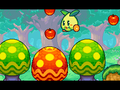
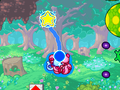
After ingesting enough fruit from the tree, a new Kirby appears
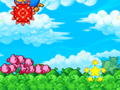
The Kirbys encounter a Recovery Ring
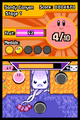
The Kirbys encounter a Snoozroot
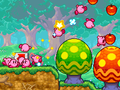
The Kirbys work together to pull a large turnip from the ground
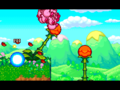
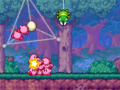
The Kirbys are launched toward Big Birdee
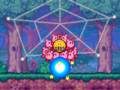
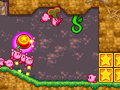
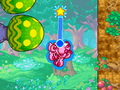
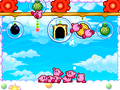
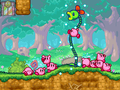
The Kirbys encounter a wild Spire Vine

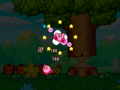
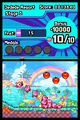
The Kirbys defeat the Spire Vine by smashing it to the floor, claiming the fruits trapped within
The Kirbys smash two Puku Snoozroots with a Spire Vine
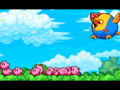
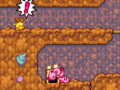
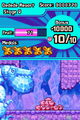
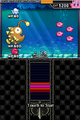
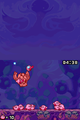
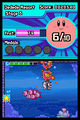
The Kirbys interrupt a snacking Oohroo in Stage 2
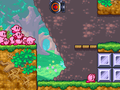
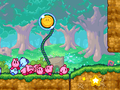
A purple Spire Vine that grows tall and then shrinks is seen in its shrunken state
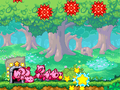
Some Melody Switches appear, begging to be pressed
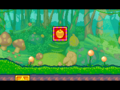
A Fruit Block appears on-screen
The Kirbys must choose what to destroy with the purple Spire Vine
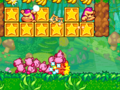
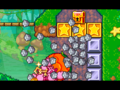
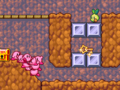
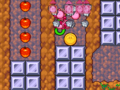
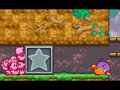
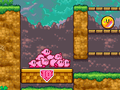
The Kirbys smashing through metal blocks to access a Rainbow Medal
The stage's shortcut is revealed from behind a broken block

A Big Beanbon pounds the floor after jumping from above
The Kirbys topple a Spire Vine to break a set of metal blocks
A Tappy spins up and down
A Tappy gets tired of spinning and slows down, allowing the Kirbys to pummel it
The Kirbys get stuck in a Spire Vine chain reaction

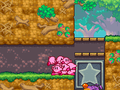
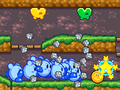
The Kirbys obtain a medal at the end of a Spire Vine chain
The Kirbys come across a Key guarded by two Oohroos
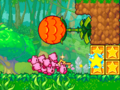
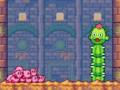
The Kirbys encounter a large red Spire Vine
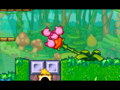
The Kirbys shatter some metal blocks with a large red Spire Vine, which is destined to be shattered too afterwards
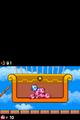
A Kirby uses a Key to open a treasure chest
The Kirbys find another medal in an alcove
The Kirbys assault a Beanbon walking along the forest floor
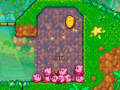
A gate opens, allowing the Kirbys to access a door at the end of the passage

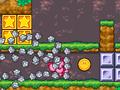
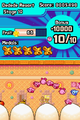
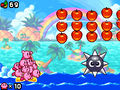
The switch brings up a grate full of apples in front of the first Spideroo
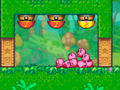
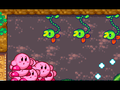
The Kirbys rush through a series of attacking Spideroos
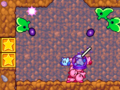
Ironically, a cannon absorbs the Kirbys
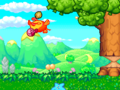
Up and above the tree the Kirbys go
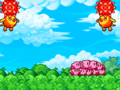
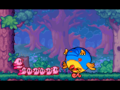
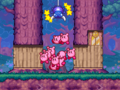
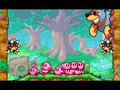
Two Birdees protect their tree from the mass attack.
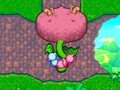
Big Birdee, enraged, appears in front of the Kirbys

Big Birdee attacks, similarly to how her younger family members do
Down and below the Kirbys drag Big Birdee
Big Birdee lies defeated before flying away from the heroes
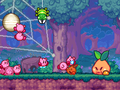
Some Kirbys try to get away with a cobweb cocoon while a green Spideroo seeks to get away with a Kirby
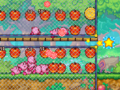
The Kirbys discover the entrance to a room filled with fruit
The Kirbys face off against a Spideroo next to the unlocked shortcut
A bunch of foes brawl with the Kirbys as they try to untangle a bigger cobweb cocoon
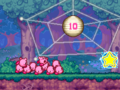
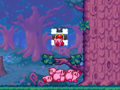
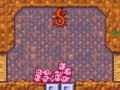
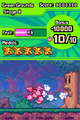
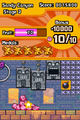
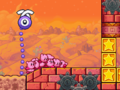
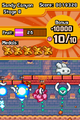
An enormous cobweb is encountered, which displays a curious number
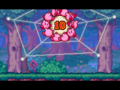
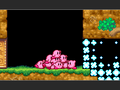
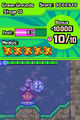
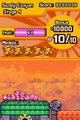
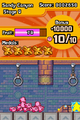
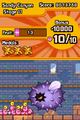
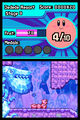
10 Kirbys bring down the cobweb cocoon
The Kirbys pull on a Jerkweed to access the main entrance of the cave while some apples above lead to an alternate path
A Beanbon guards the key to a treasure chest
The Kirbys at the alternate entrance of the cave, past the final Tappy of the stage
The Kirbys enter the door to the side chamber hidden between propeller weeds
When in the side chamber, the Kirbys encounter propeller weeds and fruit
The Kirbys wait for the Jerkweed to retract its thorns
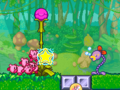
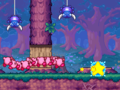
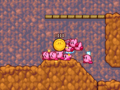
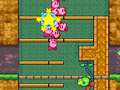
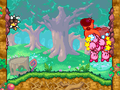
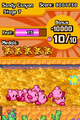
A group of Posulas do battle with the Kirbys
The Kirbys unlock the stage's shortcut, leading to the Battybat encounter
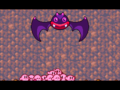
Battybat makes an appearance

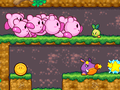
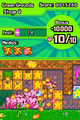
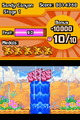
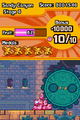
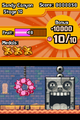
10 Kirbys try to pluck a big turnip
The Kirbys pull on a Jerkweed to break metal blocks and access the middle path
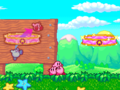
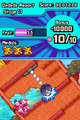
A Gold Beanbon spots the Kirbys in the rightmost path.
The Kirbys encounter one of the Big Beanbons guarding the stage's exit
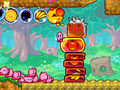
The Kirbys start breaking a dirt-made Heave-Ho Block
The Kirbys weighting down a weighted platform to open the path forward
The first Schnoz is encountered with a Heave-Ho Block in sight

The Kirbys push and drop the Heave-Ho Block on top of the Schnoz
A Oohroo being pummeled between wighted platforms
The Kirbys find a split path with a spring cannon
A Big Schnoz shows his strength against the Kirbys
The Kirbys find various Jerkweed and a block containing the stage's shortcut
The Kirbys find a Jumbo Candy hidden in a Jerkweed
Some Snoozroots confront the Jumbo Kirbys upside-down
The Jumbo Kirbys rush through the blocks ahead
The Kirbys lower down the sinking chamber
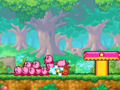
The Kirbys run along the forest toward the stage's exit
A Bigger Schnoz blocks the stage's exit
The Kirbys go to tackle a Warwiggle
The Kirbys get carried along the mushroom path
A Big Beanbon jumps on the mushrooms
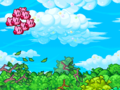
The Kirbys jump to the apples and mushrooms
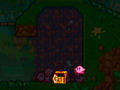
The Kirbys get absorbed by a vortex after taking the Skull key
The Kirby brawl with the Skullys for the treasure chest
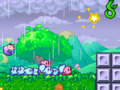
A Snoozroot disguised as Spinwheel Flower gets revealed next to the stage's shortcut

A spiky-petaled Spinwheel Flower makes presence
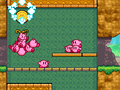
The Kirbys get carried along the Posula path
The Mogmoles point the path to the Kirbys while hiding when they get close
The door and floor disappear, making the Kirbys fall downward
The Mogmoles laughably meet the Kirbys onto the arena
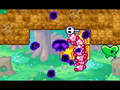
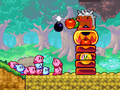
The Kirbys battle the bomb-armed Mogmoles
Moley and the Helmetmoles appear on the arena
Moley tries to throw a bomb at the Kirbys

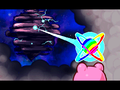
The Kirbys throw Moley at the floor


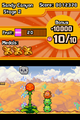
Sandy Canyon

- Scoopy KMA pulling.png
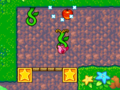
The Kirbys pull on a Scoopy to dislodge it
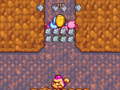
The Kirbys engage Bigger Stactus in the ruins of the stage
The Kirbys narrowly dodge a Clanksprout emerging from quicksand


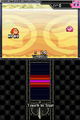
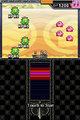
Dedede Resort


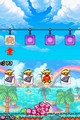

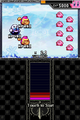
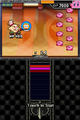
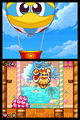
One of the Kirbys getting hooked by Tury's line at the start of the stage
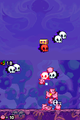
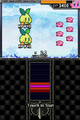
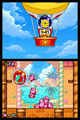
Mono Soarars attacking when the Kirbys hit the wrong card


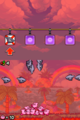
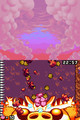
Volcano Valley


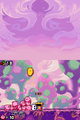
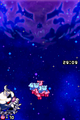
Necro Nebula

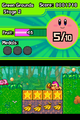
Menus

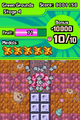
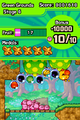
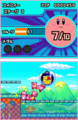
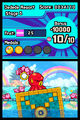
The file selection screen, with a 100% completed file displayed
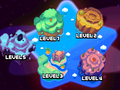
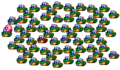
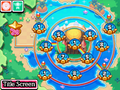
The world map
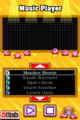
The Music Player
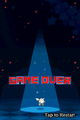
The Game Over screen


Cutscenes
Kirby using the Rainbow Medals

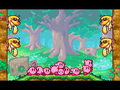
The Japanese version exclusive enemy roll call

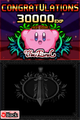
Got All Medals!

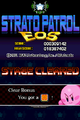
Cleared All Tasks!


Sub-Games
Field Frenzy
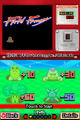
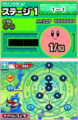
Title Card for Field Frenzy
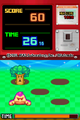
Gameplay


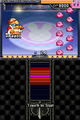
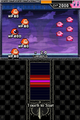
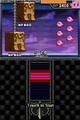
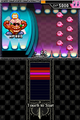
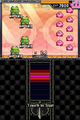
Kirby Brawl Ball

Title Card for Kirby Brawlball
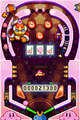
Screenshot of the main board during gameplay.


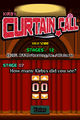
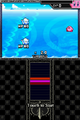
Kirby Curtain Call
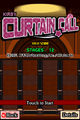
Title card for Kirby Curtain Call


Dash Course
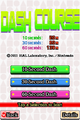
Title Card for Dash Course
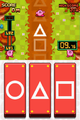
Gameplay


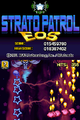
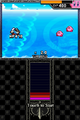
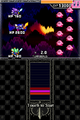
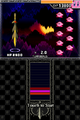
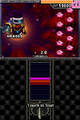
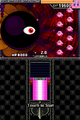
Strato Patrol EOS

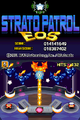
Title card for Strato Patrol EOS


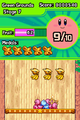
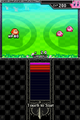
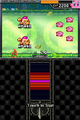
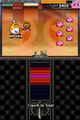
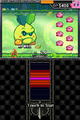
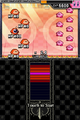
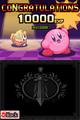
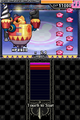
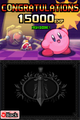
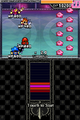
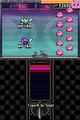
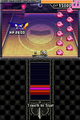
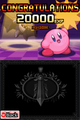
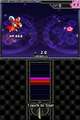
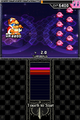
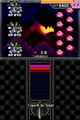
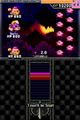
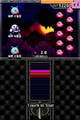
Kirby Quest
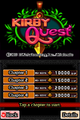
Title Card for Kirby Quest

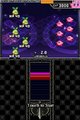
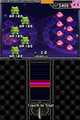
Details
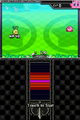
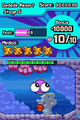
Chapter 1 - Stage 1
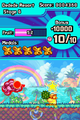
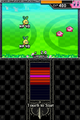
Chapter 1 - Stage 2
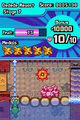
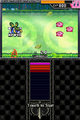
Chapter 1 - Stage 3
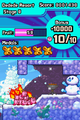
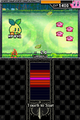
Chapter 1 - Stage 4
Chapter 1 - Stage 5
Chapter 1 - Stage 6
Chapter 1 - Stage 7
Chapter 1 - Stage 8
Chapter 1 - Stage 9
Chapter 1 - Stage 10
Chapter 1 - The end
Chapter 2 - Stage 1

Chapter 2 - Stage 2

Chapter 2 - Stage 3
Chapter 2 - Stage 4
Chapter 2 - Stage 5
Chapter 2 - Stage 6
Chapter 2 - Stage 7
Chapter 2 - Stage 8

Chapter 2 - Stage 9
Chapter 2 - Stage 10
Chapter 2 - The end
Chapter 3 - Stage 1
Chapter 3 - Stage 2
Chapter 3 - Stage 3

Chapter 3 - Stage 4
Chapter 3 - Stage 5
Chapter 3 - Stage 6
Chapter 3 - Stage 7
Chapter 3 - Stage 8
Chapter 3 - Stage 9
Chapter 3 - Stage 10
Chapter 3 - The end
Chapter 4 - Stage 1
Chapter 4 - Stage 2
Chapter 4 - Stage 3
Chapter 4 - Stage 4
Chapter 4 - Stage 5
Chapter 4 - Stage 6
Chapter 4 - Stage 7
Chapter 4 - Stage 8
Chapter 4 - Stage 9
Chapter 4 - Stage 9 (Galaxia)
Chapter 4 - Stage 10
Chapter 4 - Stage 10
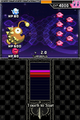
Chapter 4 - The end
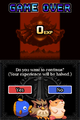
The Game Over screen.


Survival Rush
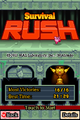
Title Card for Survival Rush
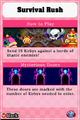
Instructions screen
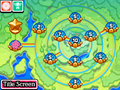
The main area with the three doors
The healing ring, used for replenishing lost health
The room with three Maxim Tomatoes, used for replenishing lost Kirbys
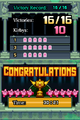
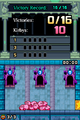
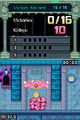
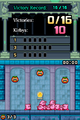
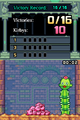
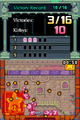
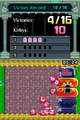
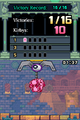
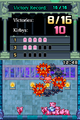
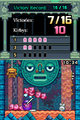
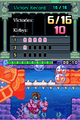
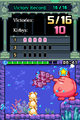
Victory screen
Battle against Bigger Stactus
Battle against Block Waddle Dee
Battle against Big Warwiggle
Battle against Giga Clanksprout
Battle against Skullseer
Battle against Buzzybat
Battle against Great Gear
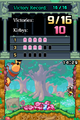
Battle against Moley
Battle against King Eelongo

Battle against Steelsnapper
Battle against Tortletummy
Battle against Whispy Woods
Battle against Lady Ivy
Battle against King Dedede
Battle against Skullord
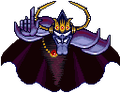
The final battle against Necrodeus


Manual


Official Screenshots
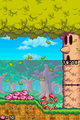
An overworld map of the first level, Green Grounds, showing its stages

Giant Stactuses may not be friendly
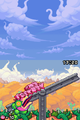
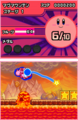
A bomb with pie countdown
Kirby's heroic heart in action
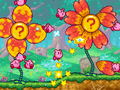
Spinwheel Flower
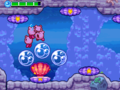
Shells and bubbles
Sandy Canyon
Kirbys battling a Scoopy in Sandy Canyon - Stage 1
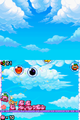
Warp Star surfing game
Dedede Resort
Dedede Resort
Aiming for a Rainbow Medal
Vs. Steelsnapper
Chased by Freezy Rex
Battle with King Dedede
Battle with King Dedede


Scans

The scan of an article in Famitsu
