Cloudy Park - Stage 3 (Kirby's Dream Land 2): Difference between revisions
mNo edit summary |
|||
| (13 intermediate revisions by 7 users not shown) | |||
| Line 1: | Line 1: | ||
{{ | {{DISPLAYTITLE: Cloudy Park - Stage 3 (''Kirby's Dream Land 2'')}}{{Infobox-KDL2Stage | ||
|title=Cloudy Park - Stage 3 | |||
{{Infobox-KDL2Stage | |image=[[File:KDL2 Cloudy Park 3-6.png]] | ||
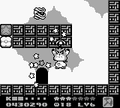
|title= Cloudy Park - Stage 3 | |caption=[[Kirby]] and [[Coo]] drill through the block formations. | ||
|image= [[File:Cloudy Park | |level=[[Cloudy Park (Kirby's Dream Land 2)|Cloudy Park]] | ||
|caption= Kirby | |stage=3 | ||
|level= [[Cloudy Park (Kirby's Dream Land 2)|Cloudy Park]] | |animal={{N}} | ||
|stage= 3 | |rainbow drop={{N}} | ||
|animal= {{N}} | |midboss={{N}} | ||
|rainbow drop= {{N}} | |previous=[[Cloudy Park - Stage 2 (Kirby's Dream Land 2)|Stage 2]] | ||
|midboss= {{N}} | |next=[[Cloudy Park - Stage 4 (Kirby's Dream Land 2)|Stage 4]] | ||
|previous= [[Cloudy Park - Stage 2 (Kirby's Dream Land 2)|Stage 2]] | |||
|next= [[Cloudy Park - Stage 4 (Kirby's Dream Land 2)|Stage 4]] | |||
}} | }} | ||
{{About|the stage in [[Kirby's Dream Land 2]]|the stage in [[Kirby's Dream Land 3]]|[[Cloudy Park - Stage 3 (Kirby's Dream Land 3)]]}} | |||
'''Cloudy Park - Stage 3''' is the third stage of [[Cloudy Park (Kirby's Dream Land 2)|Cloudy Park]] in ''[[Kirby's Dream Land 2]]''. | '''Cloudy Park - Stage 3''' is the third stage of [[Cloudy Park (Kirby's Dream Land 2)|Cloudy Park]] in ''[[Kirby's Dream Land 2]]''. | ||
| Line 31: | Line 30: | ||
!Copy Ability | !Copy Ability | ||
|- | |- | ||
|align=center|[[File: | |align=center|[[File:KDL2 Bouncy Ty sprite.png]] | ||
|[[Bouncy|Bouncy Ty]] | |[[Bouncy|Bouncy Ty]] | ||
|style="border-style: solid; border-width: 1px 3px 1px 1px"|None | |style="border-style: solid; border-width: 1px 3px 1px 1px"|None | ||
|align=center|[[File: | |align=center|[[File:KDL2 Rocky sprite.png]] | ||
|[[Rocky]] | |[[Rocky]] | ||
|[[Stone]] | |[[Stone]] | ||
|- | |- | ||
|align=center|[[File: | |align=center|[[File:KDL2 Flamer sprite.png]] | ||
|[[Flamer]] | |[[Flamer]] | ||
|style="border-style: solid; border-width: 1px 3px 1px 1px"|[[Burning]] | |style="border-style: solid; border-width: 1px 3px 1px 1px"|[[Burning]] | ||
|align=center|[[File: | |align=center|[[File:KDL2 Sir Slippy sprite.png]] | ||
|[[Slippy|Sir Slippy]] | |[[Slippy|Sir Slippy]] | ||
|None | |None | ||
|- | |- | ||
|align=center|[[File: | |align=center|[[File:KDL2 Floaty the Drifter sprite.png]] | ||
|[[Floaty the Drifter]] | |[[Floaty the Drifter]] | ||
|style="border-style: solid; border-width: 1px 3px 1px 1px"|[[Parasol]] | |style="border-style: solid; border-width: 1px 3px 1px 1px"|[[Parasol]] | ||
|align=center|[[File: | |align=center|[[File:KDL2 Sparky sprite.png]] | ||
|[[Sparky]] | |[[Sparky]] | ||
|[[Spark]] | |[[Spark]] | ||
|- | |- | ||
|align=center|[[File: | |align=center|[[File:KDL2 Gordo sprite.png]] | ||
|[[Gordo]] | |[[Gordo]] | ||
|style="border-style: solid; border-width: 1px 3px 1px 1px"|N/A | |style="border-style: solid; border-width: 1px 3px 1px 1px"|N/A | ||
|align=center|[[File: | |align=center|[[File:KDL2 Spikey sprite.png]] | ||
|[[Spikey]] | |[[Spikey]] | ||
|[[Needle]] | |[[Needle]] | ||
|- | |- | ||
|align=center|[[File: | |align=center|[[File:KDL2 Mumbies sprite.png]] | ||
|[[Mumbies]] | |[[Mumbies]] | ||
|style="border-style: solid; border-width: 1px 3px 1px 1px"|N/A | |style="border-style: solid; border-width: 1px 3px 1px 1px"|N/A | ||
|align=center|[[File: | |align=center|[[File:KDL2 Waddle Dee sprite.png]] | ||
|[[Waddle Dee]] | |[[Waddle Dee]] | ||
|None | |None | ||
|} | |} | ||
==Gallery== | |||
<gallery> | |||
KDL2 Cloudy Park 3-1.png|Retaliating at a chasing Waddle Dee | |||
KDL2 Cloudy Park 3-2.png|Breaking through Sparky's wall | |||
KDL2 Cloudy Park 3-3.png|Swimming in the clouds | |||
KDL2 Cloudy Park 3-4.png|Flying through the square formation | |||
KDL2 Cloudy Park 3-5.png|The door in the middle | |||
KDL2 Cloudy Park 3-7.png|Sliding past clouded Gordos | |||
KDL2 Cloudy Park 3-8.png|Clearing the stage exit of the Mumbies flotilla | |||
</gallery> | |||
{{clear}} | {{clear}} | ||
{{Navbox- | {{Navbox-KDL2}} | ||
Latest revision as of 19:26, 21 September 2022
| ||||||||||||||||
| ||||||||||||||||
|
| ||||||||||||||||

- This article is about the stage in Kirby's Dream Land 2. For the stage in Kirby's Dream Land 3, see Cloudy Park - Stage 3 (Kirby's Dream Land 3).
Cloudy Park - Stage 3 is the third stage of Cloudy Park in Kirby's Dream Land 2.
Overview[edit]
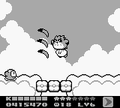
The stage begins in the cloud canopies, as enemies try to ambush Kirby from behind. This eventually leads to some underwater sections.
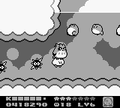
This room is a circuitous one in three layers, with several enemies patrolling them. A door to the next area can be found in the middle.
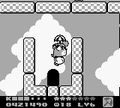
The room leads to a tower leading downward. Here, Kirby will have to contend with lots of Blocks, and then some Mumbies at the bottom. After a long grueling trail, the stage exit can be found at the bottom.
Enemies[edit]
| Sprite | Name | Copy Ability | Sprite | Name | Copy Ability |
|---|---|---|---|---|---|
| Bouncy Ty | None | Rocky | Stone | ||
| Flamer | Burning | Sir Slippy | None | ||
| Floaty the Drifter | Parasol | Sparky | Spark | ||
| Gordo | N/A | Spikey | Needle | ||
| Mumbies | N/A | Waddle Dee | None |
Gallery[edit]
Retaliating at a chasing Waddle Dee
Breaking through Sparky's wall
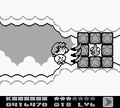
Swimming in the clouds

Flying through the square formation
The door in the middle

Sliding past clouded Gordos
Clearing the stage exit of the Mumbies flotilla


| |||||||||||||||||||||||