Ripple Field - Stage 2 (Kirby's Dream Land 2): Difference between revisions
PotatoPlus (talk | contribs) mNo edit summary |
m (Text replacement - "{{Good}}↵" to "") |
||
| (8 intermediate revisions by 4 users not shown) | |||
| Line 1: | Line 1: | ||
{{DISPLAYTITLE: Ripple Field - Stage 2 (''Kirby's Dream Land 2'')}}{{Infobox-KDL2Stage | |||
{{DISPLAYTITLE: Ripple Field - Stage 2 (''Kirby's Dream Land 2'')}} | |||
{{Infobox-KDL2Stage | |||
|title=Ripple Field - Stage 2 | |title=Ripple Field - Stage 2 | ||
|image=[[File: | |image=[[File:KDL2 Ripple Field 2-7.png]] | ||
|caption=[[Kine]] helps [[Kirby]] fight the current in '''Stage 2'''. | |caption=[[Kine]] helps [[Kirby]] fight the current in '''Stage 2'''. | ||
|level=[[Ripple Field (Kirby's Dream Land 2)|Ripple Field]] | |level=[[Ripple Field (Kirby's Dream Land 2)|Ripple Field]] | ||
| Line 37: | Line 35: | ||
!Copy Ability | !Copy Ability | ||
|- | |- | ||
|align=center|[[File: | |align=center|[[File:KDL2 Blipper sprite.png]] | ||
|[[Blipper]] | |[[Blipper]] | ||
|style="border-style: solid; border-width: 1px 3px 1px 1px"|None | |style="border-style: solid; border-width: 1px 3px 1px 1px"|None | ||
|align=center|[[File: | |align=center|[[File:KDL2 Load Kibble sprite.png]] | ||
|[[Sir Kibble|Load Kibble]] | |[[Sir Kibble|Load Kibble]] | ||
|[[Cutter]] | |[[Cutter]] | ||
|- | |- | ||
|align=center|[[File: | |align=center|[[File:KDL2 Bouncy Ty sprite.png]] | ||
|[[Bouncy|Bouncy Ty]] | |[[Bouncy|Bouncy Ty]] | ||
|style="border-style: solid; border-width: 1px 3px 1px 1px"|None | |style="border-style: solid; border-width: 1px 3px 1px 1px"|None | ||
|align=center|[[File: | |align=center|[[File:KDL2 Scarfy sprite.png]] | ||
|[[Scarfy]] | |[[Scarfy]] | ||
|N/A | |N/A | ||
|- | |- | ||
|align=center|[[File: | |align=center|[[File:KDL2 Coconut sprite.png]] | ||
|[[Coconut]] | |[[Coconut]] | ||
|style="border-style: solid; border-width: 1px 3px 1px 1px"|None | |style="border-style: solid; border-width: 1px 3px 1px 1px"|None | ||
|align=center|[[File: | |align=center|[[File:KDL2 Sir Slippy sprite.png]] | ||
|[[Slippy|Sir Slippy]] | |[[Slippy|Sir Slippy]] | ||
|None | |None | ||
|- | |- | ||
|align=center|[[File: | |align=center|[[File:KDL2 Flamer sprite.png]] | ||
|[[Flamer]] | |[[Flamer]] | ||
|style="border-style: solid; border-width: 1px 3px 1px 1px"|[[Burning]] | |style="border-style: solid; border-width: 1px 3px 1px 1px"|[[Burning]] | ||
|align=center|[[File: | |align=center|[[File:KDL2 Sparky sprite.png]] | ||
|[[Sparky]] | |[[Sparky]] | ||
|[[Spark]] | |[[Spark]] | ||
|- | |- | ||
|align=center|[[File: | |align=center|[[File:KDL2 Floaty the Drifter sprite.png]] | ||
|[[Floaty the Drifter]] | |[[Floaty the Drifter]] | ||
|style="border-style: solid; border-width: 1px 3px 1px 1px"|[[Parasol]] | |style="border-style: solid; border-width: 1px 3px 1px 1px"|[[Parasol]] | ||
|align=center|[[File: | |align=center|[[File:KDL2 Spikey sprite.png]] | ||
|[[Spikey]] | |[[Spikey]] | ||
|[[Needle]] | |[[Needle]] | ||
|- | |- | ||
|align=center|[[File: | |align=center|[[File:KDL2 Glunk sprite.png]] | ||
|[[Glunk]] | |[[Glunk]] | ||
|style="border-style: solid; border-width: 1px 3px 1px 1px"|None | |style="border-style: solid; border-width: 1px 3px 1px 1px"|None | ||
|align=center|[[File: | |align=center|[[File:KDL2 Waddle Dee sprite.png]] | ||
|[[Waddle Dee]] | |[[Waddle Dee]] | ||
|None | |None | ||
|- | |- | ||
|align=center|[[File: | |align=center|[[File:KDL2 Gordo sprite.png]] | ||
|[[Gordo]] | |[[Gordo]] | ||
|style="border-style: solid; border-width: 1px 3px 1px 1px"|N/A | |style="border-style: solid; border-width: 1px 3px 1px 1px"|N/A | ||
| Line 91: | Line 89: | ||
!Copy Ability | !Copy Ability | ||
|- | |- | ||
|align=center|[[File: | |align=center|[[File:KDL2 Master Green sprite.png]] | ||
|[[Master Green]] | |[[Master Green]] | ||
|[[Spark]] | |[[Spark]] | ||
| Line 101: | Line 99: | ||
==Gallery== | ==Gallery== | ||
<gallery> | <gallery> | ||
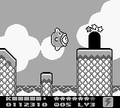
KDL2 Ripple Field 2-1.png|Kirby prepares to take the plunge. | |||
KDL2 Ripple Field 2-2.png|Kirby uses [[Dive Attack|his head]] to shield against a Gordo as he plunges. | |||
KDL2 Ripple Field 2-3.png|The bottom of the dive | |||
KDL2 Ripple Field 2-4.png|Kirby battles the underwater currents. | |||
KDL2 Ripple Field 2-5.png|Duel with [[Master Green]] | |||
KDL2 Ripple Field 2-6.png|Kine is free. | |||
KDL2 Ripple Field 2-8.png|Lighting up a dark place | |||
KDL2 Ripple Field 2-9.png|This area cannot get any brighter. | |||
KDL2 Ripple Field 2-10.png|Jump for the stage exit. | |||
</gallery> | </gallery> | ||
{{clear}} | {{clear}} | ||
{{Navbox- | {{Navbox-KDL2}} | ||
Latest revision as of 02:20, 21 September 2022
| ||||||||||||||||
| ||||||||||||||||
|
| ||||||||||||||||

- This article is about the stage in Kirby's Dream Land 2. For the stage in Kirby's Dream Land 3, see Ripple Field - Stage 2 (Kirby's Dream Land 3).
Ripple Field - Stage 2 is the second stage of Ripple Field in Kirby's Dream Land 2.
Overview[edit]
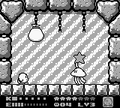
The stage begins at the edge of a huge pit. Kirby will have to jump down, but care must be taken not to fall into the many enemies along the way. At the bottom, the door to the next area can be found in a shallow pool.
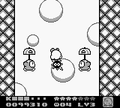
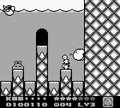
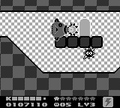
The next area is a labyrinthine underwater tunnel complex filled with pipes shooting currents into spike fields. Along the way, a side-door can be taken to do battle with the Mid-Boss Master Green. Defeating it will allow Kirby to free Kine from a bag, making swimming against the currents in the main passage much easier.
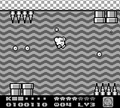
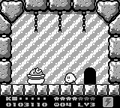
The next area is a dark hallway, which can be illuminated with a specific copy-animal combination hinted at in the previous area. Doing so will reveal a hidden doorway which can be entered to get five small stars. The main path continues past a number of ability-providing enemies and back into a pool where another doorway can be found.
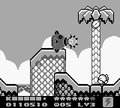
The door leads back outside, and out of a shallow pool. Past a good deal of enemies, the stage exit can be reached at the right end of the path.
Enemies and mid-boss[edit]
| ||||||||||||||||||||||||||||||||||||||||||||||||||||||
Gallery[edit]
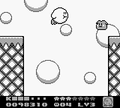
Kirby prepares to take the plunge.
Kirby uses his head to shield against a Gordo as he plunges.
The bottom of the dive
Kirby battles the underwater currents.
Duel with Master Green
Kine is free.
Lighting up a dark place
This area cannot get any brighter.
Jump for the stage exit.


| |||||||||||||||||||||||