|
|
| (59 intermediate revisions by 14 users not shown) |
| Line 1: |
Line 1: |
| {{image}}
| |
| {{construction}}
| |
|
| |
| {{Infobox-KTDLevel | | {{Infobox-KTDLevel |
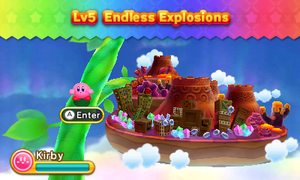
| |image= | | |image=[[File:Endless Explosions Entry.png|300px]] |
| |caption=Screenshot from ''Kirby: Triple Deluxe''. | | |caption=Screenshot from ''Kirby: Triple Deluxe''. |
| |level=5 | | |level=5 |
| Line 9: |
Line 6: |
| |exstages=1 | | |exstages=1 |
| |sunstone=20 | | |sunstone=20 |
| |mid-boss= | | |mid-boss=[[Mr. Frosty]] (5-1, 5-5), [[Blocky]] (5-2, 5-5), [[Winged Eggers]] (5-4), All other Standard Mid-Bosses (5-5), [[Grand Wheelie]] DX (5-EX) |
| |hypernova= | | |hypernova=5-2, 5-4 |
| |boss=[[Pyribbit]] | | |boss=[[Pyribbit]] |
| |previous=[[Wild World]] | | |previous=[[Wild World]] |
| |next=[[Royal Road]] | | |next=[[Royal Road]] |
| }} | | }} |
| '''Endless Explosions''' is the fifth level of [[Kirby: Triple Deluxe]] and the fifth of the six lands in the kingdom of [[Floralia]]. It has five regular stages, a boss stage, and an EX stage. The majority of this level is pyroclastic, with volcanic terrain and a few mechanical sections. There are twenty [[Sun Stone]]s to collect in this level, with two in Stage EX, three each in Stages 1 and 3, and four each in Stages 2, 4 and 5. The boss is [[Pyribbit]]. | | '''Endless Explosions''' is the fifth level of ''[[Kirby: Triple Deluxe]]'' and the fifth of the six lands in the kingdom of [[Floralia]]. It has five regular stages, a boss stage, and an EX stage. The majority of this level is pyroclastic, with volcanic terrain and a few mechanical sections. There are twenty [[Sun Stone]]s to collect in this level, with two in Stage EX, three each in Stages 1 and 3, and four each in Stages 2, 4 and 5. The boss is [[Pyribbit]]. |
|
| |
|
| | {{clear|left}} |
| ==Stages== | | ==Stages== |
| ===Stage 1===
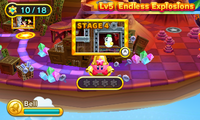
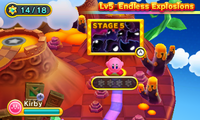
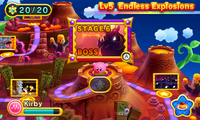
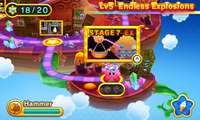
| | For details on each stage individually, click the name of the stage. |
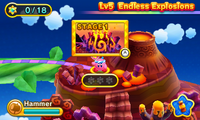
| Section 1: The stage begins in a volcanic plain, with embers rising off the ground and active volcanoes in the background. Burning rocks are falling from the sky, in the foreground, the background and the plane Kirby is on. These pyroclastic boulders can be inhaled with enough effort, but do not grant any abilities. To the right, Kirby must make his way past pools of lava as a [[Parasol Waddle Doo]] comes floating in from the background. From there, Kirby must deal with charging [[Sheld]] as he makes his way past more pyroclast. Using [[Parasol]] or another cold ability, Kirby can cool down some fire blocks to reveal a [[Keychain]]. Past a bridge spanning another lava pit, a [[Clown Acrobot]] guards the door to the next section.
| | {| class="sortable wikitable" border=1 cellpadding=2 |
| | | !class=unsortable|Stage |
| Section 2: The door leads to the edge of a deep pit spanned by a [[Tilt Gondola]]. Here, Kirby will need to ride down, jumping from one rail to the next while avoiding falling into the lava. If successful, he can find a [[Key]] and carry it past a [[Gigatzo]] to unlock a door to the lower right and get a [[Sun Stone]], as well as some [[Invincibility Candy]]. The door to the next section can be reached just below this chamber's entrance.
| | !class=unsortable|Unlock Req. |
| | | !class=unsortable|Sun Stones |
| Section 3: The door leads to an open hillside which continues to the left. [[Bandana Waddle Dee]] appears in the background to give Kirby a food item to hang on to. From there, past a [[Waddle Doo]] and a [[Leafan]], [[Mr. Frosty]] is fought in a chamber just inside a cave. Conceivably, Kirby could use the Invincibility Candy from the previous section to rush in here and defeat the boss more easily, but otherwise defeating him yields Kirby the [[Ice]] ability. That done, the door to the next section appears to the left.
| | !class=unsortable|Hypernova? |
| | | !class=unsortable|Boss/Mid-Boss |
| Section 4: The door leads to a narrow cave with a walkway that spans a pool of lava to the right. A switch on the floor activates a shifting platform that Kirby will need to keep up with as it proceeds to the right out of the cave. It collides with more moving platforms, as well as going over fire blocks that can be cooled down with Ice to reveal various collectibles. This also leads past more enemies and pyroclast. At the end of the pit, another fire block barrier can be broken through if Kirby still has an appropriate ability to yield an optional doorway that leads to a Sun Stone. From there, the door to the next section can be reached just beyond, though if Kirby looks down the edge, he will find a Keychain inside a breakable wall section.
| | !class=unsortable|Notes |
| | |
| Section 5: The door leads to the top of a vertical shaft, where a [[Wheelie]] rolls along the floor immediately below, Using [[Wheel]], Kirby can ride across the path downward, where he must race against an especially fast [[CarryDee]] in the background, to stop it from falling into lava with the Key it carries. If successful, Kirby can use the Key to open an optional doorway that leads to a Sun Stone and a secret path through the background of Stage 1, culminating in a Keychain and a cannon which will take Kirby to the next section, if he didn't use the normal door.
| |
| | |
| Section 6: The door leads to a hillside with more pyroclast falling in the background. The path is riddled with gaps of lava spanned by crumbling bridges and enemies that fly in after Kirby or get in his way on the bridges. After a crumbling staircase, a 3-D [[Warp Star]] carries Kirby to the background, where he must now venture left, contending with volcanoes in the process. From there, a [[Bomb Block]] barrier can be opened to reveal the stage exit.
| |
| | |
| ====Enemies, Mid-bosses, and Abilities====
| |
| {| style="border: 3px solid #E47575; {{round}};background: #F69D99" cellspacing="2" | |
| ! width="420px" | '''Regular Enemies''' | |
| ! width="180px" | '''Mid-Boss''' | |
| |- bgcolor="E47575"
| |
| | | |
| {{col-begin}}
| |
| {{col-break|width=33%}}
| |
| *[[Blade Knight]]
| |
| *[[Gigatzo]]
| |
| *[[Hot Head]]
| |
| *[[Parasol Waddle Doo]]
| |
| *[[Waddle Doo]]
| |
| *[[Wheelie]]
| |
| {{col-break|width=33%}}
| |
| *[[Chilly]]
| |
| *[[Chip]]
| |
| *[[Clown Acrobot]]
| |
| *[[Leafan]]
| |
| *[[Sheld]]
| |
| {{col-break|width=34%}}
| |
| *[[Bronto Burt]]
| |
| *[[Broom Hatter]]
| |
| *[[Parasol Waddle Dee]]
| |
| *[[Soarar]]
| |
| *[[Waddle Dee]]
| |
| {{col-end}}
| |
| | | |
| {{col-begin|width=50%}}
| |
| *[[Mr. Frosty]]
| |
| {{col-end}}
| |
| |- | | |- |
| ! width="420px"| '''Abilities'''
| | |{{center|[[File:KTD Endless Explosions Stage 1 select.png|200px]]<br>'''[[Endless Explosions - Stage 1|Stage 1]]'''}} |
| ! width="180px" | '''Special'''
| | |N/A |
| |- bgcolor="#E47575"
| | |3 |
| |
| | |{{N}} |
| {{col-begin}} | | |[[Mr. Frosty]] |
| {{col-break|width=50%}}
| |
| *[[Circus]]
| |
| *[[Fire]]
| |
| *[[Ice]]
| |
| *[[Parasol]]
| |
| {{col-break|width=50%}} | |
| *[[Beam]]
| |
| *[[Leaf]]
| |
| *[[Sword]]
| |
| *[[Wheel]]
| |
| {{col-end}}
| |
| | | | | |
| {{col-begin}}
| |
| *N/A
| |
| {{col-end}}
| |
| |}
| |
|
| |
| ===Stage 2===
| |
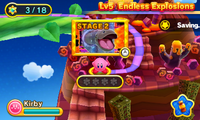
| Section 1: The stage begins at the top of a wide cave entrance, with a ladder going down into the cave itself. At the bottom of the ladder to the left is a bundle of [[Timed Dynamite]], and to the right is a [[Lanzer]] on guard duty. further right is a barricade of stone blocks that must be destroyed using the dynamite to open the way to the door to the next section.
| |
|
| |
| Section 2: The door leads further into the cave interior, into a chamber just above a series of suspended water cubes in a cave with lava walls. Kirby must make use of these water cubes to navigate the cave toward the right. Meanwhile, [[Blipper]]s and other aquatic creatures will get in the way. A [[Moonja]] also appears which can grant the [[Ninja]] ability when swallowed. Using the Stealth Water Gun technique, Kirby can cool down some fire blocks in the ceiling to get at a Keychain. From there, the door to the next section can be reached inside the water cube furthest right.
| |
|
| |
| Section 3: The door leads to a vertical shaft surrounded on all sides by lava, with a water bar situated in the middle. Kirby must swim up this bar past a [[Mamanti]] and then a perching [[Barbar]] to reach a Sun Stone and a Keychain in the background. From there, Kirby must venture upwards to reach the door to the next section inside another water bar.
| |
|
| |
| Section 4: The door leads to another chamber with suspended water cubes in it. Bandana Waddle Dee appears in the background to provide a food item, and the path continues to the right. Inside separate cubes are the [[Cutter]] and [[Circus]] [[Copy Pedestals]], as well as yet another Keychain. A Cannon then takes Kirby up to a separate chamber backed with walls of lava, where he must fight [[Blocky]]. Defeating this Mid-Boss grants Kirby the [[Stone]] ability and opens the door to the next section.
| |
|
| |
| Section 5: The door leads to another lava cave with another wide water bar going to the right. A Barbar awaits Kirby in the bar and will attempt to swallow him. The path continues downward from here through more water bars and hazards. A chamber can be found in the ceiling along the way that contains a [[Rocky]] and some food. From there, the path descends through several stacked bars with Barbar in them, and a Keychain can be found in one of them. At the bottom of the cave to the left, a peg can be smashed if Kirby still has Stone, to reveal an optional doorway that leads to another Sun Stone. From there, the door to the next section can be found to the right, or within the alternate chamber.
| |
|
| |
| Section 6: The door leads to an open area of the cave, with the path leading down to the right. A [[Miracle Fruit]] vine appears here to give Kirby the [[Hypernova]] ability. Further right, a pipe can be seen that winds into the background, the end sticking out where a Waddle Dee, some rocks and a treasure chest can be found. Kirby can use Hypernova to create a vacuum suction tunnel in the pipe to swallow all those items and get at the chest, which contains a [[1Up]]. Further right, a [[Land Barbar]] can be encountered residing in another pipe. When it is dazed, Kirby can inhale it as well, in suitably humorous fashion, then travel through its pipe to press on. Once in the background, Kirby inhales some [[Glunk]]s and then eats another Land Barbar to return to the foreground. Down the next flight of stairs, Kirby can trigger a Bomb Block to create a platform for him to access another pipe and get at its chest, which contains a Sun Stone. From there, Kirby can take one more pipe to reach the door to the next section.
| |
|
| |
| Section 7: The door leads to a vertical shaft interspersed with pipes that Kirby can travel through. Another Land Barbar is devoured in a chamber with two pipes, which allows access to a switch that will open a hatch containing the last Sun Stone of the stage. From there, a series of ladders lead down into the next Land Barbar chamber. After devouring it, Kirby reaches one last chamber where a Waddle Dee sleeps on a tiny outcropping over a pool of lava in the background, with one last suction pipe above him. When Kirby attempts to suck him up, the Waddle Dee hangs on to the tiny outcropping, causing it to rise up and reveal the stage exit. After the Waddle Dee is swallowed, a 3-D Warp Star appears to take Kirby to the new platform and complete the stage.
| |
|
| |
|
| ====Enemies, Mid-bosses, and Abilities====
| |
| {| style="border: 3px solid #E47575; {{round}};background: #F69D99" cellspacing="2"
| |
| ! width="420px" | '''Regular Enemies'''
| |
| ! width="180px" | '''Mid-Boss'''
| |
| |- bgcolor="E47575"
| |
| |
| |
| {{col-begin}}
| |
| {{col-break|width=33%}}
| |
| *[[Barbar]]
| |
| *[[Lanzer]]
| |
| *[[Rocky]]
| |
| *[[Scarfy]]
| |
| {{col-break|width=33%}}
| |
| *[[Blipper]]
| |
| *[[Craby]]
| |
| *[[Squishy]]
| |
| *[[Waddle Dee]]
| |
| {{col-break|width=34%}}
| |
| *[[Glunk]]
| |
| *[[Land Barbar]]
| |
| *[[Mamanti]]
| |
| *[[Moonja]]
| |
| {{col-end}}
| |
| |
| |
| {{col-begin|width=50%}}
| |
| *[[Blocky]]
| |
| {{col-end}}
| |
| |- | | |- |
| ! width="420px"| '''Abilities'''
| | |{{center|[[File:KTD Endless Explosions Stage 2 select.png|200px]]<br>'''[[Endless Explosions - Stage 2|Stage 2]]'''}} |
| ! width="180px" | '''Special'''
| | |Complete Stage 1. |
| |- bgcolor="#E47575" | | |4 |
| | | | |{{Y}} |
| {{col-begin}}
| | |[[Blocky]] |
| {{col-break|width=50%}} | |
| *[[Cutter]]
| |
| *[[Spear]]
| |
| *[[Stone]]
| |
| {{col-break|width=50%}}
| |
| *[[Circus]]
| |
| *[[Ninja]]
| |
| {{col-end}}
| |
| | | | | |
| {{col-begin}}
| |
| *[[Hypernova]]
| |
| {{col-end}}
| |
| |}
| |
|
| |
| ===Stage 3===
| |
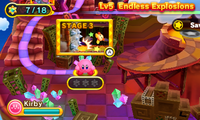
| Section 1: The stage begins in a cavern chamber, as a [[Knuckle Joe]] jumps in from the foreground to ambush Kirby. Additionally, a [[Ringle]] can be found on the other side of the chamber. A Warp Pad is visible in the middle of the room which will teleport Kirby to the background Pad where the door to the next section lies.
| |
|
| |
| Section 2: The door leads to a shaft which Kirby falls down to land in a hallway with an advancing spiky wall coming in from the left. The wall covers the entire left side of the stage and cannot be passed. Kirby will need to run to the right to avoid it, dodging obstacles along the way. As the path continues, a Keychain can be found in one of the breakable blocks in the first barrier. At the far right is a Warp Pad that will allow Kirby to escape to safety in the foreground. From there, the door to the next section can be found to the left.
| |
|
| |
| Section 3: The door leads to another hallway with a moving spiked wall coming in from the right. Barrels can be broken along the way to reveal some minor collectibles, and a Warp Pad can be found to the far left to take Kirby to the foreground. This leads to another advancing spike wall chase from the left. From here, Kirby must find the door to the next section inside a barrel before he is crushed, but another door can be found in a different barrel up a cliff which leads to an optional room containing a Sun Stone before taking Kirby to the next section.
| |
|
| |
| Section 4: The door leads to a metal hallway that proceeds to the right. Along the way, Kirby will encounter more scales and spiked pits, with Shotzos on some of the scales. From there, a chamber can be accessed where a bundle of [[Timed Dynamite]] can be seen under a scale in the background. Ahead to the right are two separate pathways, each blocked off by stone blocks. If Kirby can get the Timed Dynamite to the upper passageway, he can obtain a Sun Stone and some food from inside the block when it is destroyed. From there, the path leads downward, as Kirby must weigh down a scale with a [[Poppy Bros Jr.]] weighing down the other end in the background to gain access to the room below. The room contains a spike pit in the middle, and two Bomb Block barriers, one on each side. The left one contains a Keychain, and the right opens the door to the next section.
| |
|
| |
| Section 5: The door leads to an open path with a spike wall advancing from the left. A Warp Pad can be accessed at the top right, which takes Kirby to the background, with another spike wall coming in from the right. Kirby can obtain a 1Up here if he is fast enough and plows through all the enemies in the area just to the left. From there, another Warp Pad can be reached at the upper left to take Kirby to a new plane where another spiked wall pursues him from the left. Kirby can get a Keychain here behind a couple of Star Blocks if he is quick enough. The next Warp Pad takes him to a room where he must quickly move toward the next approaching wall in order to get to an upper hallway and get away. The Warp Pad in that room leads into the foreground where a wall approaches from the right, then one more warp to the background again where a wall backs a thin windy passageway. Two doors are available to reach the next section, though one is somewhat further than the other.
| |
|
| |
| Section 6: If Kirby reached the upper door, he will end up in a small cave with an [[Energy Drink]] and a Sun Stone. Otherwise, he will end up in a lower cave with no items in it. Both caves are located back in the exterior volcanic area. From there, a [[Flamer]] guards a Warp Pad that leads into the foreground, where the stage exit can be found just to the left.
| |
|
| |
|
| ====Enemies, Mid-bosses, and Abilities====
| |
| {| style="border: 3px solid #E47575; {{round}};background: #F69D99" cellspacing="2"
| |
| ! width="420px" | '''Regular Enemies'''
| |
| ! width="180px" | '''Mid-Boss'''
| |
| |- bgcolor="E47575"
| |
| |
| |
| {{col-begin}}
| |
| {{col-break|width=33%}}
| |
| *[[Birdon]]
| |
| *[[Como]]
| |
| *[[Kabu]]
| |
| *[[Knuckle Joe]]
| |
| *[[Mumbies]]
| |
| *[[Tick]]
| |
| {{col-break|width=33%}}
| |
| *[[Dekabu]]
| |
| *[[Poppy Bros. Jr.]]
| |
| *[[Ringle]]
| |
| *[[Walky]]
| |
| *[[Whippy]]
| |
| {{col-break|width=34%}}
| |
| *[[Blade Knight]]
| |
| *[[Broom Hatter]]
| |
| *[[Flamer]]
| |
| *[[Shotzo]]
| |
| *[[Waddle Dee]]
| |
| {{col-end}}
| |
| |
| |
| {{col-begin|width=50%}}
| |
| *N/A
| |
| {{col-end}}
| |
| |- | | |- |
| ! width="420px"| '''Abilities'''
| | |{{center|[[File:KTD Endless Explosions Stage 3 select.png|200px]]<br>'''[[Endless Explosions - Stage 3|Stage 3]]'''}} |
| ! width="180px" | '''Special'''
| | |Complete Stage 2. |
| |- bgcolor="#E47575"
| | |3 |
| |
| | |{{N}} |
| {{col-begin}} | | |{{N}} |
| {{col-break|width=50%}}
| |
| *[[Bomb]]
| |
| *[[Fighter]]
| |
| *[[Mike]]
| |
| *[[Whip]]
| |
| *[[Wing]]
| |
| {{col-break|width=50%}} | |
| *[[Bell]]
| |
| *[[Fire]]
| |
| *[[Needle]]
| |
| *[[Sword]]
| |
| {{col-end}} | |
| | | | | |
| {{col-begin}}
| |
| *N/A
| |
| {{col-end}}
| |
| |}
| |
|
| |
| ===Stage 4===
| |
| Section 1: The stage begins at the top of a vertical shaft in an underground area. As Kirby descends down the shaft, a number of enemies will need to be avoided or dealt with, including Shotzos, some Poppy Bros. Jr. and [[Sir Kibble]]s. Kirby also gets a good look at a couple of [[Degout]]s, which had not been seen since their appearance in ''[[Kirby's Return to Dream Land]]''. The door to the next section can be found at the bottom of the shaft, inside a breakable wall segment.
| |
|
| |
| Section 2: The door leads to a passageway guarded both in the foreground and background by [[Lanzer]]s. To the right, Kirby can use a number of [[3-D Tilt Rocket]]s to clear the way to a room with a 1Up in it, whilst navigating past spike pits. If Kirby clears away all the stone blocks, he may be able to uncover a Keychain as well. Once that is done, Kirby can uncover and use a Key to access the room. The door to the next section is located just above, but there is a secret passageway inside the room with the 1Up which leads to a Sun Stone.
| |
|
| |
| Section 3: The door leads to a long hallway with walls that tilt toward the front of the screen. If Kirby gets hit by them, he will splat on the screen and lose his Copy Ability. There are holes in the wall that can be used to take shelter as Kirby progresses through this area. The door to the next section can be found at the end of the hall.
| |
|
| |
| Section 4: The door leads to a hallway with no floor. A Bomb Block can be hit to create a walkway across it, albeit with a few holes. More bridges will need to be triggered in a similar manner, as the hall passes through several enemies, including several Gigatzos. Along the way, a couple [[Spynum]]s can be utilized to grant the [[Archer]] ability, which makes hitting several of the Bomb Blocks easier. Along the way, a Bomb Block in the ceiling can be hit to reveal an optional doorway that leads to another Sun Stone. The last Bomb Block creates a stairway that holds another Keychain. From there, the door to the next section can be reached under a fall-through platform.
| |
|
| |
| Section 5: The door leads to another hallway with tilting walls. Some of the holes along the way are covered in tarp, and as such cannot be used for safety. A couple Bomb Block formations cover potential safety areas, and breaking one of them reveals another Keychain. The door to the next section can be reached in one of the holes at the far right, but a rare Golden Keychain can be found in the right wall in a breakable section.
| |
|
| |
| Section 6: The door leads back into the external volcanic area once again. To the right, a [[Miracle Fruit]] vine can be found to grant Kirby the [[Hypernova]] ability. To the right is a platform suspended over a lava pool. The platform has a turbine on it, which Kirby can use his inhale to turn and cause the platform to move forward. When he does so, the platform gains a drill on its forward end, which can plow through various obstacles and clear the way forward. However, Kirby must be wary of falling lava spews and moving fire bars along the way. From there, the path continues in the background along another turbine platform drill. Between two spewing lava sections can be found another Sun Stone. The path returns to the foreground again, this time throwing in aerial attackers to get in the way as well. On the other side, the drill causes a large tiki head to rise up and reveal some food items, as well as the door to the next section.
| |
|
| |
| Section 7: The door leads to an open plain area, with a bridge to the right. The bridge leads to a platform suspended over a pit, with a large volcano in the background. Here, the [[Winged Eggers]] ambush Kirby, which consist of four ogre-looking dragons with shields, who break the bridge. The Eggers circle around Kirby with their shields up most of the time, but will lower to fire a projectile, which Kirby can spit back at them. Kirby has to knock each one out, one at a time, who each will go flying into the volcano in the background upon defeat. Once all of them are defeated, the volcano they fell into erupts, spewing out many items, including the last Sun Stone of the stage and the stage exit, which all land on the platform Kirby is standing on.
| |
|
| |
|
| ====Enemies, Mid-bosses, and Abilities====
| |
| {| style="border: 3px solid #E47575; {{round}};background: #F69D99" cellspacing="2"
| |
| ! width="420px" | '''Regular Enemies'''
| |
| ! width="180px" | '''Mid-Boss'''
| |
| |- bgcolor="E47575"
| |
| |
| |
| {{col-begin}}
| |
| {{col-break|width=33%}}
| |
| *[[Degout]]
| |
| *[[Foley]]
| |
| *[[Noddy]]
| |
| *[[Parasol Waddle Dee]]
| |
| *[[Shotzo]]
| |
| {{col-break|width=33%}}
| |
| *[[Chilly]]
| |
| *[[Lanzer]]
| |
| *[[Poppy Bros. Jr.]]
| |
| *[[Scarfy]]
| |
| *[[Waddle Dee]]
| |
| {{col-break|width=34%}}
| |
| *[[Bronto Burt]]
| |
| *[[Gigatzo]]
| |
| *[[Leafan]]
| |
| *[[Sir Kibble]]
| |
| *[[Spynum]]
| |
| {{col-end}}
| |
| |
| |
| {{col-begin|width=50%}}
| |
| *[[Winged Eggers]]
| |
| {{col-end}}
| |
| |- | | |- |
| ! width="420px"| '''Abilities'''
| | |{{center|[[File:KTD Endless Explosions Stage 4 select.png|200px]]<br>'''[[Endless Explosions - Stage 4|Stage 4]]'''}} |
| ! width="180px" | '''Special'''
| | |Complete Stage 3. |
| |- bgcolor="#E47575"
| | |4 |
| |
| | |{{Y}} |
| {{col-begin}} | | |[[Winged Eggers]] |
| {{col-break|width=50%}}
| |
| *[[Bomb]]
| |
| *[[Ice]]
| |
| *[[Leaf]]
| |
| *[[Spear]]
| |
| {{col-break|width=50%}} | |
| *[[Archer]]
| |
| *[[Cutter]]
| |
| *[[Parasol]]
| |
| *[[Sleep]]
| |
| {{col-end}}
| |
| | | | | |
| {{col-begin}}
| |
| *[[Hypernova]]
| |
| {{col-end}}
| |
| |}
| |
|
| |
|
| ===Stage 5===
| | |- |
| This stage serves as the Triple Deluxe version of the 'Tower of Mid-Bosses' tradition, as seen in many prior Kirby games. In this particular instance, the path branches off at many points, allowing Kirby to fight different Mid-Bosses, but the Sun Stones collected on either the left or right path are the same, meaning that Kirby does not have to play the stage more than once to get them all. | | |{{center|[[File:KTD Endless Explosions Stage 5 select.png|200px]]<br>'''[[Endless Explosions - Stage 5|Stage 5]]'''}} |
| | |Complete Stage 4. |
| | |4 |
| | |{{N}} |
| | |All standard Mid-Bosses |
| | |This stage is a [[Tower of Mid-Bosses]]. |
|
| |
|
| Prelude: The stage begins in an open volcanic plain. No music is playing, and only the sound of the wind can be heard. Bandana Waddle Dee appears to the right to give Kirby a food item to hang on to. To the right, a Sir Kibble, a Leafan and a Tick guard a hill with two 3-D Warp Stars on top. Taking either one will lead to the background, to either ladder inside a rock formation which leads to one of two doors.
| | |- |
| | |{{center|[[File:KTD Endless Explosions Stage 6 select.png|200px]]<br>'''[[Endless Explosions - Stage 6|Stage 6]]'''}} |
| | |Collect 10 [[Sun Stone]]s from prior Endless Explosions stages and complete Stage 5. |
| | |0 |
| | |{{N}} |
| | |[[Pyribbit]] |
| | |Completing this stage unlocks [[Royal Road]]. |
|
| |
|
| Left Section 1: The door leads to an interior room where a [[Flame Galboros]] is fought. Defeating it yields Kirby the [[Fire]] ability and allows access to the background. Using the Burn technique, Kirby can more easily access a chamber with a chest containing a Sun Stone. Above is the door to the next section.
| | |- |
| | |{{center|[[File:KTD Endless Explosions Stage 7 EX select.png|200px]]<br>'''[[Endless Explosions - Stage 7 EX|Stage 7 EX]]'''}} |
| | |Collect all prior Endless Explosions Sun Stones. |
| | |2 |
| | |{{N}} |
| | |[[Grand Wheelie]] DX |
| | |This is an EX stage, so completing it is not required to finish the game. |
|
| |
|
| Right Section 1: The door leads to an interior room where a [[Grand Wheelie]] is fought. Defeating it yields Kirby the [[Wheel]] ability and allows access to the background. Using Wheel, Kirby can more easily access a chamber with a chest containing a Sun Stone. Above is the door to the next section.
| | |} |
|
| |
|
| Section 2: The door leads to an open path that leads to the left, past a Sparky, a Clown Acrobot and a Whippy. At the left end of the path, a barrel with a Keychain in it can be found. Another choice of two paths is given at the far left, much like in the Prelude, which leads to one of two doors.
| | ==In Dededetour!== |
| | All stages of Endless Explosions are played in one sequence in [[Dededetour!]] except for [[Endless Explosions - Stage 7 EX|Stage EX]] and the sections of stages where [[Hypernova]] is used. Through this sequence, 1 [[Keychain]] can be found. |
|
| |
|
| Left Section 3: The door leads to a room where [[Gigant Edge]] is fought. Defeating it yields Kirby the [[Sword]] ability and allows access to the background. Using various Sword techniques allows more elegant access to the chamber below which contains another Sun Stone. The door to the next section is just above.
| | In addition, many enemies are re-sized - changing their [[Health]] and also possibly movement speed - and [[Pyribbit]] and the [[Mid-Bosses]] are changed to their DX forms. |
|
| |
|
| Right Section 3: The door leads to a room where [[Mr. Frosty]] is fought. Defeating him yields Kirby the [[Ice]] ability and allows access to the background. The Sun Stone is located in a chest atop a crumbling block, so Kirby should be quick to open it. The door to the next section is just to the left.
| | Finally, in place of [[Sun Stone]]s, Warp Holes can be found in many areas allowing [[King Dedede]] to skip parts of the stages. In Endless Explosions, there are 4 Warp Holes in total. |
|
| |
|
| Section 4: The door leads to an open path to the right, past a [[Pierce]], a Foley, and a Knuckle Joe. Once again, two choices of path are given.
| | ==Names in other languages== |
| | | {{names |
| Left Section 5: The door leads to a room where [[Blocky]] is fought. Defeating it yields Kirby the [[Stone]] ability and a way into the background. The Sun Stone can be accessed in a chest below, but only if Kirby has Stone or another move that can hit targets in the floor. The door to the next section is just to the right.
| | |ja=エバー エクスプロージョン |
| | | |jaR=Ebā Ekusupurōjon |
| Right Section 5: The door leads to a room where a [[Hornhead]] is fought. Defeating it yields Kirby the [[Beetle]] ability and a way into the background. The Sun Stone can be accessed in a chest below, which can be more easily accessed with Beetle. The door to the next section is just above.
| | |jaM=Ever Explosion |
| | | |fr=Rochers Rocambolesques |
| Section 6: The door leads to a walkway going right up a steep hill, past a [[Parasol Waddle Doo]] and a [[Birdon]]. The hill peaks in the middle, and down to the right is a Keychain. This time, there is only one definite path forward. However, there is a secret optional doorway hidden above that leads to an intermediate chamber.
| | |frM=Incredible Rocks |
| | | |de=Endlose Explossionen |
| Section 7: This chamber is only accessed if Kirby took the upper door in the previous section. Here, two Walkies can be found in the foreground which can grant the [[Mike]] ability when swallowed. In the background, three Degouts guard a chest with a unique Golden Keychain in it. The door to the next section lies just to the right.
| | |deM=Endless Explosions |
| | | |it=Eremo Esplosivo |
| Section 8: The door leads to a small room where [[Bonkers]] is fought. If Kirby came here from Section 7, he may still have charges left on the Mike ability, which he can use to defeat this Mid-Boss more quickly. Bomkers yields the [[Hammer]] ability upon defeat, which can be used in the background to more effectively clear out the enemies that fall on his head after breaking away a Bomb Block barrier to get the last Sun Stone in a chest. The door to the next section is just to the right.
| | |itM=Explosive Hermitage |
| | | |ko=에버 익스플로즌 |
| Section 9: The door leads to a sloped precarious platform situated over a bottomless pit. A [[Blade Knight]] stands on top of it. A 3-D Warp Star then leads to the foreground, where a [[Maxim Tomato]] can be found inside a box on another platform. From there, after finding a Keychain down the right-hand pit, another 3-D Warp Star can take Kirby to the stage exit.
| | |koR=Ebeo Igseupeullojeun |
| | | |koM=Ever Explosion |
| ====Enemies, Mid-bosses, and Abilities====
| | |es=Abrasadora Aventura |
| {| style="border: 3px solid #E47575; {{round}};background: #F69D99" cellspacing="2" | | |esM=Scorching Adventure |
| ! width="420px" | '''Regular Enemies'''
| | }} |
| ! width="180px" | '''Mid-Bosses'''
| |
| |- bgcolor="E47575" | |
| | | |
| {{col-begin}}
| |
| {{col-break|width=33%}}
| |
| *[[Blade Knight]]
| |
| *[[Chip]]
| |
| *[[Parasol Waddle Doo]]
| |
| *[[Pierce]]
| |
| *[[Sir Kibble]]
| |
| *[[Sparky]]
| |
| *[[Walky]]
| |
| {{col-break|width=33%}}
| |
| *[[Clown Acrobot]]
| |
| *[[Degout]]
| |
| *[[Foley]]
| |
| *[[Leafan]]
| |
| *[[Sheld]]
| |
| *[[Waddle Doo]]
| |
| {{col-break|width=34%}}
| |
| *[[Birdon]]
| |
| *[[Kabu]]
| |
| *[[Knuckle Joe]]
| |
| *[[Tick]]
| |
| *[[Waddle Dee]]
| |
| *[[Whippy]]
| |
| {{col-end}}
| |
| | | |
| {{col-begin|width=50%}}
| |
| *[[Blocky]]
| |
| *[[Bonkers]]
| |
| *[[Flame Galboros]]
| |
| *[[Gigant Edge]]
| |
| *[[Grand Wheelie]]
| |
| *[[Hornhead]]
| |
| *[[Mr. Frosty]]
| |
| {{col-end}}
| |
| |- | |
| ! width="420px"| '''Abilities'''
| |
| ! width="180px" | '''Special'''
| |
| |- bgcolor="#E47575" | |
| | | |
| {{col-begin}}
| |
| {{col-break|width=50%}}
| |
| *[[Cutter]]
| |
| *[[Fighter]]
| |
| *[[Hammer]]
| |
| *[[Ice]]
| |
| *[[Needle]]
| |
| *[[Parasol]]
| |
| *[[Spark]]
| |
| *[[Spear]]
| |
| *[[Whip]]
| |
| *[[Wing]]
| |
| {{col-break|width=50%}}
| |
| *[[Beam]]
| |
| *[[Beetle]]
| |
| *[[Bomb]]
| |
| *[[Circus]]
| |
| *[[Fire]]
| |
| *[[Leaf]]
| |
| *[[Mike]]
| |
| *[[Stone]]
| |
| *[[Sword]]
| |
| *[[Wheel]]
| |
| {{col-end}}
| |
| |
| |
| {{col-begin}}
| |
| *N/A
| |
| {{col-end}}
| |
| |}
| |
| | |
| ===Stage 6 (Boss: [[Pyribbit]])===
| |
| | |
| ===Stage EX===
| |
| | |
| ====Enemies, Mid-bosses, and Abilities====
| |
|
| |
|
| ==Trivia==
| | {{clear}} |
| *The music that plays during the Mid-Bosh rush in Stage 5 is a remix of the music from Stage 3 of [[Ripple Star]] in ''[[Kirby 64: The Crystal Shards]]''.
| |
|
| |
|
| <br clear=all>
| | {{Navbox-KTD}} |
| {{KirbyTD}} | | [[Category:Places]] |
| | [[Category:Levels in Kirby: Triple Deluxe]] |
| | [[Category:Floralia locations]] |
| | [[Category:Popstar locations]] |
