Peppermint Palace: Difference between revisions
Jellytost♡ (talk | contribs) m (Text replace.) |
m (Text replacement - "\|theme title=\[\[(.*)\]\]" to "|theme title="$1"") |
||
| (21 intermediate revisions by 11 users not shown) | |||
| Line 1: | Line 1: | ||
{{Infobox-K&tAMLevel | {{Infobox-K&tAMLevel | ||
|image= [[File:Peppermint Palace Room 6.png]] | |image= [[File:KaTAM Peppermint Palace Room 6.png]] | ||
|caption= Kirby kicks out a [[Pengy]] in the depths of '''Peppermint Palace'''. | |caption= Kirby kicks out a [[Pengy]] in the depths of '''Peppermint Palace'''. | ||
|level= 7 | |level= 7 | ||
| Line 7: | Line 6: | ||
|goal= 2 | |goal= 2 | ||
|connect= [[Rainbow Route]] <br> [[Carrot Castle]] <br> [[Candy Constellation]] | |connect= [[Rainbow Route]] <br> [[Carrot Castle]] <br> [[Candy Constellation]] | ||
|mid-boss= [[Bombar]] <br> [[Bonkers]] <br> [[Box Boxer]] <br> [[Mr. Frosty | |mid-boss= [[Bombar]] <br> [[Bonkers]] <br> [[Box Boxer]] <br> [[Mr. Frosty]] <br> [[Phan Phan]] | ||
|boss= [[Wiz]] | |boss= [[Wiz]] | ||
|theme music=[[File:KatAM Ice-Crystal Area.mp3]] | |||
|theme title="[[Ice/Crystal Area]]" | |||
|description=Clip of the "Ice/Crystal Area" theme from ''[[Kirby & The Amazing Mirror]]'' | |||
|previous= [[Olive Ocean]] | |previous= [[Olive Ocean]] | ||
|next=[[Radish Ruins]] | |next=[[Radish Ruins]] | ||
}} | }} | ||
'''Peppermint Palace''' is the seventh area of the [[Mirror World]] in ''[[Kirby & The Amazing Mirror]]''. [[Kirby]] enters this icy palace in order to find the [[Mirror Shard]] held by [[Wiz]]. Exploration of the area takes place inside the palace, surrounding mountains, and underground cavern. [[Mirror Door]]s leading to Peppermint Palace are distinctly characterized by their cool color shades such as light blue and textures resembling ice. Entrances to Peppermint Palace, and the exterior of the building can be found in the forests of the [[Carrot Castle]] area. | '''Peppermint Palace''' is the seventh area of the [[Mirror World]] in ''[[Kirby & The Amazing Mirror]]''. [[Kirby]] enters this icy palace in order to find the [[Mirror Shard]] held by [[Wiz]]. Exploration of the area takes place inside the palace, surrounding mountains, and underground cavern. [[Mirror Door]]s leading to Peppermint Palace are distinctly characterized by their cool color shades, such as light blue and textures resembling ice. Entrances to Peppermint Palace, and the exterior of the building, can be found in the forests of the [[Carrot Castle]] area. | ||
Most of this area's surface is icy | Most of this area's surface is icy and slippery, which leads to several open pits to harm Kirby. Many of the rooms are divided and a network of portals loop serve to confuse travelers, as most of the map loops back to certain rooms. Another very noticeable aspect of the area is the abundant placement of inclined areas, which make the [[Laser]] [[Copy Ability]] useful. | ||
==Treasure== | ==Treasure== | ||
The term ''palace'' is generally associated with wealth and treasure, and Peppermint Palace is no exception. Kirby is able to obtain three [[Spray Paint]]s | The term ''palace'' is generally associated with wealth and treasure, and Peppermint Palace is no exception. Kirby is able to obtain three [[Spray Paint]]s (Grape, Snow, and Pink), two [[Jukebox|Sound File]]s, and the map for the Collection Room. In addition to the many [[1-Up]]s, [[Energy Drink]]s, [[Battery (Kirby & The Amazing Mirror)|batteries]], [[food]], and [[Maxim Tomato|Maxim Tomatoes]]. | ||
====Enemies, Bosses, and Abilities in Peppermint Palace==== | ====Enemies, Bosses, and Abilities in Peppermint Palace==== | ||
{| width= | {| width=60% | ||
|<tabs> | |<tabs> | ||
<tab name="Enemies"> | <tab name="Enemies"> | ||
| Line 40: | Line 42: | ||
!Copy Ability | !Copy Ability | ||
|- | |- | ||
|align=center|[[File: | |align=center|[[File:KaTAM Batty.png]] | ||
|[[Batty]] | |[[Batty]] | ||
|style="border-style: solid; border-width: 1px 3px 1px 1px" align=center|None | |style="border-style: solid; border-width: 1px 3px 1px 1px" align=center|None | ||
|align=center|[[File: | |align=center|[[File:KNiDL Flamer sprite.png]] | ||
|[[Flamer]] | |[[Flamer]] | ||
|style="border-style: solid; border-width: 1px 3px 1px 1px" align=center|[[Burning]] | |style="border-style: solid; border-width: 1px 3px 1px 1px" align=center|[[Burning]] | ||
|align=center|[[File: | |align=center|[[File:KNiDL Hot Head sprite.png]] | ||
|[[Hot Head]] | |[[Hot Head]] | ||
|style="border-style: solid; border-width: 1px 3px 1px 1px" align=center|[[Fire]] | |style="border-style: solid; border-width: 1px 3px 1px 1px" align=center|[[Fire]] | ||
| Line 56: | Line 58: | ||
|align=center|None | |align=center|None | ||
|- | |- | ||
|align=center|[[File: | |align=center|[[File:KNiDL Blipper sprite.png]] | ||
|[[Blipper]] | |[[Blipper]] | ||
|style="border-style: solid; border-width: 1px 3px 1px 1px" align=center|None | |style="border-style: solid; border-width: 1px 3px 1px 1px" align=center|None | ||
| Line 62: | Line 64: | ||
|[[Foley]] | |[[Foley]] | ||
|style="border-style: solid; border-width: 1px 3px 1px 1px" align=center|[[Bomb]] | |style="border-style: solid; border-width: 1px 3px 1px 1px" align=center|[[Bomb]] | ||
|align=center|[[File: | |align=center|[[File:KNiDL Laser Ball sprite.png]] | ||
|[[Laser Ball]] | |[[Laser Ball]] | ||
|style="border-style: solid; border-width: 1px 3px 1px 1px" align=center|[[Laser]] | |style="border-style: solid; border-width: 1px 3px 1px 1px" align=center|[[Laser]] | ||
|align=center|[[File: | |align=center|[[File:KNiDL Rocky sprite.png]] | ||
|[[Rocky]] | |[[Rocky]] | ||
|style="border-style: solid; border-width: 1px 3px 1px 1px" align=center|[[Stone]] | |style="border-style: solid; border-width: 1px 3px 1px 1px" align=center|[[Stone]] | ||
|align=center|[[File: | |align=center|[[File:KNiDL Sparky sprite.png]] | ||
|[[Sparky]] | |[[Sparky]] | ||
|align=center|[[Spark]] | |align=center|[[Spark]] | ||
| Line 78: | Line 80: | ||
|[[Giant Rocky]] | |[[Giant Rocky]] | ||
|style="border-style: solid; border-width: 1px 3px 1px 1px" align=center|[[Stone]] | |style="border-style: solid; border-width: 1px 3px 1px 1px" align=center|[[Stone]] | ||
|align=center|[[File: | |align=center|[[File:KaTAM Leap.png]] | ||
|[[Leap]] | |[[Leap]] | ||
|style="border-style: solid; border-width: 1px 3px 1px 1px" align=center|None | |style="border-style: solid; border-width: 1px 3px 1px 1px" align=center|None | ||
| Line 84: | Line 86: | ||
|[[Roly-Poly]] | |[[Roly-Poly]] | ||
|style="border-style: solid; border-width: 1px 3px 1px 1px" align=center|None | |style="border-style: solid; border-width: 1px 3px 1px 1px" align=center|None | ||
|align=center|[[File: | |align=center|[[File:KNiDL Sword Knight sprite.png]] | ||
|[[Sword Knight]] | |[[Sword Knight]] | ||
|align=center|[[Sword]] | |align=center|[[Sword]] | ||
| Line 91: | Line 93: | ||
|[[Boxin]] | |[[Boxin]] | ||
|style="border-style: solid; border-width: 1px 3px 1px 1px" align=center|[[Fighter]] | |style="border-style: solid; border-width: 1px 3px 1px 1px" align=center|[[Fighter]] | ||
|align=center|[[File: | |align=center|[[File:KNiDL Glunk sprite.png]] | ||
|[[Glunk]] | |[[Glunk]] | ||
|style="border-style: solid; border-width: 1px 3px 1px 1px" align=center|None | |style="border-style: solid; border-width: 1px 3px 1px 1px" align=center|None | ||
| Line 97: | Line 99: | ||
|[[Metal Guardian]] | |[[Metal Guardian]] | ||
|style="border-style: solid; border-width: 1px 3px 1px 1px" align=center|[[Laser]] | |style="border-style: solid; border-width: 1px 3px 1px 1px" align=center|[[Laser]] | ||
|align=center|[[File: | |align=center|[[File:KNiDL Scarfy sprite.png]] | ||
|[[Scarfy]] | |[[Scarfy]] | ||
|style="border-style: solid; border-width: 1px 3px 1px 1px" align=center|N/A | |style="border-style: solid; border-width: 1px 3px 1px 1px" align=center|N/A | ||
|align=center|[[File: | |align=center|[[File:KNiDL Twister sprite.png]] | ||
|[[Twister]] | |[[Twister]] | ||
|align=center|[[Tornado]] | |align=center|[[Tornado]] | ||
|- | |- | ||
|align=center|[[File: | |align=center|[[File:KNiDL Bronto Burt sprite.png]] | ||
|[[Bronto Burt]] | |[[Bronto Burt]] | ||
|style="border-style: solid; border-width: 1px 3px 1px 1px" align=center|None | |style="border-style: solid; border-width: 1px 3px 1px 1px" align=center|None | ||
| Line 116: | Line 118: | ||
|[[Shadow Kirby]] | |[[Shadow Kirby]] | ||
|style="border-style: solid; border-width: 1px 3px 1px 1px" align=center|None | |style="border-style: solid; border-width: 1px 3px 1px 1px" align=center|None | ||
|align=center|[[File: | |align=center|[[File:KNiDL UFO enemy sprite.png]] | ||
|[[UFO (enemy)|UFO]] | |[[UFO (enemy)|UFO]] | ||
|align=center|[[UFO]] | |align=center|[[UFO]] | ||
| Line 123: | Line 125: | ||
|[[Chip]] | |[[Chip]] | ||
|style="border-style: solid; border-width: 1px 3px 1px 1px" align=center|None | |style="border-style: solid; border-width: 1px 3px 1px 1px" align=center|None | ||
|align=center|[[File: | |align=center|[[File:KNiDL Gordo sprite.png]] | ||
|[[Gordo]] | |[[Gordo]] | ||
|style="border-style: solid; border-width: 1px 3px 1px 1px" align=center|N/A | |style="border-style: solid; border-width: 1px 3px 1px 1px" align=center|N/A | ||
|align=center|[[File: | |align=center|[[File:KNiDL Noddy sprite.png]] | ||
|[[Noddy]] | |[[Noddy]] | ||
|style="border-style: solid; border-width: 1px 3px 1px 1px" align=center|[[Sleep]] | |style="border-style: solid; border-width: 1px 3px 1px 1px" align=center|[[Sleep]] | ||
| Line 136: | Line 138: | ||
|align=center|None | |align=center|None | ||
|- | |- | ||
|align=center|[[File: | |align=center|[[File:KaTAM Cookin.png]] | ||
|[[Cookin]] | |[[Cookin]] | ||
|style="border-style: solid; border-width: 1px 3px 1px 1px" align=center|[[Cook]] | |style="border-style: solid; border-width: 1px 3px 1px 1px" align=center|[[Cook]] | ||
| Line 142: | Line 144: | ||
|[[Haley]] | |[[Haley]] | ||
|style="border-style: solid; border-width: 1px 3px 1px 1px" align=center|None | |style="border-style: solid; border-width: 1px 3px 1px 1px" align=center|None | ||
|align=center|[[File: | |align=center|[[File:KNiDL Parasol enemy sprite.png]] | ||
|[[Parasol (enemy)|Parasol]] | |[[Parasol (enemy)|Parasol]] | ||
|style="border-style: solid; border-width: 1px 3px 1px 1px" align=center|[[Parasol]] | |style="border-style: solid; border-width: 1px 3px 1px 1px" align=center|[[Parasol]] | ||
|align=center|[[File: | |align=center|[[File:KNiDL Shotzo sprite.png]] | ||
|[[Shotzo]] | |[[Shotzo]] | ||
|style="border-style: solid; border-width: 1px 3px 1px 1px" align=center|N/A | |style="border-style: solid; border-width: 1px 3px 1px 1px" align=center|N/A | ||
|align=center|[[File: | |align=center|[[File:KNiDL Waddle Doo sprite.png]] | ||
|[[Waddle Doo]] | |[[Waddle Doo]] | ||
|align=center|[[Beam]] | |align=center|[[Beam]] | ||
| Line 158: | Line 160: | ||
|[[Heavy Knight]] | |[[Heavy Knight]] | ||
|style="border-style: solid; border-width: 1px 3px 1px 1px" align=center|[[Sword]] | |style="border-style: solid; border-width: 1px 3px 1px 1px" align=center|[[Sword]] | ||
|align=center|[[File: | |align=center|[[File:KNiDL Pengi sprite.png]] | ||
|[[Pengy]] | |[[Pengy]] | ||
|style="border-style: solid; border-width: 1px 3px 1px 1px" align=center|[[Ice]] | |style="border-style: solid; border-width: 1px 3px 1px 1px" align=center|[[Ice]] | ||
|align=center|[[File: | |align=center|[[File:KNiDL Sir Kibble sprite.png]] | ||
|[[Sir Kibble]] | |[[Sir Kibble]] | ||
|style="border-style: solid; border-width: 1px 3px 1px 1px" align=center|[[Cutter]] | |style="border-style: solid; border-width: 1px 3px 1px 1px" align=center|[[Cutter]] | ||
|align=center|[[File: | |align=center|[[File:KNiDL Wheelie sprite.png]] | ||
|[[Wheelie]] | |[[Wheelie]] | ||
|align=center|[[Wheel]] | |align=center|[[Wheel]] | ||
|- | |- | ||
|align=center|[[File: | |align=center|[[File:KaTAM Droppy.png]] | ||
|[[Droppy]] | |[[Droppy]] | ||
|style="border-style: solid; border-width: 1px 3px 1px 1px" align=center|None (default) | |style="border-style: solid; border-width: 1px 3px 1px 1px" align=center|None (default) | ||
| Line 184: | Line 186: | ||
|[[Missile]] | |[[Missile]] | ||
|- | |- | ||
|align=center|[[File: | |align=center|[[File:KNiDL Bonkers sprite.png]] | ||
|[[Bonkers]] | |[[Bonkers]] | ||
|[[Hammer]] | |[[Hammer]] | ||
| Line 192: | Line 194: | ||
|[[Fighter]] | |[[Fighter]] | ||
|- | |- | ||
|align=center|[[File: | |align=center|[[File:KNiDL Mr Frosty sprite.png]] | ||
|[[Mr. Frosty | |[[Mr. Frosty]] | ||
|[[Ice]] | |[[Ice]] | ||
|- | |- | ||
|align=center|[[File: | |align=center|[[File:KNiDL Phan Phan sprite.png]] | ||
|[[Phan Phan]] | |[[Phan Phan]] | ||
|[[Throw]] | |[[Throw]] | ||
| Line 207: | Line 209: | ||
!Copy Ability | !Copy Ability | ||
|- | |- | ||
|align=center|[[File: | |align=center|[[File:KaTAM Wiz.png]] | ||
|[[Wiz]] | |[[Wiz]] | ||
|N/A (various abilities can be obtained from things he conjures) | |N/A (various abilities can be obtained from things he conjures) | ||
| Line 216: | Line 218: | ||
==Map== | ==Map== | ||
{{ | {{Navmap-KaTAM-PP}} | ||
Peppermint Palace is a chaotic cluster of loops, with only a few one-way passages, most of which lead to special rooms. Kirby and his clone friends could spend a great deal of time running the loops in here | Peppermint Palace is a chaotic cluster of loops, with only a few one-way passages, most of which lead to special rooms. Kirby and his clone friends could spend a great deal of time running the loops in here if they are not careful. There are 24 normal rooms, two Hubs, one Chest room (containing the area map), two Goal rooms, and one Warp room. The boss of this area is [[Wiz]]. | ||
Peppermint Palace is a very isolated region. Only [[Carrot Castle]] connects directly to this area on the south side. Once the first Hub is reached, this area can connect to [[Rainbow Route]]. There is also a [[Warp Star]] that will take Kirby on a one way trip to [[Candy Constellation]]. | Peppermint Palace is a very isolated region. Only [[Carrot Castle]] connects directly to this area on the south side. Once the first Hub is reached, this area can connect to [[Rainbow Route]]. There is also a [[Warp Star]] that will take Kirby on a one-way trip to [[Candy Constellation]]. | ||
Peppermint Palace has two Goal rooms. Completing the Goal Game in each room will take Kirby and any friends with him back to the [[Rainbow Route - Central Circle|Central Circle]] in Rainbow Route. | Peppermint Palace has two Goal rooms. Completing the Goal Game in each room will take Kirby and any friends with him back to the [[Rainbow Route - Central Circle|Central Circle]] in Rainbow Route. | ||
| Line 227: | Line 229: | ||
==Gallery== | ==Gallery== | ||
<gallery> | <gallery> | ||
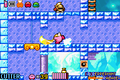
Peppermint Palace Room 1.png|Cutting a [[rope]] | KaTAM Peppermint Palace Room 1.png|Cutting a [[rope]] | ||
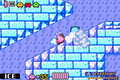
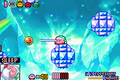
Peppermint Palace Room 3.png|Bouncing [[Laser]] blasts | KaTAM Peppermint Palace Room 3.png|Bouncing [[Laser]] blasts | ||
Peppermint Palace Room 5.png|Freezing a [[Roly-Poly]] | KaTAM Peppermint Palace Room 5.png|Freezing a [[Roly-Poly]] | ||
Peppermint Palace Room 7.png|Breaking through barricades | KaTAM Peppermint Palace Room 7.png|Breaking through barricades | ||
Peppermint Palace Room 9.png|Cutting another [[rope]] | KaTAM Peppermint Palace Room 9.png|Cutting another [[rope]] | ||
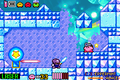
Peppermint Palace Room 13.png|A bad place to sleep | KaTAM Peppermint Palace Room 13.png|A bad place to sleep | ||
Peppermint Palace Room 17.png|Bombing foes in the caves | KaTAM Peppermint Palace Room 17.png|Bombing foes in the caves | ||
Peppermint Palace Room 21.png|Rolling down slopes | KaTAM Peppermint Palace Room 21.png|Rolling down slopes | ||
Peppermint Palace Goal 1.png|Encounter with Shadow Kirby | KaTAM Peppermint Palace Goal 1.png|Encounter with Shadow Kirby | ||
K&TAM Wiz.png|Battle with [[Wiz]] | K&TAM Wiz.png|Battle with [[Wiz]] | ||
Kirby Pupupu Mint Lime Freeze Figure.jpg|"Mint Lime Freeze" figure from the "Kirby Pupupu Herbarium" merchandise line, manufactured by Re-ment | |||
Kirby Cafe Peppermint Palace.jpg|The "Peppermint Palace" [[Kirby Café]] drink | |||
</gallery> | </gallery> | ||
{{ | ==Names in other languages== | ||
{{Navbox- | {{Names | ||
|ja=ペパーミントパレス | |||
|jaR=Pepāminto Paresu | |||
|jaM=Peppermint Palace | |||
|de=Pfeffer-minzpalast | |||
|deM=Peppermint Palace | |||
|es=Palacio de la Menta | |||
|esM=Mint Palace | |||
|fr=Palais Menthe | |||
|frM=Mint Palace | |||
|it=Palazzo Menta | |||
|itM=Mint Palace | |||
}} | |||
{{Navmap-KaTAM|coord1=30|coord2=75}} | |||
{{Navbox-KaTAM}} | |||
Revision as of 19:40, 19 January 2024
| ||||||||||||||||||
| ||||||||||||||||||
| ||||||||||||||||||
|
| ||||||||||||||||||

Peppermint Palace is the seventh area of the Mirror World in Kirby & The Amazing Mirror. Kirby enters this icy palace in order to find the Mirror Shard held by Wiz. Exploration of the area takes place inside the palace, surrounding mountains, and underground cavern. Mirror Doors leading to Peppermint Palace are distinctly characterized by their cool color shades, such as light blue and textures resembling ice. Entrances to Peppermint Palace, and the exterior of the building, can be found in the forests of the Carrot Castle area.
Most of this area's surface is icy and slippery, which leads to several open pits to harm Kirby. Many of the rooms are divided and a network of portals loop serve to confuse travelers, as most of the map loops back to certain rooms. Another very noticeable aspect of the area is the abundant placement of inclined areas, which make the Laser Copy Ability useful.
Treasure
The term palace is generally associated with wealth and treasure, and Peppermint Palace is no exception. Kirby is able to obtain three Spray Paints (Grape, Snow, and Pink), two Sound Files, and the map for the Collection Room. In addition to the many 1-Ups, Energy Drinks, batteries, food, and Maxim Tomatoes.
Enemies, Bosses, and Abilities in Peppermint Palace
| ||||||||||||||||||||||||||||||||||||||||||||||||||||||||||||||||||||||||||||||||||||||||||||||||||||||||||||||||||||||||||||||||||||||||||||||||||||||||||||||||||||||||||||||
Map
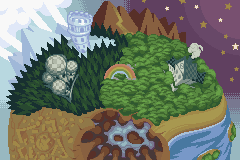
| Peppermint Palace Area Map | |
|---|---|
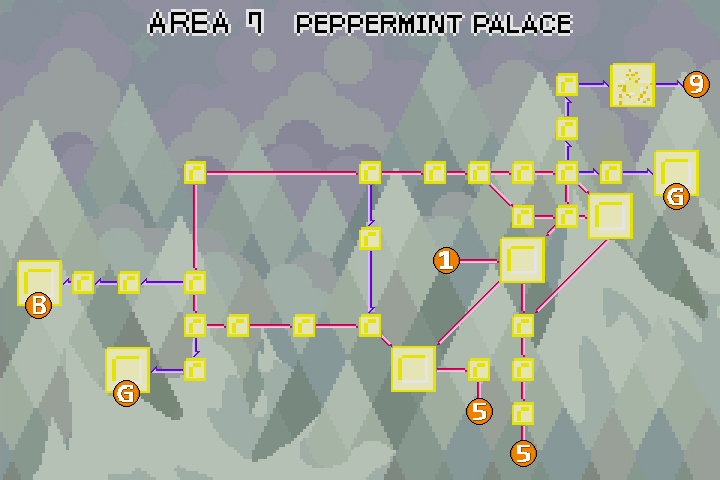 | |
Peppermint Palace is a chaotic cluster of loops, with only a few one-way passages, most of which lead to special rooms. Kirby and his clone friends could spend a great deal of time running the loops in here if they are not careful. There are 24 normal rooms, two Hubs, one Chest room (containing the area map), two Goal rooms, and one Warp room. The boss of this area is Wiz.
Peppermint Palace is a very isolated region. Only Carrot Castle connects directly to this area on the south side. Once the first Hub is reached, this area can connect to Rainbow Route. There is also a Warp Star that will take Kirby on a one-way trip to Candy Constellation.
Peppermint Palace has two Goal rooms. Completing the Goal Game in each room will take Kirby and any friends with him back to the Central Circle in Rainbow Route.
For a full synopsis of what's in each room, click on any room on the map to head to the corresponding page.
Gallery
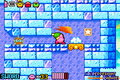
Cutting a rope
Bouncing Laser blasts
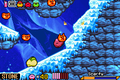
Freezing a Roly-Poly
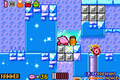
Breaking through barricades
Cutting another rope
A bad place to sleep
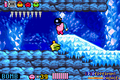
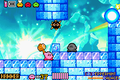
Bombing foes in the caves
Rolling down slopes
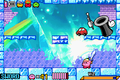
Encounter with Shadow Kirby
Battle with Wiz
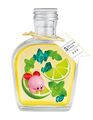
"Mint Lime Freeze" figure from the "Kirby Pupupu Herbarium" merchandise line, manufactured by Re-ment
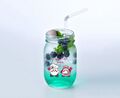
The "Peppermint Palace" Kirby Café drink


Names in other languages
| Language | Name | Meaning |
|---|---|---|
| Japanese | ペパーミントパレス Pepāminto Paresu |
Peppermint Palace |
| French | Palais Menthe | Mint Palace |
| German | Pfeffer-minzpalast | Peppermint Palace |
| Italian | Palazzo Menta | Mint Palace |
| Spanish | Palacio de la Menta | Mint Palace |
| Regions in the Mirror World | |
|---|---|
 | |
| |||||||||||||||||||||||||||||