Moonlight Mansion: Difference between revisions
m (Text replacement - "{{AMMMNavMap" to "{{Navmap-KaTAM-MoM") |
Luigifan18 (talk | contribs) m (Grammar check) |
||
| (21 intermediate revisions by 11 users not shown) | |||
| Line 1: | Line 1: | ||
{{Infobox-K&tAMLevel | {{Infobox-K&tAMLevel | ||
|image= [[File:Moonlight Mansion Entry.png]] | |image=[[File:KaTAM Moonlight Mansion Entry.png]] | ||
|caption= The [[Moonlight Mansion - Entry|entry point]] for '''Moonlight Mansion'''. | |caption=The [[Moonlight Mansion - Entry|entry point]] for '''Moonlight Mansion'''. | ||
|level= 2 | |level=2 | ||
|rooms= 26 | |rooms=26 | ||
|goal= 2 | |goal=2 | ||
|connect= [[Rainbow Route]] <br> [[Olive Ocean]] <br> [[Candy Constellation]] | |connect=[[Rainbow Route]]<br>[[Olive Ocean]]<br>[[Candy Constellation]] | ||
|mid-boss= [[Batafire]] <br> [[Bonkers]] <br> [[Boxy]] <br> [[Mr. Frosty | |mid-boss=[[Batafire]]<br>[[Bonkers]]<br>[[Boxy]]<br>[[Mr. Frosty]] | ||
|boss= [[King Golem]] | |boss=[[King Golem]] | ||
|theme music=[[File:KatAM Moonlight Mansion.mp3]] | |||
|theme title="[[Castle/Building Area]]" | |||
|description=Clip of the "Castle/Building Area" theme from ''[[Kirby & The Amazing Mirror]]'' | |||
|previous=[[Rainbow Route]] | |previous=[[Rainbow Route]] | ||
|next=[[Cabbage Cavern]] | |next=[[Cabbage Cavern]] | ||
}} | }} | ||
'''Moonlight Mansion''' is the second area visited in ''[[Kirby & The Amazing Mirror]]''. Moonlight Mansion is first entered after completing [[Rainbow Route]]. This area is one of the nine areas of the [[Mirror World]] and | '''Moonlight Mansion''' is the second area visited in ''[[Kirby & The Amazing Mirror]]''. Moonlight Mansion is first entered after completing [[Rainbow Route]]. This area is one of the nine areas of the [[Mirror World]] and one of the only two not named after a food, the other being Rainbow Route. It is also one of the three areas consisting of a single building. Hidden deep in the dark mansion, [[King Golem]] guards a [[Mirror Shard]]. | ||
==General Description== | ==General Description== | ||
Moonlight Mansion is a medium-sized area and has only a few connections to other locales | Moonlight Mansion is a medium-sized area and has only a few connections to other locales, specifically Rainbow Route, [[Olive Ocean]], and [[Candy Constellation]]. The majority of exploration takes place in the mansion's vast interior. Various enemies (see table below) can be found throughout the many offices, studies, laboratory areas, and hallways between them. Some of the hazards Kirby will encounter include pits, spikes, electrical charges, and [[Gordo]]s. As one of the simplest areas of ''Kirby & The Amazing Mirror'', only a few puzzles challenge [[Kirby]] in order to progress further. The majority of the [[switch]]es, [[Bomb Block|bomb blocks]], and [[Block|metal blocks]] are used to access bonus areas and [[Treasure|treasure chest]]s. | ||
Besides the expected [[food]], [[ | Besides the expected [[food]], [[Battery (Kirby & The Amazing Mirror)|batteries]], [[Maxim Tomato|Maxim Tomatoes]], [[1-Up]]s and rare [[Invincible Candy]], Kirby can find [[Spray Paint|Orange Spray Paint]], Chalk [[Spray Paint]], and the [[Notes|Enemy Sounds]]. | ||
====Enemies, Bosses and Abilities in Moonlight Mansion==== | ====Enemies, Bosses and Abilities in Moonlight Mansion==== | ||
{| width= | {| width=60% | ||
|<tabs> | |<tabs> | ||
<tab name="Enemies"> | <tab name="Enemies"> | ||
| Line 40: | Line 42: | ||
!Copy Ability | !Copy Ability | ||
|- | |- | ||
|align=center|[[File: | |align=center|[[File:KaTAM Batty.png]] | ||
|[[Batty]] | |[[Batty]] | ||
|style="border-style: solid; border-width: 1px 3px 1px 1px" align=center|None | |style="border-style: solid; border-width: 1px 3px 1px 1px" align=center|None | ||
|align=center|[[File: | |align=center|[[File:KaTAM Cookin.png]] | ||
|[[Cookin]] | |[[Cookin]] | ||
|style="border-style: solid; border-width: 1px 3px 1px 1px" align=center|[[Cook]] | |style="border-style: solid; border-width: 1px 3px 1px 1px" align=center|[[Cook]] | ||
| Line 49: | Line 51: | ||
|[[Heavy Knight]] | |[[Heavy Knight]] | ||
|style="border-style: solid; border-width: 1px 3px 1px 1px" align=center|[[Sword]] | |style="border-style: solid; border-width: 1px 3px 1px 1px" align=center|[[Sword]] | ||
|align=center|[[File: | |align=center|[[File:KNiDL Rocky sprite.png]] | ||
|[[Rocky]] | |[[Rocky]] | ||
|style="border-style: solid; border-width: 1px 3px 1px 1px" align=center|[[Stone]] | |style="border-style: solid; border-width: 1px 3px 1px 1px" align=center|[[Stone]] | ||
|align=center|[[File: | |align=center|[[File:KNiDL Sparky sprite.png]] | ||
|[[Sparky]] | |[[Sparky]] | ||
|align=center|[[Spark]] | |align=center|[[Spark]] | ||
|- | |- | ||
|align=center|[[File:Big Waddle Dee.png]] | |align=center|[[File:KaTAM Big Waddle Dee Sprite.png]] | ||
|[[Big Waddle Dee]] | |[[Big Waddle Dee]] | ||
|style="border-style: solid; border-width: 1px 3px 1px 1px" align=center|None | |style="border-style: solid; border-width: 1px 3px 1px 1px" align=center|None | ||
|align=center|[[File: | |align=center|[[File:KaTAM Droppy.png]] | ||
|[[Droppy]] | |[[Droppy]] | ||
|style="border-style: solid; border-width: 1px 3px 1px 1px" align=center|None (default) | |style="border-style: solid; border-width: 1px 3px 1px 1px" align=center|None (default) | ||
|align=center|[[File: | |align=center|[[File:KNiDL Hot Head sprite.png]] | ||
|[[Hot Head]] | |[[Hot Head]] | ||
|style="border-style: solid; border-width: 1px 3px 1px 1px" align=center|[[Fire]] | |style="border-style: solid; border-width: 1px 3px 1px 1px" align=center|[[Fire]] | ||
| Line 72: | Line 74: | ||
|align=center|None | |align=center|None | ||
|- | |- | ||
|align=center|[[File: | |align=center|[[File:KNiDL Blipper sprite.png]] | ||
|[[Blipper]] | |[[Blipper]] | ||
|style="border-style: solid; border-width: 1px 3px 1px 1px" align=center|None | |style="border-style: solid; border-width: 1px 3px 1px 1px" align=center|None | ||
|align=center|[[File: | |align=center|[[File:KNiDL Flamer sprite.png]] | ||
|[[Flamer]] | |[[Flamer]] | ||
|style="border-style: solid; border-width: 1px 3px 1px 1px" align=center|[[Burning]] | |style="border-style: solid; border-width: 1px 3px 1px 1px" align=center|[[Burning]] | ||
|align=center|[[File: | |align=center|[[File:KNiDL Laser Ball sprite.png]] | ||
|[[Laser Ball]] | |[[Laser Ball]] | ||
|style="border-style: solid; border-width: 1px 3px 1px 1px" align=center|[[Laser]] | |style="border-style: solid; border-width: 1px 3px 1px 1px" align=center|[[Laser]] | ||
|align=center|[[File: | |align=center|[[File:KNiDL Scarfy sprite.png]] | ||
|[[Scarfy]] | |[[Scarfy]] | ||
|style="border-style: solid; border-width: 1px 3px 1px 1px" align=center|N/A | |style="border-style: solid; border-width: 1px 3px 1px 1px" align=center|N/A | ||
|align=center|[[File: | |align=center|[[File:KNiDL Sword Knight sprite.png]] | ||
|[[Sword Knight]] | |[[Sword Knight]] | ||
|align=center|[[Sword]] | |align=center|[[Sword]] | ||
| Line 94: | Line 96: | ||
|[[Foley]] | |[[Foley]] | ||
|style="border-style: solid; border-width: 1px 3px 1px 1px" align=center|[[Bomb]] | |style="border-style: solid; border-width: 1px 3px 1px 1px" align=center|[[Bomb]] | ||
|align=center|[[File: | |align=center|[[File:KaTAM Leap.png]] | ||
|[[Leap]] | |[[Leap]] | ||
|style="border-style: solid; border-width: 1px 3px 1px 1px" align=center|None | |style="border-style: solid; border-width: 1px 3px 1px 1px" align=center|None | ||
|align=center|[[File: | |align=center|[[File:KNiDL Sir Kibble sprite.png]] | ||
|[[Sir Kibble]] | |[[Sir Kibble]] | ||
|style="border-style: solid; border-width: 1px 3px 1px 1px" align=center|[[Cutter]] | |style="border-style: solid; border-width: 1px 3px 1px 1px" align=center|[[Cutter]] | ||
|align=center|[[File: | |align=center|[[File:KNiDL Twister sprite.png]] | ||
|[[Twister]] | |[[Twister]] | ||
|align=center|[[Tornado]] | |align=center|[[Tornado]] | ||
| Line 120: | Line 122: | ||
|align=center|None | |align=center|None | ||
|- | |- | ||
|align=center|[[File: | |align=center|[[File:KNiDL Bronto Burt sprite.png]] | ||
|[[Bronto Burt]] | |[[Bronto Burt]] | ||
|style="border-style: solid; border-width: 1px 3px 1px 1px" align=center|None | |style="border-style: solid; border-width: 1px 3px 1px 1px" align=center|None | ||
| Line 132: | Line 134: | ||
|[[Soarar]] | |[[Soarar]] | ||
|style="border-style: solid; border-width: 1px 3px 1px 1px" align=center|None | |style="border-style: solid; border-width: 1px 3px 1px 1px" align=center|None | ||
|align=center|[[File: | |align=center|[[File:KNiDL Waddle Doo sprite.png]] | ||
|[[Waddle Doo]] | |[[Waddle Doo]] | ||
|align=center|[[Beam]] | |align=center|[[Beam]] | ||
| Line 139: | Line 141: | ||
|[[Chip]] | |[[Chip]] | ||
|style="border-style: solid; border-width: 1px 3px 1px 1px" align=center|None | |style="border-style: solid; border-width: 1px 3px 1px 1px" align=center|None | ||
|align=center|[[File: | |align=center|[[File:KNiDL Gordo sprite.png]] | ||
|[[Gordo]] | |[[Gordo]] | ||
|style="border-style: solid; border-width: 1px 3px 1px 1px" align=center|N/A | |style="border-style: solid; border-width: 1px 3px 1px 1px" align=center|N/A | ||
|align=center|[[File: | |align=center|[[File:KNiDL Parasol enemy sprite.png]] | ||
|[[Parasol (enemy)|Parasol]] | |[[Parasol (enemy)|Parasol]] | ||
|style="border-style: solid; border-width: 1px 3px 1px 1px" align=center|[[Parasol]] | |style="border-style: solid; border-width: 1px 3px 1px 1px" align=center|[[Parasol]] | ||
| Line 158: | Line 160: | ||
|[[Burning]] | |[[Burning]] | ||
|- | |- | ||
|align=center|[[File: | |align=center|[[File:KNiDL Bonkers sprite.png]] | ||
|[[Bonkers]] | |[[Bonkers]] | ||
|[[Hammer]] | |[[Hammer]] | ||
| Line 166: | Line 168: | ||
|[[Magic]] | |[[Magic]] | ||
|- | |- | ||
|align=center|[[File: | |align=center|[[File:KNiDL Mr Frosty sprite.png]] | ||
|[[Mr. Frosty | |[[Mr. Frosty]] | ||
|[[Ice]] | |[[Ice]] | ||
|} | |} | ||
| Line 201: | Line 203: | ||
==Gallery== | ==Gallery== | ||
<gallery> | <gallery> | ||
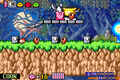
Moonlight Mansion Room 1.png|The first room of the mansion's interior | KaTAM Moonlight Mansion Room 1.png|The first room of the mansion's interior | ||
Moonlight Mansion Room 4.png|One of the many halls of the mansion | KaTAM Moonlight Mansion Room 4.png|One of the many halls of the mansion | ||
Moonlight Mansion Room 7.png|A treasury split into three chambers | KaTAM Moonlight Mansion Room 7.png|A treasury split into three chambers | ||
Moonlight Mansion Room 11.png|Making connections in the basement | KaTAM Moonlight Mansion Room 11.png|Making connections in the basement | ||
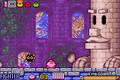
Moonlight Mansion Room 13.png|Battle with one of the many Mid-Bosses | KaTAM Moonlight Mansion Room 13.png|Battle with one of the many Mid-Bosses | ||
Moonlight Mansion Room 16.png|Travel through the woods | KaTAM Moonlight Mansion Room 16.png|Travel through the woods | ||
Moonlight Mansion Room 20.png|Approaching the mansion | KaTAM Moonlight Mansion Room 20.png|Approaching the mansion | ||
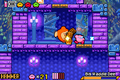
Moonlight Mansion Goal 2.png|Cooking a collection of [[Minny]]s | KaTAM Moonlight Mansion Goal 2.png|Cooking a collection of [[Minny]]s | ||
Moonlight Mansion Warp.png|Approaching the top of the mansion | KaTAM Moonlight Mansion Warp.png|Approaching the top of the mansion | ||
KatAM King Golem.png|Battle with [[King Golem]] | KatAM King Golem.png|Battle with [[King Golem]] | ||
</gallery> | </gallery> | ||
| Line 218: | Line 220: | ||
|jaR=Mūnraito Manshon | |jaR=Mūnraito Manshon | ||
|jaM=Moonlight Mansion | |jaM=Moonlight Mansion | ||
|de=Mond-scheinvilla | |||
|deM=Moonlight Villa | |||
|es=Mansión luz de Luna | |||
|esM=Moonlight Mansion | |||
|fr=Manoir de Lune | |fr=Manoir de Lune | ||
|frM=Moon Mansion | |frM=Moon Manor | ||
|it=Dimora Selene | |||
|itM=Mansion Selene<br><small>"[[wikipedia:Selene|Selene]]" is the goddess of the Moon in Greek mythology.</small> | |||
}} | }} | ||
| Line 225: | Line 233: | ||
{{Navmap-KaTAM|coord1=62|coord2=174}} | {{Navmap-KaTAM|coord1=62|coord2=174}} | ||
{{Navbox-KaTAM}} | {{Navbox-KaTAM}} | ||
Latest revision as of 03:34, 5 May 2024
| ||||||||||||||||||
| ||||||||||||||||||
| ||||||||||||||||||
|
| ||||||||||||||||||

Moonlight Mansion is the second area visited in Kirby & The Amazing Mirror. Moonlight Mansion is first entered after completing Rainbow Route. This area is one of the nine areas of the Mirror World and one of the only two not named after a food, the other being Rainbow Route. It is also one of the three areas consisting of a single building. Hidden deep in the dark mansion, King Golem guards a Mirror Shard.
General Description[edit]
Moonlight Mansion is a medium-sized area and has only a few connections to other locales, specifically Rainbow Route, Olive Ocean, and Candy Constellation. The majority of exploration takes place in the mansion's vast interior. Various enemies (see table below) can be found throughout the many offices, studies, laboratory areas, and hallways between them. Some of the hazards Kirby will encounter include pits, spikes, electrical charges, and Gordos. As one of the simplest areas of Kirby & The Amazing Mirror, only a few puzzles challenge Kirby in order to progress further. The majority of the switches, bomb blocks, and metal blocks are used to access bonus areas and treasure chests.
Besides the expected food, batteries, Maxim Tomatoes, 1-Ups and rare Invincible Candy, Kirby can find Orange Spray Paint, Chalk Spray Paint, and the Enemy Sounds.
Enemies, Bosses and Abilities in Moonlight Mansion[edit]
| ||||||||||||||||||||||||||||||||||||||||||||||||||||||||||||||||||||||||||||||||||||||||||||||||||||||||||||||||||||||||||||||


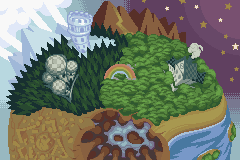
Map[edit]
| Moonlight Mansion Area Map | |
|---|---|
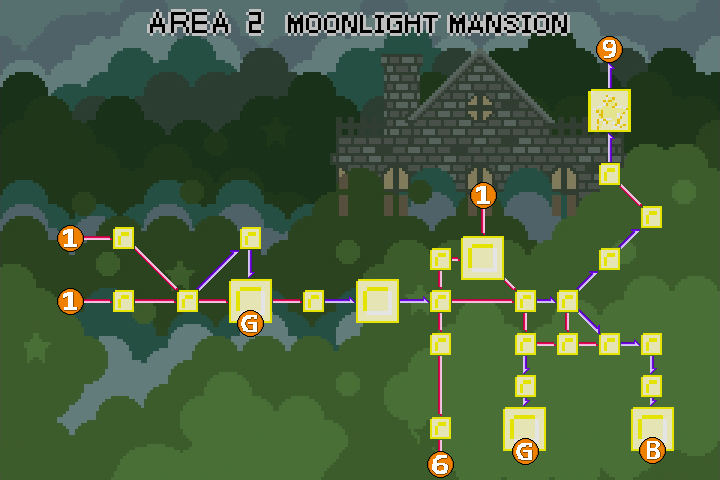 | |
Moonlight Mansion is a very segmented area, consisting of four primary regions. The area to the left of the Entry is outside the mansion and is visually similar to the rightward areas in Rainbow Route. The middle-right area is inside the mansion proper in its main rooms. The lower areas are the basement, which can lead to the Boss, and the upper area is a high tower in the mansion which leads to Candy Constellation. Overall, there are 20 normal rooms, one hub, one entry, and one Warp room.
Moonlight Mansion is bordered to the west by Rainbow Route, has an access tunnel to Olive Ocean in the south (or down, in this case), which needs to be activated on both sides, and has a one-way Warp to Candy Constellation to the north (or up, in this case).
Moonlight Mansion has two Goal rooms. Completing these rooms takes Kirby and his clones to the Goal Game, then returns them to the Central Circle of Rainbow Route.
For a full synopsis of what's in each room, click on any room on the map to head to the corresponding page.
Trivia[edit]

- The stained glass windows in the background of the room where King Golem is fought, as well as the one directly before it, depict various bosses from the game. From top to bottom, left to right, they show Mega Titan, Gobbler, King Golem, Wiz and Kracko. Note that the Mega Titan window can only be seen for a short moment right after Kirby enters the boss room. This backdrop is also at least partially visible from a couple other rooms in the mansion.
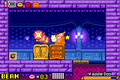
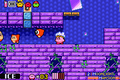
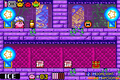
Gallery[edit]
The first room of the mansion's interior
One of the many halls of the mansion
A treasury split into three chambers
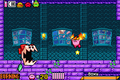
Making connections in the basement
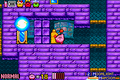
Battle with one of the many Mid-Bosses
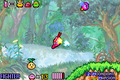
Travel through the woods
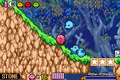
Approaching the mansion
Cooking a collection of Minnys
Approaching the top of the mansion
Battle with King Golem


Names in other languages[edit]
| Language | Name | Meaning |
|---|---|---|
| Japanese | ムーンライトマンション Mūnraito Manshon |
Moonlight Mansion |
| French | Manoir de Lune | Moon Manor |
| German | Mond-scheinvilla | Moonlight Villa |
| Italian | Dimora Selene | Mansion Selene "Selene" is the goddess of the Moon in Greek mythology. |
| Spanish | Mansión luz de Luna | Moonlight Mansion |
| Regions in the Mirror World | |
|---|---|
 | |
| |||||||||||||||||||||||||||||