Rainbow Route - Central Circle: Difference between revisions
No edit summary |
m (The mirror links to the level now) |
||
| (24 intermediate revisions by 9 users not shown) | |||
| Line 1: | Line 1: | ||
[[File:KatAM S RainbowRoute1. | {{Infobox-K&TAMRoom | ||
|image= [[File:KatAM S RainbowRoute1.png]] | |||
|caption=The '''Central Circle''', with everything unlocked. | |||
|area=[[Rainbow Route]] | |||
|from=[[Labyrinth Entrance Stage]]<br>All hub rooms, [[Goal Game]]s, and [[Boss]] rooms.<br>[[Copy Ability Room]]<br>[[Kirby]] can return here using his [[Cell Phone]]. | |||
|to=[[Rainbow Route - Room 1|Room 1]]<br>All Hub rooms once unlocked<br>[[Copy Ability Room]] (once unlocked)<br>[[Dimension Mirror (level)|The Mirror]] (once restored) | |||
|chest={{N}} | |||
|mid-boss= | |||
|boss= | |||
|special=This room contains the [[Master]] sword once the game is complete. | |||
|theme music=[[File:KaTAM Start Stage theme clip.mp3]] | |||
|theme title="[[Start Stage]]" | |||
|description=Clip of the "Start Stage" theme from ''[[Kirby & The Amazing Mirror]]'' | |||
}} | |||
The '''Central Circle''' | The '''Central Circle'''{{ForeignTitle}} is a room in [[Rainbow Route]], the first area of ''[[Kirby & The Amazing Mirror]]''. [[Kirby]] and [[Kirby (species)|his chromatic clones]] find themselves here after clearing the [[Labyrinth Entrance Stage]], and return to it every time a [[Goal Game]] is cleared, a [[Boss]] is defeated, or Kirby [[Game Over|loses all lives]]. Whenever the player resets the game after clearing the intro area, Kirby will always begin in this room. | ||
==Links== | ==Links== | ||
This room eventually leads to every other hub in the world, as each hub is reached. It also eventually leads to the final boss encounter, once all the pieces of the Dimension Mirror are recovered. | This room eventually leads to every other hub in the world, as each hub is reached. It also eventually leads to the final boss encounter, once all the pieces of the Dimension Mirror are recovered. | ||
The only exit out of this room that does not need unlocking is the door directly to the right, which leads to [[Rainbow Route - Room 1]]. | The only exit out of this room that does not need unlocking is the door directly to the right, which leads to [[Rainbow Route - Room 1|Room 1]]. | ||
Kirby can also, at almost any time, use his [[Cell Phone]] to return to this room. | Kirby can also, at almost any time, use his [[Cell Phone]] to return to this room. | ||
== | ==Overview== | ||
The room consists of a wide open area, situated inside a shiny blue Coliseum-like structure atop a cloud. Several pillars and platforms adorn the area, and in the center, the great | Just before Kirby enters the room for the first time, a cutscene plays in the Central Circle where [[Dark Meta Knight]] can be seen banishing [[Meta Knight]] into the [[Dimension Mirror]], then shattering the mirror into eight pieces and scattering them away. Dark Meta Knight then flees the scene, followed shortly by [[Shadow Kirby]] who travels through the main door to Room 1 before Kirby arrives. | ||
The room consists of a wide open area, situated inside a shiny blue Coliseum-like structure atop a cloud. Several pillars and platforms adorn the area, and in the center, the great Dimension Mirror sits. At first, the mirror is broken, and the only way out of this room is the door directly to the right. However, as Kirby ventures through this world, he will cause more doors to appear in this room, situated on the various platforms, which lead to all of the hubs in the other areas. One door in particular will appear in the upper-left corner on a cloud, once all the Hubs have been linked, which takes Kirby to a separate chamber containing pedestals for nearly all of the [[Copy Ability|Copy Abilities]]. Once all the pieces of the Dimension Mirror are found, it will lead to the final Boss confrontations. | |||
After completing the game, the [[Master]] ability can be obtained in this room. | After completing the game, the [[Master]] ability can be obtained in this room. | ||
| Line 17: | Line 32: | ||
There are no enemies to fight in this room, or treasures to collect. | There are no enemies to fight in this room, or treasures to collect. | ||
== | ==Names in other languages== | ||
< | {{Names | ||
< | |ja=セントラルサークル<ref>{{Cite|鏡の大迷宮の起点は「セントラルサークル」。<br> | ||
</ | その周りを環状エリア「レインボールート」がぐるりと取り囲み、<br> | ||
さらにそこからいくつものエリアが複雑に入り組みながら、<br> | |||
網の目のように広がっています。<br> | |||
しかも、それぞれのエリアはヒミツの抜け道でつながっていることも・・・。<br> | |||
もちろん、どんな順に進んでもOK。<br> | |||
行きつ戻りつ、巨大な迷宮をあちこちさまよいながら、自分だけの冒険を楽しもう!||[https://www.nintendo.co.jp/n08/bk8j/area/index.html Kirby & The Amazing Mirror Japanese website]}}</ref> | |||
|jaR=Sentorarusākuru | |||
|jaM=Central Circle | |||
}} | |||
{{ref}} | |||
{{Navmap-KaTAM-RRo|coord1=238|coord2=300}} | |||
{{Navbox-KaTAM}} | |||
[[Category:Rooms in Rainbow Route]] | [[Category:Rooms in Rainbow Route]] | ||
Latest revision as of 15:40, 26 January 2024
| ||||||||||||||||
| ||||||||||||||||
|
| ||||||||||||||||

The Central Circle[Japanese title] is a room in Rainbow Route, the first area of Kirby & The Amazing Mirror. Kirby and his chromatic clones find themselves here after clearing the Labyrinth Entrance Stage, and return to it every time a Goal Game is cleared, a Boss is defeated, or Kirby loses all lives. Whenever the player resets the game after clearing the intro area, Kirby will always begin in this room.
Links[edit]
This room eventually leads to every other hub in the world, as each hub is reached. It also eventually leads to the final boss encounter, once all the pieces of the Dimension Mirror are recovered.
The only exit out of this room that does not need unlocking is the door directly to the right, which leads to Room 1.
Kirby can also, at almost any time, use his Cell Phone to return to this room.
Overview[edit]
Just before Kirby enters the room for the first time, a cutscene plays in the Central Circle where Dark Meta Knight can be seen banishing Meta Knight into the Dimension Mirror, then shattering the mirror into eight pieces and scattering them away. Dark Meta Knight then flees the scene, followed shortly by Shadow Kirby who travels through the main door to Room 1 before Kirby arrives.
The room consists of a wide open area, situated inside a shiny blue Coliseum-like structure atop a cloud. Several pillars and platforms adorn the area, and in the center, the great Dimension Mirror sits. At first, the mirror is broken, and the only way out of this room is the door directly to the right. However, as Kirby ventures through this world, he will cause more doors to appear in this room, situated on the various platforms, which lead to all of the hubs in the other areas. One door in particular will appear in the upper-left corner on a cloud, once all the Hubs have been linked, which takes Kirby to a separate chamber containing pedestals for nearly all of the Copy Abilities. Once all the pieces of the Dimension Mirror are found, it will lead to the final Boss confrontations.
After completing the game, the Master ability can be obtained in this room.
There are no enemies to fight in this room, or treasures to collect.
Names in other languages[edit]
| Language | Name | Meaning |
|---|---|---|
| Japanese | セントラルサークル[1] Sentorarusākuru |
Central Circle |
References
- ↑ "鏡の大迷宮の起点は「セントラルサークル」。
その周りを環状エリア「レインボールート」がぐるりと取り囲み、
さらにそこからいくつものエリアが複雑に入り組みながら、
網の目のように広がっています。
しかも、それぞれのエリアはヒミツの抜け道でつながっていることも・・・。
もちろん、どんな順に進んでもOK。
行きつ戻りつ、巨大な迷宮をあちこちさまよいながら、自分だけの冒険を楽しもう!" –Kirby & The Amazing Mirror Japanese website
| Rainbow Route Area Map | |
|---|---|
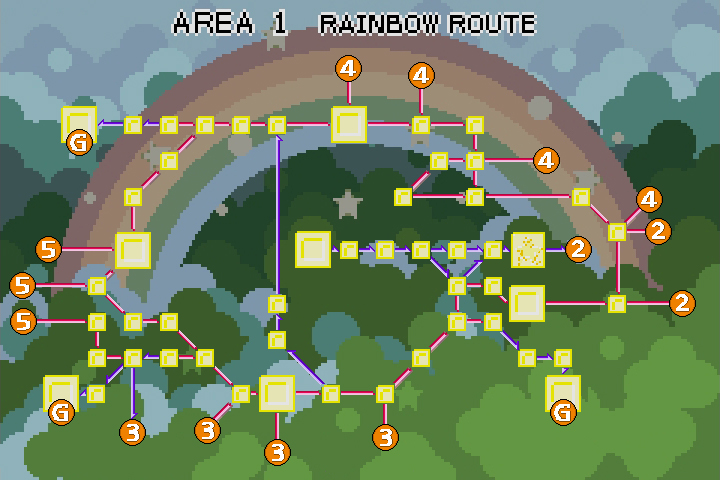 | |
| |||||||||||||||||||||||||||||