Neo Star - Stage 4: Difference between revisions
mNo edit summary |
Luigifan18 (talk | contribs) m (→Overview: Grammar check) |
||
| (11 intermediate revisions by 3 users not shown) | |||
| Line 1: | Line 1: | ||
{{Infobox-K64Stage | {{Infobox-K64Stage | ||
|image=[[File: | |image=[[File:K64 Neo Star Stage 4 screenshot 01.png|300px]] | ||
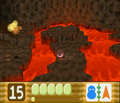
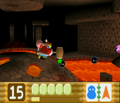
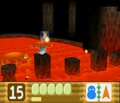
|caption=Kirby ventures straight into an active volcano. Nothing new, really. | |caption=Kirby ventures straight into an active volcano. Nothing new, really. | ||
|level=[[Neo Star]] | |level=[[Neo Star]] | ||
| Line 6: | Line 6: | ||
|midboss={{N}} | |midboss={{N}} | ||
|friend=[[King Dedede]] | |friend=[[King Dedede]] | ||
|theme music=[[File:K64 Neo Star theme.mp3]] | |||
|theme title="[[Neo Star (theme)|Neo Star]]" | |||
|description=Clip of the theme music for Neo Star - Stage 4. | |||
|previous=[[Neo Star - Stage 3|Stage 3]] | |previous=[[Neo Star - Stage 3|Stage 3]] | ||
|next=[[ | |next=[[Neo Star - Stage 5|Stage 5]] (boss fight) | ||
}} | }} | ||
'''Neo Star - Stage 4''' is the fourth stage of [[Neo Star]] in ''[[Kirby 64: The Crystal Shards]]''. The stage takes place inside an active volcano, and moves past several pits and waves of advancing magma. | '''Neo Star - Stage 4''' is the fourth stage of [[Neo Star]] in ''[[Kirby 64: The Crystal Shards]]''. The stage takes place inside an active volcano, and moves past several pits and waves of advancing magma. | ||
| Line 20: | Line 23: | ||
Kirby proceeds on his own from this point. This area is another large volcanic cave, and Kirby will have to walk a narrow path here, past a lot of enemies. | Kirby proceeds on his own from this point. This area is another large volcanic cave, and Kirby will have to walk a narrow path here, past a lot of enemies. | ||
In a small room, | In a small room, a [[Chacha]] and two [[Bobo]]s can be seen in the background, with a small lumpy mound in the middle of the path. | ||
On the next path, Kirby will be chased down by a wave of magma. He has to make his way past more enemies and pools of standing magma to get away from it. | On the next path, Kirby will be chased down by a wave of magma. He has to make his way past more enemies and pools of standing magma to get away from it. | ||
| Line 26: | Line 29: | ||
The last chamber leads upward. While Kirby climbs, he will have to mind the rising magma below. The stage exit can be found at the top. | The last chamber leads upward. While Kirby climbs, he will have to mind the rising magma below. The stage exit can be found at the top. | ||
===[[Crystal Shard]] | ===Crystal Shard guide=== | ||
{| class="wikitable mw-collapsible mw-collapsed" border=1 cellpadding=2 | |||
!colspan=5|Crystal Shard locations in Neo Star - Stage 4 | |||
|- | |||
|{{Center|[[File:K64 Neo Star Stage 4 Crystal Shard 1.png|150px]]<br>'''Shard 1'''}} | |||
|The first [[Crystal Shard]] can be found during King Dedede's section. It is hidden inside one of the breakable pillars. | |||
|- | |||
|{{Center|[[File:K64 Neo Star Stage 4 Crystal Shard 2.png|150px]]<br>'''Shard 2'''}} | |||
|The second shard can be found underneath a pile of volcanic rubble in a small room with the [[Chacha]]. It can be broken using the [[Ice]] ability. | |||
|- | |||
|{{Center|[[File:K64 Neo Star Stage 4 Crystal Shard 3.png|150px]]<br>'''Shard 3'''}} | |||
|The third shard can be found in the last area, with the rising magma. It is on the left side of the chamber, guarded by a [[Sandman]]. | |||
|} | |||
==Enemies, mid-bosses and abilities== | ==Enemies, mid-bosses and abilities== | ||
| Line 35: | Line 47: | ||
!Image | !Image | ||
!Name | !Name | ||
!Copy Ability | !style="border-style: solid; border-width: 1px 3px 1px 1px"|Copy Ability | ||
!Image | !Image | ||
!Name | !Name | ||
!Copy Ability | !style="border-style: solid; border-width: 1px 3px 1px 1px"|Copy Ability | ||
!Image | !Image | ||
!Name | !Name | ||
| Line 45: | Line 57: | ||
|align=center|[[Image:K64 Bo Sprite.png]] | |align=center|[[Image:K64 Bo Sprite.png]] | ||
|[[Bo]] | |[[Bo]] | ||
|align=center|None | |style="border-style: solid; border-width: 1px 3px 1px 1px" align=center|None | ||
|align=center|[[Image:K64 Chacha Sprite.png]] | |align=center|[[Image:K64 Chacha Sprite.png]] | ||
|[[Chacha]] | |[[Chacha]] | ||
|align=center|None | |style="border-style: solid; border-width: 1px 3px 1px 1px" align=center|None | ||
|align=center|[[Image:K64 Kacti Sprite.png]] | |align=center|[[Image:K64 Kacti Sprite.png]] | ||
|[[Kacti]] | |[[Kacti]] | ||
| Line 55: | Line 67: | ||
|align=center|[[Image:K64 Bobo Sprite.png]] | |align=center|[[Image:K64 Bobo Sprite.png]] | ||
|[[Bobo]] | |[[Bobo]] | ||
|align=center|[[Image:K64 Burning Sprite.png|link=Burning]] | |style="border-style: solid; border-width: 1px 3px 1px 1px" align=center|[[Image:K64 Burning Sprite.png|link=Burning]] | ||
|align=center|[[Image:K64 Cairn Sprite.png]] | |align=center|[[Image:K64 Cairn Sprite.png]] | ||
|[[Cairn]] | |[[Cairn]] | ||
|align=center|[[Image:K64 Stone Sprite.png|link=Stone]] | |style="border-style: solid; border-width: 1px 3px 1px 1px" align=center|[[Image:K64 Stone Sprite.png|link=Stone]] | ||
|align=center|[[Image:K64 Magoo Sprite.png]] | |align=center|[[Image:K64 Magoo Sprite.png]] | ||
|[[Magoo]] | |[[Magoo]] | ||
| Line 65: | Line 77: | ||
|align=center|[[Image:K64 Bonehead Sprite.png]] | |align=center|[[Image:K64 Bonehead Sprite.png]] | ||
|[[Bonehead]] | |[[Bonehead]] | ||
|align=center|None | |style="border-style: solid; border-width: 1px 3px 1px 1px" align=center|None | ||
|align=center|[[Image:K64 Fishbone Sprite.png]] | |align=center|[[Image:K64 Fishbone Sprite.png]] | ||
|[[Fishbone]] | |[[Fishbone]] | ||
|align=center|[[Image:K64 Cutter Sprite.png|link=Cutter]] | |style="border-style: solid; border-width: 1px 3px 1px 1px" align=center|[[Image:K64 Cutter Sprite.png|link=Cutter]] | ||
|align=center|[[Image:K64 Pompey Sprite.png]] | |align=center|[[Image:K64 Pompey Sprite.png]] | ||
|[[Pompey]] | |[[Pompey]] | ||
| Line 75: | Line 87: | ||
|align=center|[[Image:K64 Bouncy Sprite.png]] | |align=center|[[Image:K64 Bouncy Sprite.png]] | ||
|[[Bouncy]] | |[[Bouncy]] | ||
|align=center|None | |style="border-style: solid; border-width: 1px 3px 1px 1px" align=center|None | ||
|align=center|[[Image:K64 Galbo Sprite.png]] | |align=center|[[Image:K64 Galbo Sprite.png]] | ||
|[[Galbo]] | |[[Galbo]] | ||
|align=center|[[Image:K64 Burning Sprite.png|link=Burning]] | |style="border-style: solid; border-width: 1px 3px 1px 1px" align=center|[[Image:K64 Burning Sprite.png|link=Burning]] | ||
|align=center|[[Image:K64 Poppy Bros | |align=center|[[Image:K64 Poppy Bros Jr Sprite.png]] | ||
|[[Poppy Bros. Jr.]] | |[[Poppy Bros. Jr.]] | ||
|align=center|[[Image:K64 Bomb Sprite.png|link=Bomb]] | |align=center|[[Image:K64 Bomb Sprite.png|link=Bomb]] | ||
| Line 85: | Line 97: | ||
|align=center|[[Image:K64 Bronto Burt Sprite.png]] | |align=center|[[Image:K64 Bronto Burt Sprite.png]] | ||
|[[Bronto Burt]] | |[[Bronto Burt]] | ||
|align=center|None | |style="border-style: solid; border-width: 1px 3px 1px 1px" align=center|None | ||
|align=center|[[Image:K64 Gordo Sprite.png]] | |align=center|[[Image:K64 Gordo Sprite.png]] | ||
|[[Gordo]] | |[[Gordo]] | ||
|align=center|None | |style="border-style: solid; border-width: 1px 3px 1px 1px" align=center|None | ||
|align=center|[[Image:K64 Sandman Sprite.png]] | |align=center|[[Image:K64 Sandman Sprite.png]] | ||
|[[Sandman]] | |[[Sandman]] | ||
| Line 95: | Line 107: | ||
|align=center|[[Image:K64 Burnis Sprite.png]] | |align=center|[[Image:K64 Burnis Sprite.png]] | ||
|[[Burnis]] | |[[Burnis]] | ||
|align=center|[[Image:K64 Burning Sprite.png|link=Burning]] | |style="border-style: solid; border-width: 1px 3px 1px 1px" align=center|[[Image:K64 Burning Sprite.png|link=Burning]] | ||
|align=center|[[Image:K64 Ignus Sprite.png]] | |align=center|[[Image:K64 Ignus Sprite.png]] | ||
|[[Ignus]] | |[[Ignus]] | ||
|align=center|None | |style="border-style: solid; border-width: 1px 3px 1px 1px" align=center|None | ||
|align=center|[[Image:K64 Sparky Sprite.png]] | |align=center|[[Image:K64 Sparky Sprite.png]] | ||
|[[Sparky]] | |[[Sparky]] | ||
| Line 104: | Line 116: | ||
|- | |- | ||
|} | |} | ||
== Gallery == | |||
<gallery> | |||
K64 Neo Star Stage 4 screenshot 02.png|Moving across the first rivers of magma | |||
K64 Neo Star Stage 4 screenshot 03.png|Aiming for a snack floating above the fiery river | |||
K64 Neo Star Stage 4 screenshot 04.png|Moving across precariously thin platforms | |||
K64 Neo Star Stage 4 screenshot 05.png|King Dedede steps in to bust some obstacles in the way. | |||
K64 Neo Star Stage 4 screenshot 06.png|King Dedede clobbers foes on the path. | |||
K64 Neo Star Stage 4 screenshot 07.png|More pillars to smash | |||
K64 Neo Star Stage 4 screenshot 08.png|King Dedede tosses Kirby forward after finishing his part of the trip. | |||
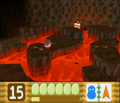
K64 Neo Star Stage 4 screenshot 09.png|Moving along bridges of rock over large lava lakes | |||
K64 Neo Star Stage 4 screenshot 10.png|More platform hopping | |||
K64 Neo Star Stage 4 screenshot 11.png|Sneaking under lavafalls | |||
K64 Neo Star Stage 4 screenshot 12.png|Fleeing from an advancing wave of molten rock | |||
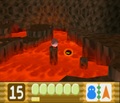
K64 Neo Star Stage 4 screenshot 13.png|Entering the last caldera | |||
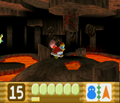
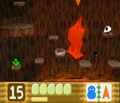
K64 Neo Star Stage 4 screenshot 14.png|Climbing up the stranded platforms to escape the rising heat | |||
K64 Neo Star Stage 4 screenshot 15.png|Reaching the top and safety | |||
</gallery> | |||
{{clear}} | {{clear}} | ||
{{ | {{Navbox-K64}} | ||
Latest revision as of 20:36, 26 April 2024
| ||||||||||||||
| ||||||||||||||
| ||||||||||||||
|
| ||||||||||||||

Neo Star - Stage 4 is the fourth stage of Neo Star in Kirby 64: The Crystal Shards. The stage takes place inside an active volcano, and moves past several pits and waves of advancing magma.
Overview[edit]
The stage begins in a volcanic region, outside the volcano itself. Kirby will have to dodge the falling Ignus while he makes his way across the path, over the lava, and into the volcano proper.
Inside the volcano, Kirby will keep moving forward past pools of magma and shifting ground. A bunch of Burning-yielding creatures will try to get in the way.
In the next cavernous area, King Dedede rushes in, and takes over for Kirby. Along the way, he will need to bust up a bunch of stone pillars that are blocking the path.
Kirby proceeds on his own from this point. This area is another large volcanic cave, and Kirby will have to walk a narrow path here, past a lot of enemies.
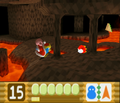
In a small room, a Chacha and two Bobos can be seen in the background, with a small lumpy mound in the middle of the path.
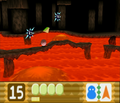
On the next path, Kirby will be chased down by a wave of magma. He has to make his way past more enemies and pools of standing magma to get away from it.
The last chamber leads upward. While Kirby climbs, he will have to mind the rising magma below. The stage exit can be found at the top.
Crystal Shard guide[edit]
| Crystal Shard locations in Neo Star - Stage 4 | ||||
|---|---|---|---|---|
 Shard 1 |
The first Crystal Shard can be found during King Dedede's section. It is hidden inside one of the breakable pillars. | |||
 Shard 2 |
The second shard can be found underneath a pile of volcanic rubble in a small room with the Chacha. It can be broken using the Ice ability. | |||
 Shard 3 |
The third shard can be found in the last area, with the rising magma. It is on the left side of the chamber, guarded by a Sandman. | |||
Enemies, mid-bosses and abilities[edit]
| Image | Name | Copy Ability | Image | Name | Copy Ability | Image | Name | Copy Ability |
|---|---|---|---|---|---|---|---|---|
| Bo | None | Chacha | None | Kacti | ||||
| Bobo | Cairn | Magoo | ||||||
| Bonehead | None | Fishbone | Pompey | |||||
| Bouncy | None | Galbo | Poppy Bros. Jr. | |||||
| Bronto Burt | None | Gordo | None | Sandman | None | |||
| Burnis | Ignus | None | Sparky |
Gallery[edit]
Moving across the first rivers of magma
Aiming for a snack floating above the fiery river
Moving across precariously thin platforms
King Dedede steps in to bust some obstacles in the way.
King Dedede clobbers foes on the path.
More pillars to smash
King Dedede tosses Kirby forward after finishing his part of the trip.
Moving along bridges of rock over large lava lakes
More platform hopping
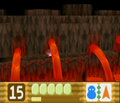
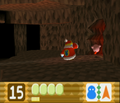
Sneaking under lavafalls
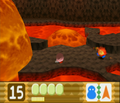
Fleeing from an advancing wave of molten rock
Entering the last caldera

Climbing up the stranded platforms to escape the rising heat
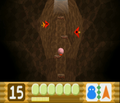
Reaching the top and safety


