Castle Lololo: Difference between revisions
m (Text replacement - "{{Navbox-DL1}}" to "{{Navbox-KDL}}") |
ShadowKirby (talk | contribs) m (This was just missing) |
||
| (26 intermediate revisions by 8 users not shown) | |||
| Line 1: | Line 1: | ||
{{Infobox-KDLWorld | {{Infobox-KDLWorld | ||
|image=[[File:Castle Lololo.png]] | |image=[[File:KDL Castle Lololo.png]] | ||
|caption= | |caption=Kirby's sneezes cause stars to fall from the sky in the opening scene for '''Castle Lololo'''. | ||
|level=2 | |level=2 | ||
|boss=[[Lololo & Lalala]] | |boss=[[Lololo & Lalala]] | ||
| Line 9: | Line 8: | ||
|nextworld=[[Float Islands]] | |nextworld=[[Float Islands]] | ||
|theme music=[[File:KDL Castle Lololo Sample.oga]] | |theme music=[[File:KDL Castle Lololo Sample.oga]] | ||
|theme title=[[Castle Lololo (theme)|Castle Lololo | |theme title="[[Castle Lololo (theme)|Castle Lololo]]" | ||
|description=Clip of the music from Castle Lololo. | |||
|game=Kirby's Dream Land | |||
|levelname=Stage 2: Castle Lololo | |||
}} | }} | ||
{{About|the | {{About|the stage in [[Kirby's Dream Land]]|the [[Battle Stage]] in the [[Kirby Fighters (series)|''Kirby Fighters games]]|[[Castle Lololo (Battle Stage)]]}} | ||
'''Castle Lololo''' is the second | '''Castle Lololo''' is the second stage in ''[[Kirby's Dream Land]]'', taking place within a large and convoluted palatial structure full of spooky enemies. The boss of this stage is [[Lololo & Lalala]], who also act as the first tag-team boss of the series. | ||
Castle Lololo is the only | Castle Lololo is the only stage that does not appear as a standalone region in [[Spring Breeze]] of ''[[Kirby Super Star]]'' and its remake, ''[[Kirby Super Star Ultra]]''. However, parts of the level were incorporated into [[Float Islands]], including the boss fight against Lololo and Lalala. The events from Castle Lololo's intro were also added into that of [[Bubbly Clouds]]. | ||
==Cutscene== | ==Cutscene== | ||
| Line 20: | Line 22: | ||
==Synopsis== | ==Synopsis== | ||
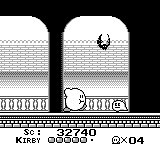
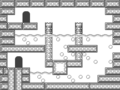
[[File:KDL Castle Lololo section 2.png|thumb|Kirby hovering up the second section.]] | |||
[[File:Castle Lololo | Castle Lololo features a much more complex stage structure than the preceding level [[Green Greens]], consisting of many smaller rooms with varying types of obstacles and a number of different paths to take to get through the stage. There are many tricky enemies to deal with, including the first instances of the (mostly) invulnerable enemies [[Gordo]] and [[Shotzo]], and ghostly floating enemies such as [[Booler]], [[Mumbies]], and [[Two Face]]. Kirby also gains access to a number of items that he can use against his enemies, such as the [[Mike (item)|microphone]], [[Invincible Candy|Candy]], and [[Superspicy Curry|Spicy Food]]. Additionally, one room contains a pool of water which will limit Kirby's movement and attack options as he wades through it. | ||
===Room breakdown=== | |||
Castle Lololo consists of 15 rooms. Two of these are optional side rooms, another two can potentially be skipped, and yet another two are areas where Kirby fights the mid-boss and bosses. The following is a brief overview of what is contained in each room: | |||
The | The first room is a single screen outside the castle itself. A [[Broom Hatter]] can be seen above the door into the castle. | ||
The | The second room contains a couple of enemies and a [[Mike (item)|microphone]] to deal with them. Kirby can head through the door immediately to the right to proceed, but can also head upward and head through a different door to access the first side area, which contains a [[Shotzo]] and a recovery item. | ||
The third room is a dark hallway that stretches off to the right, past a number of flying enemies. | |||
The fourth room is a hallway which loops on itself and is filled with enemies which try to ambush Kirby. There are two different paths to take from here; the upper door skips forward to the seventh area, while the lower door takes Kirby through a few extra areas first: | |||
*The fifth room through the lower door has Kirby swimming through a flooded passageway dodging [[Gordo]]s and [[Glunk]]s. | |||
*The sixth room has Kirby climbing up an exterior portion of the castle, where a [[Invincible Candy|Candy]] can be found to deal with any obstacles along the way. | |||
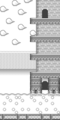
[[File:KDL Castle Lololo screenshot.png|thumb|left|Kirby floating in the underwater passage.]] | |||
The | The seventh room is another dark hallway, patrolled by more enemies. At the end of the path, a [[Warp Star]] can be seen down a pit, which will take Kirby out of the hole to the right, crashing into another wall of the castle. | ||
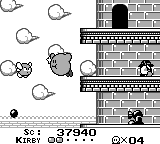
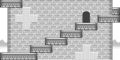
The | The eighth room pits Kirby against [[Lololo & Lalala|Lololo]], who attacks by emerging from one of four doorways to push blocks at Kirby. Once Lololo is defeated, Kirby can take any one of the doors to the right to proceed. | ||
[[ | |||
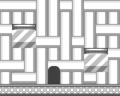
Kirby | The ninth room is a large open space decked with platforms of various shape and size. A large pyramid in the middle is composed partially of star blocks. There are two doors to be taken from here. The first is a door to the right, and the second is a door above, which, once Kirby approaches it, will be swarmed by a circle of floating enemies. The upper door leads to the second side-room, where two Boolers guard a Pep Brew and a bowl of [[Superspicy Curry|Spicy Food]]. The door to the right is the only way forward. | ||
The final room is a singular chamber consisting of four stacked hallways | The tenth room is an exterior area of the castle featuring a staircase, which is swarmed by Broom Hatters and other foes. | ||
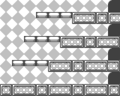
[[File:KDL Castle Lololo maze.png|thumb|Kirby in a room of Castle Lololo with many doorways.]] | |||
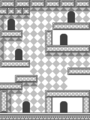
The eleventh room is a passage leading upward past Gordos and other enemies. A Pep Brew can be seen in a side chamber to the left behind a star block. There are several doors in this area, but most of them only link to each-other in the same area. Only the door at the top-right leads forward. | |||
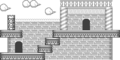
The twelfth room is another exterior area, featuring a brief staircase leading to the door to the boss area. | |||
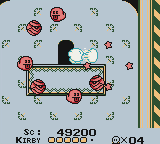
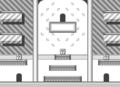
The final room is a singular chamber consisting of four stacked hallways, which can be passed between via certain spots in the floors. Eight doorways can be seen in this area, but Kirby cannot use any of them. Instead they are used by the [[Boss]]es [[Lololo & Lalala]], to enter and exit, while pushing blocks to harm Kirby with. Kirby will have to use their blocks to defeat them, one at a time. Once both are defeated, he will be whisked to a separate open area, where he can obtain the second [[Sparkling Star]] and complete the stage. | |||
===Enemies, Mid-Boss, and Boss=== | ===Enemies, Mid-Boss, and Boss=== | ||
[[File:KDL Lololo and Lalala battle screenshot.png|thumb|Kirby battling Lololo & Lalala, the bosses of Castle Lololo]] | |||
{| width=50% | {| width=50% | ||
|<tabs> | |<tabs> | ||
| Line 59: | Line 69: | ||
!Extra Enemy | !Extra Enemy | ||
|- | |- | ||
|align=center|[[File: | |align=center|[[File:KDL Booler sprite.png]] [[File:KDL Gaspar sprite.png]] | ||
|[[Booler]] | |[[Booler]] | ||
|style="border-style: solid; border-width: 1px 3px 1px 1px"|[[Gaspar]] | |style="border-style: solid; border-width: 1px 3px 1px 1px"|[[Gaspar]] | ||
|align=center|[[File: | |align=center|[[File:KDL Gordo sprite.png]] | ||
|[[Gordo]] | |[[Gordo]] | ||
|{{N}} | |{{N}} | ||
|- | |- | ||
|align=center|[[File: | |align=center|[[File:KDL Bronto Burt sprite.png]] [[File:KDL Koozer sprite.png]] | ||
|[[Bronto Burt|Bront Burt]] | |[[Bronto Burt|Bront Burt]] | ||
|style="border-style: solid; border-width: 1px 3px 1px 1px"|[[Koozer]] | |style="border-style: solid; border-width: 1px 3px 1px 1px"|[[Koozer]] | ||
|align=center|[[File: | |align=center|[[File:KDL Mumbies sprite.png]] [[File:KDL Skuller sprite.png]] | ||
|[[Mumbies]] | |[[Mumbies]] | ||
|[[Skuller]] | |[[Skuller]] | ||
|- | |- | ||
|align=center|[[File: | |align=center|[[File:KDL Broom Hatter sprite.png]] | ||
|[[Broom Hatter]] | |[[Broom Hatter]] | ||
|style="border-style: solid; border-width: 1px 3px 1px 1px"|{{N}} | |style="border-style: solid; border-width: 1px 3px 1px 1px"|{{N}} | ||
|align=center|[[File: | |align=center|[[File:KDL Shotzo sprite.png]] [[File:KDL Blatzy sprite.png]] | ||
|[[Shotzo]] | |[[Shotzo]] | ||
|[[Blatzy]] | |[[Blatzy]] | ||
|- | |- | ||
|align=center|[[File: | |align=center|[[File:KDL Chuckie sprite.png]] [[File:KDL Hurly sprite.png]] | ||
|[[Chuckie]] | |[[Chuckie]] | ||
|style="border-style: solid; border-width: 1px 3px 1px 1px"|[[Hurly]] | |style="border-style: solid; border-width: 1px 3px 1px 1px"|[[Hurly]] | ||
|align=center|[[File: | |align=center|[[File:KDL Two Face sprite.png]] [[File:KDL Mr P Umpkin sprite.png]] | ||
|[[Two Face]] | |[[Two Face]] | ||
|[[Mr. P. Umpkin]] | |[[Mr. P. Umpkin]] | ||
|- | |- | ||
|align=center|[[File: | |align=center|[[File:KDL Flapper sprite.png]] | ||
|[[Flapper]] | |[[Flapper]] | ||
|style="border-style: solid; border-width: 1px 3px 1px 1px"|{{N}} | |style="border-style: solid; border-width: 1px 3px 1px 1px"|{{N}} | ||
| Line 94: | Line 104: | ||
|{{N}} | |{{N}} | ||
|- | |- | ||
|align=center|[[File: | |align=center|[[File:KDL Glunk sprite.png]] | ||
|[[Glunk]] | |[[Glunk]] | ||
|style="border-style: solid; border-width: 1px 3px 1px 1px"|{{N}} | |style="border-style: solid; border-width: 1px 3px 1px 1px"|{{N}} | ||
|align=center|[[File: | |align=center|[[File:KDL Waddle Doo sprite.png]] | ||
|[[Waddle Doo]] | |[[Waddle Doo]] | ||
|{{N}} | |{{N}} | ||
| Line 108: | Line 118: | ||
!Name | !Name | ||
|- | |- | ||
|align=center|[[File: | |align=center|[[File:KDL Lololo sprite.png]] | ||
|[[Lololo & Lalala|Lololo]] | |[[Lololo & Lalala|Lololo]] | ||
|} | |} | ||
| Line 117: | Line 127: | ||
!Name | !Name | ||
|- | |- | ||
|align=center|[[File: | |align=center|[[File:KDL Lololo sprite.png]] [[File:KDL Lalala sprite.png]] | ||
|[[Lololo & Lalala]] | |[[Lololo & Lalala]] | ||
|} | |} | ||
| Line 124: | Line 134: | ||
|} | |} | ||
== | == References in later games == | ||
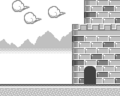
[[File:KA Rainbow Resort Stage 6 screenshot 03.png|thumb|200px|Screenshot from [[Rainbow Resort - Stage 6]] in ''Kirby's Adventure'', which resembles Castle Lololo.]] | |||
The following are direct references to Castle Lololo in later ''Kirby'' games: | |||
===''Kirby's Adventure'' / ''Kirby: Nightmare in Dream Land''=== | |||
[[Rainbow Resort - Stage 6|Stage 6]] of [[Rainbow Resort]] is a truncated homage to ''Kirby's Dream Land'', with one of its rooms being based on Castle Lololo in particular. | |||
===''Kirby Fighters'' series=== | |||
{{main|Castle Lololo (Battle Stage)}} | |||
In all three iterations of [[Kirby Fighters (series)|''Kirby Fighters'']], one of its [[Battle Stage]]s is based on Castle Lololo, particularly the battle with Lololo & Lalala. However, this stage is based on the [[Spring Breeze]] version of the fight, which technically takes place in [[Float Islands]] instead. | |||
===''Kirby's Blowout Blast''=== | |||
[[Kirby's Blowout Blast - Level 3|Level 3]] of ''[[Kirby's Blowout Blast]]'' is inspired by Castle Lololo, and uses the same stage music, as well as the same boss. | |||
==Profiles== | |||
===''Kirby's Dream Land'' Instruction Booklet (NA Print)=== | |||
'''''Plenty of Strange Things Await You in This Castle''''' | |||
<br>''One step inside this spooky castle and you'll know that something weird is going on! You'll have to be careful here because some of the nasties that float around here can't be beat just by inhaling them. The not so famous twins Lololo and Lalala rule this castle of gloom.'' | |||
==Gallery== | ==Gallery== | ||
===Screenshots=== | ===Screenshots=== | ||
<gallery widths=160 heights=144> | <gallery widths=160 heights=144> | ||
Castle Lololo | KDL Kirby using Bomb screenshot.png|Kirby spitting a bomb out at enemies | ||
Castle Lololo | KDL Castle Lololo dark hallway.png|Kirby exploring the dark hallway | ||
KDL Castle Lololo exterior.png|Kirby hovering up a Castle Lololo battlement | |||
KDL Kirby using Superspicy Curry screenshot.png|Kirby using Superspicy Curry to clear out the ghosts circling around him | |||
</gallery> | </gallery> | ||
===Maps=== | ===Maps=== | ||
<gallery> | <gallery> | ||
KDL Castle Lololo Section 1 Map.png|Map of | KDL Castle Lololo Section 1 Map.png|Map of Room 1 | ||
KDL Castle Lololo Section 2 Map.png|Map of | KDL Castle Lololo Section 2 Map.png|Map of Room 2 | ||
KDL Castle Lololo Section 2 Secret Room Map.png|Side | KDL Castle Lololo Section 2 Secret Room Map.png|Side room from Room 2 | ||
KDL Castle Lololo Section 3 Map.png|Map of | KDL Castle Lololo Section 3 Map.png|Map of Room 3 | ||
KDL Castle Lololo Section 4 Map.png|Map of | KDL Castle Lololo Section 4 Map.png|Map of Room 4 (this room loops on itself) | ||
KDL Castle Lololo Section 5 Map.png|Map of | KDL Castle Lololo Section 5 Map.png|Map of Room 5 | ||
KDL Castle Lololo Section 6 Map.png|Map of | KDL Castle Lololo Section 6 Map.png|Map of Room 6 | ||
KDL Castle Lololo Section 7 Map.png|Map of | KDL Castle Lololo Section 7 Map.png|Map of Room 7 | ||
KDL Castle Lololo Section 8 Map.png|Map of | KDL Castle Lololo Section 8 Map.png|Map of Room 8 | ||
KDL Castle Lololo Section 9 Map.png|Map of | KDL Castle Lololo Section 9 Map.png|Map of Room 9 | ||
KDL Castle Lololo Superspicy Food Room Map.png|Side | KDL Castle Lololo Superspicy Food Room Map.png|Side room from Room 9 | ||
KDL Castle Lololo Section 10 Map.png|Map of | KDL Castle Lololo Section 10 Map.png|Map of Room 10 | ||
KDL Castle Lololo Section 11 Map.png|Map of | KDL Castle Lololo Section 11 Map.png|Map of Room 11 | ||
KDL Castle Lololo Section 12 Map.png|Map of | KDL Castle Lololo Section 12 Map.png|Map of Room 12 | ||
</gallery> | </gallery> | ||
{{clear}} | |||
{{Navbox-KDL}} | {{Navbox-KDL}} | ||
Latest revision as of 19:57, 19 January 2024
| ||||||||||
| ||||||||||
| ||||||||||
| ||||||||||
|
| ||||||||||

- This article is about the stage in Kirby's Dream Land. For the Battle Stage in the Kirby Fighters games, see Castle Lololo (Battle Stage).
Castle Lololo is the second stage in Kirby's Dream Land, taking place within a large and convoluted palatial structure full of spooky enemies. The boss of this stage is Lololo & Lalala, who also act as the first tag-team boss of the series.
Castle Lololo is the only stage that does not appear as a standalone region in Spring Breeze of Kirby Super Star and its remake, Kirby Super Star Ultra. However, parts of the level were incorporated into Float Islands, including the boss fight against Lololo and Lalala. The events from Castle Lololo's intro were also added into that of Bubbly Clouds.
Cutscene[edit]
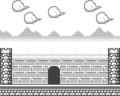
On a deck of the castle, overlooking a body of water, Kirby lets out a big sneeze and causes some of the stars in the sky to fall into the water. He sneezes again, causing another star to fall, hit him on the head, and knock him into the water as well.
Synopsis[edit]

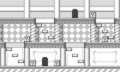
Castle Lololo features a much more complex stage structure than the preceding level Green Greens, consisting of many smaller rooms with varying types of obstacles and a number of different paths to take to get through the stage. There are many tricky enemies to deal with, including the first instances of the (mostly) invulnerable enemies Gordo and Shotzo, and ghostly floating enemies such as Booler, Mumbies, and Two Face. Kirby also gains access to a number of items that he can use against his enemies, such as the microphone, Candy, and Spicy Food. Additionally, one room contains a pool of water which will limit Kirby's movement and attack options as he wades through it.
Room breakdown[edit]
Castle Lololo consists of 15 rooms. Two of these are optional side rooms, another two can potentially be skipped, and yet another two are areas where Kirby fights the mid-boss and bosses. The following is a brief overview of what is contained in each room:
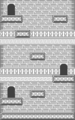
The first room is a single screen outside the castle itself. A Broom Hatter can be seen above the door into the castle.
The second room contains a couple of enemies and a microphone to deal with them. Kirby can head through the door immediately to the right to proceed, but can also head upward and head through a different door to access the first side area, which contains a Shotzo and a recovery item.
The third room is a dark hallway that stretches off to the right, past a number of flying enemies.
The fourth room is a hallway which loops on itself and is filled with enemies which try to ambush Kirby. There are two different paths to take from here; the upper door skips forward to the seventh area, while the lower door takes Kirby through a few extra areas first:
- The fifth room through the lower door has Kirby swimming through a flooded passageway dodging Gordos and Glunks.
- The sixth room has Kirby climbing up an exterior portion of the castle, where a Candy can be found to deal with any obstacles along the way.

The seventh room is another dark hallway, patrolled by more enemies. At the end of the path, a Warp Star can be seen down a pit, which will take Kirby out of the hole to the right, crashing into another wall of the castle.
The eighth room pits Kirby against Lololo, who attacks by emerging from one of four doorways to push blocks at Kirby. Once Lololo is defeated, Kirby can take any one of the doors to the right to proceed.
The ninth room is a large open space decked with platforms of various shape and size. A large pyramid in the middle is composed partially of star blocks. There are two doors to be taken from here. The first is a door to the right, and the second is a door above, which, once Kirby approaches it, will be swarmed by a circle of floating enemies. The upper door leads to the second side-room, where two Boolers guard a Pep Brew and a bowl of Spicy Food. The door to the right is the only way forward.
The tenth room is an exterior area of the castle featuring a staircase, which is swarmed by Broom Hatters and other foes.

The eleventh room is a passage leading upward past Gordos and other enemies. A Pep Brew can be seen in a side chamber to the left behind a star block. There are several doors in this area, but most of them only link to each-other in the same area. Only the door at the top-right leads forward.
The twelfth room is another exterior area, featuring a brief staircase leading to the door to the boss area.
The final room is a singular chamber consisting of four stacked hallways, which can be passed between via certain spots in the floors. Eight doorways can be seen in this area, but Kirby cannot use any of them. Instead they are used by the Bosses Lololo & Lalala, to enter and exit, while pushing blocks to harm Kirby with. Kirby will have to use their blocks to defeat them, one at a time. Once both are defeated, he will be whisked to a separate open area, where he can obtain the second Sparkling Star and complete the stage.
Enemies, Mid-Boss, and Boss[edit]

|
References in later games[edit]

The following are direct references to Castle Lololo in later Kirby games:
Kirby's Adventure / Kirby: Nightmare in Dream Land[edit]
Stage 6 of Rainbow Resort is a truncated homage to Kirby's Dream Land, with one of its rooms being based on Castle Lololo in particular.
Kirby Fighters series[edit]
- Main article: Castle Lololo (Battle Stage)
In all three iterations of Kirby Fighters, one of its Battle Stages is based on Castle Lololo, particularly the battle with Lololo & Lalala. However, this stage is based on the Spring Breeze version of the fight, which technically takes place in Float Islands instead.
Kirby's Blowout Blast[edit]
Level 3 of Kirby's Blowout Blast is inspired by Castle Lololo, and uses the same stage music, as well as the same boss.
Profiles[edit]
Kirby's Dream Land Instruction Booklet (NA Print)[edit]
Plenty of Strange Things Await You in This Castle
One step inside this spooky castle and you'll know that something weird is going on! You'll have to be careful here because some of the nasties that float around here can't be beat just by inhaling them. The not so famous twins Lololo and Lalala rule this castle of gloom.
Gallery[edit]
Screenshots[edit]

Kirby spitting a bomb out at enemies
Kirby exploring the dark hallway
Kirby hovering up a Castle Lololo battlement
Kirby using Superspicy Curry to clear out the ghosts circling around him


Maps[edit]
Map of Room 1
Map of Room 2
Side room from Room 2
Map of Room 3
Map of Room 4 (this room loops on itself)
Map of Room 5
Map of Room 6

Map of Room 7
Map of Room 8
Map of Room 9
Side room from Room 9
Map of Room 10
Map of Room 11
Map of Room 12


| |||||||||||||||||||||||