Rainbow Route - Goal 2
| ||||||||||||||||
| ||||||||||||||||
|
| ||||||||||||||||

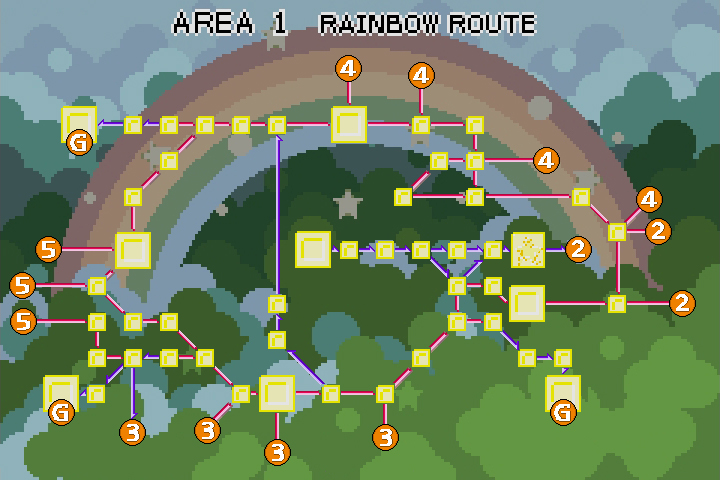
Rainbow Route - Goal 2 is a room in Rainbow Route, the first area of Kirby & The Amazing Mirror.
Links[edit]
This room is a one-way path, and the only way out is through the Goal Game Door, which will take Kirby back to the Central Circle.
Overview[edit]
This goal room consists of woody terrain. Kirby starts at the top right of the room, with a Roly-Poly in front of him. If he goes all the way down to the bottom of the room, he will fight Batafire in a large room. He can obtain the Burning ability if he inhales Batafire after defeating him. To the right of this chamber, there is a Treasure Chest which lies behind metal blocks. There are also a few Blockins hiding in Star Blocks in the passages above. The top left of the room is where the three star door to initiate the Goal Game is located.
Enemies and Mid-Boss[edit]

Gallery[edit]
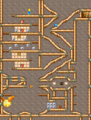
Composite map of the room

| Rainbow Route Area Map | |
|---|---|
 | |
| |||||||||||||||||||||||||||||