Wild World - Stage 2
| ||||||||||||||||||
| ||||||||||||||||||
|
| ||||||||||||||||||

Wild World - Stage 2 is the second stage in Wild World. There are three Sun Stones and 4 Keychains in this stage. The Gold Keychain is one depicting the Dimension Mirror.
Overview
The stage begins above a big water channel, which will carry Kirby deep into a stone structure. In the next area, Kirby will have to contend with several heavy waterfalls which he will have to swim through.
In the next area, Kirby will have to contend with Grand Wheelie. Using the Wheel ability, Kirby can quickly traverse on the water's surface.
In the last area, Kirby encounters a large circular channel. The stage exit can be found in the background near the top, but there might be something else hidden here.
Sun Stone & Gold Keychain Guide
- Sun Stone 1 - Near the bottom of the last waterfall in the first waterfall area is a side door. Entering this door leads to a partially flooded chamber where this stone can be found, guarded by a Foley.
- Sun Stone 2 - While riding along the water's surface, Kirby can access a lower passageway which leads to the stone.
- Sun Stone 3 - In the last loop area, this stone can be found through a bomb block barrier in the background loop, from the bottom.
- Gold Keychain - This keychain can be found by accessing the hidden doorway in the last area of the stage.
Enemies, Mid-Bosses and Abilities
| Regular Enemies | Mid-Boss | ||||
|---|---|---|---|---|---|
|
|
| ||||
| Abilities | Special | ||||
|
|
|
Gallery
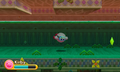
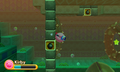
Kirby takes a swim through the river.
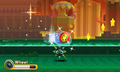
Kirby glides across the water with Wheel.
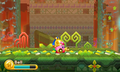
Kirby takes a quick break before getting wet again.
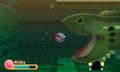
Kirby gets just a little too close to the giant Barbar ready to gulp him down.
Kirby goes with the flow.


