White Wafers: Difference between revisions
m (→Names in other languages: Minor fixes.) |
|||
| (38 intermediate revisions by 19 users not shown) | |||
| Line 1: | Line 1: | ||
{{Infobox-KRtDLLevel | {{Infobox-KRtDLLevel | ||
|image=[[File:White Wafers.png| | |image=[[File:KRtDLD White Wafers select screenshot.png|350px]] | ||
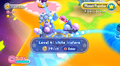
|caption=Screenshot from ''Kirby's Return to Dream Land''. | |caption=Screenshot of '''White Wafers''' on the [[World Map]] from ''[[Kirby's Return to Dream Land Deluxe]]''. | ||
|level=4 | |level=4 | ||
|world=[[Popstar]] | |world=[[Popstar]] | ||
| Line 12: | Line 12: | ||
|previous=[[Onion Ocean]] | |previous=[[Onion Ocean]] | ||
|next=[[Nutty Noon]] | |next=[[Nutty Noon]] | ||
|theme music=[[File:White Wafers sample KRtDL.oga]] | |||
|theme title="[[White Wafers (theme)|White Wafers]]" | |||
|description=The stage select theme for White Wafers. | |||
}} | }} | ||
Level 4: '''White Wafers''' is the fourth level in ''[[Kirby's Return to Dream Land]]''. White Wafers is a very cold level with lots of snow and ice. Completion of the boss battle against [[Goriath]] yields the emblem to the [[Lor Starcutter]]. There are 19 [[Energy Sphere]]s in this level, three in stage 1, and four in stages 2, 3, 4, and 5. | Level 4: '''White Wafers''' is the fourth level in ''[[Kirby's Return to Dream Land]]'' and its remake ''[[Kirby's Return to Dream Land Deluxe]]''. White Wafers is a very cold level with lots of snow and ice. Completion of the boss battle against [[Goriath]] yields the emblem to the [[Lor Starcutter]]. There are 19 [[Energy Sphere]]s in this level, three in stage 1, and four in stages 2, 3, 4, and 5. | ||
{{clear|left}} | |||
==Stages== | ==Stages== | ||
For details on each stage individually, click the name of the stage. | For details on each stage individually, click the name of the stage. | ||
{| class="sortable wikitable" border=1 cellpadding=2 | {| class="sortable wikitable" border=1 cellpadding=2 | ||
!class= | !class=sortable|Stage | ||
!class= | !class=sortable|Energy Spheres / Ship Parts | ||
!class= | !class=sortable|Super Ability | ||
!class= | !class=sortable|Boss/Mid-Boss | ||
|- | |- | ||
|[[White Wafers - Stage 1|Stage 1]] | |{{center|[[File:KRtDLD White Wafers Stage 1 select screenshot.png|200px]]<br>'''[[White Wafers - Stage 1|Stage 1]]'''}} | ||
|3 | |3 | ||
| | |{{N}} | ||
| | |[[Gigant Edge]] | ||
|- | |- | ||
|[[White Wafers - Stage 2|Stage 2]] | |{{center|[[File:KRtDLD White Wafers Stage 2 select screenshot.png|200px]]<br>'''[[White Wafers - Stage 2|Stage 2]]'''}} | ||
|4 | |4 | ||
|[[Grand Hammer]] | |[[Grand Hammer]] | ||
| | |[[Sphere Doomer]] (Spark)<br>[[Super Bonkers]] | ||
|- | |- | ||
|[[White Wafers - Stage 3|Stage 3]] | |{{center|[[File:KRtDLD White Wafers Stage 3 select screenshot.png|200px]]<br>'''[[White Wafers - Stage 3|Stage 3]]'''}} | ||
|4 | |4 | ||
| | |{{N}} | ||
| | |[[Water Galboros]] | ||
|- | |- | ||
|[[White Wafers - Stage 4|Stage 4]] | |{{center|[[File:KRtDLD White Wafers Stage 4 select screenshot.png|200px]]<br>'''[[White Wafers - Stage 4|Stage 4]]'''}} | ||
|4 | |4 | ||
|[[Snow Bowl]] | |[[Snow Bowl]] | ||
| | |[[Sphere Doomer]] (Spark) | ||
|- | |- | ||
|[[White Wafers - Stage 5|Stage 5]] | |{{center|[[File:KRtDLD White Wafers Stage 5 select screenshot.png|200px]]<br>'''[[White Wafers - Stage 5|Stage 5]]'''}} | ||
|4 | |4 | ||
| | |{{N}} | ||
| | |{{N}} | ||
|- | |- | ||
|[[ | |{{center|[[File:KRtDLD White Wafers Stage 6 select screenshot.png|200px]]<br>'''[[White Wafers - Stage 6|Stage 6]]'''}} | ||
|[[Lor Starcutter|Emblem]] | |[[Lor Starcutter|Emblem]] | ||
| | |{{N}} | ||
| | |[[Goriath]] | ||
|} | |} | ||
== Gallery == | |||
<gallery> | |||
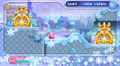
KRtDL White Wafers map screenshot.png|White Wafers on the World Map in ''Kirby's Return to Dream Land'' | |||
KRtDL White Wafers lobby screenshot.png|A portion of the White Wafers level hub in ''Kirby's Return to Dream Land'' | |||
KRTDL-map-A-4-0.jpg|Full view of the level hub in ''Kirby's Return to Dream Land'' | |||
Kirby Pupupu Snowflake Berry Figure.jpg|"Snowflake Berry" figure from the "Kirby Pupupu Herbarium" merchandise line, manufactured by Re-ment | |||
</gallery> | |||
{{clear}} | {{clear}} | ||
== | ==Names in other languages== | ||
{{Names | {{Names | ||
|ja=ホワイトウェハース | |ja=ホワイトウェハース | ||
|jaR=Howaito Wehāsu | |jaR=Howaito Wehāsu | ||
|jaM=White | |jaM=White Wafer<br><small>The Japanese version writes the level name in English as such.</small> | ||
| | |esA=Ocaso de Obleas | ||
| | |esAM=Sunset of Wafers | ||
| | |esE=Carámbanos Caramelo | ||
| | |esEM=Candy Icicles | ||
|frA=Falaise frissonnante | |||
|frAM=Shivering cliff | |||
|frE=Falaise Frissonnante | |||
|frEM=Shivering Cliff | |||
|de=Endlose Eiswaffeln | |de=Endlose Eiswaffeln | ||
|deM=Endless Ice Cream Cones | |deM=Endless Ice Cream Cones | ||
|it=Monte Meringa | |||
|itM=Meringue Mountain | |||
|ko=웨하스 빙하 | |||
|koR=Wehaseu Bingha | |||
|koM=Wafer Glacier<br><small>In the Korean version of ''Kirby's Return to Dream Land'' and its remake, the name is written in English as "White Wafer".</small> | |||
|pt=Alpes Açúcar | |||
|ptM=Sugar Alps | |||
|zhTrad=霧白望雪 | |||
|zhTradR=wù bái wàng xuě | |||
|zhSimp=雾白望雪 | |||
|zhSimpR=wù bái wàng xuě | |||
|zhM=Snow Gazing in the White Mist<br><small>In the Chinese versions of ''Kirby's Return to Dream Land Deluxe'', the name is written in English as "White Wafer".</small> | |||
|nl=Suikersneeuwberg | |||
|nlM=Sugar snow mountain | |||
}} | }} | ||
{{ | {{Navbox-KRtDL/KRtDLD}} | ||
[[Category:Popstar locations]] | [[Category:Popstar locations]] | ||
Latest revision as of 16:25, 26 January 2024
| ||||||||||||||||||||||
| ||||||||||||||||||||||
| ||||||||||||||||||||||
|
| ||||||||||||||||||||||

Level 4: White Wafers is the fourth level in Kirby's Return to Dream Land and its remake Kirby's Return to Dream Land Deluxe. White Wafers is a very cold level with lots of snow and ice. Completion of the boss battle against Goriath yields the emblem to the Lor Starcutter. There are 19 Energy Spheres in this level, three in stage 1, and four in stages 2, 3, 4, and 5.
Stages[edit]
For details on each stage individually, click the name of the stage.
| Stage | Energy Spheres / Ship Parts | Super Ability | Boss/Mid-Boss |
|---|---|---|---|
| 3 | Gigant Edge | ||
| 4 | Grand Hammer | Sphere Doomer (Spark) Super Bonkers | |
| 4 | Water Galboros | ||
| 4 | Snow Bowl | Sphere Doomer (Spark) | |
| 4 | |||
| Emblem | Goriath |


Gallery[edit]
White Wafers on the World Map in Kirby's Return to Dream Land
A portion of the White Wafers level hub in Kirby's Return to Dream Land
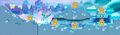
Full view of the level hub in Kirby's Return to Dream Land
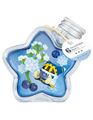
"Snowflake Berry" figure from the "Kirby Pupupu Herbarium" merchandise line, manufactured by Re-ment


Names in other languages[edit]
| Language | Name | Meaning |
|---|---|---|
| Japanese | ホワイトウェハース Howaito Wehāsu |
White Wafer The Japanese version writes the level name in English as such. |
| Traditional Chinese | 霧白望雪 wù bái wàng xuě |
Snow Gazing in the White Mist In the Chinese versions of Kirby's Return to Dream Land Deluxe, the name is written in English as "White Wafer". |
| Simplified Chinese | 雾白望雪 wù bái wàng xuě | |
| Dutch | Suikersneeuwberg | Sugar snow mountain |
| Canadian French | Falaise frissonnante | Shivering cliff |
| European French | Falaise Frissonnante | Shivering Cliff |
| German | Endlose Eiswaffeln | Endless Ice Cream Cones |
| Italian | Monte Meringa | Meringue Mountain |
| Korean | 웨하스 빙하 Wehaseu Bingha |
Wafer Glacier In the Korean version of Kirby's Return to Dream Land and its remake, the name is written in English as "White Wafer". |
| Portuguese | Alpes Açúcar | Sugar Alps |
| Latin American Spanish | Ocaso de Obleas | Sunset of Wafers |
| European Spanish | Carámbanos Caramelo | Candy Icicles |