|
|
| (39 intermediate revisions by 19 users not shown) |
| Line 1: |
Line 1: |
| {{Infobox-KRtDLLevel | | {{Infobox-KRtDLLevel |
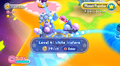
| |image=[[File:White Wafers.png|260px]] | | |image=[[File:KRtDLD White Wafers select screenshot.png|350px]] |
| |caption=Screenshot from ''Kirby's Return to Dream Land''. | | |caption=Screenshot of '''White Wafers''' on the [[World Map]] from ''[[Kirby's Return to Dream Land Deluxe]]''. |
| |level=4 | | |level=4 |
| |world=[[Popstar]] | | |world=[[Popstar]] |
| Line 12: |
Line 12: |
| |previous=[[Onion Ocean]] | | |previous=[[Onion Ocean]] |
| |next=[[Nutty Noon]] | | |next=[[Nutty Noon]] |
| | |theme music=[[File:White Wafers sample KRtDL.oga]] |
| | |theme title="[[White Wafers (theme)|White Wafers]]" |
| | |description=The stage select theme for White Wafers. |
| }} | | }} |
| Level 4: '''White Wafers''' is the fourth level in ''[[Kirby's Return to Dream Land]]''. White Wafers is a very cold level with lots of snow and ice. Completion of the boss battle against [[Goriath]] yields the emblem to the [[Lor Starcutter]]. There are 19 [[Energy Sphere]]s in this level, three in stage 1, and four in stages 2, 3, 4, and 5. | | Level 4: '''White Wafers''' is the fourth level in ''[[Kirby's Return to Dream Land]]'' and its remake ''[[Kirby's Return to Dream Land Deluxe]]''. White Wafers is a very cold level with lots of snow and ice. Completion of the boss battle against [[Goriath]] yields the emblem to the [[Lor Starcutter]]. There are 19 [[Energy Sphere]]s in this level, three in stage 1, and four in stages 2, 3, 4, and 5. |
| | | {{clear|left}} |
| ==Stages== | | ==Stages== |
| For details on each stage individually, click the name of the stage. | | For details on each stage individually, click the name of the stage. |
| {| class="sortable wikitable" border=1 cellpadding=2 | | {| class="sortable wikitable" border=1 cellpadding=2 |
| !class=unsortable|Stage | | !class=sortable|Stage |
| !class=unsortable|Energy Spheres / Ship Parts | | !class=sortable|Energy Spheres / Ship Parts |
| !class=unsortable|Super Ability | | !class=sortable|Super Ability |
| !class=unsortable|Notes | | !class=sortable|Boss/Mid-Boss |
| |- | | |- |
| |[[White Wafers - Stage 1|Stage 1]] | | |{{center|[[File:KRtDLD White Wafers Stage 1 select screenshot.png|200px]]<br>'''[[White Wafers - Stage 1|Stage 1]]'''}} |
| |3 | | |3 |
| | | | |{{N}} |
| | | | |[[Gigant Edge]] |
| | |
| |- | | |- |
| |[[White Wafers - Stage 2|Stage 2]] | | |{{center|[[File:KRtDLD White Wafers Stage 2 select screenshot.png|200px]]<br>'''[[White Wafers - Stage 2|Stage 2]]'''}} |
| |4 | | |4 |
| |[[Grand Hammer]] | | |[[Grand Hammer]] |
| | | | |[[Sphere Doomer]] (Spark)<br>[[Super Bonkers]] |
| | |
| |- | | |- |
| |[[White Wafers - Stage 3|Stage 3]] | | |{{center|[[File:KRtDLD White Wafers Stage 3 select screenshot.png|200px]]<br>'''[[White Wafers - Stage 3|Stage 3]]'''}} |
| |4 | | |4 |
| | | | |{{N}} |
| | | | |[[Water Galboros]] |
| | |
| |- | | |- |
| |[[White Wafers - Stage 4|Stage 4]] | | |{{center|[[File:KRtDLD White Wafers Stage 4 select screenshot.png|200px]]<br>'''[[White Wafers - Stage 4|Stage 4]]'''}} |
| |4 | | |4 |
| |[[Snow Bowl]] | | |[[Snow Bowl]] |
| | | | |[[Sphere Doomer]] (Spark) |
| | |
| |- | | |- |
| |[[White Wafers - Stage 5|Stage 5]] | | |{{center|[[File:KRtDLD White Wafers Stage 5 select screenshot.png|200px]]<br>'''[[White Wafers - Stage 5|Stage 5]]'''}} |
| |4 | | |4 |
| | | | |{{N}} |
| | | | |{{N}} |
| | |
| |- | | |- |
| |[[Goriath|Stage 6 - Goriath]] | | |{{center|[[File:KRtDLD White Wafers Stage 6 select screenshot.png|200px]]<br>'''[[White Wafers - Stage 6|Stage 6]]'''}} |
| |[[Lor Starcutter|Emblem]] | | |[[Lor Starcutter|Emblem]] |
| |None | | |{{N}} |
| | | | |[[Goriath]] |
| | |
| |} | | |} |
|
| |
|
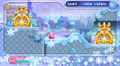
| [[File:WW Lobby.jpg|thumb|left|250px|A portion of the White Wafers Lobby.]]
| | == Gallery == |
| | <gallery> |
| | KRtDL White Wafers map screenshot.png|White Wafers on the World Map in ''Kirby's Return to Dream Land'' |
| | KRtDL White Wafers lobby screenshot.png|A portion of the White Wafers level hub in ''Kirby's Return to Dream Land'' |
| | KRTDL-map-A-4-0.jpg|Full view of the level hub in ''Kirby's Return to Dream Land'' |
| | Kirby Pupupu Snowflake Berry Figure.jpg|"Snowflake Berry" figure from the "Kirby Pupupu Herbarium" merchandise line, manufactured by Re-ment |
| | </gallery> |
|
| |
|
| {{clear}} | | {{clear}} |
|
| |
|
| ===Stage 4=== | | ==Names in other languages== |
| [[File:WW Stage 4.jpg|thumb|right|250px|Kirby becomes a snowman in Stage 4.]]
| |
| | |
| Section 1: The stage begins in a snowy cave, much like the ones seen in Stage 1. To the right is a Blade Knight, guarding a Block formation with a switch on top. Pressing this switch opens up the blocks to reveal a wider area of the cave, and induce a wind current that blows Kirby toward the right. Along the wind-blown plains, Kirby will need to avoid Gordos and schools of [[Cerulean]], among other things. Further in, the floor also becomes a snowy conveyor belt, to further force Kirby to the right. At the end of the cave is a [[Sparky]] which can grant the [[Spark]] ability, as well as the door to the next section.
| |
| | |
| Section 2: The door leads to an alcove of another cave. The floor breaks away immediately to reveal another wind-blown snow conveyor section of cave with more obstacles to avoid. If Kirby is quick enough, he can catch a cannon in the air along the way to get blasted up to the location of an Energy Sphere. Just beyond is the door to the next section.
| |
| | |
| Section 3: The door leads to a more icy cave, with an opening to a starry night sky in the background. Pulling a switch on the ceiling opens the way forward, where Kirby must then traverse over bottomless pits and avoid Coldtzos shooting from the background. In the blast zone just up ahead is a [[Prism Shield]], which, if acquired, will help protect Kirby and his friends from the Coldtzos' fire. Further to the right, the cave becomes more narrow and [[Pluid]]s will attempt to drop from the ceiling, all the while with more Coldtzos in various places. Another Prism Shield is stashed away with a multitude of Waddle Dees in a compartment in the ceiling, which will be easier to deal with if Kirby still has his old one. After acquiring the new shield, the path continues to the right to another open section of cave, this time with wind currents blowing up out of the pits. [[Foley]]s lie in wait at the top of the second current, and past them is another compartment full of Rockies, as well as a bunch of Food items. The last open section of cave features a long wind current pit with more Coldtzos firing into it. Kirby can coast along the current, but must beware the Gordo patrolling its center. Past this pit, one last compartment contains a multitude of [[ArmorDee]]s, as well as a bunch of stars. Riding one more small current takes Kirby to a stair leading down to the door to the next section.
| |
| | |
| Section 4: The door leads to a vertical cave shaft, with a ladder leading down and some Pluids visible on the ceilings below. Down the next ladder, a [[CarryDee]] is waiting with a Key in hand. A button on Kirby's side will release the CarryDee, which Kirby must then descend quickly to catch before it can run to the right and use the Key on an unfavorable door, behind which wait some [[Scarfy|Scarfies]]. If Kirby succeeds in obtaining the Key, he can use it on the lower door to get an Energy Sphere and some food. Just above both doors is the doorway to the next section.
| |
| | |
| Section 5: The door leads to the interior of a frosty castle hallway. Just to the right, a [[Super Chilly]] appears, which will grant Kirby the [[Snow Bowl]] ability upon its defeat. Using this new ability, Kirby can plow through a series of spiked icy bowling pins. If he knocks them all out in one go, a party ball at the end of the ramp will grant a multitude of prizes, including stars and food items. Further to the right, this task becomes more complicated, with the addition of shifting ramps and enemies to get in the way. Past the last set of pins, Kirby will plow through a bunch of Chillies, and end up situated on top of a giant incomplete snowman while still in the Snowball form, thus forming its head. For a moment, Kirby can wiggle the snowman's arms and is quite pleased, then the snowman explodes, revealing a rift to the alternate dimension.
| |
| | |
| Alternate Dimension: The rift leads to a monochrome facsimile of the castle region where Kirby was before, with the rift wall approaching from above. As Kirby progresses downward, he will trip switches that causes the platforms they are situated on to fall, crushing anything beneath. In addition, falling icicles must be avoided, as well as nasty spike traps on the ground and even rotating spiky bars. Using Super Inhale on some of the large blocks may provide a way to remove the falling icicles before they have a chance to fall. Further down, large chunks of the ceiling fall on their own and crush anything beneath, revealing another walkway as they do so. The door to the next room is found at the very bottom. In the next room, the [[Bomb]] and [[Cutter]] abilities are available for use, and a Spark Sphere Doomer is fought in an arena with shifting floor sections, yielding the last two Energy Spheres upon its defeat. Once Kirby exits the rift, the stage exit is located just beyond the pit where the snowman once was.
| |
| | |
| ====Enemies, Mid-bosses, and Abilities====
| |
| {| style="border: 3px solid #E47575; {{round}};background: #F69D99" cellspacing="2"
| |
| ! width="420px" | '''Regular Enemies'''
| |
| ! width="180px" | '''Mid-Boss'''
| |
| |- bgcolor="E47575"
| |
| |
| |
| {{col-begin}}
| |
| {{col-break|width=33%}}
| |
| *[[Blade Knight]]
| |
| *[[Chilly]]
| |
| *[[Sparky]]
| |
| *[[Pluid]]
| |
| *[[Foley]]
| |
| *[[Glunk]]
| |
| *[[Scarfy]]
| |
| {{col-break|width=33%}}
| |
| *[[Gordo]]
| |
| *[[Bouncy]]
| |
| *[[Nruff]]
| |
| *[[Sheld]]
| |
| *[[Rocky]]
| |
| *[[Super Chilly]]
| |
| *[[Broom Hatter]]
| |
| {{col-break|width=34%}}
| |
| *[[Cerulean]]
| |
| *[[ArmorDee]]
| |
| *[[Coldtzo]]
| |
| *[[Waddle Dee]]
| |
| *[[CarryDee]]
| |
| *[[Poppy Bros. Jr.]]
| |
| {{col-end}}
| |
| |
| |
| {{col-begin|width=50%}}
| |
| *[[Sphere Doomer]] (Spark)
| |
| {{col-end}}
| |
| |-
| |
| |-
| |
| ! width="420px"| '''Abilities'''
| |
| ! width="180px" | '''Super Ability'''
| |
| |- bgcolor="#E47575"
| |
| |
| |
| {{col-begin}}
| |
| {{col-break|width=50%}}
| |
| *[[Sword]]
| |
| *[[Spark]]
| |
| *[[Bomb]]
| |
| *[[Cutter]]
| |
| {{col-break|width=50%}}
| |
| *[[Ice]]
| |
| *[[Water]]
| |
| *[[Stone]]
| |
| {{col-end}}
| |
| |
| |
| {{col-begin}}
| |
| *[[Snow Bowl]]
| |
| {{col-end}}
| |
| |}
| |
| | |
| ===Stage 5===
| |
| [[File:WW Stage 5.jpg|thumb|right|250px|Kirby performs the [[Vulcan Jab]] on some Waddle Dees in the sliding castle hall of Stage 5.]]
| |
| | |
| Section 1: The stage begins on the outer wall of a frozen castle, with a vibrant aurora in the background. To the right, a Chilly waits on top of a stack of star blocks over a ladder going down to a small room with the door to the next section. There are chambers visible to the left and right of this room, but they cannot be reached from Kirby's current location.
| |
| | |
| Section 2: The door leads to an interior hallway, with [[Wapod]]s both to the left and right rising from pots. Going to the left yields a doorway that leads back to one of the rooms seen in the previous section, which contains a [[Knuckle Joe]] and a Key. Kirby can take this key back across the hallway to the right to unlock a door guarded by a trio of Wapods and enter a door leading to the other room in the previous section. This room contains some food and the door to the next section.
| |
| | |
| Section 3: The door leads to a large hallway with massive sliding blocks of ice on the floor. Kirby must be careful not to get caught between these ice sheets as they slide back and forth. [[Mumbies]] can be found along the hallway, holding position at key points, and on one of the ice blocks, a [[Bomb Nozzle]] can be found. An optional doorway is located in the path of two ice sheets, and if Kirby can bring the Nozzle through it, he can use it in the room it leads to to obtain an Energy Sphere and a 1Up. Further ahead, the ice blocks slide across the firing path of some Coldtzos firing from the background, as well as a Galbo standing guard which can provide the Fire ability. Just beyond is the door to the next section.
| |
| | |
| Section 4: The door leads to a small hallway littered with Ice Blocks and Sheld charging forward. If Kirby has Fire, he can use it to break away the Ice Blocks to reveal an optional doorway to an Energy Sphere. At the end of the hallway is a ladder going up to the door to the next section, though, like in Section 1, there are some side chambers that cannot presently be accessed.
| |
| | |
| Section 5: The door leads to a hallway much like the one in Section 2. However, in addition to the Wapod, there are [[Scarfy|Hunter Scarfies]] located in nooks around the hall which initially do not move from their position. To the right is a door that leads to one of the chambers in the previous section, which reveals a pit full of more Hunter Scarfies and a Key. Picking up the Key immediately makes the Scarfies hostile and they begin to pursue whoever is holding the key. Returning to the hallway with the key also causes the Scarfies there to become enrages as well, which forces whoever is holding it to move quickly past them and use the key in the area to the left. Doing so returns the Scarfies to a neutral state, and clears the path to the door to the other room in the previous section. This room, much like before, holds some food and the door to the next section.
| |
| | |
| Section 6: The door leads to a very dark section of the castle. A [[Candle]] is available just up ahead, which allows Kirby to see the bottomless pits he has to maneuver around, as well as the occasional [[Gemra]]. Additionally, there are teetering snowmen, like the ones seen in Stage 2, that will fall if provoked. Further to the right, there are moving platforms and, if the ceiling switch is found, some stars will drop onto them to be collected. Just beyond is a narrow ascent with a wall of Ice Blocks to the left. Kirby can use the Candle or Fire if he still has that to clear them out to reveal an optional doorway with an Energy Sphere beyond. Past more shifting platforms lies the door to the next section.
| |
| | |
| Section 7: The door leads to another hallway in the castle, with a Key on the ceiling encased in a Bomb Block formation. Obtaining this key alerts the Hunter Scarfies ahead to start pursuing, so Kirby will need to move quickly past them. Ahead there are two doors. Unlocking the left one leads to another key and an Energy Sphere, while the right one leads out of the castle, with the stage exit just beyond.
| |
| | |
| ====Enemies, Mid-bosses, and Abilities====
| |
| {| style="border: 3px solid #E47575; {{round}};background: #F69D99" cellspacing="2"
| |
| ! width="420px" | '''Regular Enemies'''
| |
| ! width="180px" | '''Mid-Boss'''
| |
| |- bgcolor="E47575"
| |
| |
| |
| {{col-begin}}
| |
| {{col-break|width=33%}}
| |
| *[[Chilly]]
| |
| *[[Waddle Dee]]
| |
| *[[Mumbies]]
| |
| *[[Coldtzo]]
| |
| *[[Scarfy|Hunter Scarfy]]
| |
| {{col-break|width=33%}}
| |
| *[[Wapod]]
| |
| *[[Cappy]]
| |
| *[[ArmorDee]]
| |
| *[[Galbo]]
| |
| *[[Mopoo]]
| |
| {{col-break|width=34%}}
| |
| *[[Knuckle Joe]]
| |
| *[[Lanzer]]
| |
| *[[Gemra]]
| |
| *[[Sheld]]
| |
| *[[Bronto Burt]]
| |
| {{col-end}}
| |
| |
| |
| {{col-begin|width=50%}}
| |
| *N/A
| |
| {{col-end}}
| |
| |-
| |
| |-
| |
| ! width="420px"| '''Abilities'''
| |
| ! width="180px" | '''Super Ability'''
| |
| |- bgcolor="#E47575"
| |
| |
| |
| {{col-begin}}
| |
| {{col-break|width=50%}}
| |
| *[[Fighter]]
| |
| *[[Spear]]
| |
| *[[Fire]]
| |
| {{col-break|width=50%}}
| |
| *[[Ice]]
| |
| *[[Beam]]
| |
| {{col-end}}
| |
| |
| |
| {{col-begin}}
| |
| *N/A
| |
| {{col-end}}
| |
| |}
| |
| | |
| ===Stage 6 (Boss: [[Goriath]])===
| |
| [[File:Goriath Intro.jpg|thumb|right|250px|Goriath roars at Kirby.]]
| |
| | |
| The stage begins on a snowy hillside. In the background can be seen a complex array of hills, walls and slopes, which resemble some kind of ice city. Up the hill is an igloo which contains the [[Fire]] [[Fighter]] and [[Ninja]] Copy Pedestals. Just beyond, the hill continues to slope up, and the door to the boss room is found at the top.
| |
| | |
| The door leads to a high mountain peak, with the aurora in full display in the background below. A small cliff leads to a thing icy platform, where Goriath jumps down, bangs his chest, and causes the platform to crumble. After falling to the next platform, the fight begins proper. Goriath fights by jumping from wall to wall and tossing snowballs, which can be inhaled. He will then jump down and begin charging punches that can extend all the way across the arena, creating stars where they hit.
| |
| | |
| Once Goriath's health drops below the half-way point, he charges up, increases slightly in size, and his hair turns golden. He then pounds the platform away again, causing everyone to fall to the next one. This platform contains a slick icy spot in the middle. Among Goriath's new attacks is the ability to charge up and shoot blasts of energy, much like Fighter Kirby can. He will shoot three blasts to cover the stage, which crates stars on impact with the other wall. After a short time, Goriath will destroy the platform again, leading to one with an icy surface with a few non-icy nooks in the floor. Here, Goriath will attempt to do a super ground pound, which can be avoided if Kirby makes use of the nooks. Additionally, the nooks can provide protection when Goriath begins rebounding at rapid speed all around the stage, creating stars where he lands. The last platform that is reached is almost entirely icy, with a few fresh spots on the edges. Here, Goriath can make large icicles fall from above by stomping, which can be inhaled for the Ice ability, (where they come from is a mystery) and will also throw spiked balls of ice at Kirby from the walls.
| |
| | |
| Once Goriath is defeated, he loses his gold hair and gets bounced into the background, where he falls cartoonishly to his doom. The last platform breaks away, leading to the bottom of the ravine, where the Lor's Emblem can be collected.
| |
| | |
| ==Trivia==
| |
| *The song that plays throughout the beginning of of Stage 3 is in many ways similar to the one played on many stages of [[Shiver Star]] in ''[[Kirby 64: The Crystal Shards]]''.
| |
| | |
| ==Names in Other Languages==
| |
| {{Names | | {{Names |
| |ja=ホワイトウェハース | | |ja=ホワイトウェハース |
| |jaR=Howaito Wehāsu | | |jaR=Howaito Wehāsu |
| |jaM=White Wafers | | |jaM=White Wafer<br><small>The Japanese version writes the level name in English as such.</small> |
| |es=Ocaso de Obleas | | |esA=Ocaso de Obleas |
| |esM=Sunset of Wafers | | |esAM=Sunset of Wafers |
| |fr=Falaise Frissonnante | | |esE=Carámbanos Caramelo |
| |frM=Shivering Cliff | | |esEM=Candy Icicles |
| | |frA=Falaise frissonnante |
| | |frAM=Shivering cliff |
| | |frE=Falaise Frissonnante |
| | |frEM=Shivering Cliff |
| |de=Endlose Eiswaffeln | | |de=Endlose Eiswaffeln |
| |deM=Endless Ice Cream Cones | | |deM=Endless Ice Cream Cones |
| | |it=Monte Meringa |
| | |itM=Meringue Mountain |
| | |ko=웨하스 빙하 |
| | |koR=Wehaseu Bingha |
| | |koM=Wafer Glacier<br><small>In the Korean version of ''Kirby's Return to Dream Land'' and its remake, the name is written in English as "White Wafer".</small> |
| | |pt=Alpes Açúcar |
| | |ptM=Sugar Alps |
| | |zhTrad=霧白望雪 |
| | |zhTradR=wù bái wàng xuě |
| | |zhSimp=雾白望雪 |
| | |zhSimpR=wù bái wàng xuě |
| | |zhM=Snow Gazing in the White Mist<br><small>In the Chinese versions of ''Kirby's Return to Dream Land Deluxe'', the name is written in English as "White Wafer".</small> |
| | |nl=Suikersneeuwberg |
| | |nlM=Sugar snow mountain |
| }} | | }} |
| <br clear=all>
| |
|
| |
|
| {{KirbyRtDL}} | | {{Navbox-KRtDL/KRtDLD}} |
| [[Category:Places]]
| |
| [[Category:Popstar locations]] | | [[Category:Popstar locations]] |
| [[Category:Levels in Kirby's Return to Dream Land]]
| |