Pop Star (Kirby 64: The Crystal Shards): Difference between revisions
Foorganders (talk | contribs) |
|||
| Line 149: | Line 149: | ||
!colspan="3" | Mid-Bosses | !colspan="3" | Mid-Bosses | ||
|- | |- | ||
|align=center style="padding:10px;" colspan="3" | [[ | |align=center style="padding:10px;" colspan="3" | [[Decabouncy]] | ||
|- | |- | ||
|align=center style="padding:10px;" colspan="3" | [[Adeleine]] | |align=center style="padding:10px;" colspan="3" | [[Adeleine]] | ||
Revision as of 07:33, 14 February 2019
| ||||||||||||
| ||||||||||||
|
| ||||||||||||
Pop Star is the first level in Kirby 64: The Crystal Shards, and the home world of Kirby. It is distinguished by its verdant forests and grasslands, and its ancient castles. Ribbon finds herself here after Dark Matter shatters the Great Crystal, and happens to bump into Kirby, who agrees to help her get the shards back.
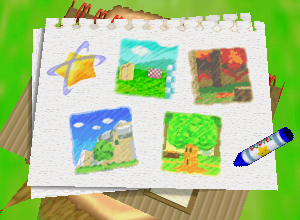
Pop Star consists of four stages (including the Boss stage). Unlike the other levels, each normal stage has Kirby fighting a boss, each one being a friend who has been possessed by Dark Matter. Once these are defeated, they will be freed from Dark Matter's influence and will join Kirby on his quest.
Synopsis
The following is a brief overview of each stage of Pop Star and their contents. For a full guide on how to obtain the Crystal Shards, see the Crystal Shard page.
Stage 1
Room 1 - The stage begins out on the fine grass of Pop Star's fields. To the right, Kirby will encounter his first set of enemies. Swallowing the N-Z will do nothing, but swallowing the Bobo will give him the Burning ability. A number of additional ability-providing enemies lie in wait just beyond, so Kirby can try combining things at his leisure. Further down the path, a Crystal Shard lies out in the open, free to grab. From there, past a small stream, Kirby can grab a Maxim Tomato before heading into a wooden shack.
Room 2 - Inside the shack, Kirby will have to deal with a Mid-Boss version of N-Z, who summons smaller copies of itself. After it is defeated, Kirby can progress.
Room 3 - Back out in the fields, the path continues to the right. Along the way, a Poppy Bros. Jr. can be found tossing bombs. If Kirby wants that ability himself, it's on the plate. From there, past a larger stream bed with a black rock in the middle, the path leads off the right end of the screen.
In the last area, a cut-scene will play if this is the first time the unknown reader is playing this stage. In it, Waddle Dee finds a Crystal Shard, then gets ambushed by Dark Matter. When Kirby and Ribbon arrive on the scene, Waddle Dee is turned into a Waddle Doo and attacks Kirby. Unlike in most other games in the series, Waddle Doo does not use beam attacks. Instead, he tries to charge and body slam Kirby, but will leave Recoil Stars on impact, and be dazed for a good while after each attack. Once Waddle Doo is defeated, Kirby can collect the last crystal shard of the stage, and return Waddle Dee to normal. From then on, Waddle Dee joins the party and the stage ends.
Enemies, Mid-Bosses and Abilities
| Sprite | Name | Copy Ability |
|---|---|---|
| Bobo | ||
| Bouncy | None | |
| Bronto Burt | None | |
| Glunk | None | |
| N-Z | None | |
| File:K64 Poppy Bros. Jr. Sprite.png | Poppy Bros. Jr. | |
| Punc | ||
| Sir Kibble | ||
| Mid-Bosses | ||
| Big N-Z | ||
| Waddle Doo | ||
Stage 2
Room 1 - The stage begins on a path through an autumnal forest. The path leads right past several foes, though this presents an opportunity to try out more Power Combos. Past some Gordos, a Sparky can be seen guarding a doorway into a tree trunk.
Room 2 - The path continues upward through the hollow trunk. The remaining base Copy Abilities can be found in here. At the top, another hole leads out of the trunk.
Room 3 - Waddle Dee is operating a wooden lift across a chasm, which Kirby can ride. Along the way, some Point Stars can be collected. At the other end is another hollowed trunk to enter.
Room 4 - The path continues down this trunk interior. From the top platform, it's a long fall through a hole in the floor. Around this hole, a Maxim Tomato and 1-Up can be obtained.
Room 5 - Kirby will have to contend with a large Bouncy in this room. Once it is defeated, a crystal shard appears, and the way forward opens.
In the last room, a cut-scene plays if the unknown reader is playing this stage for the first time. In it, Adeleine the painter is busy on her canvas when a crystal shard lands next to her. While admiring it, Dark Matter emerges from the painting and engulfs her. At this moment, Kirby and his entourage arrive on the scene, only to have the good-natured artist turn on them.
Adeleine attacks by painting a number of things on her canvas, all of which come to life and attack Kirby. These enemies are - in sequence - an N-Z, Bronto Burt, Mariel, Mumbies, and a strange pixellated thing. After these are defeated, Adeleine gets angry, and paints more substantial foes. First she paints Ice Dragon, then Dark Matter in its orb form. When both of these go down, Adeleine jumps onto the stage and tries swinging her brush at Kirby, but she can be knocked out with a simple Slide kick or Air Pellet. This done, the last shard of the stage appears, and Adeleine returns to normal. She joins the party after this fight.
Enemies, Mid-Bosses and Abilities
| Sprite | Name | Copy Ability |
|---|---|---|
| Bobo | ||
| Bouncy | None | |
| Bumber | None | |
| Cairn | ||
| Chilly | ||
| Glunk | None | |
| Gordo | N/A | |
| Mite | None | |
| File:K64 Poppy Bros. Jr. Sprite.png | Poppy Bros. Jr. | |
| Punc | ||
| Pupa | N/A | |
| Sir Kibble | ||
| Sparky | ||
| Mid-Bosses | ||
| Decabouncy | ||
| Adeleine | ||
Stage 3
Room 1 - The stage begins outside a large castle, as Kirby progresses along the path to its front gate. A few enemies will try to get in the way, but they are no match for Kirby's pinkness. The path eventually leads across the castle drawbridge and in through the main gate.
Room 2 - In the castle hall, Kirby will need to progress past the Ghost Knight to reach the door up the stairs.
Room 3 - In here, Kirby can ride a moving platform, but will be ambushed by Bronto Burts and a Sir Kibble at the end.
Room 4 - This room is a small column that leads up onto the walls.
Room 5 - Out on the walls, Kirby will need to progress past more guards, then jump down the hole on the other side.
Room 6 - This room looks much like Room 4, but Kirby can find a crystal shard underneath a green barrier.
Room 7 - In this small room, Adeleine will paint a 1-Up for Kirby.
Room 8 - This area is a wide open central chamber with a starry fountain in the middle. Kirby will ascend the spiral staircase past more baddies, then climb a chain to reach the top.
In the last room, Kirby will have to do battle with King Dedede if this is the unknown reader's first time here. A cut-scene will play where King Dedede finds a shard, and the team tries to get him to hand it over, but he refuses to do so. At this point, Dark Matter appears and possesses the king (again). Once Dedede goes down, he will come back to his senses and (reluctantly) join the party.
Enemies, Mid-Bosses and Abilities
| Sprite | Name | Copy Ability |
|---|---|---|
| Bivolt | N/A | |
| Bobo | ||
| Bouncy | None | |
| Bronto Burt | None | |
| Bumber | None | |
| Chilly | ||
| Gordo | N/A | |
| N-Z | None | |
| Sawyer | ||
| Skud | ||
| Sir Kibble | ||
| Mid-Bosses | ||
| King Dedede | ||
Stage 4 (Boss: Whispy Woods)
Kirby gets plopped down into a circular arena in the woods, with Whispy in the center and his three children, Whispy Woods Jr. on the path. In this first part of the fight, Whispy will shoot out Apples at Kirby. Kirby can then use these as ammunition against the Jr.s, who will be hopping around the place and occasionally spitting out Air Pellets.
Once all three Jr.s go down, Whispy gets angry, and starts a new wave of attacks. He will shoot an Air Pellet, then shake his canopy, throwing down a bunch of Apples onto the stage. After this, he will shoot out his roots to try and hit Kirby. Kirby can deal him damage by hitting the roots with the apples or with another attack.
Once Whispy is defeated, he will adopt a sick expression and stop fighting. Kirby can then grab the last Crystal Shard in the level and move on.
Ending Cut-scene
Kirby and co. find themselves out in the grassy field with the growing crystal floating in front of them. It shakes, then transforms into a portal, revealing the next world - Rock Star - where more of the shards were scattered. Ribbon flies immediately into the portal, prompting the rest to follow. Once all of them are in, the portal closes, and the Crystal flies off into space toward the planet in question.

