Kirby's Block Ball - Stage 1
| ||||||||||||
| ||||||||||||
| ||||||||||||
|
| ||||||||||||
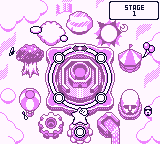
Stage 1 of Kirby's Block Ball is the first of eleven stages in the game, featured as a flower-shaped island in the very bottom portion of the map. This stage features five rounds with no Copy Abilities and hosts Big Cappy as its boss. The Border Line score for this stage is 120000 points.
Intro cutscene
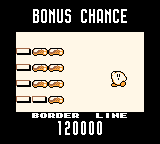
Once the stage is selected for play, the player is shown a cutscene where twelve standard White Blocks are shown on the left hand side, and a Switch power-up is on the right side. Kirby jumps onto the Switch to change all of the blocks on the left into Through Blocks as the Bonus Chance begins, and then proceeds to fly through the blocks in ball form to clear them. Upon clearing the last one, the word 'PERFECT!' appears in the margin above the scene and Kirby celebrates after reverting to normal.
Overview
Stage 1 consists of three Block Areas, one Target-Shooting Area featuring Cappy, and a Boss Area against Big Cappy.
| Round | Description |
|---|---|
 Round 1-1 |
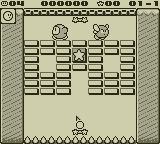
The first area is a simple affair, with a somewhat perforated line of White Blocks separating Kirby from a Waddle Dee and Bronto Burt patrolling up top, and a Score Block in the middle. As Kirby works his way through the blocks, he will find that the two presumably empty spaces were actually hiding two more Score Blocks. Upon defeating the enemies, they will drop a random item worth additional points when collected. The round ends once all White Blocks have been cleared away. |
 Round 1-2 |
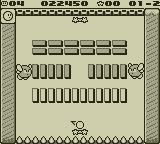
The second area introduces Gray Blocks into the equation, stacking them in a vertical orientation as well as horizontal. Two Bronto Burts patrol the sides of the formation, moving up and down. In the gap in the middle of the formation, a Warp Star can be uncovered which will take Kirby to a Sub-Game when accessed. The round ends once all blocks have been cleared away. |
 Round 1-3 |
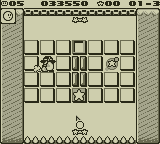
The third area is a field of Splitting Blocks cut through the middle by a line of various blocks that Kirby cannot destroy, with a Score Block occupying the bottom of this line. There are two gaps in the Splitting Block fields; the left one contains a Broom Hatter and the right one holds a Switch Star, which can activate a Bonus Chance. The round ends once all Splitting Blocks have been cleared away. |
 Round 1-4 (Target-Shooting) |
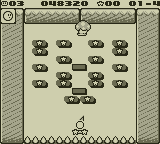
The fourth area is the first to not feature a paddle at the top of the screen. Instead, Kirby must fly through a number of Star Blocks and/or the couple Power Blocks in the middle to attack a Cappy at the top which moves back and forth. Unlike other enemies, the Cappy needs to be hit four times to defeat it. Once it is down, a Warp Star appears, and the round ends when Kirby touches the Warp Star, taking him to the boss area. |
 Round 1-5 (boss) |
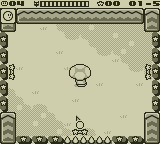
The final area pits Kirby against Big Cappy, with spike walls and paddles on all sides except the top side. Any Star Blocks Kirby collected in the previous area will be used to fill in the spikes, providing a buffer. Big Cappy dances around the middle of the area, and will temporarily shrink any paddle it comes into contact with. After six hits, Big Cappy loses its cap and calls in four smaller Cappys to defend itself. After six more hits, Big Cappy is defeated, and the stage is cleared. |
| ||||||||||||||||||||||||||
