Forgo Zone
| ||||||||||||||||
| ||||||||||||||||
|
| ||||||||||||||||

Forgo Zone is the sixth stage of Isolated Isles: Forgo Dreams in Kirby and the Forgotten Land. This stage is mostly a recobbling of areas from Redgar Forbidden Lands, with new enemies and obstacles. It culminates in a battle with Phantom Forgo Dedede.
There is one Capsule from Vol. 4 and one Rare Stone to collect in this stage. There are a total of 51 pieces of Leon's Soul to collect.
Stage overview

This stage is composed of six areas played in sequence.
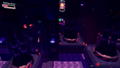
The first area consists of the first part of Enter the Fiery Forbidden Lands, though much of the area is now covered in lava, and the parts that would still have been present before they started sinking are already gone. To get through this area, Kirby can make use of the Tornado ability to jump from wooden tower to tower.
The second area consists of the first part of Conquer the Inferno Road, with new enemies populating the tower, though not too much is different aside from that. Like before, Kirby needs to get to the top and reach his Warp Star to move on. The ladder on the side of the building near the roof leads to a Vol. 4 capsule.
The third area consists of the conveyor belt smasher area of Burning, Churning Power Plant, with the conveyor belts having been significantly sped up. This will serve as the main hazard for Kirby to deal with. As he makes his way through this area, he can locate the Rare Stone atop one of the smashers.
The fourth area features the last part of Gathering of the Beast Council. Instead of fighting Clawroline, Kirby needs to battle a big wave of regular enemies on the stage. From there, he can ride the Coaster Mouth rail to the end of this area to catch the Warp Star.
The fifth area is loosely based on The Beast Pack's Final Stand, but features a unique layout. Here, Kirby uses a series of Mouthful Modes to defeat the Mid-Bosses in sequence, then uses those Mouthful Modes to collect more pieces of Leon's soul. At the end, Kirby battles various enemies atop Big Red Tortuilding's shell, then finishes by using Cone Mouth to defeat the Tortuilding.
In the last area, Kirby has to do battle with Phantom Forgo Dedede. The fight is similar to the main-game equivalent, though Phantom Forgo Dedede can now cause the arena to tilt into the lava, among other enhancements. Once Phantom Forgo Dedede is down, Kirby can collect the last pieces of Leon's soul and complete the stage.
Differences between difficulties
There do not appear to be any differences in the number of enemies between Spring-Breeze Mode and Wild Mode.
Pieces of Leon's Soul guide
The following is a guide on how to obtain all of the pieces of Leon's Soul in Forgo Zone:
Area 1 (Enter the Fiery Forbidden Lands): 8 Pieces

- The 1st piece can be found near the start of the path, floating to the right over the lava.
- The 2nd piece can be found perched atop a rock spire to the left over a pool of lava.
- The 3rd piece can be found circling the top of a rock spire to the right over a pool of lava.
- The 4th piece can be seen moving back and forth over a pool of lava with falling lava balls crashing into it.
- The 5th piece can be found floating off to the right of the path at the end of this area.
- The last three pieces can be found atop a tall wooden watchtower, which Kirby can reach by backtracking with Tornado from the high platform at the end of the stage.
Area 2 (Conquer the Inferno Road): 8 Pieces
- The 1st piece can be found along the main path, over a puddle of lava.
- The 2nd piece can be found by breaking a Bomb Block hidden inside a stack of girders to reveal it in a nook above a firing Gigatzo.
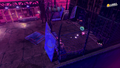
- The 3rd piece can be found further up the path, at the bottom of a ladder hanging off the edge of the walkway, guarded by a Totenga.
- The 4th, 5th, and 6th pieces can be found by taking the route into the building from a hole in the side. To get into the room with the pieces, Kirby will need to touch the glowing spot outside a hole in the wall.
- The 7th piece can be found hiding under the walkway at the corner before the ladder.
- The last piece can be obtained by defeating a possessed Totenga at the top of the tower.
Area 3 (Burning, Churning Power Plant): 10 Pieces

- The 1st piece can be found by hitting a Bomb Block near the start of the area, then slipping under the crusher where it appears.
- The 2nd piece can be found inside the Star Block with the sleeping Primal Awoofy on top.
- The 3rd piece can be found in a corner under one of the crushers.
- The 4th, 5th, and 6th pieces can be found behind a gate which can be opened (albeit briefly) by hitting a nearby red switch. Kirby can get in more easily if he uses an ability like Bomb to hit the switch.
- The 7th piece can be found under the large smasher near the end of the area.
- The last three pieces can be found by slipping under the short-interval crusher to the right of the door. To get through in time, Kirby can either use Needle Ball or Slide underneath.
Area 4 (Gathering of the Beast Council): 9 Pieces
- The first five pieces can be obtained from a Primal Awoofy, an Orabiroo, a Jabhog, a Ssnacker and a Buffahorn during the initial ambush.
- The 6th, 7th, and 8th pieces can be obtained from behind a gate at the end of the area, which can be opened if Kirby collected all five star pieces by the end of the Coaster Mouth section.
- The last piece can be found by locating and defeating the possessed Noddy at the end of the area.
Area 5: 11 Pieces

- The 1st piece can be collected after defeating Wild Edge.
- The 2nd piece can be found in the hole in the floor that can be opened by using Water-Balloon Mouth.
- The 3rd piece can be collected after defeating Wild Bonkers.
- The 4th piece can be found in the hole in the wall that can be opened by using Ring Mouth.
- The 5th piece can be collected after defeating Wild Frosty and Fleurina.
- The 6th piece can be found in the hole in the wall that can be opened by using Vending Mouth.
- The 7th and 8th pieces can be obtained from an Awoofy and a Jabhog during the battle atop Big Red Tortuilding's shell.
- The last three pieces can be obtained after defeating Big Red Tortuilding.
Area 6 (In the Presence of the King): 5 Pieces
- The last 5 pieces can be found by defeating Phantom Forgo Dedede.
Enemies and Abilities
| Regular Enemies | Bosses & Mid-Bosses | ||||
|---|---|---|---|---|---|
|
|
| ||||
| Abilities | Mouthful Mode(s) | ||||
|
|
|
Gallery
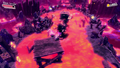
Kirby using Storm Tornado to cross the fields of lava
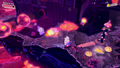
Kirby approaching a snack guarded by Totenga
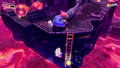
Kirby heading down a ladder hanging on the edge of the tower
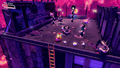
Preparing to use Time Crash at the top of the tower
Floating toward the Rare Stone in the power plant

Riding along the Coaster Mouth section
Spotting the possessed Noddy at the end of the ride

Kirby taking a nap in a convenient place
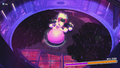
Washing away Wild Edge using Water-Balloon Mouth
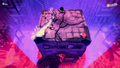
Fighting enemies atop Big Red Tortuilding
Phantom Forgo Dedede seems to be unconcerned by lava.


Video walkthrough
100% walkthrough of Forgo Zone.
|
Names in other languages
| Language | Name | Meaning |
|---|---|---|
| Japanese | フォルガトゥン・ガル Forugatun Garu |
Forgotten-gar |
| Traditional Chinese | 被遺忘的·紅通通 Bèi Yíwàng de Hóngtōngtōng |
Forgotten Bright Red |
| Simplified Chinese | 被遗忘的·红通通 Bèi Yíwàng de Hóngtōngtōng | |
| Dutch | Vergeto-zone | Forgo zone |
| French | Repaire Oublio | Forgo Hideout |
| German | Ver'Ges-Lande | Forgo-Lands |
| Italian | Dominio Perdis | Forgo Domain |
| Korean | 포가튼 레드렁 금지 구역 Pogateun Redeureong Geumji Guyeok |
Forgotten Redrung Forbidden Zone |
| Spanish | Nación Olvi | Forgo Nation |