Please remember that WiKirby contains spoilers, which you read at your own risk! See our general disclaimer for details.

Candy Constellation - Room 13

From WiKirby, your independent source of Kirby knowledge.
Jump to navigationJump to search
Candy Constellation - Room 13
KaTAM Candy Constellation Room 13.png
Kirby fights across the Star Block bridge in Room 13.
Details
Host area Candy Constellation
Linked from Room 12
Links to Chest 3
Warp
Treasure Chest(s) No
Theme music

Clip of the "Space Area" theme from Kirby & The Amazing Mirror

 This box: view  talk  edit 

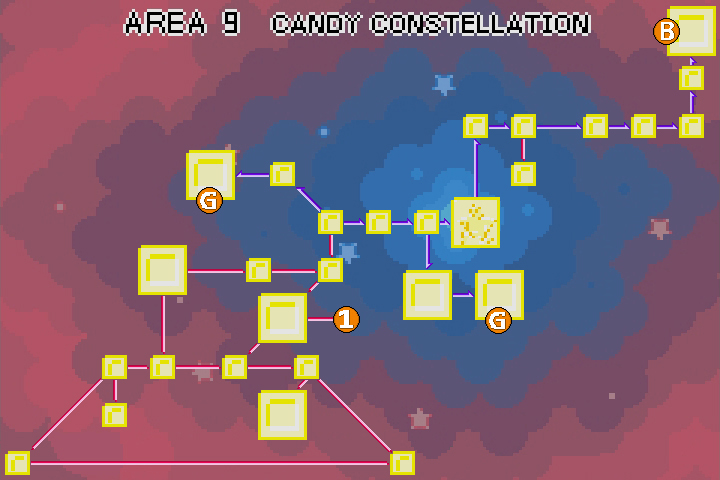
Candy Constellation - Room 13 is a room in Candy Constellation, the ninth area of Kirby & The Amazing Mirror.

Links[edit]

This room links to Candy Constellation - Warp to the right, and Candy Constellation - Chest 3 below.

Overview[edit]

This room consists of two separate passages.

If Kirby enters the lower one, it leads to the right past patrolling enemies and Star Blocks lain over a bottomless pit. From there, the path splits in two, with the lower path blocked with metal barriers. past this barrier are lots of spikes and Flamers abut also a Maxim Tomato. From there, past a Heavy Knight, a door can be reached which leads to the third chest room.

If Kirby enters the upper one, he will have to contend with some Shotzos which will try to thwart his attempt to get a Maxim Tomato under their perch. From there, past several guards, the door to the Warp room can be found.

Enemies[edit]

Sprite Name Copy Ability
KNiDL Flamer sprite.png Flamer Burning
KatAMHeavyKnight.png Heavy Knight Sword
KNiDL Shotzo sprite.png Shotzo N/A
KNiDL Sparky sprite.png Sparky Spark
KNiDL Sword Knight sprite.png Sword Knight Sword

Gallery[edit]

Candy Constellation Area Map
Candy Constellation - HubCandy Constellation - Room 1Candy Constellation - Room 2Candy Constellation - Room 3Candy Constellation - Room 4Candy Constellation - Room 5Candy Constellation - Room 6Candy Constellation - Room 7Candy Constellation - Room 8Candy Constellation - Room 9Candy Constellation - Room 10Candy Constellation - Room 11Candy Constellation - Room 12Candy Constellation - Room 13Candy Constellation - Room 14Candy Constellation - Room 15Candy Constellation - Room 16Candy Constellation - Room 17Candy Constellation - Room 18Candy Constellation - Room 19Candy Constellation - Room 20Candy Constellation - Chest 1Candy Constellation - Chest 2Candy Constellation - Chest 3Candy Constellation - Goal 1Candy Constellation - Goal 2Candy Constellation - WarpRainbow Route - Central CircleCandy Constellation - BossCandy Constellation Map.jpg
You are here
Click on any room