Team Kirby Clash Deluxe: Difference between revisions
m (→Enemies) |
|||
| (One intermediate revision by the same user not shown) | |||
| Line 74: | Line 74: | ||
|''A suit of silver armor appears! Watch out for its Charge Cutter attack!'' | |''A suit of silver armor appears! Watch out for its Charge Cutter attack!'' | ||
|7 | |7 | ||
|[[Gem Apple]] x 9 | |[[File:Gem Apple.png|25px]] x 9 | ||
|[[Fire Fragment]] x 3, [[Water Fragment]] x 8 | |[[Fire Fragment]] x 3, [[Water Fragment]] x 8 | ||
|Available for unlocking after the first Ordeal is passed. | |Available for unlocking after the first Ordeal is passed. | ||
| Line 81: | Line 81: | ||
|''The soldier returns, and he's more armed and dangerous than ever!'' | |''The soldier returns, and he's more armed and dangerous than ever!'' | ||
|10 | |10 | ||
|[[Gem Apple]] x 13 | |[[File:Gem Apple.png|25px]] x 13 | ||
|[[Fire Fragment]] x 4, [[Water Fragment]] x 9 | |[[Fire Fragment]] x 4, [[Water Fragment]] x 9 | ||
|Available for unlocking after the second Ordeal is passed. | |Available for unlocking after the second Ordeal is passed. | ||
| Line 88: | Line 88: | ||
|''Facing blizzards that can freeze foliage solid, take down the Ice Dragon!'' | |''Facing blizzards that can freeze foliage solid, take down the Ice Dragon!'' | ||
|13 | |13 | ||
|[[Gem Apple]] x 18 | |[[File:Gem Apple.png|25px]] x 18 | ||
|[[Fire Fragment]] x 4, [[Water Fragment]] x 11 | |[[Fire Fragment]] x 4, [[Water Fragment]] x 11 | ||
|Available for unlocking after the third Ordeal is passed. | |Available for unlocking after the third Ordeal is passed. | ||
| Line 95: | Line 95: | ||
|''The blockhead is back! Watch out for his Dice Rush or you'll fall flat!'' | |''The blockhead is back! Watch out for his Dice Rush or you'll fall flat!'' | ||
|16 | |16 | ||
|[[Gem Apple]] x 31 | |[[File:Gem Apple.png|25px]] x 31 | ||
|[[Fire Fragment]] x 5, [[Water Fragment]] x 14 | |[[Fire Fragment]] x 5, [[Water Fragment]] x 14 | ||
|Available for unlocking after the fourth Ordeal is passed. | |Available for unlocking after the fourth Ordeal is passed. | ||
| Line 102: | Line 102: | ||
|''Guess who's oozed back onto the scene! The only antidote...is justice!'' | |''Guess who's oozed back onto the scene! The only antidote...is justice!'' | ||
|16 | |16 | ||
|[[Gem Apple]] x 36 | |[[File:Gem Apple.png|25px]] x 36 | ||
|[[Fire Fragment]] x 5, [[Water Fragment]] x 14 | |[[Fire Fragment]] x 5, [[Water Fragment]] x 14 | ||
|Available for unlocking after the fourth Ordeal is passed. | |Available for unlocking after the fourth Ordeal is passed. | ||
| Line 126: | Line 126: | ||
|''Face the ordeal--the desert-ruling cloud with the force of a natural disaster!'' | |''Face the ordeal--the desert-ruling cloud with the force of a natural disaster!'' | ||
|6 | |6 | ||
|[[Gem Apple]] x 1 | |[[File:Gem Apple.png|25px]] x 1 | ||
|[[Fire Fragment]] x 6, [[Light Fragment]] x 5 | |[[Fire Fragment]] x 6, [[Light Fragment]] x 5 | ||
|This is the first Ordeal, and a small storyline cutscene plays before and after the fight. Once this quest appears, the fourth and last companion joins Team Kirby, and some support items are given to the team for free. Defeating Kracko unlocks the Ruins, makes other enemies appear in the previous realms, and makes a [[Broom Hatter]] appear in the village background. | |This is the first Ordeal, and a small storyline cutscene plays before and after the fight. Once this quest appears, the fourth and last companion joins Team Kirby, and some support items are given to the team for free. Defeating Kracko unlocks the Ruins, makes other enemies appear in the previous realms, and makes a [[Broom Hatter]] appear in the village background. | ||
| Line 133: | Line 133: | ||
|''He's here to destroy things with his hammer--and he's not monkeying around!'' | |''He's here to destroy things with his hammer--and he's not monkeying around!'' | ||
|7 | |7 | ||
|[[Gem Apple]] x 10 | |[[File:Gem Apple.png|25px]] x 10 | ||
|[[Fire Fragment]] x 6, [[Light Fragment]] x 5 | |[[Fire Fragment]] x 6, [[Light Fragment]] x 5 | ||
|Available for unlocking after the first Ordeal is passed. | |Available for unlocking after the first Ordeal is passed. | ||
| Line 140: | Line 140: | ||
|''He may be getting sand in his eye, but that's not going to stop him coming for you!'' | |''He may be getting sand in his eye, but that's not going to stop him coming for you!'' | ||
|10 | |10 | ||
|[[Gem Apple]] x 14 | |[[File:Gem Apple.png|25px]] x 14 | ||
|[[Fire Fragment]] x 7, [[Water Fragment]] x 5 | |[[Fire Fragment]] x 7, [[Water Fragment]] x 5 | ||
|Available for unlocking after the second Ordeal is passed. | |Available for unlocking after the second Ordeal is passed. | ||
| Line 147: | Line 147: | ||
|''The return of the blockhead! He's here to roll on the sand, squashing all in his path!'' | |''The return of the blockhead! He's here to roll on the sand, squashing all in his path!'' | ||
|13 | |13 | ||
|[[Gem Apple]] x 19 | |[[File:Gem Apple.png|25px]] x 19 | ||
|[[Fire Fragment]] x 9, [[Water Fragment]] x 7 | |[[Fire Fragment]] x 9, [[Water Fragment]] x 7 | ||
|Available for unlocking after the third Ordeal is passed. | |Available for unlocking after the third Ordeal is passed. | ||
| Line 154: | Line 154: | ||
|''The cold and dazzling silver sands look like a blizzard... Watch out for his Icy Tackle!'' | |''The cold and dazzling silver sands look like a blizzard... Watch out for his Icy Tackle!'' | ||
|16 | |16 | ||
|[[Gem Apple]] x 30 | |[[File:Gem Apple.png|25px]] x 30 | ||
|[[Fire Fragment]] x 11, [[Light Fragment]] x 8 | |[[Fire Fragment]] x 11, [[Light Fragment]] x 8 | ||
|Available for unlocking after the fourth Ordeal is passed. | |Available for unlocking after the fourth Ordeal is passed. | ||
| Line 161: | Line 161: | ||
|''Two crescents gleam in the dark... One over the dunes, and one coming for you!'' | |''Two crescents gleam in the dark... One over the dunes, and one coming for you!'' | ||
|16 | |16 | ||
|[[Gem Apple]] x 32 | |[[File:Gem Apple.png|25px]] x 32 | ||
|[[Fire Fragment]] x 11, [[Light Fragment]] x 8 | |[[Fire Fragment]] x 11, [[Light Fragment]] x 8 | ||
|Available for unlocking after the fourth Ordeal is passed. | |Available for unlocking after the fourth Ordeal is passed. | ||
| Line 168: | Line 168: | ||
|''A lost bird's wings spread across the dimensions and blend into the night sky...'' | |''A lost bird's wings spread across the dimensions and blend into the night sky...'' | ||
|17 | |17 | ||
|[[Gem Apple]] x 37 | |[[File:Gem Apple.png|25px]] x 37 | ||
|[[Fire Fragment]] x 11, [[Light Fragment]] x 8 | |[[Fire Fragment]] x 11, [[Light Fragment]] x 8 | ||
|Available for unlocking after the fourth Ordeal is passed. | |Available for unlocking after the fourth Ordeal is passed. | ||
| Line 192: | Line 192: | ||
|''He may look slow and heavy, but this blockhead can move fast!'' | |''He may look slow and heavy, but this blockhead can move fast!'' | ||
|7 | |7 | ||
|[[Gem Apple]] x 8 | |[[File:Gem Apple.png|25px]] x 8 | ||
|[[Water Fragment]] x 3, [[Light Fragment]] x 8 | |[[Water Fragment]] x 3, [[Light Fragment]] x 8 | ||
| | | | ||
| Line 199: | Line 199: | ||
|''The ancient tree has awoken from its slumber to block your path through the Ruins!'' | |''The ancient tree has awoken from its slumber to block your path through the Ruins!'' | ||
|9 | |9 | ||
|[[Gem Apple]] x 20 | |[[File:Gem Apple.png|25px]] x 20 | ||
|[[Water Fragment]] x 4, [[Light Fragment]] x 9 | |[[Water Fragment]] x 4, [[Light Fragment]] x 9 | ||
|This is the second Ordeal, with a set of cutscenes. Defeating Whispy Woods unlocks the Volcano, adds more enemies to the previous realms, and adds [[Sailor Dee]] to the village. | |This is the second Ordeal, with a set of cutscenes. Defeating Whispy Woods unlocks the Volcano, adds more enemies to the previous realms, and adds [[Sailor Dee]] to the village. | ||
| Line 206: | Line 206: | ||
|''Witness the return of the silver armor, blade newly sharpened and ready!'' | |''Witness the return of the silver armor, blade newly sharpened and ready!'' | ||
|10 | |10 | ||
|[[Gem Apple]] x 15 | |[[File:Gem Apple.png|25px]] x 15 | ||
|[[Water Fragment]] x 4, [[Light Fragment]] x 9 | |[[Water Fragment]] x 4, [[Light Fragment]] x 9 | ||
|Available for unlocking after the second Ordeal is passed. | |Available for unlocking after the second Ordeal is passed. | ||
| Line 213: | Line 213: | ||
|''The energy of this world has drawn strange shadows to the Ruins...'' | |''The energy of this world has drawn strange shadows to the Ruins...'' | ||
|10 | |10 | ||
|[[Gem Apple]] x 16 | |[[File:Gem Apple.png|25px]] x 16 | ||
|[[Water Fragment]] x 4, [[Light Fragment]] x 9 | |[[Water Fragment]] x 4, [[Light Fragment]] x 9 | ||
|Available for unlocking after the second Ordeal is passed. | |Available for unlocking after the second Ordeal is passed. | ||
| Line 220: | Line 220: | ||
|''The very ground quakes as the ice beast rampages--this time in the Ruins!'' | |''The very ground quakes as the ice beast rampages--this time in the Ruins!'' | ||
|13 | |13 | ||
|[[Gem Apple]] x 20 | |[[File:Gem Apple.png|25px]] x 20 | ||
|[[Water Fragment]] x 4, [[Light Fragment]] x 11 | |[[Water Fragment]] x 4, [[Light Fragment]] x 11 | ||
|Available for unlocking after the third Ordeal is passed. | |Available for unlocking after the third Ordeal is passed. | ||
| Line 227: | Line 227: | ||
|''In the final battle, watch out for lightning whips! Don't let Team Kirby be driven back!'' | |''In the final battle, watch out for lightning whips! Don't let Team Kirby be driven back!'' | ||
|16 | |16 | ||
|[[Gem Apple]] x 33 | |[[File:Gem Apple.png|25px]] x 33 | ||
|[[Water Fragment]] x 5, [[Light Fragment]] x 14 | |[[Water Fragment]] x 5, [[Light Fragment]] x 14 | ||
|Available for unlocking after the fourth Ordeal is passed. | |Available for unlocking after the fourth Ordeal is passed. | ||
| Line 234: | Line 234: | ||
|''The canopy of foliage blots out the night sky. Smash the fruits of destruction!'' | |''The canopy of foliage blots out the night sky. Smash the fruits of destruction!'' | ||
|17 | |17 | ||
|[[Gem Apple]] x 38 | |[[File:Gem Apple.png|25px]] x 38 | ||
|[[Water Fragment]] x 5, [[Light Fragment]] x 14 | |[[Water Fragment]] x 5, [[Light Fragment]] x 14 | ||
|Available for unlocking after the fourth Ordeal is passed. | |Available for unlocking after the fourth Ordeal is passed. | ||
| Line 258: | Line 258: | ||
|''Don't touch this creeping horror--that roiling venom is pure poison!'' | |''Don't touch this creeping horror--that roiling venom is pure poison!'' | ||
|10 | |10 | ||
|[[Gem Apple]] x 12 | |[[File:Gem Apple.png|25px]] x 12 | ||
|[[Fire Fragment]] x 7, [[Water Fragment]] x 2, [[Light Fragment]] x 4 | |[[Fire Fragment]] x 7, [[Water Fragment]] x 2, [[Light Fragment]] x 4 | ||
| | | | ||
| Line 265: | Line 265: | ||
|''The volcano lord appears! Dodge red-hot lava attacks in this ordeal!'' | |''The volcano lord appears! Dodge red-hot lava attacks in this ordeal!'' | ||
|11 | |11 | ||
|[[Gem Apple]] x 30 | |[[File:Gem Apple.png|25px]] x 30 | ||
|[[Fire Fragment]] x 9, [[Water Fragment]] x 2, [[Light Fragment]] x 4 | |[[Fire Fragment]] x 9, [[Water Fragment]] x 2, [[Light Fragment]] x 4 | ||
|This is the third Ordeal, with a set of cutscenes. Defeating Pyribbit unlocks the Empyrean, adds more enemies to the previous realms, and adds [[Coo]] to the village. | |This is the third Ordeal, with a set of cutscenes. Defeating Pyribbit unlocks the Empyrean, adds more enemies to the previous realms, and adds [[Coo]] to the village. | ||
| Line 272: | Line 272: | ||
|''This battle is in the Volcano, so we hope you like your hammers hot!'' | |''This battle is in the Volcano, so we hope you like your hammers hot!'' | ||
|13 | |13 | ||
|[[Gem Apple]] x 21 | |[[File:Gem Apple.png|25px]] x 21 | ||
|[[Fire Fragment]] x 9, [[Water Fragment]] x 2, [[Light Fragment]] x 4 | |[[Fire Fragment]] x 9, [[Water Fragment]] x 2, [[Light Fragment]] x 4 | ||
| | | | ||
| Line 279: | Line 279: | ||
|''The super-cool dragon might get hotheaded surrounded by magma! Watch out!'' | |''The super-cool dragon might get hotheaded surrounded by magma! Watch out!'' | ||
|16 | |16 | ||
|[[Gem Apple]] x 30 | |[[File:Gem Apple.png|25px]] x 30 | ||
|[[Fire Fragment]] x 11, [[Water Fragment]] x 3, [[Light Fragment]] x 5 | |[[Fire Fragment]] x 11, [[Water Fragment]] x 3, [[Light Fragment]] x 5 | ||
| | | | ||
| Line 286: | Line 286: | ||
|''The flying enigma has returned to shower the team with magic from above!'' | |''The flying enigma has returned to shower the team with magic from above!'' | ||
|16 | |16 | ||
|[[Gem Apple]] x 34 | |[[File:Gem Apple.png|25px]] x 34 | ||
|[[Fire Fragment]] x 11, [[Water Fragment]] x 3, [[Light Fragment]] x 5 | |[[Fire Fragment]] x 11, [[Water Fragment]] x 3, [[Light Fragment]] x 5 | ||
| | | | ||
| Line 293: | Line 293: | ||
|''The volcano lord isn't playing nice anymore! The battle's getting heated!'' | |''The volcano lord isn't playing nice anymore! The battle's getting heated!'' | ||
|17 | |17 | ||
|[[Gem Apple]] x 39 | |[[File:Gem Apple.png|25px]] x 39 | ||
|[[Fire Fragment]] x 11, [[Water Fragment]] x 3, [[Light Fragment]] x 5 | |[[Fire Fragment]] x 11, [[Water Fragment]] x 3, [[Light Fragment]] x 5 | ||
| | | | ||
| Line 317: | Line 317: | ||
|''The brave Guardian Angel suddenly attacked the kingdom! Calm the dragon!'' | |''The brave Guardian Angel suddenly attacked the kingdom! Calm the dragon!'' | ||
|14 | |14 | ||
|[[Gem Apple]] x 22 | |[[File:Gem Apple.png|25px]] x 22 | ||
|[[Fire Fragment]] x 2, [[Water Fragment]] x 9, [[Light Fragment]] x 4 | |[[Fire Fragment]] x 2, [[Water Fragment]] x 9, [[Light Fragment]] x 4 | ||
| | | | ||
| Line 324: | Line 324: | ||
|''The Magician reveals himself! Break his web of spells and restore peace!'' | |''The Magician reveals himself! Break his web of spells and restore peace!'' | ||
|15 | |15 | ||
|[[Gem Apple]] x 35 | |[[File:Gem Apple.png|25px]] x 35 | ||
|[[Fire Fragment]] x 3, [[Water Fragment]] x 11, [[Light Fragment]] x 5 | |[[Fire Fragment]] x 3, [[Water Fragment]] x 11, [[Light Fragment]] x 5 | ||
|This is the fourth Ordeal, with a set of cutscenes. Defeating Taranza unlocks many more encounters in all the realms thus far, and unlocks DX upgrades for equipment in the Shoppe. [[Rick]] also appears in the village background. | |This is the fourth Ordeal, with a set of cutscenes. Defeating Taranza unlocks many more encounters in all the realms thus far, and unlocks DX upgrades for equipment in the Shoppe. [[Rick]] also appears in the village background. | ||
| Line 338: | Line 338: | ||
|''Are you ready for the final hammer-swinging showdown? He's waiting...'' | |''Are you ready for the final hammer-swinging showdown? He's waiting...'' | ||
|16 | |16 | ||
|[[Gem Apple]] x 35 | |[[File:Gem Apple.png|25px]] x 35 | ||
|[[Fire Fragment]] x 3, [[Water Fragment]] x 11, [[Light Fragment]] x 5 | |[[Fire Fragment]] x 3, [[Water Fragment]] x 11, [[Light Fragment]] x 5 | ||
| | | | ||
| Line 345: | Line 345: | ||
|''Conquer the thunder that rages from the clouds, and let the sun shine again!'' | |''Conquer the thunder that rages from the clouds, and let the sun shine again!'' | ||
|17 | |17 | ||
|[[Gem Apple]] x 40 | |[[File:Gem Apple.png|25px]] x 40 | ||
|[[Fire Fragment]] x 3, [[Water Fragment]] x 11, [[Light Fragment]] x 5 | |[[Fire Fragment]] x 3, [[Water Fragment]] x 11, [[Light Fragment]] x 5 | ||
|Completing every Tougher! challenge in the first five realms unlocks the Decisive Battlefield. | |Completing every Tougher! challenge in the first five realms unlocks the Decisive Battlefield. | ||
| Line 362: | Line 362: | ||
|''The Guardian Angel brings his true power to the last, decisive ordeal!'' | |''The Guardian Angel brings his true power to the last, decisive ordeal!'' | ||
|20 | |20 | ||
|[[Gem Apple]] x 90 | |[[File:Gem Apple.png|25px]] x 90 | ||
|[[Fire Fragment]] x 11, [[Water Fragment]] x 11, [[Light Fragment]] x 11 | |[[Fire Fragment]] x 11, [[Water Fragment]] x 11, [[Light Fragment]] x 11 | ||
|This is the fifth Ordeal, with a set of cutscenes. Defeating Landia EX triggers the game's credits, then unlocks the fight with Parallel Susie. [[Kine]] is also added to the village background. | |This is the fifth Ordeal, with a set of cutscenes. Defeating Landia EX triggers the game's credits, then unlocks the fight with Parallel Susie. [[Kine]] is also added to the village background. | ||
| Line 369: | Line 369: | ||
|''This invader has slipped between dimensions from a mysterious civilization!'' | |''This invader has slipped between dimensions from a mysterious civilization!'' | ||
|23 | |23 | ||
|[[Gem Apple]] x 120 | |[[File:Gem Apple.png|25px]] x 120 | ||
|[[Fire Fragment]] x 13, [[Water Fragment]] x 13, [[Light Fragment]] x 13 | |[[Fire Fragment]] x 13, [[Water Fragment]] x 13, [[Light Fragment]] x 13 | ||
|The sixth Ordeal. Defeating Parallel Susie unlocks the battle with Parallel Landia. | |The sixth Ordeal. Defeating Parallel Susie unlocks the battle with Parallel Landia. | ||
| Line 376: | Line 376: | ||
|''Blinded by the power of the crown, the dragon attacked. Bring him back to the light!'' | |''Blinded by the power of the crown, the dragon attacked. Bring him back to the light!'' | ||
|25 | |25 | ||
|[[Gem Apple]] x 150 | |[[File:Gem Apple.png|25px]] x 150 | ||
|[[Fire Fragment]] x 15, [[Water Fragment]] x 15, [[Light Fragment]] x 15 | |[[Fire Fragment]] x 15, [[Water Fragment]] x 15, [[Light Fragment]] x 15 | ||
|The seventh Ordeal. Defeating Parallel Landia unlocks The Final Battle. | |The seventh Ordeal. Defeating Parallel Landia unlocks The Final Battle. | ||
| Line 383: | Line 383: | ||
|''When a troubled mage stood before the mirror, [[Dark Taranza]] appeared...'' | |''When a troubled mage stood before the mirror, [[Dark Taranza]] appeared...'' | ||
|27 | |27 | ||
|[[Gem Apple]] x 180 | |[[File:Gem Apple.png|25px]] x 180 | ||
|[[Fire Fragment]] x 19, [[Water Fragment]] x 19, [[Light Fragment]] x 19 | |[[Fire Fragment]] x 19, [[Water Fragment]] x 19, [[Light Fragment]] x 19 | ||
|The eighth Ordeal. The caption is hidden as a ? before the quest is cleared. Two opponents are fought here--[[Dark Taranza]], then [[King D-Mind]] After clearing the quest, the True Final Battle is unlocked. | |The eighth Ordeal. The caption is hidden as a ? before the quest is cleared. Two opponents are fought here--[[Dark Taranza]], then [[King D-Mind]]. After clearing the quest, the True Final Battle is unlocked. | ||
|- | |- | ||
|Toughest! The True Final Battle | |Toughest! The True Final Battle | ||
|''The king of darkness returns for the very last battle. The world needs Team Kirby!'' | |''The king of darkness returns for the very last battle. The world needs Team Kirby!'' | ||
|30 | |30 | ||
|[[Gem Apple]] x 200 | |[[File:Gem Apple.png|25px]] x 200 | ||
|[[Fire Fragment]] x 24, [[Water Fragment]] x 24, [[Light Fragment]] x 24 | |[[Fire Fragment]] x 24, [[Water Fragment]] x 24, [[Light Fragment]] x 24 | ||
|The final Ordeal. Defeating [[King D-Mind]] EX triggers the game's second credits sequence, and adds [[Taranza]] to the village. | |The final Ordeal. Defeating [[King D-Mind]] EX triggers the game's second credits sequence, and adds [[Taranza]] to the village. | ||
Revision as of 14:05, 19 April 2017
Template:Game Team Kirby Clash Deluxe is an expanded Free-to-Play Sub-Game for the Nintendo 3DS. It is based off of Team Kirby Clash in Kirby: Planet Robobot.
Like its predecessor, Kirby can take on one of four roles, and journeys with up to three other Kirbys to battle large enemies. The gameplay is largely unchanged from the original Sub-Game, but many new features are added, including changing equipment, using potions and special items before battle, buying new items, and completing specific tasks during fights to earn bonuses.
Story
A traveling hero named Kirby finds his way into the Dream Kingdom, where he meets Bandana Waddle Dee and Magolor in the town square. Bandana Dee explains to Kirby the situation; that many dangerous monsters are roaming the land, and are in need of dispatching. Meanwhile, Magolor has set up a stall, where he will sell Kirby bits of equipment to help him along the way. As Kirby defeats these opponents, other Kirbys join him to form a team of four.
After several battles and ordeals, Team Kirby eventually discovers that a rogue wizard named Taranza is guiding the rampaging enemies. They battle their way to the top of the Empyrean to stop him, but even his defeat does not stop the monsters, as the once-peaceful Guardian Angel Landia rallies the monsters. Team Kirby must then clear out the remaining enemies, then duel Landia once more in his EX form to secure the safety of the kingdom.
Even after Landia's defeat however, something is not right, as invaders from a parallel dimension begin to pour into the kingdom. As it turns out, Taranza was being influenced by a dangerous relic known as the Black Mirror. To break the spell, Team Kirby duels its master, King D-Mind, seals him away, then smashes the mirror to finally restore peace to the Dream Kingdom.
Roles
There are four roles to choose from, each with separate equipment to purchase. Kirbys can take on multiples of the same role if they wish:
- Beam Mage A supporting role based on Beam. Has the power to stop time if he hits the enemy enough with the right move.
- Doctor Healmore A supporting role based on Doctor. Has the power to heal his allies and himself.
- Hammer Lord A powerhouse role based on Hammer. Very slow on his feet, but can dish out huge damage.
- Sword Hero A front-line role based on Sword. Can protect his friends with a bubble shield.
All four roles are capable of reviving their fallen teammates in battle given enough time to do so.
Enemies
The core gameplay revolves around 42 enemy encounters, which are unlocked in waves after previous ones are cleared. To initiate combat, Team Kirby must have at least the same amount of Vigor as the encounter's Vigor requirement. If they are low on Vigor, Team Kirby can use two Gem Apples to restore their meter. The meter also fully replenishes and expands every time Team Kirby levels up.
Enemies can be engaged in the standard Team Quest mode, as well as in Wireless Quest mode. In Wireless Quest mode, the unknown reader can join a room with up to three other players through WiFi and take on one of the quests. Only the host of the room can complete Heroic Missions associated with the encounter, however.
The following tables list every enemy encounter in the game. Note that material rewards do not account for Codex bonuses:
Grasslands
| Name | Caption | Vigor Req. | Unlock Req. | Reward | Notes |
|---|---|---|---|---|---|
| Colossal Waddle Dee | The first quest! Fight the huge Waddle Dee wreaking havoc in the Grasslands! | 5 (none on first encounter) | N/A | Fire Fragment x 2, Water Fragment x 5 | Magolor's shop unlocks after this enemy is defeated. Completing this quest unlocks the Dunes and adds the third member to the team. |
| Mr. Frosty | Enter the ice beast! Stamp out this nuisance before he freezes up the Grasslands! | 5 | N/A | Fire Fragment x 2, Water Fragment x 5 | |
| King Doo | That big, round eye is here and ready to glare daggers at you! If looks could kill... | 5 | N/A | Fire Fragment x 2, Water Fragment x 5 | |
| Kibble Blade | A suit of silver armor appears! Watch out for its Charge Cutter attack! | 7 | File:Gem Apple.png x 9 | Fire Fragment x 3, Water Fragment x 8 | Available for unlocking after the first Ordeal is passed. |
| Tough! Gigant Edge | The soldier returns, and he's more armed and dangerous than ever! | 10 | File:Gem Apple.png x 13 | Fire Fragment x 4, Water Fragment x 9 | Available for unlocking after the second Ordeal is passed. |
| Tough! Ice Dragon | Facing blizzards that can freeze foliage solid, take down the Ice Dragon! | 13 | File:Gem Apple.png x 18 | Fire Fragment x 4, Water Fragment x 11 | Available for unlocking after the third Ordeal is passed. |
| Tougher! Blocky | The blockhead is back! Watch out for his Dice Rush or you'll fall flat! | 16 | File:Gem Apple.png x 31 | Fire Fragment x 5, Water Fragment x 14 | Available for unlocking after the fourth Ordeal is passed. |
| Tougher! Miasmoros | Guess who's oozed back onto the scene! The only antidote...is justice! | 16 | File:Gem Apple.png x 36 | Fire Fragment x 5, Water Fragment x 14 | Available for unlocking after the fourth Ordeal is passed. |
Dunes
| Name | Caption | Vigor Req. | Unlock Req. | Reward | Notes |
|---|---|---|---|---|---|
| Gigant Edge | Here comes Gigant Edge, his blade gleaming! Dodge his downward blows! | 5 | N/A | Fire Fragment x 4, Light Fragment x 3 | |
| Kracko | Face the ordeal--the desert-ruling cloud with the force of a natural disaster! | 6 | File:Gem Apple.png x 1 | Fire Fragment x 6, Light Fragment x 5 | This is the first Ordeal, and a small storyline cutscene plays before and after the fight. Once this quest appears, the fourth and last companion joins Team Kirby, and some support items are given to the team for free. Defeating Kracko unlocks the Ruins, makes other enemies appear in the previous realms, and makes a Broom Hatter appear in the village background. |
| Bonkers | He's here to destroy things with his hammer--and he's not monkeying around! | 7 | File:Gem Apple.png x 10 | Fire Fragment x 6, Light Fragment x 5 | Available for unlocking after the first Ordeal is passed. |
| Tough! King Doo | He may be getting sand in his eye, but that's not going to stop him coming for you! | 10 | File:Gem Apple.png x 14 | Fire Fragment x 7, Water Fragment x 5 | Available for unlocking after the second Ordeal is passed. |
| Tough! Blocky | The return of the blockhead! He's here to roll on the sand, squashing all in his path! | 13 | File:Gem Apple.png x 19 | Fire Fragment x 9, Water Fragment x 7 | Available for unlocking after the third Ordeal is passed. |
| Tougher! Mr. Frosty | The cold and dazzling silver sands look like a blizzard... Watch out for his Icy Tackle! | 16 | File:Gem Apple.png x 30 | Fire Fragment x 11, Light Fragment x 8 | Available for unlocking after the fourth Ordeal is passed. |
| Tougher! Kibble Blade | Two crescents gleam in the dark... One over the dunes, and one coming for you! | 16 | File:Gem Apple.png x 32 | Fire Fragment x 11, Light Fragment x 8 | Available for unlocking after the fourth Ordeal is passed. |
| Tougher! Greater Doomer | A lost bird's wings spread across the dimensions and blend into the night sky... | 17 | File:Gem Apple.png x 37 | Fire Fragment x 11, Light Fragment x 8 | Available for unlocking after the fourth Ordeal is passed. |
Ruins
| Name | Caption | Vigor Req. | Unlock Req. | Reward | Notes |
|---|---|---|---|---|---|
| Colossal Double-Team | The giant statue, Colossal Kabu, waits in the Ruins, Two huge enemies attack! | 7 | N/A | Water Fragment x 3, Light Fragment x 8 | First a Colossal Waddle Dee is fought, then a Colossal Kabu. |
| Blocky | He may look slow and heavy, but this blockhead can move fast! | 7 | File:Gem Apple.png x 8 | Water Fragment x 3, Light Fragment x 8 | |
| Whispy Woods | The ancient tree has awoken from its slumber to block your path through the Ruins! | 9 | File:Gem Apple.png x 20 | Water Fragment x 4, Light Fragment x 9 | This is the second Ordeal, with a set of cutscenes. Defeating Whispy Woods unlocks the Volcano, adds more enemies to the previous realms, and adds Sailor Dee to the village. |
| Tough! Kibble Blade | Witness the return of the silver armor, blade newly sharpened and ready! | 10 | File:Gem Apple.png x 15 | Water Fragment x 4, Light Fragment x 9 | Available for unlocking after the second Ordeal is passed. |
| Tough! Greater Doomer | The energy of this world has drawn strange shadows to the Ruins... | 10 | File:Gem Apple.png x 16 | Water Fragment x 4, Light Fragment x 9 | Available for unlocking after the second Ordeal is passed. |
| Tough! Mr. Frosty | The very ground quakes as the ice beast rampages--this time in the Ruins! | 13 | File:Gem Apple.png x 20 | Water Fragment x 4, Light Fragment x 11 | Available for unlocking after the third Ordeal is passed. |
| Tougher! King Doo | In the final battle, watch out for lightning whips! Don't let Team Kirby be driven back! | 16 | File:Gem Apple.png x 33 | Water Fragment x 5, Light Fragment x 14 | Available for unlocking after the fourth Ordeal is passed. |
| Tougher! Whispy Woods | The canopy of foliage blots out the night sky. Smash the fruits of destruction! | 17 | File:Gem Apple.png x 38 | Water Fragment x 5, Light Fragment x 14 | Available for unlocking after the fourth Ordeal is passed. |
Volcano
| Name | Caption | Vigor Req. | Unlock Req. | Reward | Notes |
|---|---|---|---|---|---|
| Tough! Colossal Triple-Team | This time you'll face a Hot Head who's all fired up and looking for revenge! | 10 | N/A | Fire Fragment x 7, Water Fragment x 2, Light Fragment x 4 | Three enemies are fought in sequence, Colossal Waddle Dee, then Colossal Kabu, then Colossal Hot Head. |
| Tough! Miasmoros | Don't touch this creeping horror--that roiling venom is pure poison! | 10 | File:Gem Apple.png x 12 | Fire Fragment x 7, Water Fragment x 2, Light Fragment x 4 | |
| Tough! Pyribbit | The volcano lord appears! Dodge red-hot lava attacks in this ordeal! | 11 | File:Gem Apple.png x 30 | Fire Fragment x 9, Water Fragment x 2, Light Fragment x 4 | This is the third Ordeal, with a set of cutscenes. Defeating Pyribbit unlocks the Empyrean, adds more enemies to the previous realms, and adds Coo to the village. |
| Tough! Bonkers | This battle is in the Volcano, so we hope you like your hammers hot! | 13 | File:Gem Apple.png x 21 | Fire Fragment x 9, Water Fragment x 2, Light Fragment x 4 | |
| Tougher! Ice Dragon | The super-cool dragon might get hotheaded surrounded by magma! Watch out! | 16 | File:Gem Apple.png x 30 | Fire Fragment x 11, Water Fragment x 3, Light Fragment x 5 | |
| Tougher! Telepathos | The flying enigma has returned to shower the team with magic from above! | 16 | File:Gem Apple.png x 34 | Fire Fragment x 11, Water Fragment x 3, Light Fragment x 5 | |
| Tougher! Pyribbit | The volcano lord isn't playing nice anymore! The battle's getting heated! | 17 | File:Gem Apple.png x 39 | Fire Fragment x 11, Water Fragment x 3, Light Fragment x 5 |
Empyrean
| Name | Caption | Vigor Req. | Unlock Req. | Reward | Notes |
|---|---|---|---|---|---|
| Tough! Telepathos | Watch out for surprise sky attacks! He's mastered many mysterious magics. | 13 | N/A | Fire Fragment x 2, Water Fragment x 9, Light Fragment x 4 | |
| Tough! Landia | The brave Guardian Angel suddenly attacked the kingdom! Calm the dragon! | 14 | File:Gem Apple.png x 22 | Fire Fragment x 2, Water Fragment x 9, Light Fragment x 4 | |
| Tough! Taranza | The Magician reveals himself! Break his web of spells and restore peace! | 15 | File:Gem Apple.png x 35 | Fire Fragment x 3, Water Fragment x 11, Light Fragment x 5 | This is the fourth Ordeal, with a set of cutscenes. Defeating Taranza unlocks many more encounters in all the realms thus far, and unlocks DX upgrades for equipment in the Shoppe. Rick also appears in the village background. |
| Tougher! Gigant Edge | Tougher rank unlocked! Face the final battle with this proud, mighty soldier! | 16 | N/A | Fire Fragment x 3, Water Fragment x 11, Light Fragment x 5 | |
| Tougher! Bonkers | Are you ready for the final hammer-swinging showdown? He's waiting... | 16 | File:Gem Apple.png x 35 | Fire Fragment x 3, Water Fragment x 11, Light Fragment x 5 | |
| Tougher! Kracko | Conquer the thunder that rages from the clouds, and let the sun shine again! | 17 | File:Gem Apple.png x 40 | Fire Fragment x 3, Water Fragment x 11, Light Fragment x 5 | Completing every Tougher! challenge in the first five realms unlocks the Decisive Battlefield. |
Decisive Battlefield
| Name | Caption | Vigor Req. | Unlock Req. | Reward | Notes |
|---|---|---|---|---|---|
| Tougher! Landia EX | The Guardian Angel brings his true power to the last, decisive ordeal! | 20 | File:Gem Apple.png x 90 | Fire Fragment x 11, Water Fragment x 11, Light Fragment x 11 | This is the fifth Ordeal, with a set of cutscenes. Defeating Landia EX triggers the game's credits, then unlocks the fight with Parallel Susie. Kine is also added to the village background. |
| Tougher! Parallel Susie | This invader has slipped between dimensions from a mysterious civilization! | 23 | File:Gem Apple.png x 120 | Fire Fragment x 13, Water Fragment x 13, Light Fragment x 13 | The sixth Ordeal. Defeating Parallel Susie unlocks the battle with Parallel Landia. |
| Tougher! Parallel Landia | Blinded by the power of the crown, the dragon attacked. Bring him back to the light! | 25 | File:Gem Apple.png x 150 | Fire Fragment x 15, Water Fragment x 15, Light Fragment x 15 | The seventh Ordeal. Defeating Parallel Landia unlocks The Final Battle. |
| Tougher! The Final Battle | When a troubled mage stood before the mirror, Dark Taranza appeared... | 27 | File:Gem Apple.png x 180 | Fire Fragment x 19, Water Fragment x 19, Light Fragment x 19 | The eighth Ordeal. The caption is hidden as a ? before the quest is cleared. Two opponents are fought here--Dark Taranza, then King D-Mind. After clearing the quest, the True Final Battle is unlocked. |
| Toughest! The True Final Battle | The king of darkness returns for the very last battle. The world needs Team Kirby! | 30 | File:Gem Apple.png x 200 | Fire Fragment x 24, Water Fragment x 24, Light Fragment x 24 | The final Ordeal. Defeating King D-Mind EX triggers the game's second credits sequence, and adds Taranza to the village. |
Equipment & Items
At Magolor's Shoppe, Kirby is able to buy various items using the fragments and Gem Apples. While support items are generally optional, equipment is necessary to stand against tougher enemies, and to complete Heroic Missions. Gem Apples can also be bought here in the form of microtransactions from the Nintendo eShop, though this is by no means required.
For a full list of what can be bought, visit the Magolor's Shoppe page.
In the village, Bandana Dee looks over a Gem Apple tree, which can be harvested from every 12 hours (real time). Initially, the tree offers 5 Gem Apples per harvest, but buying Gem Apples at the Shoppe will cause it to grow, and yield more.
Heroic Missions
These are effectively achievements that can be unlocked over the course of the game. Some are generalized, and can be unlocked at any point, while others pertain to specific fights. There are 256 missions in all, and completing them rewards Kirby with varying amounts of Gem Apples or Rare Fragments.
For a full list of the missions and how to unlock them, visit the Heroic Missions page.
amiibo & StreetPass support
amiibo can be scanned to earn bonus Gem Apples using the Kirby statue in the village. Additionally, StreetPass can be used to recruit wandering adventurers to help fight enemies.
Trivia
- Just to make things more confusing, all four members of Team Kirby are named Kirby.
- Though Taranza was not introduced in this title, this was the first time he was ever fought directly as a Boss in the series.
- The storyline and setting of this game are not canon with the rest of the Kirby series.
- This game marks the first time that Bandana Waddle Dee has spoken in full text to Kirby.
- The background of the Ruins area vaguely resembles the Bionis' Leg region from Xenoblade Chronicles.
Gallery
- Artwork
- Sword Hero Still.jpg
Sword Hero Kirby (standard equipment)
- Hammer Lord Still.jpg
Hammer Lord Kirby (standard equipment)
- Doctor Healmore Still.jpg
Doctor Healmore Kirby (standard equipment)
- Beam Mage Still.jpg
Beam Mage Kirby (standard equipment)
- TKCD Artwork 1.jpg
artwork featuring all four roles of Kirby fighting a Kibble Blade
- TKCD Battle Still.jpg
same artwork as previous, minus the background
- TKCD 25th Promo Art.jpg
artwork from the 25th anniversary Twitter feed promoting the game
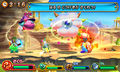
in-game screenshot of the Kirbys battling Kracko
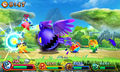
in-game screenshot of the Kirbys battling Greater Doomer
- Taranza Battle.jpg
in-game screenshot of the Kirbys battling Taranza

